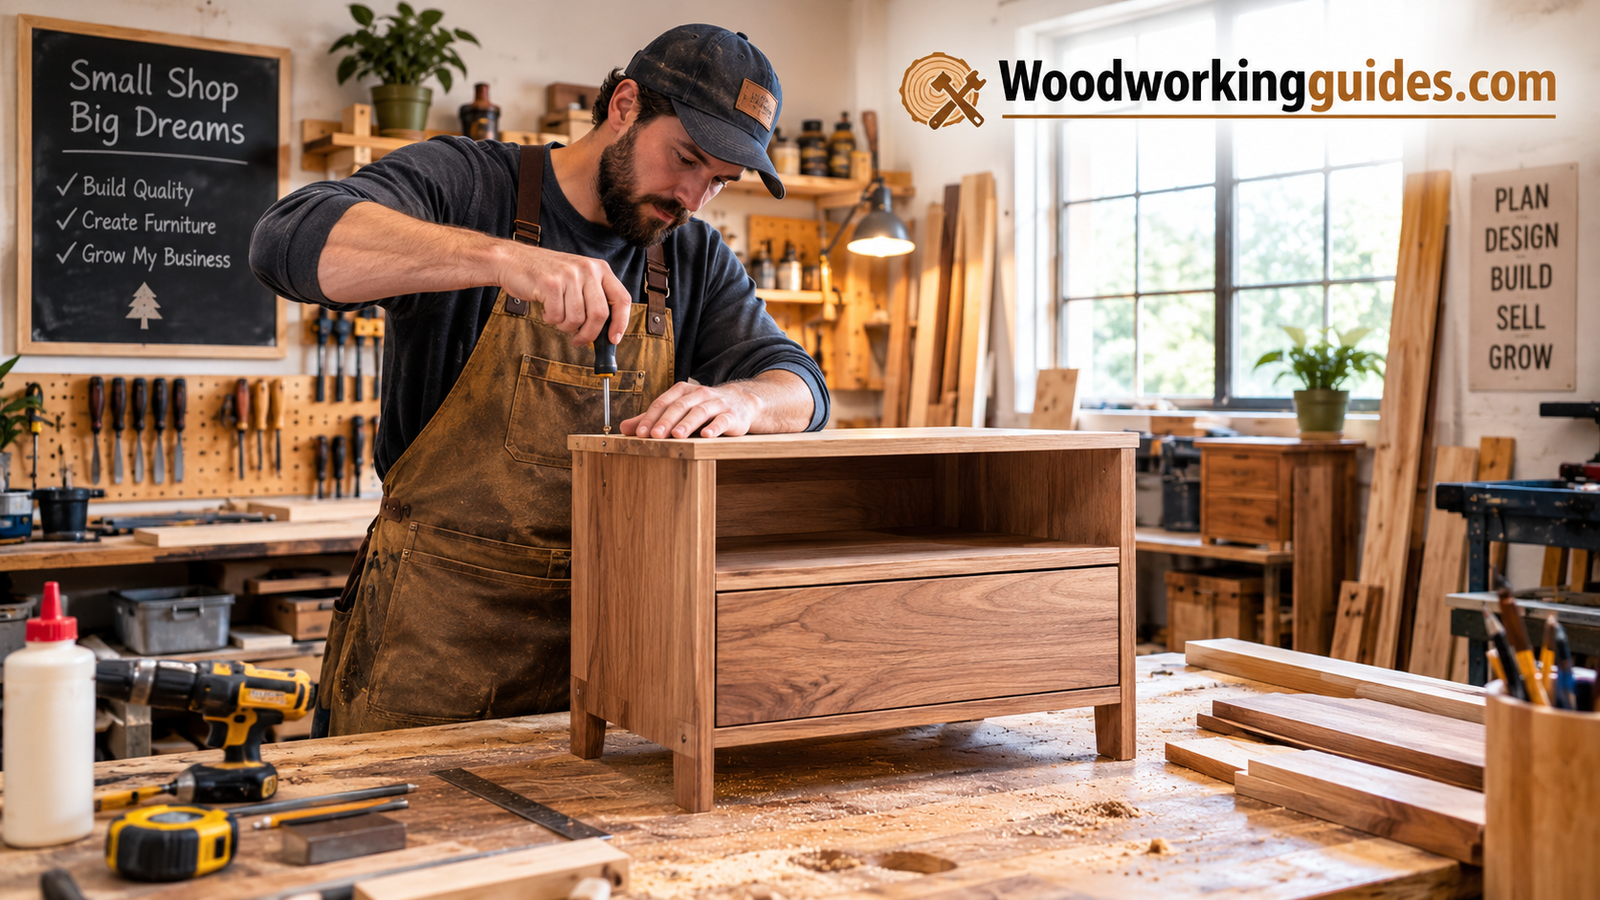
How to Start a Woodworking Business: A Practical Guide From First Cut to First Customers
Turn a weekend hobby into real income with a clear niche, a smart shop setup, honest pricing, and a plan to find buyers.
Almost every woodworker hears the same comment sooner or later: “You should sell these.” A friend admires a cutting board, a relative wants a bookshelf, and suddenly the idea of getting paid for something you already enjoy feels very real. The gap between a hobby and a business, though, is wider than most people expect. A hobby rewards you for taking your time. A business rewards you for being consistent, priced correctly, and easy to buy from.
This guide walks through the whole path in plain language: choosing what to make, getting your skills and shop ready, setting prices that actually leave a profit, handling the paperwork, and finding customers who value handmade work. Whether you have a corner of the garage or a full shop, you will come away with a clear sequence of steps. If you are still brand new to the craft, it helps to read what woodworking is and how to start woodworking with no experience first, then come back here when your basic projects turn out clean and repeatable.
1. Is a Woodworking Business Right for You?
Before you buy a single board or tool for business purposes, take an honest look at what you are signing up for. Making things is perhaps thirty percent of the job. The rest is photographing, listing, answering messages, quoting, packing, shipping, bookkeeping, and sweeping. Many talented makers burn out because they only planned for the fun part.
The mindset shift from hobbyist to maker-owner
A hobbyist builds what they find interesting. A business owner builds what sells, in a quantity and timeframe that makes financial sense. That does not mean you give up creativity. It means you channel it into a product line, a style, and a process that customers recognize. The most successful small shops are often known for one thing done beautifully, not for being able to build anything.
Questions worth answering honestly
- How much time can you commit weekly? Part-time evenings and weekends is a perfectly good way to start.
- How much money can you risk? Treat startup spending as money you could live without for a year.
- Do you enjoy repetition? Selling means making the same item many times with consistent quality.
- Are you comfortable talking to customers? Even online sales involve plenty of communication.
- Do you have space? Dust, noise, and lumber storage all need a plan, and some neighborhoods have rules about them.
If most of those answers feel manageable, you are in a good position to continue. A smart low-risk approach is to run your business as a side project for several months, sell a handful of items, and watch what happens before you leave a stable income. Selling to neighbors, coworkers, and local groups gives you real data without much pressure.
What a realistic first year looks like
Most new woodworking businesses follow a similar arc. The first few months are about learning your true production speed, discovering which products attract attention, and fixing small quality issues. Sales may be modest and irregular, which is normal. By the middle of the year, patterns appear: certain items sell repeatedly, certain channels deliver better buyers, and certain customers return. The final months are usually where confidence grows, because you have real numbers to plan with instead of guesses. Expect to reinvest most early income into tools, materials, and marketing rather than paying yourself fully. Makers who accept that trade-off tend to build stronger foundations than those who expect immediate profit.
It also helps to define what success means to you. For some people it is a few hundred extra dollars each month to fund their hobby. For others it is a full-time living. Both are legitimate, and each calls for a different pace of spending and a different level of risk. Write your definition down, because it will guide every decision from which tool to buy to which events to attend.
Starting small? Browse beginner-friendly woodworking essentials on Amazon.
Shop Beginner Woodworking Gear2. Step 1: Pick a Profitable Niche
The first real step is deciding what you will sell. A tight niche makes everything else easier: you buy fewer tools, learn fewer techniques, buy lumber in predictable amounts, and your marketing speaks to one kind of buyer. It also helps with trust. Someone searching for a hand-finished walnut serving board wants a maker who obviously specializes in them.
Popular woodworking business niches
| Niche | Startup Cost | Skill Level | Typical Sales Channel |
|---|---|---|---|
| Cutting boards and kitchen goods | Low | Beginner to intermediate | Online marketplaces, craft fairs |
| Home decor and signs | Low | Beginner | Online, local shops |
| Toys, puzzles and games | Low to medium | Beginner to intermediate | Craft fairs, gift shops |
| Small furniture (stools, shelves, tables) | Medium | Intermediate | Local clients, social media |
| Custom cabinetry and built-ins | High | Advanced | Referrals, contractors |
| Outdoor furniture and planters | Medium | Intermediate | Local buyers, online |
How to choose between them
Start with what you already do well, then check whether people pay for it. Browse online marketplaces and search for your product idea. Look at how many sellers exist, what they charge, and what the reviews complain about. Complaints are gold: slow shipping, poor finish quality, and generic designs are all openings for you.
Next, think about your equipment. Small goods such as boards, boxes, and toys can be made with a modest tool set, while furniture usually calls for larger machines and more floor space. Finally, consider repeatability. Products you can batch, such as ten boards cut and glued in one session, will always earn more per hour than one-off pieces that need fresh design work each time.
Find starter lumber, clamps and finishing supplies for your first niche products.
Shop Woodworking Supplies3. Step 2: Build Real Skills Before You Sell
Selling work that is almost good enough is the fastest way to earn a bad reputation. Before you charge anyone, your joints should close tightly, your surfaces should be flat, and your finishes should look even. That standard is higher than what most people accept for personal projects, and meeting it is what separates a seller from a hobbyist.
Skills that matter most for sellers
- Accurate milling: flat, square, consistent stock. Understanding what a jointer does pays off here.
- Reliable joinery: glue-ups, mortise and tenon, and dovetails if you build furniture. Our overview of wood joinery tools helps you pick methods and equipment.
- Routing and shaping: edge profiles, flush trimming, and decorative details. Read what a woodworking router is used for to see how much it adds to your range.
- Sanding and finishing: the step buyers notice first, and the step most beginners rush.
- Jigs and repeatability: learn what a jig is in woodworking, because jigs are how small shops produce identical parts quickly.
A practical way to practice
Make the same simple product five to ten times. Time each build. Note where mistakes happen and where you lose minutes. By the tenth piece you will know your real production time, which is the number that determines your pricing later. Give early pieces to friends in exchange for honest feedback and photos, then use those photos in your first listings.
Quality control: your personal standard
Create a short checklist you run on every piece before it leaves the shop. Check that all surfaces are sanded through the grits you chose, that edges are broken evenly, that joints are tight and glue squeeze-out is fully removed, that hardware operates smoothly, and that the finish is even without drips or dust nibs. Look at the piece in raking light, which exposes flaws you will otherwise miss. Customers will forgive a lot, but they rarely forgive sloppy finishing on something they paid for. A consistent checklist also protects your reputation as you speed up, because speed without a standard produces errors.
Finally, learn to say when something is not ready. Setting aside a flawed piece costs you a few hours; sending it out and dealing with a disappointed buyer can cost a repeat customer and a review. Keep seconds for discounted sales, shop use, or donation, and move on.
Sharpen your technique with quality hand tools and practice supplies.
Shop Hand Tools4. Step 3: Set Up Your Shop and Choose Your Tools
Your shop is your factory, and a good layout saves more money than most tools do. You do not need a huge space. You need a logical flow: lumber storage, rough cutting, milling, assembly, finishing, then packing. Keep finishing away from sawdust, and keep heavy items near the door. If you are starting from scratch, our walkthrough on setting up a beginner woodshop covers space, power, dust collection, and storage in detail.
Start with the core machines
The classic order of purchase is a good table saw, a miter saw, a router, a cordless drill, a sander, and a set of sharp chisels. Our roundup of the best woodworking tools gives you the big picture. For specific buying decisions, these guides go deeper:
- Best table saw for woodworking and how to choose a table saw
- Best miter saw for a home shop
- Top wood router picks
- Best cordless drill for woodworking
- Best random orbital sander
- Best chisel set for beginners
Hand tools or power tools?
For production, power tools win on speed. For fine detail, hand tools still shine, and many sellers use a mix. If you are unsure where to put your money, read hand tools vs power tools for woodworking before you buy.
Do not skip the workbench and safety gear
A solid bench is the most underrated tool in a shop. See the best woodworking workbench options, or build your own using woodworking workbench plans in PDF form. If you take work to markets, a portable woodworking workbench is handy, and choosing the best wood for a woodworking bench keeps it flat for years. Add eye protection, hearing protection, a dust mask, and a good shop apron. Our picks for the best woodworking apron and the best leather woodworking apron are worth a look.
Compare table saws, routers, drills and sanders for a small business shop.
Shop Power Tools5. Step 4: Write a Simple Business Plan and Price Correctly
A business plan does not need to be a fifty-page document. For a small woodworking operation, one or two pages is enough: what you sell, who buys it, what it costs to make, what you will charge, and how much you hope to earn in the first year. The act of writing it forces useful decisions.
The pricing formula that keeps you in business
The most common beginner error is pricing a piece by guessing what feels fair. Instead, use a formula: materials + labor + overhead + profit. Materials include lumber, glue, hardware, sandpaper, and finish, with a little extra for offcuts and mistakes. Labor means your hours at a rate you set, even if you pay yourself modestly at first. Overhead covers electricity, blade sharpening, shop supplies, packaging, marketplace fees, and tool wear. Profit is the margin that lets the business grow rather than merely survive.
| Cost Category | What to Include | Common Mistake |
|---|---|---|
| Materials | Lumber, glue, hardware, finish, sandpaper | Ignoring waste and offcuts |
| Labor | Design, milling, assembly, finishing, photos | Counting only cutting time |
| Overhead | Utilities, blades, packaging, platform fees | Treating it as free |
| Profit | Cash to reinvest and cover slow months | Leaving it at zero to “stay competitive” |
Know your numbers
Track every project in a simple spreadsheet: hours spent, material cost, and final sale price. After ten projects, you will see which products earn the most per hour. Drop or reprice the ones that do not. Pricing too low also attracts the wrong customers, the ones who haggle and expect discounts, while fair pricing signals quality and draws buyers who value craftsmanship.
Set realistic goals
Write down a modest target for your first six months, such as a number of orders, a handful of repeat customers, and a basic profit goal. Review it monthly. Treat results as feedback, not as a verdict on your talent.
Cash flow and deposits
Many small shops run into trouble not because they lack sales but because money arrives late. Lumber, hardware, and finish must be paid for up front, while customers may not pay until delivery. Protect yourself by taking a deposit on every custom order, commonly a portion of the total, and collecting the balance before delivery. For retail items, price in marketplace fees and payment processing so they do not erode your margin silently. Keep a small cash cushion for slow months, blade replacements, and unexpected repairs, and separate it mentally from your personal budget so you can see how the business performs on its own.
When quoting custom work, add a modest buffer for changes and surprises, state clearly what is included, and define how revisions are handled. Clear terms feel professional and prevent awkward conversations later.
Keep your costs organized with measuring tools, labels and project supplies.
Shop Measuring Tools6. Step 5: Handle the Legal Side the Right Way
Rules differ widely by country, state, and city, so treat this section as a checklist of topics to research rather than legal advice. A short conversation with a local accountant or a small business advisor is inexpensive and can save headaches.
Core items to look into
- Business structure: many makers begin as a sole proprietor, then move to an LLC for liability protection as sales grow. Ask a professional which fits your situation.
- Local licenses and permits: some areas require a general business license, a seller’s permit, or zoning approval for home-based shops.
- Sales tax: understand when you must collect it and how to file. Marketplaces sometimes handle part of this, but not always.
- Insurance: a standard homeowner policy often excludes business activity. Product liability coverage matters when you sell furniture, children’s items, or anything that could injure someone.
- Banking: a separate account makes bookkeeping and tax time much simpler.
- Product safety: toys and children’s products can have specific testing and labeling rules. Check them before you list anything for kids.
Protect yourself in the shop with safety glasses, ear protection and dust masks.
Shop Safety Gear7. Step 6: Source Materials Smartly and Protect Your Margins
Lumber is usually your biggest material expense, and it behaves like a commodity: prices move, quality varies, and the cheapest board is rarely the cheapest result. Smart sourcing means building relationships, buying in sensible quantities, and storing wood so it stays flat and dry.
Where to buy
Home centers are convenient but pricey and limited. A local hardwood dealer offers better selection and kiln-dried boards, and many will give a discount once you become a regular. Small sawmills and tree services can supply character wood at lower cost, though you may need to dry it yourself. Ask about offcut bins as well, since small pieces are perfect for cutting boards, boxes, and toys.
Choose wood that fits your product
Match species to purpose. Maple, walnut, and cherry are popular for kitchen goods and furniture because they machine and finish well. Pine and poplar keep costs down for painted pieces and prototypes. For workbench tops, jigs, and shop furniture, plywood is often the smart option, and our guide on the best wood for a woodworking bench can help you decide where solid wood is worth the money.
Reduce waste, protect profit
- Plan cut lists on paper or software before touching a board.
- Buy slightly more than you need, then use leftovers in small products.
- Stack and sticker lumber so air can move around it.
- Keep a log of suppliers, prices, and quality so you can compare over time.
Even a ten percent drop in waste can be the difference between an average month and a good one. Treat scraps as inventory: a small bin of offcuts can turn into coasters, keychains, and cutting boards that sell at a good margin without any extra material spending.
Stock up on glue, finishes and hardware at competitive prices.
Shop Glue and Finishes8. Step 7: Design a Product Line and Build a Portfolio
A product line is a small collection of items that look like they belong together and that you can build efficiently. It gives customers a reason to buy more than one thing, and it gives you predictable materials, jigs, and workflows.
The product ladder
Think of three levels. Entry items such as coasters or small boards sell quickly and bring in new customers. Core items such as shelves, stools, and boxes make up most of your steady income. Premium commissions, like dining tables or custom built-ins, carry the highest profit but require more time and trust. A healthy shop usually offers all three, with most effort aimed at the middle tier.
Use jigs to produce consistent work
Repeatable work is what makes small-batch production profitable. A simple crosscut sled, a router template, or a drilling guide can cut minutes from every piece and keep parts identical. If you want to go deeper, read about what a jig is in woodworking and plan your first three shop-made helpers around your best-selling product.
Photograph everything
Your photos are your storefront. Use natural light, a clean background, and several angles including a close-up of grain and joinery. Add one lifestyle shot showing the item in a real room. Keep a portfolio folder with finished work, process shots, and customer feedback. These images feed your website, social posts, and marketplace listings for months.
Test before you scale
Make small batches of three to five and watch what sells. Ask buyers which items they would pay more for, or what they wish existed. Use their answers to refine designs. A product that sells quickly at a price you set is a signal to repeat it, while a product that sits unsold for weeks is a signal to improve photos, change the price, or retire it.
| Product Tier | Build Time | Profit Potential | Best For |
|---|---|---|---|
| Entry items | Short | Low per piece, high in volume | Attracting first customers |
| Core products | Moderate | Solid and steady | Reliable monthly income |
| Premium commissions | Long | Highest per piece | Established reputation |
Gather the router bits, templates and clamps that make repeat production faster.
Shop Router Bits and Clamps9. Step 8: Choose Where to Sell Your Work
No single channel is perfect, so most sellers start with two or three and double down on whichever performs best. Each has its own audience, costs, and workload.
| Channel | Upfront Cost | Pros | Cons |
|---|---|---|---|
| Online marketplaces | Listing and transaction fees | Built-in traffic, easy start | Competition, fee pressure |
| Your own website | Domain and hosting | Full control, brand building | You must drive traffic |
| Craft fairs and markets | Booth fees, display gear | Instant feedback, direct sales | Time away from the shop |
| Local shops and consignment | Commission share | Steady exposure | Lower margin per sale |
| Custom commissions | Minimal | Highest margin, deposits | Needs communication and trust |
Selling online
Marketplaces are the fastest way to get your first sale because buyers already arrive looking for handmade goods. Write clear titles using the words people actually search, describe dimensions and wood species, and show scale in photos. Be upfront about lead time, and ship with sturdy packaging since damaged parcels are an expensive lesson. Over time, build your own site as well so you are not dependent on one platform.
Selling in person
Craft fairs, farmers markets, and holiday shows are excellent for learning. You see reactions instantly, collect emails, and meet people who later place larger custom orders. A portable display and a tidy booth go a long way. A compact portable woodworking workbench can even double as a demonstration station if you want to show your process.
Commissions and local clients
Custom orders are where profit is highest, but they need clear communication. Agree on dimensions, wood, finish, price, and timeline in writing. Take a deposit before buying materials, and send progress photos so the buyer feels involved. Satisfied clients refer friends, and referrals often become your best source of work.
Handling customer service and returns
Good service turns one-time buyers into advocates. Respond to messages promptly and politely, even when the answer is simply that an item is sold out or that a request falls outside what you offer. State your lead times honestly, and update customers if something slips. Decide ahead of time how you will handle damage in shipping, requests for changes, and returns. A short, clear policy posted on your listings reduces disputes and shows buyers they can trust you. When a problem does occur, a quick fix or replacement often earns a glowing review and a loyal customer, which is worth more than the cost of the item.
Protect your pieces in transit with packing and shipping supplies.
Shop Packing Supplies10. Step 9: Brand and Market Yourself
Branding is not just a logo. It is the reason a stranger remembers your work and trusts you with their money. For a small woodworking business, branding comes from a consistent style, a clear story, and a recognizable presentation.
Define your brand
Pick a name that is easy to spell and remember. Choose two or three colors, a simple logo, and a consistent tone in your descriptions. Decide what you stand for: sustainably sourced local wood, heirloom-quality joinery, playful toys, or minimalist modern design. When every listing, label, and post reinforces the same idea, your shop feels established even when it is new.
Tell your story
People buy handmade because they want a connection. Share why you started, what you love about the craft, and where your wood comes from. Include a small card with each order explaining care instructions and thanking the buyer. Little touches like these encourage reviews and repeat orders.
Marketing that works for small shops
- Short videos: process clips of milling, gluing, and finishing perform well on social platforms because people enjoy watching things get made.
- Search-friendly website content: care guides, project stories, and buying tips help new customers find you through search engines.
- Email list: collect addresses at markets and online. Email lets you announce new items without paying for reach.
- Local presence: business cards, community boards, and partnerships with interior designers, realtors, and cafes.
- Reviews and testimonials: ask happy customers for a few sentences and a photo.
Consistency beats intensity. Posting a few times each week for six months builds an audience that a single big push never can. Pick two platforms you actually enjoy, and let your work do most of the talking.
Upgrade your photo setup with lighting and backdrops for better listings.
Shop Photo Gear11. Step 10: Build Systems, Scale Up and Add Digital Income
Once orders start arriving regularly, the challenge shifts from finding customers to keeping up without losing quality or your sanity. Systems are what let a one-person shop handle growth.
Batch your work
Cut all parts for five items in one session, glue them together on one afternoon, and finish them in a single run. Batching reduces setup time dramatically and is the single biggest efficiency gain available to most small shops.
Track and reinvest
Keep monthly records of income, expenses, and hours. Use profit to buy the next limiting tool, upgrade dust collection, or hire occasional help for sanding and packing. Be selective: investing in tools that remove bottlenecks gives a far better return than buying equipment you rarely use.
Add digital products
Selling physical goods is limited by the hours in your day. Digital products are not. Many woodworkers create downloadable plans, cut lists, and build guides from projects they already make. Because you build each project anyway, documenting it with photos and measurements adds income without more lumber. Our guide on how to sell woodworking plans online explains formats, pricing, and platforms in detail.
Other ways to grow
- Teach: host small classes or workshops for beginners.
- Wholesale: supply boutiques, restaurants, or offices with repeatable products.
- Collaborate: work with interior designers, builders, and contractors.
- Content: share build videos and tutorials, which can lead to sponsorships and affiliate income.
Whatever direction you choose, protect your time. Burnout is the biggest risk for makers who grow quickly. Set working hours, say no to projects that do not pay fairly, and schedule time to rest, because tired hands make costly mistakes.
Invest in dust collection and shop organization as your output grows.
Shop Dust Collection12. Mistakes to Avoid and the Honest Pros and Cons
Most failed woodworking businesses stumble on the same handful of issues. Knowing them in advance is one of the cheapest forms of insurance you can buy.
Common mistakes
- Underpricing: charging materials only and treating your time as free.
- Buying too many tools too soon: equipment that sits idle is expensive clutter.
- Trying to sell everything: a scattered catalog confuses customers and slows production.
- Poor photos: great work hidden behind dim, cluttered images.
- Skipping paperwork: no records, no deposits, no written agreements.
- Ignoring safety: injuries stop income instantly, so guards, dust control, and protective gear are business expenses, not options.
- No marketing rhythm: waiting for customers instead of showing up regularly.
Pros and cons at a glance
The Upsides
- Get paid for work you enjoy
- Low entry cost for small products
- Flexible schedule once established
- Strong demand for handmade, durable goods
- Room to grow into teaching and digital products
The Challenges
- Income can be uneven at first
- Physical, time-intensive work
- Material costs fluctuate
- Marketing and admin take real hours
- Shop noise and dust need management
A woodworking business rewards patience. The makers who last tend to be the ones who stay curious, track their numbers, and keep improving small details such as edge profiles, finish quality, and packaging.
A simple first ninety days plan
If you are wondering where to start tomorrow, use this rhythm. In the first month, choose your niche, finish a small batch of products, and photograph them well. In the second month, open one online channel and book one local market or arrange sales to friends and neighbors, then record every cost and hour. In the third month, review the numbers, raise prices where margins are thin, retire the products that do not sell, and double down on the one that does. After ninety days you will have a tested product, real pricing data, and your first customers, which is far more valuable than any amount of planning in the abstract.
Ready to equip your shop? See top-rated woodworking tools and accessories.
Shop Woodworking ToolsFrequently Asked Questions
How much does it cost to start a woodworking business?
It depends on your niche. A small-goods business such as boards, coasters, and signs can start with a modest tool set and basic supplies. Furniture and cabinetry need larger machines and more space, which raises costs substantially. Many sellers start part-time with tools they already own and reinvest early profits.
Can I start a woodworking business from my garage?
Yes, many do. Check local zoning, noise rules, and any homeowner association restrictions, and make sure your insurance covers business activity. Good dust collection and a clear workflow matter even more in tight spaces.
What are the most profitable things to make and sell?
Profit depends on how efficiently you build. Items you can batch, like cutting boards, serving trays, and small shelves, often earn well per hour. Custom furniture can earn the most per piece but takes longer and requires trust and reputation.
Do I need a business license to sell woodwork?
Requirements vary by location. Many areas require a general business license or seller’s permit, and some require sales tax registration. Contact your local government office or a small business advisor to confirm what applies to you.
How do I price my woodworking projects?
Add materials, labor, overhead, and profit. Track your real hours and costs on every project, then compare your price with similar handmade products to make sure you are positioned fairly without undercutting yourself.
What tools do I need first?
Most shops begin with a table saw, miter saw, router, cordless drill, sander, chisels, clamps, and a sturdy workbench. Buy what your first products require and add machines as income grows. Our best woodworking tools guide is a good starting point.
Where should I sell my woodworking products?
Start with two or three channels, such as an online marketplace, local craft fairs, and custom commissions. Track which one brings the best profit per hour and focus your energy there.
Do I need insurance?
It is strongly worth considering. Standard home policies often exclude business activity, and product liability coverage protects you if a piece causes harm. Speak with an insurance agent about options for your products.
How long until a woodworking business becomes profitable?
Timelines vary widely. Some part-time sellers see profit within months, while others take a year or more to build a steady customer base. Good pricing, strong photos, and consistent marketing shorten the path.
Can I run a woodworking business part-time?
Absolutely. Many successful makers begin on evenings and weekends, sell at weekend markets, and move to full-time only once income is reliable and savings cover slow periods.
Do I need to be an expert woodworker to sell my work?
You do not need to be a master, but your work must be consistently clean and safe. If you are still learning, start with how to start woodworking with no experience and keep practicing with simple, repeatable products.
Can I make money selling woodworking plans?
Yes. Digital plans and guides scale without extra materials or shipping. Document projects you already build, then follow the steps in our guide on selling woodworking plans online.
Conclusion: Your First Step Starts in the Shop
Starting a woodworking business is less about a single big leap and more about a series of small, steady decisions. Choose a niche you can execute well, build skills until your work is consistent, set up a shop that supports efficient production, and price every piece so the numbers work. Handle your legal basics, source wood wisely, build a small product line, and test two or three sales channels. Then keep refining.
The craft will always be the rewarding part, but the business wrapped around it is what lets you keep doing it. Begin with one product, sell a handful, learn from each sale, and grow from there. Your next customer is probably closer than you think.
Ready to take the first step? Equip your shop with trusted woodworking gear.
Start Shopping on Amazon