What Is Woodworking? The Complete Guide to the Craft, the Tools, and the Skills Behind It
From the first hand-cut joint to the finished dining table, here is everything you need to understand about shaping wood into things worth keeping.
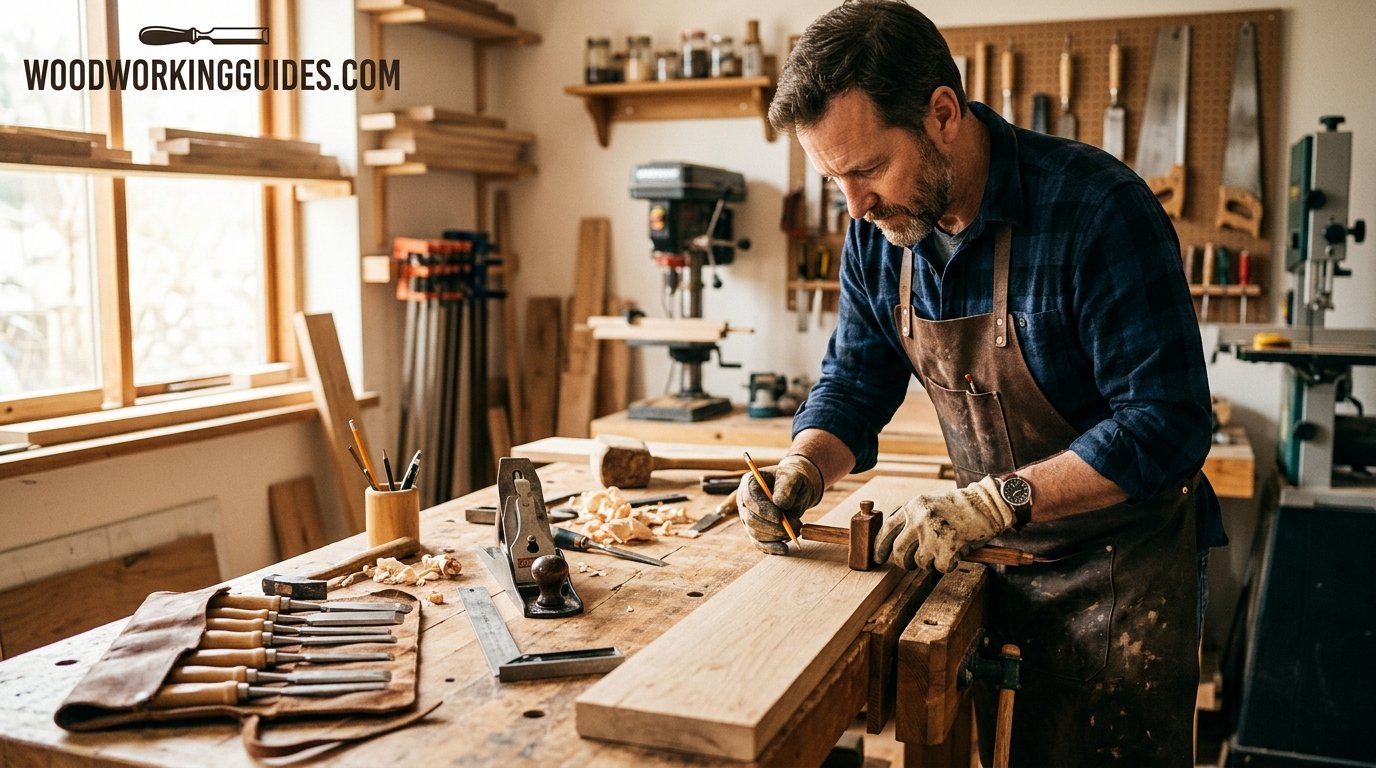
Walk into any old farmhouse and you will find woodworking everywhere: the stair rail worn smooth by a hundred years of hands, the kitchen table with a slight ripple in its top, the drawer that still glides shut with a soft whisper. None of those things were pulled off a shelf. Someone measured, cut, shaped, joined, and finished each one, and that quiet chain of decisions is what we call woodworking.
If you have ever wondered what woodworking actually involves, whether it is a hobby, a trade, an art form, or all three, you are in the right place. This guide breaks down the craft in plain language. You will learn how it began, what its different branches look like, how wood behaves, which tools matter, how joints hold furniture together, and how to take your first real steps without wasting money or losing a fingertip.
1. What Is Woodworking, Really?
Woodworking is the craft of turning raw wood into useful or decorative objects by cutting, shaping, joining, and finishing it. That single sentence covers an enormous range of activity. A person carving a spoon from a green birch branch is a woodworker. So is a cabinetmaker building a kitchen with computer-controlled machinery, a luthier shaping the top of a guitar, and a weekend hobbyist assembling a bookshelf in the garage.
What unites all of them is a relationship with a material that is alive in a way that metal, plastic, or stone are not. Wood was once a tree. It has grain that runs in a direction, it swells and shrinks with the seasons, and it carries knots, color shifts, and tiny irregularities that no two boards share. Good woodworkers learn to read those traits the same way a sailor reads weather.
The Core Activities Inside Every Project
Almost every woodworking project, no matter how simple or elaborate, passes through the same handful of stages. Understanding them gives you a mental map you can use for the rest of your woodworking life.
- Planning and design. Deciding what you are making, sketching it, choosing dimensions, and creating a cut list.
- Selecting and preparing material. Picking the right species, checking boards for warp or defects, and milling rough lumber flat and square.
- Measuring and marking. Transferring your plan onto the wood with pencils, knives, squares, and gauges.
- Cutting and shaping. Sawing, planing, routing, drilling, chiseling, turning, or carving the parts.
- Joining. Connecting parts with joinery, glue, fasteners, or a combination of all three.
- Sanding and finishing. Smoothing the surfaces and protecting them with oil, wax, varnish, paint, or stain.
Woodworking vs Carpentry
People often use the two words interchangeably, and in casual conversation that is fine. Strictly speaking, carpentry is the branch of woodworking focused on building structures: framing walls, hanging doors, laying floors, and putting up roofs. Woodworking is the broader umbrella and tends to emphasize furniture, cabinetry, small goods, and decorative objects, where fit and finish are judged up close. A carpenter works to tolerances measured in sixteenths of an inch, while a furniture maker often chases tolerances thinner than a sheet of paper.
Why So Many People Are Drawn to It
Some people come to woodworking for the money they can save on furniture. Others come for the stress relief of working with their hands after a day of screens. Plenty arrive because they want to build something for a child, a spouse, or a home they love. Whatever the reason, the pull is usually the same: a piece of wood on Friday evening becomes a finished object by Sunday afternoon, and you made it. If that sounds appealing and you are starting from zero, our walkthrough on how to start woodworking with no experience pairs nicely with this overview.
2. A Short History of Working With Wood
Woodworking is older than farming, older than pottery, and arguably older than the wheel. Wooden spears found in a German coal mine are estimated to be around four hundred thousand years old, which means early humans were shaping wood long before they were building houses. The craft grew up alongside human civilization, and almost every culture developed its own distinctive traditions.
Ancient Foundations
Egyptian craftsmen were building furniture, boats, and coffins with sophisticated joinery more than four thousand years ago. Tomb paintings show them using bow drills, adzes, and saws, and surviving pieces reveal mortise-and-tenon joints, dovetail-like connections, and veneer work. Because the Nile valley had few large trees, they imported cedar from Lebanon and prized every board.
In ancient Greece and Rome, carpenters and joiners were organized into guilds, and written records describe lathes, planes, and even early forms of plywood. Meanwhile in East Asia, builders developed temple construction methods that joined massive timbers without a single nail, relying instead on interlocking joints that flexed through earthquakes and typhoons. Japanese joinery is still studied today for its precision and elegance.
The Medieval Workshop and the Rise of Furniture
In medieval Europe, woodworking split into specialties. Carpenters framed buildings, joiners made doors and paneling, coopers built barrels, wheelwrights shaped wheels, and cabinetmakers eventually emerged to craft fine furniture for wealthy households. Apprenticeships lasted years, and the knowledge of how to cut a clean joint or choose a good board was passed hand to hand, master to student.
By the seventeenth and eighteenth centuries, furniture design had become a form of status and art. Names like Chippendale, Hepplewhite, and Sheraton became synonymous with style, while in the American colonies, Shaker communities developed a plain, honest aesthetic that valued function above ornament. Their pieces remain some of the most admired designs ever produced.
Industrialization and the Modern Revival
The Industrial Revolution brought steam-powered saws, planers, and eventually electric machines. Production sped up and prices fell, but many handcraft skills faded from everyday life. Then, in the twentieth century, a counter-movement grew. The Arts and Crafts movement celebrated handmade quality, and later generations of studio furniture makers treated wood as a sculptural medium.
Today woodworking sits in a fascinating place. Computer-controlled routers can carve complex shapes in minutes, yet online communities devoted to hand planes and wooden joinery are thriving. Beginners can learn from videos, forums, and plans that previous generations could only dream of. The craft has never been more accessible.
3. The Main Branches of Woodworking
Because woodworking is so broad, it helps to think of it as a family of related crafts rather than one single skill. Each branch has its own tools, habits, and pleasures. Many woodworkers specialize in one, while others wander freely between several. Seeing the whole map early helps you decide where your curiosity leads.
| Branch | What It Involves | Typical Projects | Difficulty to Start |
|---|---|---|---|
| Carpentry | Building and repairing structures | Decks, framing, stairs, sheds | Moderate |
| Furniture making | Designing and assembling pieces for living spaces | Tables, chairs, bookcases, beds | Moderate to high |
| Cabinetmaking | Building precise boxes, doors, and drawers | Kitchen cabinets, vanities, built-ins | Moderate to high |
| Woodturning | Shaping wood on a spinning lathe | Bowls, pens, spindles, handles | Moderate |
| Wood carving | Removing material with knives and gouges | Spoons, figures, relief panels | Low to moderate |
| Scroll sawing and marquetry | Cutting intricate patterns and inlays | Puzzles, signs, decorative boxes | Low to moderate |
| Boatbuilding and instrument making | Specialized work with curved forms and tight tolerances | Canoes, guitars, violins | High |
Carpentry and Construction
Carpentry is where most people first encounter wood on a large scale. Rough carpentry covers the structural bones of a building, while finish carpentry covers trim, crown molding, and stair parts. It rewards speed, accuracy, and a good eye for what is plumb, level, and square.
Furniture and Cabinetmaking
Furniture making is probably what most people imagine when they hear the word woodworking. A good table has to stay flat, a good chair has to survive being leaned back in, and a good drawer has to slide freely in every season. Cabinetmaking overlaps heavily but focuses on casework: boxes with doors, shelves, and drawers built to precise dimensions.
Turning, Carving, and Decorative Work
Woodturners mount a block on a lathe and shape it as it spins, producing bowls, pens, and table legs with beautiful flowing curves. Carvers work more slowly with knives and gouges, and the barrier to entry is very low: a sharp knife and a piece of basswood are enough to begin. Scroll sawing, intarsia, and marquetry sit in the decorative corner, where patience and a steady hand matter more than heavy machinery.
4. Understanding Wood: Species, Grain, and Sheet Goods
If tools are the verbs of woodworking, wood is the noun. You can own the finest chisel in the world, but if you do not understand the board in front of you, the results will disappoint. Learning how wood is classified and how it behaves is one of the fastest ways to improve.
Hardwoods and Softwoods
The words hardwood and softwood describe how a tree reproduces, not how dense the lumber actually is. Hardwoods come from broadleaf deciduous trees such as oak, maple, cherry, and walnut. Softwoods come from conifers such as pine, fir, spruce, and cedar. Some hardwoods like balsa are surprisingly soft, and some softwoods like Douglas fir are tougher than people expect.
| Wood | Type | Workability | Best Used For |
|---|---|---|---|
| Pine | Softwood | Very easy | Beginner projects, shelves, painted furniture |
| Poplar | Hardwood | Easy | Paint-grade cabinets, drawer parts, practice joinery |
| Red oak | Hardwood | Moderate | Tables, cabinets, trim |
| Hard maple | Hardwood | Challenging | Workbenches, cutting boards, durable furniture |
| Cherry | Hardwood | Moderate | Fine furniture that deepens in color with age |
| Walnut | Hardwood | Moderate | Heirloom furniture, accent pieces |
| Cedar | Softwood | Easy | Outdoor projects, chests, closet lining |
Grain, Movement, and Moisture
Grain is the direction in which a tree’s fibers run. Cut with the grain and the surface comes off smooth. Cut against it and the fibers tear. Beginners often feel this when a plane chatters or a router leaves a ragged edge, and the cure is usually to flip the board or change the direction of the cut.
Wood also moves. It absorbs moisture in humid months and releases it in dry ones, expanding and contracting mostly across its width and very little along its length. This is why a solid tabletop glued rigidly to its frame will eventually crack. Experienced woodworkers allow for seasonal movement by using techniques such as breadboard ends, floating panels, and slotted screw holes. Buying lumber that has been properly kiln-dried, and letting it acclimate in your shop for a week or two, prevents a world of frustration.
Plywood, MDF, and Other Sheet Goods
Not everything needs to be solid lumber. Plywood is made of thin layers glued with alternating grain directions, which makes it flat, stable, and strong. Medium-density fiberboard, or MDF, is made of compressed wood fibers and works well for painted pieces and jigs. Hardwood plywood with attractive face veneers is a staple of modern cabinetmaking. Sheet goods are also cost-effective for shop furniture, which is why many woodworkers build their first benches from them. If that idea appeals, our guides on the best plywood for a workbench top and the best wood for a woodworking bench go deeper.
How to Read a Lumber Yard
Lumber is sold by the board foot, a unit equal to a piece twelve inches wide, twelve inches long, and one inch thick. Boards are graded by how many clear, defect-free cuttings they contain, and grades with fewer knots cost more. When shopping, sight down the length of each board to check for bow, twist, and cup, look at the ends for cracks called checks, and bring a small moisture meter if you own one. Buying a little more than your cut list requires gives you room for mistakes and for choosing the most attractive grain for visible parts.
5. Hand Tools vs Power Tools
One of the first debates every new woodworker runs into is whether to work by hand or by machine. The honest answer is that both have a place, and the best shops usually blend them. Power tools remove material quickly and repeat cuts accurately. Hand tools give you control, quiet, and a deeper feel for the wood. Our full breakdown of hand tools vs power tools for woodworking explores the tradeoffs in detail, but here is the short version.
| Factor | Hand Tools | Power Tools |
|---|---|---|
| Speed | Slower, especially for rough stock removal | Fast and efficient for repetitive work |
| Noise and dust | Quiet, with larger shavings instead of fine dust | Loud and dusty, so protection is essential |
| Upfront cost | Can be modest if you buy a few good pieces | Higher, with many tools and accessories needed |
| Space required | Fits in a closet or on a small bench | Needs floor space, outlets, and dust control |
| Learning curve | Skill-intensive, especially sharpening | Easier to get acceptable results quickly |
| Precision | Excellent in skilled hands | Excellent with proper setup and jigs |
| Safety profile | Cuts and slips are the main risks | Kickback, blade contact, and noise require more caution |
The Case for Starting With Hand Tools
Hand tools teach fundamentals. When you saw a line by hand, you immediately feel what happens when your stance is off or your cut drifts. When you push a plane across a board, you learn what grain direction means. Sharpening a chisel teaches you what a truly keen edge feels like, and that knowledge transfers to every power tool you ever use later. They are also friendly to apartments, shared homes, and tight budgets.
The Case for Power Tools
Power tools shine when you need to process a lot of lumber, make repeated identical cuts, or build furniture on a reasonable timeline. A table saw rips boards to width in seconds. A miter saw makes consistent crosscuts. A router produces edge profiles and joinery that would take hours by hand. For many modern woodworkers, the practical sweet spot is a core set of machines for rough work and a collection of hand tools for fitting and finishing.
6. Essential Tools Every Beginner Should Know
Walk into any big-box store and the tool aisle can feel overwhelming. The good news is that you do not need most of it. A small, thoughtful collection will handle a surprising number of projects, and you can add specialized tools as your interests develop. For a ranked list with specific recommendations, see our roundup of the best woodworking tools. Below is a practical overview of what matters and why.
Measuring and Marking Tools
Accuracy begins before the first cut. A reliable tape measure, a combination square, a marking knife, a sharp pencil, and a straightedge are the foundation. Many experienced woodworkers say that most mistakes are measuring mistakes in disguise. A marking knife leaves a fine incised line that your saw or chisel can register against, which is much more precise than a thick pencil mark.
Cutting Tools
- Hand saws. A crosscut saw, a rip saw, and a fine-toothed joinery saw cover most hand cutting. Japanese pull saws are popular for their thin kerf and easy control.
- Circular saw or jigsaw. Great for breaking down plywood and cutting curves when you are not ready for larger machines.
- Miter saw. Makes fast, clean crosscuts and angled cuts. If you plan to build frames, trim, or lots of small parts, see our guide to the best miter saw for a home shop.
- Table saw. Often called the heart of the shop because of its power to rip and crosscut accurately. It is also the tool that demands the most respect. Our comparison of the best table saw for woodworking can help you narrow the field.
Shaping and Smoothing Tools
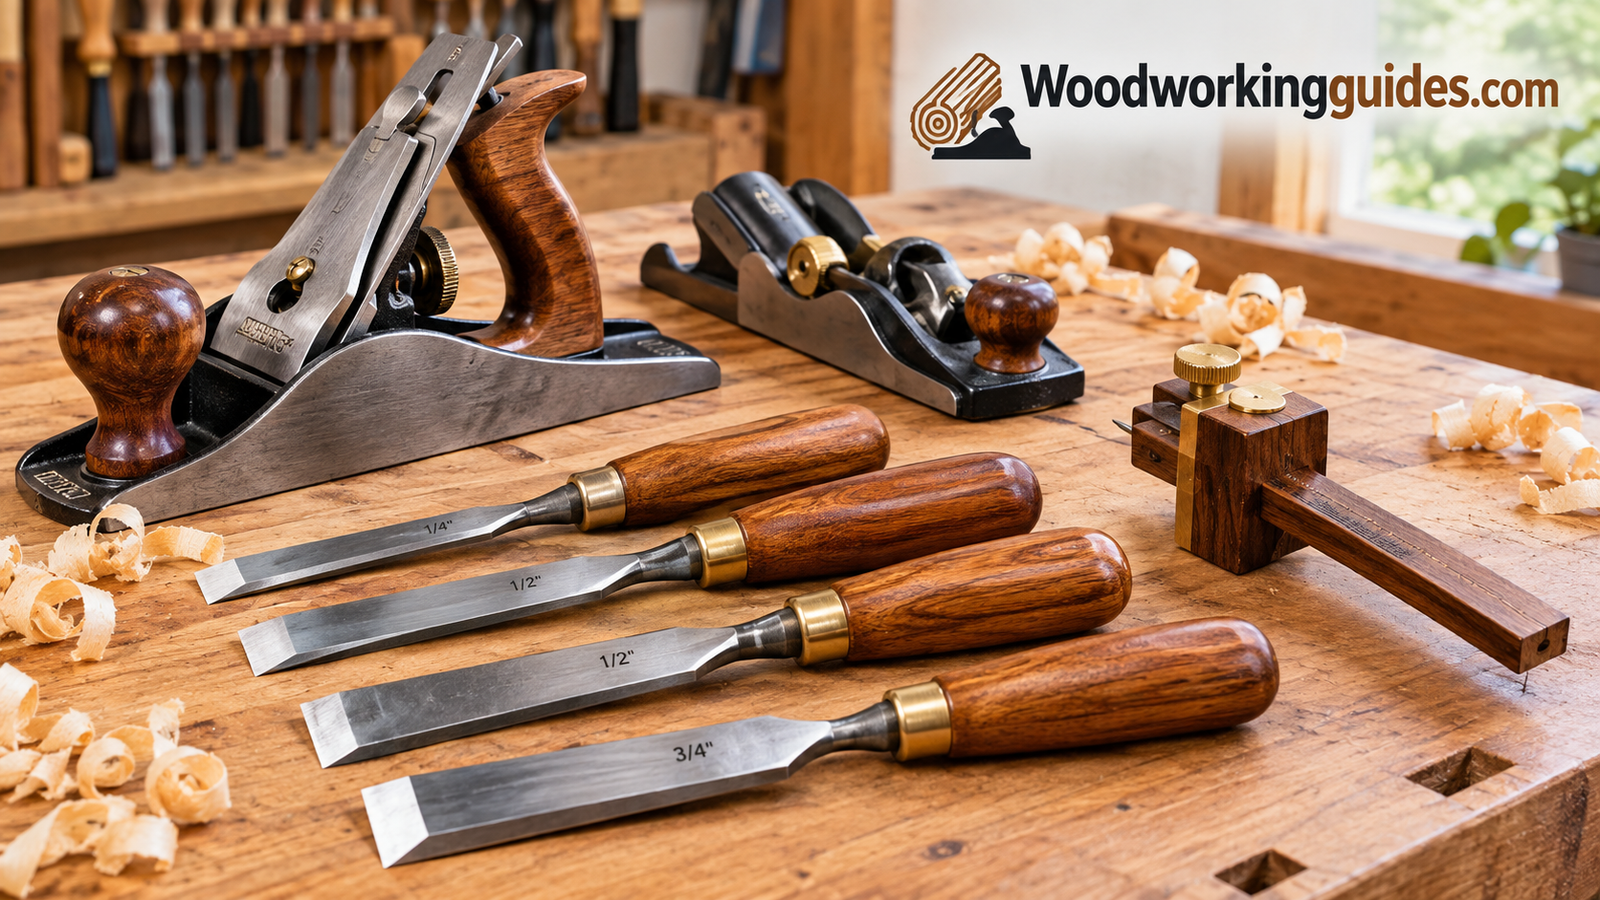
Chisels pare away waste, clean up joints, and fine-tune fits. A starter set in a few common widths is enough, and the quality of the steel matters less at first than your willingness to keep them sharp. If you are buying your first set, our list of the best chisel sets for beginners is a good place to start. A block plane and a smoothing plane add flat, glassy surfaces that sandpaper cannot match.
Routers cut grooves, round over edges, and produce many types of joints. They come in fixed-base and plunge versions, and a modest model will serve you for years. You can compare current favorites in our guide to the top wood router picks. For sanding, a random orbital sander saves hours of effort and leaves a more even finish than hand sanding alone.
Drilling and Fastening Tools
A good cordless drill pulls double duty as a driver for screws and a hole-maker for dowels, pocket holes, and hardware. Look for a model with a clutch, a reliable battery, and a comfortable grip. We have tested and compared options in our roundup of the best cordless drill for woodworking. Add a set of clamps, because you can never own enough, and a mallet for tapping joints together.
A Sensible Starter Checklist
| Priority | Tool | Why It Earns Its Place |
|---|---|---|
| Must have | Tape measure and combination square | Accurate layout prevents wasted lumber |
| Must have | Cordless drill and driver | Drilling and screwing for countless tasks |
| Must have | Clamps (several sizes) | Hold work for gluing, cutting, and assembly |
| Must have | Hand saw or circular saw | Breaks lumber down to manageable pieces |
| Should have | Chisel set and sharpening stones | Fits joints and cleans up cuts |
| Should have | Random orbital sander | Fast, even surface preparation |
| Nice to add | Router | Edge profiles, grooves, and joinery |
| Nice to add | Miter saw | Repeatable crosscuts and angles |
| Later upgrade | Table saw | Accurate ripping and sheet goods work |
7. Joinery: How Wood Pieces Connect
Joinery is the heart of woodworking. It is the collection of techniques used to connect two or more pieces of wood so they stay together, resist forces, and look good doing it. A well-made joint can outlast the glue that holds it, while a poor one fails the first time someone leans on the chair. If you want a tool-by-tool view, our article on wood joinery tools explained pairs well with this section.
Why Joint Choice Matters
Every joint is a tradeoff between strength, speed, appearance, and difficulty. The simplest connection is a butt joint, where two pieces meet end to edge or edge to edge. It looks neat but relies almost entirely on glue, and end-grain glue surfaces are weak. More elaborate joints increase the glue surface or add mechanical interlock, which resists pulling apart even if the glue fails.
| Joint | Strength | Difficulty | Common Uses |
|---|---|---|---|
| Butt joint | Low without reinforcement | Very easy | Simple boxes, framing with screws |
| Miter joint | Low to moderate | Moderate | Picture frames, trim corners |
| Pocket-hole joint | Moderate | Easy | Face frames, quick furniture, cabinets |
| Dowel joint | Moderate | Easy to moderate | Edge joining, simple furniture |
| Biscuit or domino joint | Moderate to high | Easy to moderate | Panel glue-ups, alignment |
| Rabbet and dado | Moderate to high | Moderate | Bookcases, cabinet backs and shelves |
| Mortise and tenon | Very high | Moderate to hard | Chairs, tables, doors, frames |
| Dovetail | Very high | Hard | Drawers, boxes, chests |
Mortise and Tenon
This is arguably the most important joint in furniture making. A tenon is a projection cut on the end of one piece, and a mortise is a matching cavity in another. When they fit snugly and are glued, the joint resists racking and twisting forces, which is why it appears in chair legs, table aprons, and door frames. It can be cut with chisels and saws, a router, a drill press, or a dedicated mortising machine.
Dovetails
Dovetails interlock like fingers with angled pins and tails that resist being pulled apart. They are the classic joint for drawers because the stress of opening a drawer tries to pull the front off, and the dovetail geometry fights back. Cutting them by hand is a rite of passage for many woodworkers, though jigs and routers make them accessible too.
Modern Shortcuts That Still Hold Up
Pocket-hole joinery, biscuits, and dowels get a bad reputation among purists, but when used well they build solid furniture quickly. A pocket-hole screw drives at an angle from one board into another, pulling the joint tight and eliminating the need for clamps during assembly. For beginners, these methods are an excellent way to build confidence and finish projects while the harder techniques are being practiced on the side.
8. Setting Up Your Workspace and Workbench
Your shop does not have to be large to be productive. Plenty of excellent furniture has come out of single-car garages, basements, spare bedrooms, and even balconies. What matters is that you can move safely, find your tools, and support your work at a comfortable height. Our guide to setting up a beginner woodshop walks through layout and power planning step by step, and the essentials are summarized here.
Think in Zones
A simple way to organize any shop is to divide it into zones: a lumber storage area, a machine area for sawing and routing, an assembly area where you glue and clamp, and a finishing area kept as clean as possible. Even in a small space, mentally assigning each task a corner reduces clutter and the number of times you trip over something. Mobile bases on heavy tools let you roll them out only when needed.
Lighting, Power, and Dust
Bright, even lighting is one of the cheapest improvements you can make, because shadows hide layout lines and make accidents more likely. Plan for enough outlets so you are not daisy-chaining extension cords, and consider a dedicated circuit if you plan to run a table saw or dust collector. Dust is the silent problem in woodworking. Even a simple shop vacuum connected to your sander or saw makes the air noticeably cleaner, and a small air filter helps with the fine particles that linger.
The Workbench: Your Most Important Tool
Many woodworkers describe the bench as the one tool that makes every other tool better. A solid, flat, heavy surface keeps your work from sliding, gives you a place to clamp, and holds your joinery while you cut it. If you are ready to pick one, our guide to the best woodworking workbench compares the leading options. Think about three things when choosing or building yours.
- Height. A common rule is to set the top roughly at the height of your wrist when your arm hangs at your side. Taller benches suit detail work, and lower ones suit heavy planing.
- Mass. A heavy bench resists movement while you plane, chop, or saw. Many beginners underestimate how much a wobbly bench frustrates them.
- Workholding. A vise, bench dogs, and a few clamps hold boards firmly in nearly any position.
You can build a perfectly good bench from construction lumber and plywood, and the material you choose for the top influences both cost and durability. For help deciding, see what our team recommends for the best wood for a woodworking bench and the best plywood for a workbench top.
Building Your Own Bench
- Customized height and size
- Excellent first project that teaches real skills
- Often cheaper than buying a premium bench
- You know exactly how it was made
Buying a Ready-Made Bench
- Ready to use immediately
- Predictable quality and warranty support
- Usually more expensive for similar mass
- Fixed dimensions that may not fit you
9. Safety and Protective Gear
Woodworking is a rewarding craft, but it involves sharp edges, spinning blades, flying chips, and fine dust. Nearly every serious accident has a boring cause behind it: a rushed cut, a missing guard, a distracted moment. Building safe habits from the very first day matters far more than any single piece of equipment.
Personal Protective Equipment
- Eye protection. Wear safety glasses whenever you cut, drill, sand, or chisel. Wood chips and splinters can fly in unexpected directions.
- Hearing protection. Table saws, routers, and planers produce noise levels that can cause permanent hearing damage over time. Earmuffs or plugs are inexpensive insurance.
- Respiratory protection. Fine wood dust is a respiratory irritant, and some species can trigger allergic reactions. A well-fitted dust mask or respirator should be part of your routine for sanding and machine work.
- Appropriate clothing. Avoid loose sleeves, dangling jewelry, and unsecured long hair around rotating tools. Closed-toe shoes protect against dropped boards and chisels.
An apron deserves a spot on that list too. A good one keeps sawdust off your clothes, gives you pockets for pencils and squares, and prevents loose fabric from catching on a bench corner. If you are comparing options, start with our roundup of the best woodworking apron choices.
Shop Habits That Prevent Accidents
- Keep blades and bits sharp, because dull tools require more force and slip more easily.
- Use push sticks and push blocks instead of your bare hands near blades.
- Never reach over a spinning blade or cutter, and wait for it to stop completely before clearing offcuts.
- Clamp your workpiece whenever possible so both hands stay free and away from the cutting path.
- Unplug tools or remove batteries before changing blades, bits, or settings.
- Work when you are rested and focused, and stop if you feel rushed or frustrated.
Fire, Finish, and Chemical Safety
Rags soaked in some oil finishes, particularly linseed oil, can heat up as they cure and may spontaneously combust. Lay them flat to dry outdoors or store them in a sealed metal container filled with water. Always ventilate your space when using solvent-based finishes, and keep a fire extinguisher within reach of your shop door.
10. Finishing: Sanding, Staining, and Sealing
Finishing is where a project goes from looking like a pile of parts to looking like a piece of furniture. It also protects the wood from moisture, wear, and stains. Many beginners rush this stage because they are eager to use what they built, but patient finishing is often what separates ordinary work from admired work.
Surface Preparation and Sanding
A great finish starts with a great surface. Remove glue squeeze-out, scrape or plane away mill marks, and fix dents by wetting the area with a damp cloth to raise compressed fibers. Then sand through a sequence of grits, typically beginning around 80 or 120 and moving to 180 and then 220. Skipping grits leaves scratches that show up once stain or oil goes on. Always sand with the grain in the final passes, and wipe away dust between steps.
Common Types of Finish
| Finish | Look and Feel | Durability | Ease of Application |
|---|---|---|---|
| Penetrating oil (tung, linseed, Danish) | Natural, warm, low sheen | Moderate; easy to repair | Easy |
| Wax | Soft satin glow | Low; best as a top coat | Very easy |
| Shellac | Amber warmth, quick-drying | Moderate; sensitive to alcohol and heat | Moderate |
| Polyurethane | Clear protective film | High; great for tabletops | Moderate |
| Water-based topcoat | Clear and non-yellowing | High | Moderate |
| Paint | Solid color, full coverage | High with proper primer | Easy to moderate |
Stain, Dye, and Color Control
Stain can bring out grain patterns or change a wood’s color, but it can also look blotchy on species like pine, maple, and cherry. A pre-stain conditioner or a diluted coat of shellac applied first helps even out absorption. Always test your stain on a scrap from the same board before touching the project itself, because the final tone changes with the species and the topcoat you choose.
Applying the Finish
Thin coats beat thick coats almost every time. Apply the finish evenly, let it dry fully according to the product label, and lightly sand between coats with a fine abrasive to knock down dust nibs. Work in a clean, well-lit, ventilated space, and avoid shaking cans of varnish, which introduces bubbles. Patience here pays off, as a few extra hours between coats can transform the final surface.
11. Costs, Benefits, and Realistic Expectations
Woodworking is as expensive or as affordable as you decide to make it. A person with a handsaw, a drill, a few clamps, and a sheet of plywood can build useful things. A person with a fully equipped shop can spend as much as a small car. Knowing what to expect helps you plan and avoid the all-too-common cycle of buying tools you never use.
What It Really Costs
| Approach | What You Get | Budget Level |
|---|---|---|
| Minimalist hand-tool start | Saws, chisels, a plane, measuring tools, and clamps | Low |
| Cordless-focused hobby setup | Drill, circular saw, jigsaw, sander, and basic accessories | Low to moderate |
| Home shop with core machines | Table saw, miter saw, router, dust collection, workbench | Moderate to high |
| Full furniture shop | Jointer, planer, band saw, drill press, and extensive hand tools | High |
The true cost also includes lumber, glue, fasteners, finishes, sharpening supplies, and the occasional mistake. Hardwoods can be expensive, and a single miscut on a walnut board stings. Practicing with pine, poplar, or plywood keeps the stakes low while you learn.
The Benefits
The rewards go well beyond saving money. Woodworking builds spatial reasoning, patience, and problem-solving. It gives you a sense of accomplishment that is hard to match, because the evidence of your effort sits right there in the room. Many people also find it meditative: the rhythm of planing or sanding quiets a busy mind. And for those who want to take it further, skills can lead to selling pieces online, taking commissions, or starting a small business.
Pros of Woodworking
- Creates lasting, useful objects
- Relieves stress and builds focus
- Skills improve steadily with practice
- Potential to earn side income
- Huge community and learning resources
Cons to Consider
- Tools and lumber can add up quickly
- Needs space, power, and dust management
- Mistakes happen and materials are not reusable
- Safety risks demand constant attention
- Projects often take longer than expected
Setting Realistic Expectations
Your first projects will have gaps in joints, uneven edges, and finishes that make you wince. That is normal and, in a strange way, a good sign: it means your eye is already improving faster than your hands. Progress in woodworking is rarely a straight line. One weekend you will cut a perfect joint, and the next you will wonder how you ever managed to cut one at all. Keep your early projects simple, finish them, and let the skills accumulate.
12. A Learning Path and First Project Ideas
Knowing what woodworking is feels good, but the real learning starts when you pick up a board. The most reliable way to improve is to build things in a sensible order, each one adding a small new skill to the last. Think of it as a ladder rather than a leap.
A Step-by-Step Progression
- Learn to measure, mark, and cut straight. Practice crosscuts and rip cuts on scrap until you can follow a line confidently.
- Master basic assembly. Build with glue and screws, focusing on square corners and clean surfaces.
- Add simple joinery. Try rabbets, dados, pocket holes, and dowels once your basic assembly feels reliable.
- Learn to sharpen. A sharp chisel and plane make everything else easier. Spend time on it early.
- Introduce a stronger joint. Cut your first mortise and tenon or half-blind dovetail on practice stock.
- Refine your finishing. Compare oil, shellac, and polyurethane on test boards to learn how each behaves.
- Tackle a larger piece. A small table, bench, or bookcase ties all the skills together.
Beginner Project Ideas
| Project | Skills Practiced | Suggested Wood |
|---|---|---|
| Cutting board | Glue-ups, flattening, sanding, oil finishing | Maple, walnut, cherry |
| Simple wall shelf | Accurate cuts, drilling, finishing | Pine, poplar |
| Workshop sawhorses | Angled cuts, screws, sturdy assembly | Construction lumber |
| Step stool | Joinery basics, strength and fit | Pine, oak |
| Small bookcase | Dados or pocket holes, squaring, shelf layout | Plywood, poplar |
| Workbench | Large-scale milling, joinery, and flatness | Douglas fir, maple, plywood |
Choosing Your First Major Machine
At some point, most woodworkers want a table saw, and choosing one is a big decision. Before you buy, think about your available space, power requirements, budget, and the kind of cuts you make most often. Our guide on how to choose a table saw explains portable, contractor, hybrid, and cabinet styles in plain language so you can pick with confidence rather than guesswork.
Where to Keep Learning
Community college classes, local makerspaces, and woodworking clubs offer hands-on instruction and access to machines. Online videos are a wonderful resource, though nothing replaces the feedback of someone watching your hands and correcting your stance. Books remain valuable too because they present ideas in a deliberate order. Whichever path you choose, keep a notebook of mistakes and fixes. Your future self will thank you.
Frequently Asked Questions About Woodworking
What is woodworking in simple terms?
Woodworking is the craft of making objects from wood by measuring, cutting, shaping, joining, and finishing it. The objects can be practical, like tables and cabinets, or decorative, like carved figures and turned bowls.
What is the difference between woodworking and carpentry?
Carpentry focuses on building and repairing structures such as walls, floors, and roofs, usually on a job site. Woodworking is the wider craft and often emphasizes furniture, cabinetry, and small goods made in a shop, where finer details and tighter fits matter more.
Is woodworking hard to learn for a complete beginner?
It has a learning curve, but it is very approachable when you start with simple projects and good habits. Most beginners can build a basic shelf or cutting board within their first few weeks, and skills grow naturally from there.
What tools do I need to start woodworking?
A tape measure, combination square, saw, cordless drill, clamps, and sandpaper cover many early projects. As you progress, add chisels, a sander, and eventually a router or table saw depending on the work you want to do.
How much does it cost to get started?
You can begin with a modest budget if you rely on a few hand tools and inexpensive lumber. Costs rise as you add machines, dust collection, and premium hardwoods, so many people grow their shop gradually, buying a tool only when a project calls for it.
What is the best wood for beginners?
Pine and poplar are friendly choices because they are affordable and easy to cut and shape. Plywood is also excellent for shop projects, jigs, and cabinets. Once you gain confidence, you can move to oak, maple, cherry, and walnut.
Do I need a big workshop?
No. Many woodworkers produce beautiful work in a corner of a garage, a basement, or even a small apartment using hand tools and compact power tools. A sturdy bench and a way to manage dust are more important than square footage.
Is woodworking dangerous?
Any craft involving sharp tools and machinery carries risk, but most accidents are preventable. Wear eye, ear, and breathing protection, use guards and push sticks, keep tools sharp, and never work when tired or distracted.
What are the most common woodworking joints?
Butt joints, miters, rabbets, dados, pocket-hole joints, dowels, mortise and tenon joints, and dovetails are among the most common. Each balances strength, speed, and appearance differently, so the best choice depends on the project.
How long does it take to get good at woodworking?
It depends on how often you practice and how challenging your projects are. Many people feel comfortable with basics after a few months of regular work, while mastery of advanced joinery and design can take years of steady learning.
Can I make money from woodworking?
Yes, many people sell cutting boards, furniture, signs, and custom pieces online or at local markets. Success usually requires consistent quality, good photography, fair pricing that accounts for time and materials, and patience in building a customer base.
Should I learn hand tools or power tools first?
Either path works. Hand tools teach fundamentals and cost less upfront, while power tools speed up production and make some tasks easier. Most woodworkers eventually use both and discover which combination suits their style and space.
Conclusion: Your Woodworking Journey Starts With One Board
So, what is woodworking? It is a craft with a long history, a wide variety of branches, and a gentle learning curve that rewards patience. It is the discipline of understanding wood, choosing the right tools, making joints that hold, and finishing surfaces so they last. It is also a hobby that can quietly change how you see the objects in your home, because once you know how a table is built, you will never look at one the same way again.
You do not need a perfect shop, an expensive machine, or years of experience to begin. You need a plan, a few reliable tools, a respect for safety, and the willingness to make mistakes on inexpensive lumber. Start small, finish what you begin, and let each project teach you the next skill. Before long, you will be handing someone a piece you made with your own hands, and that feeling is why people stay with this craft for life.
Pingback: Best Bench Vises for Woodworking: 10 Top Picks
Pingback: Best Clamps for Woodworking: 11 Top Sets