7 Best Table Saws for Woodworking: Tested Picks for Every Shop and Budget
From jobsite portables to cabinet-grade powerhouses — the saws that actually earn a spot in your shop.
Introduction: Finding the Right Table Saw for Your Shop
Ask any serious woodworker what the heart of their shop is, and most will point straight at the table saw. It is the tool that rips sheet goods down to size, squares up rough lumber, cuts precise joinery shoulders, and handles everything from delicate trim work to thick hardwood slabs. Choosing the wrong one can leave you fighting blade drift, chasing fence alignment, or simply running out of power halfway through a cut. Choosing the right one, on the other hand, quietly disappears into your workflow and lets you focus on the joinery, the finish, and the design instead of wrestling with the machine.
Table saws today span an enormous range, from compact benchtop units that live under a workbench between projects to full cabinet saws that anchor a garage shop for decades. Somewhere in the middle sits the category most home woodworkers actually buy from: contractor-style and jobsite saws that balance portability, power, and price. This guide breaks down seven of the best table saws for woodworking currently available, covering everything from safety-focused flesh-detection technology to rack-and-pinion fences that rival cabinet saws costing three times as much.
Before diving into individual reviews, it’s worth understanding what actually separates a good table saw from a mediocre one. Motor power matters, but so does the quality of the rip fence, the flatness and size of the table, dust collection efficiency, and how easily the saw folds down or rolls between the truck and the job site. We’ve weighed all of these factors so you can pick a saw that matches how you actually work, not just how a spec sheet reads. If you’re still assembling the rest of your shop, our guide to the best woodworking tools is a useful companion piece, and pairing your new saw with a solid miter saw for home shop use rounds out your cutting station nicely.
How We Chose These Saws
We evaluated each table saw against a consistent set of criteria that matter in real shop use rather than just marketing claims. Motor performance under load, fence accuracy and repeatability, table flatness, dust collection, safety features, portability, and long-term reliability all factored into the rankings below.
- Cutting power: Amperage, no-load RPM, and how the saw handles thick hardwood or wet lumber without bogging down.
- Fence quality: Rack-and-pinion versus T-square style fences, and how easily each locks square and stays that way.
- Portability: Folding stands, wheel kits, and overall weight for anyone moving between a shop and a jobsite.
- Dust collection: Port size, shroud design, and how much fine dust actually escapes the cabinet.
- Safety systems: Riving knives, blade guards, anti-kickback pawls, and in one case, active flesh-detection technology.
- Value: What you get relative to price, including included accessories like stands, blades, and miter gauges.
1. DeWalt DWE7491RS — Best Overall Table Saw for Woodworking
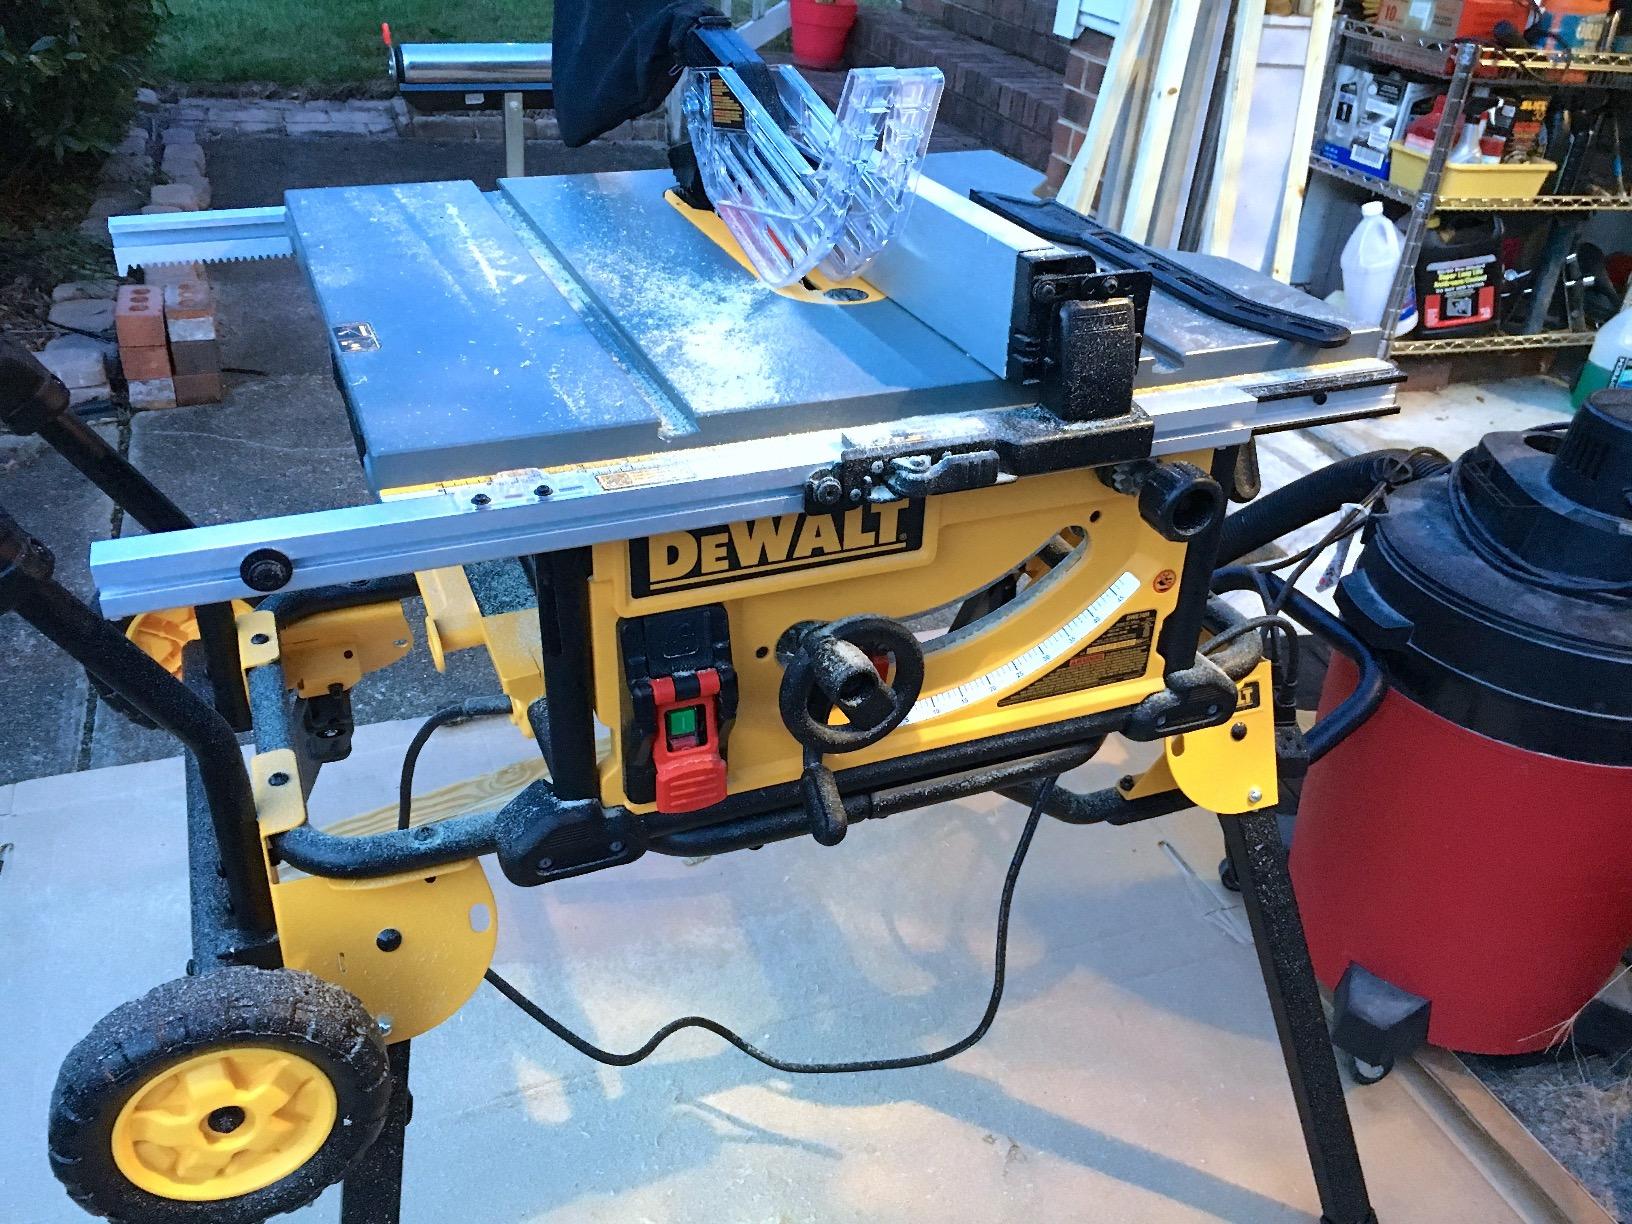
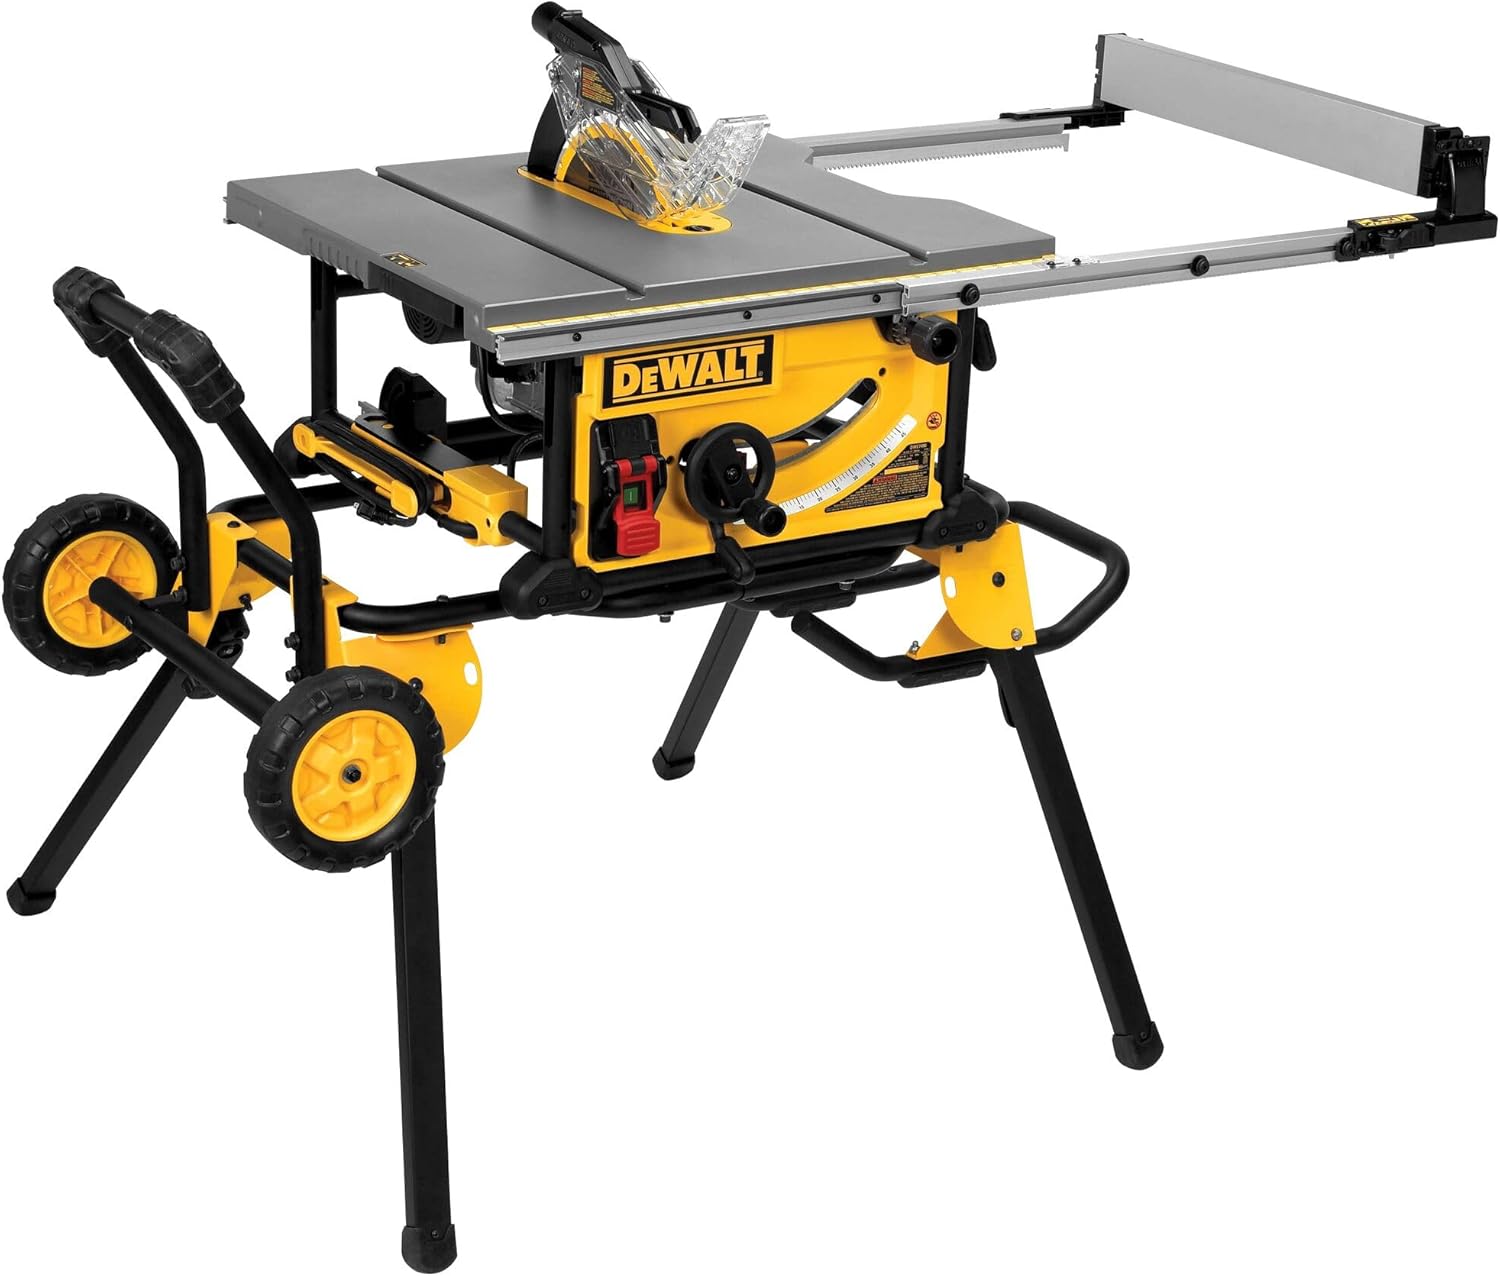
The DeWalt DWE7491RS has become the default recommendation for woodworkers who want one saw to handle both shop projects and jobsite work without compromise. Its 15-amp motor spins the 10-inch blade fast enough to rip through 2-inch hardwood without bogging down, and the rack-and-pinion fence glides smoothly while locking down dead square every time. That fence alone is a big reason this saw punches above its price class — most saws in this range still use flimsier T-square designs that require frequent re-calibration.
What really sets the DWE7491RS apart is the 32-1/2-inch rip capacity, which lets you break down a full sheet of plywood without extensions or jigs. Combine that with the rolling stand that folds flat in seconds, and you have a saw that goes from a cramped one-car garage to a job site tailgate without drama. The rear-mounted dust port, while not perfect, captures a respectable amount of debris when paired with a shop vac, keeping your workspace considerably cleaner than open-cabinet competitors.
Pros
- Excellent rack-and-pinion fence stays accurate cut after cut
- 32.5-inch rip capacity handles full plywood sheets
- Rolling stand folds down in seconds for easy transport
- Powerful 15-amp motor handles thick hardwood confidently
Cons
- Dust collection is good but not shop-saw level
- Stock blade is decent but worth upgrading quickly
For anyone building furniture, cabinetry, or general shop projects who wants a saw that won’t hold them back, the DWE7491RS remains one of the smartest purchases in this category. If you’re planning to pair it with router work for edge profiles, check out our picks for the top wood router picks.
Our top overall pick for accuracy, power, and portability.
Check Price on Amazon2. SawStop Jobsite Saw Pro — Best for Safety-Conscious Woodworkers

SawStop built its reputation on a single innovation: a blade-braking system that can stop a spinning blade in milliseconds if it detects contact with skin. The Jobsite Saw Pro brings that same flesh-detection safety technology into a portable package, which is a significant deal for anyone who has ever had a close call at the saw or simply wants the extra layer of protection while working alone in the shop.
Beyond the headline safety feature, this is a genuinely capable saw in its own right. The fence system is precise, the table is generously sized for a portable unit, and the cast aluminum extension wings add rigidity you don’t typically find at this weight class. The trade-off is price — SawStop saws carry a premium over comparable non-braking models — and the brake cartridge needs replacing after it triggers, which is an additional cost to budget for.
Pros
- Industry-leading flesh-detection blade brake
- Precise, easy-to-calibrate fence system
- Sturdy build quality with minimal table flex
- Excellent resale value due to brand reputation
Cons
- Higher upfront cost than comparable saws
- Replacement brake cartridges add to long-term expense
If safety is your top priority — especially if you work solo or teach woodworking to beginners — this saw justifies its premium. Pair it with a solid pair of hearing and eye protection, and review our general setting up a beginner woodshop guide for a full safety-first shop layout.

The safest table saw on this list, hands down.
Check Price on Amazon3. Bosch 4100XC-10 — Best Fence System

Bosch has long been known for engineering precision, and the 4100XC-10 shows exactly why. Its Smart Guard system combines the blade guard, riving knife, and anti-kickback pawls into a single tool-free assembly, making it far less tempting to skip re-installing safety gear after changing blades — a common shortcut that leads to accidents on other saws. The gravity-rise wheeled stand is another standout: a light kick raises or lowers the entire saw, and the wide wheelbase makes rolling over debris and job site clutter noticeably easier than competitors.
The fence deserves special mention. It locks parallel to the blade with almost no deflection, even at full extension, and the square-lock rip fence design means you rarely need to fine-tune alignment after moving the saw. Dust collection is similarly well thought out, with a nearly enclosed cabinet that channels debris efficiently to the vacuum port rather than letting it settle inside the base.
Pros
- Best-in-class fence accuracy and repeatability
- Gravity-rise stand makes transport effortless
- Tool-free Smart Guard safety system
- Strong dust collection for a jobsite saw
Cons
- Heavier than some direct competitors
- Premium price relative to base features
Woodworkers who prioritize precision over raw portability will appreciate what Bosch has built here. It pairs particularly well with a quality random orbital sander for finishing edges after ripping stock to size.
Unmatched fence precision and easy mobility.
Check Price on ebay4. Grizzly Industrial G0869 — Best for Serious Home Shops
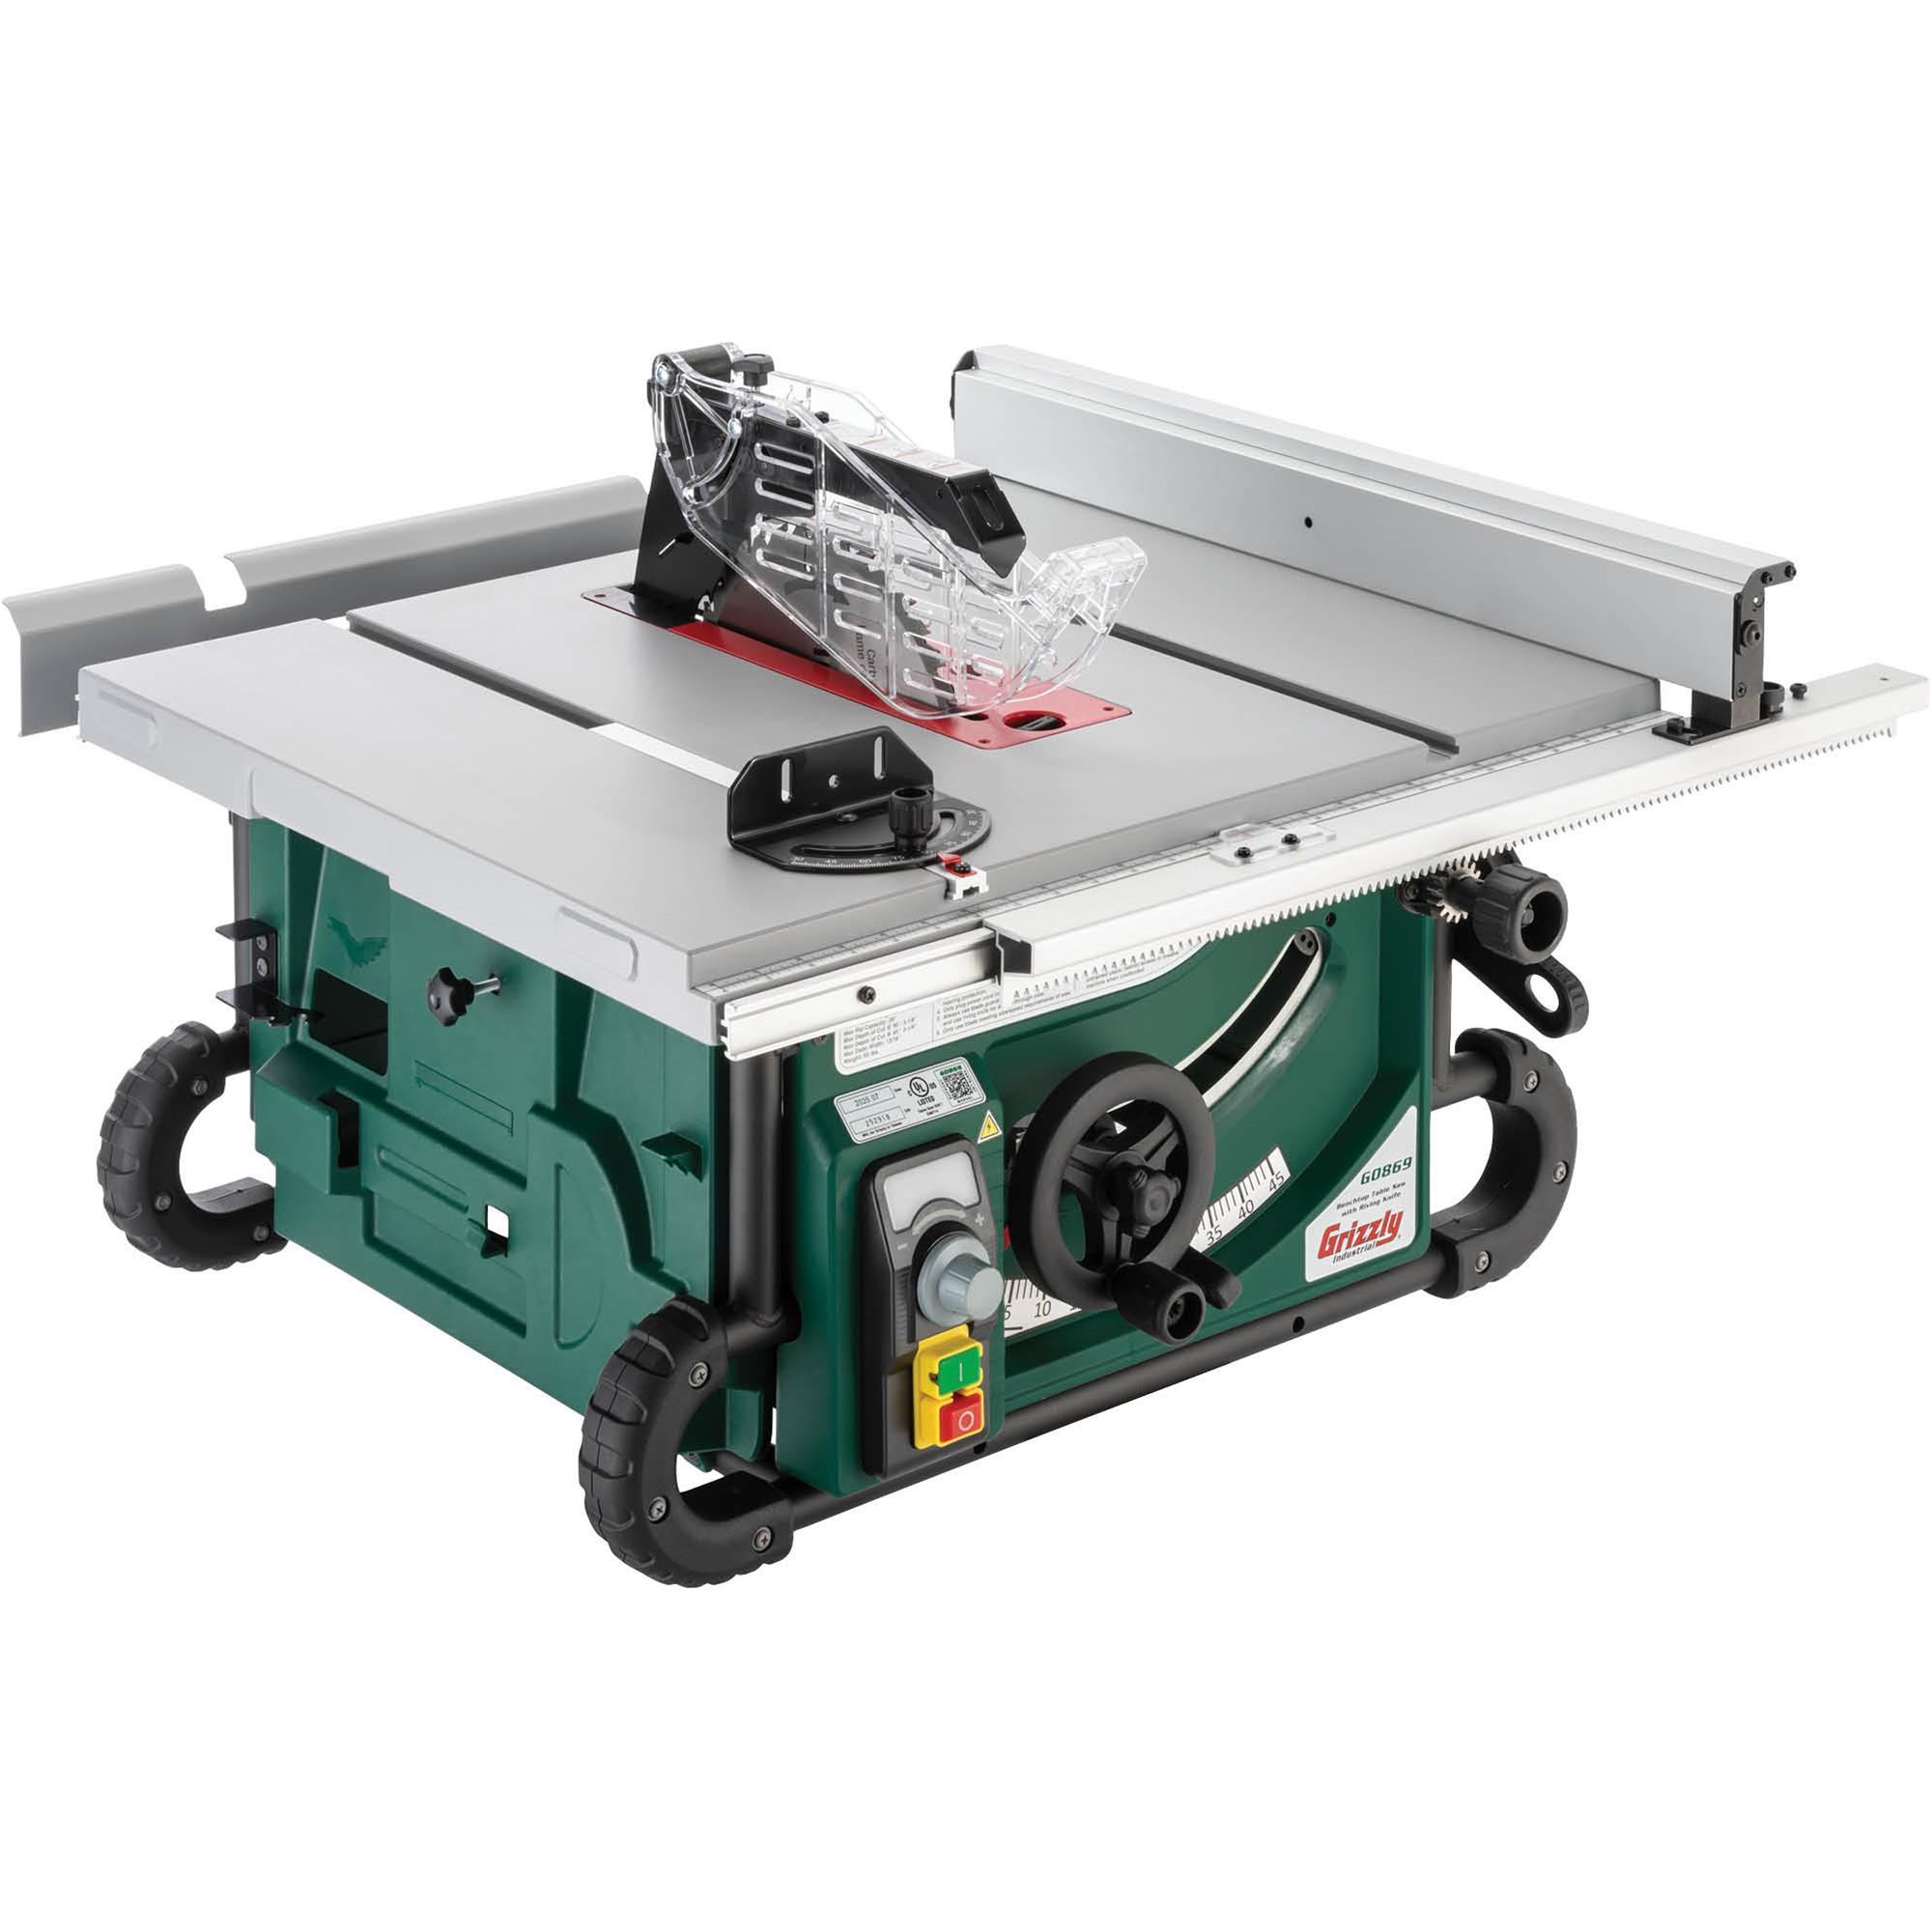
If you’ve outgrown portable jobsite saws and want something that behaves more like a stationary shop tool, the Grizzly G0869 is worth serious consideration. This hybrid-style saw uses a fully enclosed cabinet base that dramatically improves dust collection compared to open-stand jobsite saws, while still keeping the footprint and price more approachable than a full industrial cabinet saw.
The cast iron table and extension wings provide a flat, stable surface that stays true over years of use, and the trunnion assembly is mounted to the cabinet rather than the table, which keeps alignment consistent even under heavy use. Power is ample for ripping thick hardwood repeatedly without motor strain, something portable saws sometimes struggle with during long production runs.
Pros
- Cast iron table stays flat and true long-term
- Enclosed cabinet dramatically improves dust collection
- Cabinet-mounted trunnions keep alignment stable
- Handles repeated heavy cuts without bogging down
Cons
- Not portable — this is a stationary shop saw
- Requires more floor space than jobsite models
This saw makes the most sense for a dedicated home shop or garage setup rather than a mobile jobsite kit. Combine it with a proper woodworking workbench for a shop layout that can handle serious furniture-grade projects.
Cabinet-saw stability for a dedicated home shop.
Check Price5. Skil SPT99-11 — Best Budget Table Saw
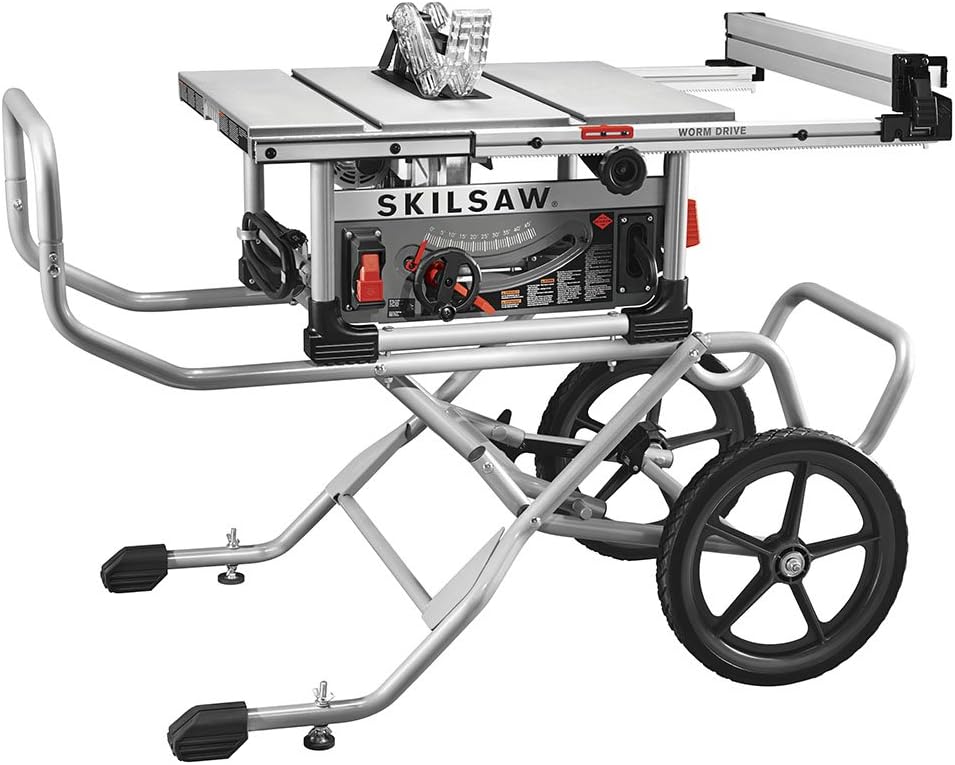
Not everyone needs — or wants to pay for — a saw loaded with premium features. The Skil SPT99-11 covers the fundamentals well at a fraction of the price of the saws above it on this list. The 15-amp motor delivers enough power for typical home projects, dimensional lumber, and plywood sheet goods, and the folding stand with rear wheels makes it reasonably easy to move around a garage or driveway.
The fence isn’t in the same league as the Bosch or DeWalt above, but it’s serviceable for most non-production work, and Skil includes a reasonably accurate rip scale that gets you close without excessive fine-tuning. For hobbyists, DIYers, and anyone building their first shop on a tight budget, this saw removes the biggest barrier to entry: cost.
Pros
- Very competitive price point for a full-size saw
- Folding stand with wheels for easy storage
- Enough power for typical home woodworking projects
- Lightweight compared to premium competitors
Cons
- Fence lacks the precision of pricier models
- Dust collection is minimal out of the box
This is a great starting point if you’re just getting into the hobby — check our hand tools vs power tools for woodworking guide to round out a beginner-friendly toolkit without overspending.

The most budget-friendly full-size option here.
Check Price on Amazon6. DeWalt DWE7485 — Best Compact Table Saw

Space is often the biggest constraint for hobbyist woodworkers, and the DWE7485 is DeWalt’s answer for shops where every square foot counts. It’s noticeably smaller and lighter than the DWE7491RS, trading some rip capacity for a footprint that fits comfortably in a small garage corner or the back of a hatchback.
Despite the smaller size, DeWalt didn’t cut corners on the fence — it’s the same rack-and-pinion style found on the larger model, which means you still get accurate, repeatable cuts. The 24-1/2-inch rip capacity is more limited than full-sheet saws, but for furniture-scale work, trim, and general shop tasks, it’s more than sufficient for most projects.
Pros
- Compact footprint ideal for small shops
- Same accurate rack-and-pinion fence as larger DeWalt models
- Lightweight enough to carry with one hand on the folded stand
- Good value for the fence quality included
Cons
- Limited rip capacity for full plywood sheets
- Smaller table offers less support for large panels
For apartment-adjacent garages or shared shop spaces, this saw strikes a smart balance between capability and footprint. It’s an especially good match alongside a portable woodworking workbench for a fully mobile small-shop setup.

Big saw accuracy in a small-shop footprint.
Check Price on Amazon7. Skil TS6307-00 — Best for Beginners

Rounding out the list is a saw built specifically with newcomers in mind. The Skil TS6307-00 keeps the control layout simple and intuitive, with clearly marked adjustments for blade height, bevel angle, and fence position — all details that matter when you’re still learning how a table saw’s controls interact with each other.
It won’t out-cut the premium saws on this list in raw power or precision, but for someone building their very first workbench project, learning basic joinery, or simply cutting plywood for shelving, it offers everything needed without an overwhelming feature set or a steep price tag.
Pros
- Simple, beginner-friendly control layout
- Affordable entry point into table saw ownership
- Lightweight and easy to store
- Includes basic safety guarding out of the box
Cons
- Not built for heavy daily production use
- Fence and table lack the rigidity of pricier saws
If you’re just starting out, pair this saw with our guide on how to choose a table saw and our best chisel set for beginners to build a well-rounded starter toolkit.

An approachable, affordable first table saw.
Check Price on AmazonWho Should Buy Which Saw?
With seven strong options on this list, it helps to think in terms of use case rather than trying to find one universal “best” saw. Someone renovating a kitchen on weekends has very different needs than a full-time cabinetmaker running a production shop, and matching the saw to the actual workflow prevents both overspending and frustration down the road.
If you split time between a home shop and the occasional job site, the DeWalt DWE7491RS or the Bosch 4100XC-10 are the strongest all-around choices — both fold down for transport while still delivering fence accuracy that rivals stationary saws. Woodworkers who work primarily solo, especially those doing repetitive ripping cuts for extended stretches, should weigh the SawStop Jobsite Saw Pro heavily; the peace of mind from active flesh detection is difficult to put a price on once you’ve had even a minor close call at the blade.
Anyone converting a garage into a permanent, dedicated shop space should look hard at the Grizzly G0869. The enclosed cabinet design and cast iron table represent a meaningful step up in rigidity and dust control that portable saws simply can’t match, and the extra weight that makes it a poor jobsite companion is exactly what gives it rock-solid stability during long cuts. On the other end of the spectrum, first-time buyers, students, and anyone building a starter shop on a modest budget will get excellent value from the Skil TS6307-00 or Skil SPT99-11, both of which cover the fundamentals without unnecessary complexity or cost.
Finally, if shop space is your primary constraint — think one-car garages shared with a vehicle, or apartment-adjacent storage units — the DeWalt DWE7485’s smaller footprint and lighter weight make it the most practical daily-use option, even though it sacrifices some rip capacity compared to its larger sibling.
Choosing the Right Blade for Your Table Saw
Every table saw on this list ships with a general-purpose combination blade, and while that’s fine for getting started, upgrading blades based on the task at hand makes a noticeable difference in cut quality. A 40-tooth combination blade handles both rip and crosscuts reasonably well for general shop use, but dedicated ripping blades with fewer, larger gullets clear waste faster and reduce burning when ripping thick hardwood stock.
For fine furniture work where visible edges matter, a high tooth-count blade — 60 to 80 teeth — produces a noticeably smoother finish with less tear-out, particularly on plywood veneers where splintering is a common frustration. Keep in mind that more teeth generally means slower feed rates and more heat buildup, so matching the blade to the material and cut type is more important than simply buying the most expensive option available.
Blade quality also interacts directly with fence accuracy. Even the best rack-and-pinion fence, like those on the DeWalt DWE7491RS or Bosch 4100XC-10, can’t fully compensate for a warped or dull blade pulling material off-line during a cut. Budgeting for a quality blade upgrade shortly after purchase is one of the highest-value investments you can make in any of the saws covered in this guide.
Understanding Table Saw Blade Anatomy: Tooth Geometry, Materials, and Kerf Width
Choosing a blade for your table saw goes far beyond counting teeth. The geometry of each tooth, the material the blade is made from, and the width of the kerf it cuts all interact to determine how clean your cuts look, how much power the motor needs to deliver, and how long the blade stays sharp before requiring replacement or sharpening. Understanding these factors helps you select the right blade for each specific task rather than relying on a single general-purpose blade for everything.
Tooth Geometry Explained
The three most common tooth grinds found on 10-inch table saw blades are Alternate Top Bevel (ATB), Flat Top Grind (FTG), and Triple Chip Grind (TCG). Each is optimized for different cutting tasks, and knowing when to use each one prevents frustration and wasted material.
Alternate Top Bevel (ATB) teeth alternate between a left-hand and right-hand bevel across the blade, creating a knife-like slicing action. This geometry produces the cleanest crosscuts and is the standard grind on most combination and crosscut blades. The bevel angle matters: a steeper bevel (marketed as “Hi-ATB” with 20 to 30 degrees of bevel) slices even more cleanly through plywood veneers and melamine, virtually eliminating tear-out on the top face of the cut. The trade-off is that ATB teeth dull faster than flat-top teeth because the thin bevel edge is more fragile, and they leave a slightly angled kerf floor that doesn’t produce perfectly flat-bottomed grooves.
Flat Top Grind (FTG) teeth have a flat, square top with no bevel angle. This makes them the ideal geometry for ripping solid wood along the grain, because the flat tooth face shears wood fibers cleanly rather than slicing them at an angle. FTG teeth also cut faster than ATB teeth in ripping applications because each tooth removes material with a chisel-like action rather than a slicing motion. The downside is that FTG teeth produce more tear-out on crosscuts and plywood cuts because the flat tooth doesn’t slice fibers before the tooth passes through. You’ll find FTG geometry on dedicated ripping blades, typically with 24 to 30 teeth, and on dado set chippers.
Triple Chip Grind (TCG) alternates between a flat-topped “trapezoid” tooth and a “chamfered” tooth that’s beveled on both sides. The trapezoid tooth roughs out the cut, and the chamfered tooth follows behind to clean and finish it. This geometry excels at cutting hard, abrasive materials like laminates, non-ferrous metals, and solid surface countertops. TCG blades last significantly longer than ATB blades when cutting abrasive materials because the flat leading edge is more resistant to chipping. For typical woodworking, however, TCG is usually unnecessary — it shows up most often on specialty blades and dado set outside blades.
Carbide-Tipped vs. High-Speed Steel
Nearly every quality table saw blade sold today uses tungsten carbide tips brazed onto a steel body. Carbide holds an edge roughly ten times longer than high-speed steel (HSS) under typical woodworking conditions, which makes it the practical default for anyone using their saw regularly. Within carbide-tipped blades, there’s meaningful variation in carbide grade — fine-grain carbide stays sharp longer and can be resharpened more times than coarse-grain carbide, though it costs more upfront. Premium blades from manufacturers like Freud, Forrest, CMT, and Diablo typically use finer-grain carbide that you can feel in cut quality and blade longevity.
High-speed steel blades are occasionally sold as budget options or for specialty applications like cutting extremely thin stock where a carbide tooth might chip the material. For general table saw woodworking, carbide-tipped blades represent a significantly better long-term value because a single resharpening costs a fraction of the price of a new blade and restores nearly original performance.
Thin Kerf vs. Full Kerf
Standard full-kerf blades cut a slot approximately 1/8 inch (3.2 mm) wide, while thin-kerf blades cut a slot closer to 3/32 inch (2.4 mm). That difference of roughly 1/32 inch sounds trivial, but it matters in two practical ways: material waste and motor load.
The narrower kerf means thin-kerf blades remove less material per cut, which translates directly into less waste — meaningful over the course of ripping hundreds of linear feet of hardwood where every thirty-second of an inch saved accumulates into a significant amount of usable stock. More importantly for smaller saws, thin-kerf blades require noticeably less motor power to push through a cut because there’s less material being converted into sawdust. This is particularly relevant for the 15-amp motors found on every saw in this guide; a thin-kerf blade can effectively give your saw the equivalent of extra power reserve when ripping thick hardwood, reducing bog-down and burning.
The trade-off is that thin-kerf blades are more prone to deflection under heavy side loads, which can produce slightly less straight cuts if you’re forcing the material or if the fence isn’t holding the stock firmly parallel. For most woodworking cuts, this difference is negligible with a sharp blade and proper technique. Many woodworkers keep both full-kerf and thin-kerf blades on hand, using thin-kerf for heavy ripping in thick stock and full-kerf for precision crosscuts and joinery where cut straightness is paramount.
Blade Diameter and Arbor Compatibility
Every table saw in this guide uses a standard 10-inch blade with a 5/8-inch arbor, which is the most common configuration for contractor and jobsite saws in North America. This universal standard means blade selection isn’t constrained by compatibility — any 10-inch, 5/8-inch arbor blade from a reputable manufacturer will physically fit every saw reviewed here. Some compact saws can also accept 8-1/4-inch blades, which is worth checking if you own or are considering the DeWalt DWE7485, but the 10-inch size dominates the market and offers the widest blade selection by far.
Tip: If you regularly switch between ripping and crosscutting, a two-blade system — a 24-tooth FTG ripping blade and a 60-tooth ATB crosscut blade — handles the vast majority of table saw tasks better than a single combination blade, and costs less than many premium all-purpose options.
Setting Up Your Table Saw for Accurate Cuts
Out-of-the-box calibration varies between models, and even the most precise fence systems benefit from a quick alignment check before the first cut. Start by squaring the blade to the table using a reliable square, checking at both the front and back of the blade to catch any twist in the arbor assembly. From there, align the fence parallel to the blade — most modern fences, including the rack-and-pinion designs featured on several saws in this guide, include adjustment screws specifically for this purpose.
Once the blade and fence are squared, check the miter slots for parallel alignment relative to the blade, since any deviation here throws off crosscut accuracy even if rip cuts are perfect. Finally, install a zero-clearance throat plate if your saw doesn’t already include one — it dramatically reduces tear-out on the underside of cuts and adds a meaningful safety margin by minimizing the gap around the blade.
Taking twenty minutes to run through this setup process after unboxing, and periodically afterward, pays dividends in cut quality regardless of which saw you choose from this list. For woodworkers building out a full joinery station around their new saw, our guide to wood joinery tools explained is a useful next read.
Essential Accessories to Pair With Your New Table Saw
A table saw rarely operates in isolation — a handful of accessories dramatically expand what it can accomplish safely and accurately. A crosscut sled built from plywood and hardwood runners provides far more control and safety for crosscuts than relying solely on a stock miter gauge, and it’s a project most woodworkers tackle within their first month of ownership.
Featherboards help maintain consistent pressure against the fence during long rip cuts, reducing the chance of material drifting off-line or binding against the blade. A dedicated push stick — or several, in different shapes for different cut types — should live within arm’s reach at all times, and outfeed support, whether a roller stand or simply a folding table at the correct height, prevents long boards from tipping and causing kickback as they clear the blade.
Rounding out a well-equipped table saw station, a shop vacuum with a cyclone pre-separator keeps dust collection efficient without constantly clogging a small filter, and a dedicated woodworking apron keeps sawdust and stray offcuts off your clothing during long shop sessions. Combined with a sturdy woodworking workbench nearby for staging cuts, these additions turn any saw on this list into the center of a genuinely efficient shop workflow.
Side-by-Side Comparison Table
Here’s a quick snapshot of how all seven saws stack up across the specs that matter most day-to-day in the shop.
| Model | Motor | Rip Capacity | Best For | Portability |
|---|---|---|---|---|
| DeWalt DWE7491RS | 15A | 32.5″ | Overall best all-rounder | Rolling stand |
| SawStop Jobsite Saw Pro | 15A | Up to 25″ | Safety-focused woodworkers | Wheeled stand |
| Bosch 4100XC-10 | 15A | Up to 25″ | Fence precision | Gravity-rise stand |
| Grizzly Industrial G0869 | 15A | 30″+ | Dedicated home shops | Stationary |
| Skil SPT99-11 | 15A | 25″ | Budget buyers | Folding wheeled stand |
| DeWalt DWE7485 | 15A | 24.5″ | Small/compact shops | Compact folding stand |
| Skil TS6307-00 | 15A | Up to 25″ | Beginners | Lightweight stand |
Table Saw Buying Guide: What Actually Matters
Motor Power and Blade Speed
Most saws in this guide run 15-amp motors, which is the practical ceiling for saws running on standard 120V household circuits. What differs is how each motor handles sustained load — ripping thick hardwood for extended periods will reveal weaker motors quickly, as blade speed sags and cuts start to burn or bind. If you frequently work with dense hardwoods like maple or oak, prioritize saws with a reputation for consistent power delivery rather than just peak amperage on the spec sheet.
Rip Fence Quality
The fence is arguably more important than the motor for day-to-day accuracy. Rack-and-pinion fences, like those on the DeWalt models and the Bosch, use a gear mechanism that keeps the fence perfectly parallel to the blade across its entire range, and they lock down with minimal deflection. Cheaper T-square style fences can work fine but often need more frequent squaring checks, especially after transport.
Rip Capacity and Table Size
If you regularly break down full 4×8 sheets of plywood or MDF, a rip capacity of at least 30 inches saves enormous time and reduces the need for extension tables or sleds. If most of your work is furniture-scale or trim, a smaller rip capacity like the DWE7485’s 24.5 inches won’t hold you back and saves shop floor space.
Dust Collection
Fine wood dust is both a nuisance and a genuine health concern over years of exposure. Enclosed-cabinet saws like the Grizzly G0869 capture dust far more effectively than open-stand jobsite saws, though pairing any saw with a shop vac and a well-sealed dust port closes much of that gap. Look for saws with rear-mounted ports sized for standard 2-1/2 inch hose connections.
Safety Features
Riving knives, blade guards, and anti-kickback pawls are standard on modern saws, but how easy they are to install and remove matters in practice — guards that are a hassle to reinstall often get left off, which defeats their purpose. The SawStop Jobsite Saw Pro takes safety further with active flesh-detection braking, a feature worth the premium for many woodworkers.
Portability vs. Stationary Use
Be honest about how you’ll actually use the saw. If it’s staying in one spot in a dedicated shop, a heavier, more rigid saw like the Grizzly G0869 rewards you with better long-term accuracy. If it’s moving between a garage, a driveway, and job sites, prioritize fold-down stands, wheels, and overall weight.
Bevel Capacity and Accuracy
Every table saw tilts the blade for bevel cuts, but the range and accuracy of that tilt varies between models. Most saws tilt from zero to 45 or 47 degrees, and premium models include a positive stop at exactly 45 degrees that you can verify with a reliable square. If you frequently cut compound angles for projects like tapered legs or compound miters for crown molding, pay attention to how precisely the bevel scale reads and whether it’s easy to fine-tune. A saw that’s a degree off at 45 degrees produces a gap that’s nearly impossible to hide in a finished joint.
Motor Type: Direct Drive vs. Belt Drive
Jobsite and compact saws universally use direct-drive motors where the blade mounts directly to the motor arbor, which keeps the design compact and eliminates belt maintenance. Cabinet and hybrid saws like the Grizzly G0869 typically use belt-driven motors, where the motor sits separately and drives the arbor through a V-belt. Belt-drive systems offer a notable advantage: the belt absorbs vibration before it reaches the blade, resulting in noticeably smoother cuts, and the motor can be larger and more powerful than a direct-drive unit of equivalent size. Belt-driven saws also tend to run quieter, which matters in a residential garage shop where noise carries through shared walls.
For a deeper dive into matching a saw to your specific projects, our full how to choose a table saw guide walks through additional scenarios, and our wood joinery tools explained article covers how a table saw fits into a broader joinery workflow.
Cabinet, Contractor, and Jobsite Saws: Understanding the Categories
Table saws are generally grouped into a few broad categories, and understanding where each falls helps clarify why the seven saws in this guide vary so much in weight, price, and dust collection. Jobsite saws, like the Skil models and DeWalt’s DWE7485, are built around portability first — light enough to carry, with folding stands designed for quick setup and teardown on a job site or in a shared garage space.
Contractor-style saws, a category that the DeWalt DWE7491RS and Bosch 4100XC-10 straddle, add more table surface, heavier fence hardware, and often larger rip capacities while still remaining mobile enough for occasional transport. These represent the sweet spot for many home woodworkers who want shop-saw performance without committing to a fully stationary setup.
Hybrid and cabinet saws, represented here by the Grizzly G0869, sit at the top of the category in terms of rigidity and dust control. Their fully enclosed bases and heavier cast iron construction essentially eliminate vibration-related accuracy drift, at the cost of portability and a larger permanent footprint. Full industrial cabinet saws go even further with more powerful motors and larger tables, but for most home and hobbyist woodworkers, a hybrid saw like the G0869 delivers the meaningful benefits of cabinet-saw rigidity without the industrial price tag or space requirements.
Understanding which category best fits your shop — and being honest about whether you’ll actually move the saw regularly or if it will live in one spot — is one of the most useful filters for narrowing down which of these seven saws deserves a closer look. It’s a similar consideration to choosing between corded and cordless options covered in our hand tools vs power tools for woodworking guide, where portability trade-offs come up again and again across different tool categories.
Riving Knife vs. Splitter: What the Difference Means for Your Safety
One of the most overlooked yet critical safety features on a table saw is the metal fin positioned directly behind the blade. On older saws, this fin is a splitter — a fixed metal plate mounted to the saw’s throat plate or blade guard assembly that sits at a fixed height above the table. On modern saws, including every model in this guide, the preferred design is a riving knife — a curved metal plate that mounts directly to the arbor assembly and moves up and down with the blade. Understanding why this distinction matters can help you make better use of the safety equipment your saw already includes.
What a Splitter Does and Its Limitations
A splitter’s job is simple: it keeps the two halves of a freshly cut board from pinching together behind the blade, which is the primary mechanism behind kickback. When wood fibers close against the back of a spinning blade, the blade’s teeth — which are angled to push material downward against the table — instead grab the wood and launch it forward toward the operator at tremendous speed. A splitter physically blocks this pinching action by occupying the space between the two halves of the cut.
The limitation of a traditional splitter is that it’s fixed in position, usually at full blade height. When you lower the blade for a shallow cut — say, cutting a thin rabbet or grooving a drawer bottom — the splitter remains at full height, which means it no longer tracks closely behind the blade. This gap reduces its effectiveness at preventing pinching exactly when the blade is at its most vulnerable (lower blade height means fewer teeth engaged in the wood, which increases the likelihood of the wood shifting). Worse, many splitters are integrated with the blade guard assembly, which means removing the guard to make a non-through cut also removes the splitter — the exact situation where kickback risk is highest.
Why Riving Knives Are Superior
A riving knife solves both problems elegantly. Because it mounts to the arbor mechanism rather than the throat plate, it moves in perfect concert with the blade as you raise or lower it. At every blade height, the riving knife sits just a fraction of an inch behind the blade’s teeth, maintaining consistent protection whether you’re making a full-depth rip cut or a shallow dado. And because a riving knife operates independently of the blade guard, you can remove the guard for non-through cuts while keeping the riving knife in place — a massive safety improvement that encourages woodworkers to leave kickback protection installed instead of removing it out of convenience.
The riving knife’s curved profile is also designed to match the blade’s arc, so it never contacts the wood during a normal cut. It simply rides in the kerf, invisible to the cut process, preventing pinching without affecting cut quality or requiring any adjustment from the operator.
When Can You Remove the Riving Knife?
There are legitimate situations where the riving knife must come off — primarily when using a stacked dado set, which is significantly wider than the riving knife and won’t pass around it. Some saws also require riving knife removal for certain non-through cuts like stopped grooves where the blade doesn’t exit the far edge of the workpiece. In these situations, extra vigilance is essential: use a push stick, stand to the side of the blade rather than behind it, and ensure the workpiece remains firmly against the fence throughout the entire cut. For detailed information on how to perform these cuts safely, consult our setting up a beginner woodshop guide.
Important: Never remove the riving knife simply because it’s “in the way” during a standard through-cut. The few seconds saved by skipping reinstallation are not worth the real kickback risk. Every table saw on this list includes a riving knife — use it.
How SawStop Flesh-Detection Technology Actually Works
SawStop’s blade-braking system is one of the most significant safety innovations in woodworking tool history, and understanding how it operates helps woodworkers make informed decisions about whether the technology is worth the premium — and what triggers it might cause unintentionally. Here is a detailed look at the physics and engineering behind the system.
The Electrical Signal Principle
The system works by passing a small, harmless electrical signal through the blade itself. During normal cutting, the blade’s teeth contact only wood, which is an electrical insulator, so the signal remains stable. When skin contacts the blade, the human body — which is a reasonably good conductor due to its water and salt content — disrupts this signal by providing a path to ground. A sensor continuously monitors the signal, and when it detects a change consistent with skin contact, it triggers the brake mechanism.
The Brake Cartridge and Aluminum Brake Block
Triggering the brake activates a spring-loaded mechanism that fires an aluminum brake block directly into the path of the spinning blade’s teeth. The blade, spinning at roughly 4,000 RPM, embeds its teeth into the soft aluminum block within approximately three to five milliseconds. The rapid deceleration forces the blade to drop below the table surface almost simultaneously, pulling it away from the operator’s hand. The entire sequence — from skin contact to full stop — happens faster than a human can physically flinch.
The Cost of Activation
When the brake triggers, it destroys both the brake cartridge and the blade. Replacement brake cartridges for the Jobsite Saw Pro cost roughly $70 to $100, and the blade must be replaced as well, since the aluminum block wedges between and often bends several teeth. So while the system saves fingers and hands — potentially avoiding tens of thousands of dollars in medical bills and months of recovery — each false trigger has a real cost. This is worth understanding before purchasing, not to dissuade you, but so you can budget accordingly and take steps to avoid unintentional activations.
What Causes Accidental Triggers
The most common cause of accidental activation is contact between the blade and wet or green wood, which can conduct electricity similarly to skin. Pressure-treated lumber with high moisture content, freshly cut green wood, and even wood that’s been sitting in a humid environment are the primary culprits. Metallic materials — including staples, nails, foil-faced insulation, and wet leaves stuck to reclaimed lumber — will also trigger the system.
To minimize accidental triggers, inspect stock carefully before cutting, particularly reclaimed wood and pressure-treated lumber. If you regularly work with wet or green material, SawStop offers a “detection bypass mode” on some saw models that temporarily disables the brake for specific cuts, though this means you sacrifice the safety protection during that time.
Is SawStop Technology Right for You?
The answer depends on your risk tolerance, budget, and working style. Woodworkers who work alone, teach classes, or have had previous close calls with a blade often find the premium easy to justify. Those who primarily work with dry, kiln-dried lumber and are diligent about safety practices may feel the cost-to-benefit ratio doesn’t pencil out for them. Either position is reasonable — what matters is making the decision based on accurate information about how the technology works and what it costs to maintain.
Table Saw Safety Tips Every Woodworker Should Follow
- Always use the riving knife and blade guard unless a specific cut genuinely requires their removal.
- Never stand directly behind the blade’s cutting line — kickback launches material straight back.
- Use a push stick or push block for any cut narrower than about 6 inches from the blade.
- Keep the blade height set just above the material — roughly a quarter inch of tooth exposure is plenty.
- Unplug the saw before changing blades, adjusting the throat plate, or clearing jammed offcuts.
- Wear hearing protection and safety glasses every single time, not just for “big” cuts.
- Never reach over a spinning blade to retrieve an offcut — wait until it fully stops.
Combining good habits with a saw that has strong built-in safety features, like the SawStop Jobsite Saw Pro or Bosch’s Smart Guard system, gives you the best of both worlds.
Common Table Saw Mistakes Beginners Make (And How to Avoid Them)
Every woodworker makes mistakes at the table saw — it’s part of the learning process. But some mistakes are more dangerous or costly than others, and knowing what to watch for before you make them can save you material, time, and potentially a trip to the emergency room. Below are the most frequent errors we see from new table saw owners, along with straightforward solutions for each one.
Removing the Riving Knife and Blade Guard
This is by far the most common and most dangerous mistake. New woodworkers frequently remove the blade guard because it seems to get in the way, and then leave it off permanently because reinstallation feels inconvenient. Some even receive this advice from more experienced woodworkers who learned on older saws where guards were poorly designed and genuinely interfered with visibility. Modern riving knives and blade guards, particularly the tool-free designs on the Bosch 4100XC-10 and SawStop models, are engineered to stay out of the way during normal cuts while providing critical kickback protection. Leave them installed for every standard through-cut.
Standing Directly Behind the Workpiece
Instinct tells you to stand directly behind the board you’re feeding, but that places your torso directly in the kickback path. If the blade catches the wood and launches it backward, the material travels in a straight line back along the direction of feed. Standing slightly to the left of the blade (for right-tilting saws) means any kickback misses your body. This positioning also gives you a better angle for watching the cut line and the fence simultaneously.
Using the Fence and Miter Gauge Together for Crosscuts
This is an extremely dangerous setup that causes kickback. When crosscutting a board, the offcut piece — the section between the blade and the fence — has nowhere to go as it separates from the main board. The spinning blade catches it and either launches it backward or binds it against the fence, both of which can cause violent kickback. For crosscuts, use only the miter gauge and move the fence out of the way. If you need to cut multiple pieces to the same length, clamp a stop block to the fence ahead of the blade so the workpiece registers against the block but the offcut is free to move away from the blade.
Feeding Too Fast or Too Slow
Pushing material into the blade too quickly overloads the motor, causing the blade to slow down and generating excessive heat that leads to burning. Feeding too slowly produces similar burning because the same teeth pass through the same spot for too long. The ideal feed rate feels smooth and steady — you should hear the motor maintain a consistent pitch, see a steady stream of sawdust exiting the blade, and feel the material moving without excessive resistance. If you hear the motor laboring or see smoke, slow down. If you see burn marks forming on the cut face, speed up slightly or check that your blade is sharp and clean.
Ignoring Grain Direction for Crosscuts
While grain direction is less critical for straight crosscuts than it is for ripping, it still affects tear-out quality on the show face of the board. When possible, orient the board so the show face (the face that will be visible in the finished project) faces upward, since the blade’s teeth enter the material from the top and produce the cleanest exit on the underside. For the cleanest possible crosscut face, use a high tooth-count blade (60 to 80 teeth) and a zero-clearance insert.
Not Supporting Long Workpieces
Ripping a long board without outfeed support is both dangerous and inaccurate. As the cut piece extends past the back of the table, its weight tips it downward, which can pull it away from the fence, bind it against the blade, or cause the operator to lose control of the feed. An outfeed support — even a simple folding table or roller stand positioned at the same height as the saw table — prevents all of these problems. For detailed guidance on setting up an outfeed support, see the woodworking workbench section later in this guide.
Using a Dull Blade
A dull blade forces you to push harder, which increases the chance of the wood shifting, binding, or being grabbed by the blade. It also generates more heat, produces rougher cuts, and strains the motor. Many beginners don’t realize their blade is dull because the degradation happens gradually. Signs include excessive feed pressure required, burn marks on cut faces, rough or fuzzy edges, and visible scoring marks on the wood surface. Replacing or resharpening a dull blade is one of the cheapest and most effective improvements you can make to any saw on this list.
Neglecting Dust Collection
Beyond the health risks of prolonged fine dust exposure, accumulated sawdust inside the cabinet or around the saw creates a real fire and safety hazard. Fine dust in the air can ignite from a spark, and sawdust buildup around the motor restricts airflow and causes overheating. At minimum, connect a shop vacuum to the dust port during every session, and periodically vacuum out the interior of the cabinet or base. For a more comprehensive approach to shop air quality, our setting up a beginner woodshop guide covers ventilation and dust management in detail.
Crosscutting Without a Miter Gauge or Sled
Freehand crosscuts — pushing a board across the blade without any guide — are unpredictable and dangerous. The board can shift sideways as it crosses the blade, causing binding and kickback, or your hands can drift too close to the blade. Always use the miter gauge for simple crosscuts, or better yet, build a crosscut sled for consistent, safe, and highly accurate crosscuts. Crosscut sleds are covered in detail in the jigs section below.
Wearing Loose Clothing and Jewelry
Loose sleeves, dangling necklaces, lanyards, and even long hair can catch on the blade, arbor, or other moving parts and pull you into the cutting area. Roll up sleeves above the elbow, remove jewelry and lanyards, and tie back long hair before operating any power tool. This isn’t a beginner-specific mistake — experienced woodworkers occasionally forget after a quick change into shop clothes — but it’s one that has severe consequences.
Table Saw Jigs Every Woodworker Should Build
A table saw straight from the box can rip and crosscut, but the real versatility of the tool emerges when you start building jigs. Jigs are shop-made fixtures that hold workpieces at specific angles, guide repetitive cuts with perfect consistency, or enable cuts that would be unsafe or impossible to make freehand. Most jigs are built from scrap plywood and hardwood, cost nearly nothing, and last for years — making them among the highest-value additions to any table saw setup regardless of which saw you own from this list.
The Crosscut Sled
If you build only one jig for your table saw, make it a crosscut sled. A crosscut sled is essentially a flat plywood platform that rides in the saw’s miter slots via hardwood runners, with a tall fence mounted perpendicular to the blade at the back edge. You place the workpiece against the sled’s fence, slide the entire assembly past the blade, and the result is a perfectly square crosscut with zero tear-out on the bottom face — because the sled supports the wood all the way through the cut.
Building a basic crosscut sled requires nothing more than a flat piece of 1/2-inch or 3/4-inch plywood for the base, a straight piece of hardwood for the rear fence, and two hardwood runners sized to fit your saw’s miter slots precisely. The key to accuracy is squaring the rear fence to the blade: after mounting the fence roughly perpendicular, make a cut through the sled’s base and then use the freshly cut edge as a reference to square the fence using the “five-cut method” — a technique that amplifies any angular error over four successive cuts, making it easy to detect and correct deviations smaller than a thousandth of an inch.
Once built, a crosscut sled replaces the stock miter gauge for nearly every crosscutting task, from trimming small parts to cutting tenon shoulders on wide boards. It’s safer because the workpiece is fully supported and your hands stay well away from the blade, and it’s more accurate because the large sled platform prevents the workpiece from shifting during the cut. Many woodworkers build multiple sleds — a full-width version for large panels and a smaller version for detail work — each permanently set up and ready to go.
The Taper Jig
A taper jig guides a board at a consistent angle past the blade, producing clean, repeatable tapered cuts essential for table legs, chair legs, and decorative elements. The simplest design uses two boards hinged at one end, with a locking mechanism that sets the desired taper angle. The workpiece clamps to the jig, and the assembly rides against the rip fence as you feed it through the blade. More sophisticated versions use a track-and-slider mechanism for infinite angle adjustment without the need for clamps.
Taper jigs are particularly useful for furniture projects where all four legs need identical tapers. Rather than trying to eyeball the angle or set up a complicated router jig, a taper jig on the table saw cuts each leg in a single pass with perfect repeatability. Typical taper angles range from 2 to 8 degrees on table legs, and the jig handles any angle within its range with equal ease.
The Thin-Rip Jig
Cutting thin strips — say, for inlay banding, edge banding, or narrow molding profiles — on a table saw is one of the most dangerous standard operations because the offcut strip is too narrow to safely push past the blade with a push stick. A thin-rip jig solves this by holding the strip against the fence on the “keeper” side of the blade rather than the offcut side. The jig uses a stop block that registers each strip at a consistent width, and a bearing or roller that keeps the strip firmly against the fence as it passes the blade. This means your fingers never come close to the blade, and each strip is identical to the last.
The Box Joint Jig
Box joints (also called finger joints) create strong, attractive corners for drawers, boxes, and small cabinets, and a simple table saw jig makes cutting them remarkably straightforward. The jig holds the workpiece vertically against a backer board, indexed by a pin that fits into a slot cut by the saw blade itself. Each successive cut advances the workpiece by exactly one “finger” width, producing interlocking fingers that fit together with precision. Building the jig teaches fundamental jig-making principles — indexing, repeatability, and tight tolerances — that apply to every other jig you’ll build in the shop.
The Tenoning Jig
A tenoning jig holds a workpiece vertically against a tall fence and slides it past the blade to cut the cheeks and shoulders of a tenon. While tenons can be cut on a table saw with just a miter gauge and multiple passes, a dedicated tenoning jig provides more control, consistency, and safety — particularly for long tenons on narrow workpieces where the miter gauge approach feels precarious. Commercial tenoning jigs are available from most tool suppliers, but shop-built versions from plywood and hardwood work equally well and can be customized to fit your specific saw’s miter slots.
The Spline Jig
Splines are thin strips of wood inserted into slots cut across mitered corners, strengthening the joint and adding a decorative accent. A spline jig holds a mitered frame or box at 45 degrees to the blade, guiding the cut across the corner with perfect alignment. The result is a slot that accepts a thin strip of contrasting wood — often a different species for visual interest — which is glued in place, trimmed flush, and sanded smooth. Spline jigs are simple to build and dramatically expand the strength and visual appeal of mitered joinery.
Tip: Label every jig you build with its purpose, the saw settings used, and the date. Months later, you’ll be glad you recorded that information instead of trying to reverse-engineer your own setup from memory.
Mastering Table Saw Joinery: Dados, Rabbets, Tenons, and Box Joints
Many woodworkers think of the table saw primarily as a cutting tool — it rips boards to width and crosscuts them to length. But a well-tuned table saw is also a remarkably capable joinery machine, capable of cutting dados, grooves, rabbets, tenons, half-laps, splines, and box joints with accuracy that rivals dedicated mortisers and dovetail jigs. Understanding how to set up and execute these cuts expands what you can build without adding new machines to the shop.
Dados and Grooves
A dado is a flat-bottomed channel cut across the grain of a board, typically used to receive the end of a shelf or divider in a cabinet or bookcase. A groove is the same cut made along the grain. Both can be cut on a table saw using either a stacked dado set or multiple passes with a standard blade.
A stacked dado set consists of two outer blades and a series of chippers that stack between them on the arbor to create a cut of precise, adjustable width — typically anywhere from 1/4 inch to 13/16 inch. The outer blades use an ATB or TCG grind for clean edges, while the chippers use an FTG grind to clear the flat bottom of the dado cleanly. Stack the chippers to achieve a width that matches your plywood or dado-tested stock (keep in mind that “3/4-inch plywood” is typically closer to 23/32 inch, so your dado stack needs to match the actual material thickness, not the nominal size).
If you don’t own a dado set, you can still cut dados and grooves using a standard blade through multiple overlapping passes. Set the blade to the desired depth, make one pass with the workpiece against the fence, then shift the fence slightly and make another pass, repeating until the channel reaches the target width. This method takes more time but produces clean results, especially with a zero-clearance insert that supports the material around the blade.
For the cleanest dados in plywood — where tear-out on the edges of the channel is a common problem — use a blade with a high tooth count and feed the workpiece slowly. A zero-clearance throat plate also dramatically reduces tear-out by supporting the wood fibers right up to the blade’s cutting edge. For guidance on selecting the best plywood for your project, our best plywood for workbench top guide covers grading and selection criteria that apply to all plywood joinery work.
Rabbets
A rabbet is an L-shaped notch cut along the edge or end of a board, commonly used for the backs of cabinets, glass frames, and as one half of a rabbet joint. On a table saw, rabbets can be cut two ways: with a stacked dado set in a single pass, or with a standard blade in two passes — one with the board flat on the table (cutting the horizontal portion of the rabbet) and one with the board on its edge against a tall fence (cutting the vertical portion).
The two-pass method with a standard blade is the more common approach for woodworkers who don’t own a dado set, and it produces perfectly clean results when the blade is sharp and the fence is accurately set. Measure the rabbet width from the fence to the blade’s far side, set the blade height to match the rabbet depth, and make both passes in sequence. A featherboard clamped to the table keeps the workpiece firmly against the fence for consistent depth.
Tenons on the Table Saw
Cutting tenons on a table saw is faster and more repeatable than cutting them by hand, and it doesn’t require a dedicated mortiser or tenoning jig for most work. The basic technique involves standing the workpiece on edge against the miter gauge (or in a tenoning jig), making a cheek cut to define the tenon’s width, then laying the workpiece flat and making shoulder cuts to define the tenon’s thickness. Multiple passes remove the waste in thin increments, preventing the blade from binding against the tenon cheeks.
For mortise-and-tenon joints in furniture — the strongest and most common joint in woodworking — the table saw produces tenons that fit tightly into mortises cut by a router or drill press. The key to a good fit is cutting the tenon slightly oversize and then sneaking up on the final thickness with test cuts in scrap wood. A tenon that’s even a few thousandths of an inch too thick won’t seat properly, while one that’s too thin relies entirely on glue rather than mechanical strength.
The shoulder cuts that define a tenon’s width are where the table saw truly excels. A single pass across the blade with the workpiece flat on the table produces a shoulder that’s perfectly perpendicular to the tenon’s cheeks — something that’s difficult to achieve as consistently by hand. For a comprehensive overview of all the joinery techniques available to hand and power tool users, see our wood joinery tools explained guide.
Half-Lap Joints
Half-lap joints, where two boards overlap by removing half the thickness from each, are among the simplest and strongest joints for frames, cross-laps, and structural assemblies. On a table saw, half-laps are cut by setting the blade height to exactly half the board’s thickness and making a series of overlapping passes across the joint area to clear the waste. A dado set speeds this process considerably, but a standard blade with multiple passes works well for occasional cuts.
The most important factor in a clean half-lap is consistent blade height — even a small error means the two halves of the joint don’t sit flush. Set the blade height carefully using a reliable gauge, make test cuts in scrap stock first, and verify the fit before cutting the actual workpieces.
Rabbet-and-Dado Joints for Cabinet Carcasses
For cabinet and bookcase construction, combining a dado in the shelf board with a rabbet on the carcass side creates a joint that’s both stronger and easier to assemble than a straight dado alone. The rabbet provides a shoulder that self-registers the shelf at the correct depth, while the dado captures the shelf end to prevent it from racking. This combination is the standard joint for face-frame and frameless cabinet construction, and the table saw is the ideal tool for cutting both cuts accurately and repeatedly.
Maintenance and Care for a Long-Lasting Table Saw
A table saw is a long-term investment, and a little routine maintenance keeps it cutting accurately for years. Wipe down the cast iron or aluminum table regularly with a light coat of paste wax to prevent rust and reduce friction when feeding material. Check fence and miter gauge alignment periodically, especially after transporting a portable saw, since vibration during travel can nudge settings out of square.
Keep the blade clean of pitch and resin buildup, which causes burning and increases motor strain, and replace dull blades before they force you to push harder than necessary — that extra force is often what leads to kickback. Vacuum out the interior cabinet or base periodically to prevent sawdust buildup from interfering with the trunnion mechanism or blade-height adjustments.
If you’re setting up a full maintenance routine for your shop tools, our best cordless drill for woodworking guide and best wood for woodworking bench article both cover complementary shop essentials worth having on hand.
Motor maintenance is often overlooked but matters just as much as blade and fence care. Periodically check that motor vents aren’t clogged with compacted sawdust, since restricted airflow causes the motor to run hotter and shortens its lifespan over time. If your saw includes a brush-type motor, inspect carbon brushes every year or two of regular use and replace them before they wear down enough to cause arcing or inconsistent power delivery. Belt-driven saws, more common on cabinet-style models like the Grizzly G0869, should have belt tension and condition checked periodically as well, since a worn or loose belt causes noticeable power loss even when the motor itself is in good health.
Storage conditions matter more than many woodworkers realize, particularly for portable saws that might sit in an unheated garage or shed. Humidity swings encourage rust on cast iron and aluminum tables, so a light protective coating and, where possible, a breathable cover go a long way toward keeping the saw’s cutting surface smooth and accurate for years. If you notice any rust spots forming, address them promptly with fine steel wool and a rust-inhibiting oil rather than letting corrosion spread across the table surface.
Table Saw Troubleshooting: Burning, Tear-Out, Vibration, and Blade Drift
Even with a quality saw and a sharp blade, you’ll occasionally encounter cut quality issues that demand diagnosis rather than brute force. Understanding the root cause of common problems — burning, tear-out, vibration, and blade drift — lets you fix the issue rather than just living with it or blaming the saw.
Burn Marks on Cut Faces
Burn marks are the single most common cut quality complaint, and they almost always result from excessive heat generated by the blade’s teeth rubbing against the wood rather than cleanly cutting it. The three primary causes are a dull blade, too slow a feed rate, and the blade not being parallel to the fence.
A dull blade can’t sever wood fibers cleanly, so the remaining fibers rub against the blade’s carbide tips, generating friction and heat. The fix is straightforward: replace or resharpen the blade. If the blade is fresh and sharp, check your feed rate — pushing too slowly allows the same teeth to remain in contact with the wood for too long, producing the same friction-induced burning. Aim for a steady, moderate pace where the motor maintains a consistent pitch and a steady stream of sawdust exits the blade.
The third cause — fence misalignment — is the most subtle. If the fence is toed in toward the blade at the rear (the fence’s tail end is closer to the blade than the front), the wood binds against the blade’s teeth at the back of the cut, generating intense heat and burn marks along the trailing edge. Check fence parallelism using a reliable straightedge and the miter slot as a reference, and adjust if needed. A fence that’s perfectly parallel or slightly toed away from the blade at the rear (no more than 0.005 inches over the blade’s diameter) eliminates this binding entirely.
Tear-Out and Splintering
Tear-out — ragged, splintered fibers along the cut edge — occurs when the blade’s teeth exit the wood and push fibers outward instead of cutting them cleanly. It’s most severe on crosscuts in plywood, veneered stock, and woods with interlocked or figured grain. Solutions include using a higher tooth-count blade with ATB or Hi-ATB geometry, installing a zero-clearance insert that supports the wood fibers directly adjacent to the blade, and orienting the workpiece so the show face is up (the blade enters from the top, producing its cleanest cut on that face).
For severe tear-out on plywood, scoring the cut line with a sharp utility knife before making the pass adds a pre-cut that the blade’s teeth follow, dramatically reducing splinter depth. Some woodworkers also apply a strip of painter’s tape along the cut line before cutting, which holds surface fibers in place — a technique that works well for veneered plywood and melamine but adds an extra step to each cut.
Vibration and Excessive Noise
Some vibration is normal in any spinning blade, but excessive vibration that you can feel through the table or hear as a change in motor tone usually indicates one of several issues. An unbalanced or warped blade is the most common cause — remove the blade and roll it on a flat surface to check for wobble, or simply try a different blade to see if the vibration disappears. A loose arbor nut or worn arbor bearings also produce vibration that worsens under load. On belt-driven saws, a worn or improperly tensioned belt can transmit motor vibration to the blade, and belt replacement is an inexpensive fix.
External factors also contribute: a saw sitting on an uneven floor rocks slightly during operation, amplifying vibration into the work surface. Leveling the saw’s feet or shimming the stand eliminates this problem. A heavy rubber mat under the saw absorbs remaining vibration and reduces noise transmission to the floor — a meaningful improvement if your shop is in a residential garage or basement where noise is a concern.
Blade Drift During Rip Cuts
Blade drift describes the tendency of a board to wander away from the fence during a rip cut, producing a cut that’s slightly angled rather than perfectly parallel to the board’s edge. Mild drift is usually caused by internal stresses in the wood being released as the blade opens the kerf — wood that was held in tension by its natural growth pattern relaxes into a slightly different shape once one side is cut free. This is a material issue, not a saw issue, and the most effective solutions are using a sharp, well-set riving knife that prevents the kerf from closing on the blade and feeding the material at a consistent, moderate pace.
Persistent drift — where every board veers the same direction regardless of wood species or grain orientation — usually points to the blade not being parallel to the miter slots. This alignment can be checked with a combination square placed in the miter slot and referenced against the blade body (not the teeth, which are set slightly wider). Most table saws include adjustment bolts for the trunnion assembly that allow you to bring the blade back into parallel with the miter slots. This adjustment is one of the most important calibrations you can perform on any table saw, and doing it periodically — especially after transporting a portable saw — keeps rip cuts straight and accurate.
Motor Overheating and Stalling
If the motor stalls during a cut or noticeably slows down under load, the most likely cause is either a dull blade (which requires more force to push through the wood) or an attempt to cut too aggressively — either too deep a cut per pass or too fast a feed rate. A 15-amp motor has a finite power budget, and pushing a full-depth cut through thick hardwood at maximum rip width can exceed that budget. The solution is to reduce the depth of cut or make multiple passes, removing material incrementally rather than all at once. Thin-kerf blades help by requiring less power per pass, effectively increasing the saw’s usable capacity on a standard household circuit.
Extended heavy use can also cause motor thermal protection to trip, shutting the saw down temporarily. This is a safety feature, not a defect — the motor is protecting itself from damage due to overheating. Let the saw cool for fifteen to twenty minutes before resuming, and consider whether the workload exceeds what the saw was designed for. For production-level ripping in dense hardwood, a more powerful saw like the Grizzly G0869 with its cabinet-mounted motor and belt drive handles sustained loads better than portable direct-drive models.
Aftermarket Fence Upgrades: When and Why to Replace Your Factory Fence
The rip fence is the single component that most affects your table saw’s day-to-day accuracy, and it’s also the component where manufacturers most aggressively cut costs to hit a price point. If you find yourself constantly re-checking fence alignment, struggling to get consistent rip widths, or fighting a fence that deflects under pressure, an aftermarket fence upgrade can transform a mediocre saw into one that cuts with cabinet-saw precision.
When an Upgrade Makes Sense
An aftermarket fence isn’t necessary for every saw — the rack-and-pinion fences on the DeWalt DWE7491RS, DeWalt DWE7485, and Bosch 4100XC-10 are already excellent, offering accuracy and repeatability that satisfy most woodworkers without modification. But budget saws like the Skil SPT99-11 and Skil TS6307-00 ship with lighter-duty fences that, while functional, may not hold alignment as reliably over time or provide the same level of precision for furniture-grade work. If you own one of these saws and find the fence is limiting your cut quality, an aftermarket upgrade is often more cost-effective than replacing the entire saw.
Popular Aftermarket Fence Systems
The most widely recommended aftermarket fence is the Vega Pro 40 or Vega Pro 50, which uses a T-square design with a precision-adjustable front rail and a micro-adjustment knob for fine-tuning rip width. Vega fences are known for staying parallel to the blade across their entire range and for being relatively straightforward to install on most contractor and cabinet-style saws. The Pro 40 offers 40 inches of rip capacity (measured from the blade to the right side of the fence), which is more than any saw in this guide provides out of the box.
The Incra LS Positioner system takes fence precision to another level, using a lead screw mechanism indexed in thousandths of an inch. This level of precision is overkill for most rip cuts but becomes invaluable for joinery operations where repeatable, micro-adjustable positioning matters — think cutting precise tenon shoulders, dado widths, or box joint spacing. The Incra system mounts to a dedicated rail and includes a fence face that adjusts independently for parallelism.
For budget-conscious upgrades, several universal T-square fence systems are available in the $100 to $200 range that represent a meaningful improvement over cheap stock fences. These typically include aluminum fence faces, adjustable rails, and more robust locking mechanisms than what ships on entry-level saws. Installation usually requires drilling new mounting holes in the saw’s table or wing, which is a straightforward afternoon project for anyone comfortable with basic tools.
Installation Considerations
Before purchasing an aftermarket fence, verify that it’s compatible with your specific saw model. Fence rail length, mounting hole patterns, and table width all affect fit, and while most aftermarket fences are designed to be universal, some require specific adapter kits for certain saws. Measure your table’s front-to-back dimension, the distance between existing mounting holes (if any), and the overall table width including extension wings. Most fence manufacturers provide compatibility charts or can advise on fit by phone or email.
After installation, take the time to align the fence precisely using the same techniques described in our how to choose a table saw setup guide. Even the best aftermarket fence delivers mediocre results if it’s installed carelessly — the investment only pays off when the alignment is verified and locked down correctly.
Building an Outfeed Table, Extension Table, and Mobile Base for Your Table Saw
A table saw without adequate support for the workpiece after it passes the blade is a table saw that’s less safe, less accurate, and less pleasant to use. Whether you’re ripping an eight-foot sheet of plywood or crosscutting a long board, the piece needs somewhere to go once it clears the table — and catching it by hand while simultaneously guiding the cut is a recipe for inaccuracy at best and injury at worst. Building a proper outfeed table is one of the highest-impact improvements you can make to any table saw setup, and pairing it with a mobile base frees up floor space in shared shops.
Outfeed Table Design
An outfeed table sits directly behind the table saw at exactly the same height as the saw’s table surface, providing a flat, continuous surface for cut pieces to slide onto as they exit the blade. The simplest version is a sheet of plywood on sawhorses at the correct height, but a more permanent solution — a dedicated table or extension wing — eliminates the setup time and height-matching hassle every time you use the saw.
The ideal outfeed table is at least as deep (front-to-back) as the saw table itself, typically 24 to 30 inches, and as wide as practical for your shop space. A 3/4-inch plywood top on a simple 2×4 frame provides more than enough rigidity for most applications. The critical dimension is height: the outfeed surface must be perfectly flush with the saw table, or within a fraction of an inch. Even a small step between the saw table and the outfeed surface causes the workpiece to catch or tip, which affects cut quality and safety.
For a permanent installation, many woodworkers mount the outfeed table directly to the back of the saw stand or cabinet using brackets, which guarantees consistent alignment regardless of whether the saw gets bumped or moved. Others build the outfeed table as a separate piece that butts up against the saw, which allows it to double as an assembly table or additional work surface when the saw isn’t in use. Either approach works — what matters is that the height is right and the surface is flat.
Extension Tables and Wing Supports
Extension tables widen the saw’s table surface to the right or left of the blade, increasing the rip capacity and providing more support for large panels. The DeWalt DWE7491RS’s 32.5-inch rip capacity is enabled partly by its built-in extension table, but smaller saws like the DWE7485 benefit enormously from an aftermarket extension that adds several inches of support width. A flat piece of MDF or phenolic-faced plywood mounted to the saw’s existing fence rail makes an effective extension wing at minimal cost.
For saws with cast iron tables, matching the extension surface height to the iron table is essential. The Grizzly G0869 ships with cast iron extension wings that bolt directly to the main table, providing a seamless surface. If you’re adding aftermarket wings to a saw with an iron table, use shims to bring the extension surface flush before tightening the mounting bolts — even a thirty-second-inch step between surfaces shows up as a defect in your work.
Mobile Bases for Stationary Saws
A dedicated shop saw like the Grizzly G0869 benefits from a mobile base that allows you to reposition it for cleaning, reconfiguration, or simply accessing the space around it. Mobile bases come in two main styles: retractable wheel bases, which sit flat on the floor under normal use and engage wheels with a foot lever when you need to move the saw, and fixed wheel bases with locking casters that keep the saw stationary during use.
Retractable bases are the better choice for heavy saws because the saw sits directly on its own feet during operation, providing maximum stability with no caster flex. Fixed caster bases are simpler and cheaper but can introduce a slight amount of wobble under heavy loads, which matters more for a 300-plus-pound cabinet saw than for a lighter contractor model. When selecting a mobile base, verify the weight capacity exceeds the saw’s weight by at least 20 percent to account for the added weight of accessories, jigs, and stored materials that tend to accumulate on and around a table saw.
Tip: Building your outfeed table with a lower shelf adds valuable storage for blades, push sticks, miter gauges, and jigs — keeping everything within arm’s reach without cluttering the top surface. A woodworking workbench plan can serve as a starting point for designing an outfeed table with integrated storage and work surface functionality.
Table Saw vs. Bandsaw vs. Miter Saw: Matching the Cut to the Tool
A table saw is extraordinarily versatile, but it’s not the right tool for every cut. Understanding where it excels — and where a bandsaw or miter saw performs better — helps you build a more efficient shop and avoid forcing a table saw into tasks that are safer or more accurate on another machine. This section breaks down the strengths and limitations of each saw type so you can direct each cut to the most appropriate tool.
Table Saw Strengths
The table saw’s defining advantage is its ability to make long, straight, precise rip cuts along the grain of a board. No other common shop tool matches it for ripping a rough board to final width, breaking down plywood sheets, or cutting consistent-width strips for edge banding or inlay work. It’s also the best tool for cutting dados, grooves, and rabbets (with or without a dado set), and its flat table and fence system provide an unmatched reference surface for joinery operations that require precise, repeatable positioning.
Crosscuts are a table saw’s secondary strength — it performs them well with a miter gauge or crosscut sled, but a dedicated miter saw is faster for repetitive crosscutting of dimensional lumber to length. Where the table saw struggles is with resawing (slicing a board along its thickness to create two thinner pieces), cutting curves or irregular shapes, and handling stock that’s too wide or unwieldy to safely guide across the blade.
Bandsaw Strengths
The bandsaw excels at the cuts the table saw can’t make. Its continuous loop blade, which moves in one direction rather than spinning, cuts curves, irregular shapes, and thick stock safely without the kickback risk inherent in table saw cuts. Resawing — one of the bandsaw’s signature capabilities — lets you slice thick boards into thinner veneers or book-matched panels, a task that’s impossible on a table saw and dangerous to attempt with any other common tool.
The bandsaw is also inherently safer for cutting curved workpieces because the blade’s downward cutting direction holds the workpiece against the table rather than trying to throw it. For woodworkers who build furniture with curved components — chair parts, cabriole legs, decorative brackets — the bandsaw is an essential complement to the table saw rather than a competitor. Many serious home shops include both: the table saw for straight cuts and joinery, and the bandsaw for curves, resawing, and rough shaping.
The bandsaw’s limitations relative to the table saw include a narrower table surface (making it less effective for large sheet goods), a less precise rip fence system on most models, and the inability to cut dados or grooves without multiple passes and careful setup. For ripping long boards to width, the table saw with its long fence and large table is faster and more precise every time.
Miter Saw Strengths
The miter saw’s purpose-built design excels at one thing: crosscutting boards to precise length, including angled (mitered) and compound-angle cuts. For a woodworker cutting dozens of pieces to identical length — think door and window trim, shelf cleats, or frame components — the miter saw is faster and more convenient than a table saw with a miter gauge. Its fixed blade and pivoting arm make angle changes quick and repeatable, and a sliding compound miter saw can crosscut boards up to 12 or 14 inches wide, covering the vast majority of dimensional lumber.
What a miter saw cannot do is rip cut — it has no ability to guide a board lengthwise past the blade, and its design makes ripping impossible. It’s also limited in depth of cut, making it unsuitable for joinery cuts like dados and rabbets that require precise depth control. The miter saw is a crosscut specialist, and it pairs with a table saw in the same way a chisel pairs with a mallet — each tool is best at its specific task.
Which Saw Should You Buy First?
If you can only buy one saw, the table saw is the most versatile single investment for a home woodworking shop. It rips, crosscuts, cuts joinery, and handles sheet goods — no other single tool covers that range of tasks. Add a miter saw when you find yourself spending too much time crosscutting on the table saw, and add a bandsaw when your projects start requiring curves, resawing, or rough shaping. For guidance on selecting the right miter saw to complement your table saw, see our best miter saw for home shop guide.
Key Takeaway: The table saw, bandsaw, and miter saw are complementary, not competing. The table saw handles rip cuts and joinery, the bandsaw handles curves and resawing, and the miter saw handles crosscuts and miters. A well-equipped shop eventually includes all three, but if you’re starting with one, the table saw offers the broadest capability.
Noise Levels, Hearing Protection, and Workshop Acoustics
Table saws are among the loudest tools in a woodworking shop, typically producing between 95 and 110 decibels (dB) at the operator’s position depending on the saw type, blade, and material being cut. To put that in context, sustained exposure above 85 dB causes permanent hearing damage over time, which means every table saw session without hearing protection is contributing to irreversible noise-induced hearing loss. This isn’t a theoretical risk — studies consistently show that woodworkers have significantly higher rates of hearing damage than the general population.
Understanding Noise Levels by Saw Type
Jobsite saws with direct-drive motors tend to be the loudest, typically measuring 100 to 110 dB during cutting. The smaller motor has to spin faster to maintain blade speed, and the open-stand design provides no sound dampening. Cabinet and hybrid saws like the Grizzly G0869 are generally quieter, measuring 85 to 100 dB, partly because their enclosed cabinets contain some of the noise and partly because belt-driven motors with larger, slower-spinning armatures produce less high-frequency noise. The blade itself also affects noise level — thin-kerf blades vibrate more than full-kerf blades, and blades with anti-vibration slots or dampening features (common on premium blades from Freud and Diablo) cut noticeably quieter than solid-body blades.
Hearing Protection Options
Every woodworker should own and use hearing protection for every table saw session. The three main categories are foam earplugs, passive earmuffs, and electronic earmuffs with active noise cancellation.
Foam earplugs are the cheapest option and provide excellent noise reduction (typically 25 to 33 dB depending on the NRR rating and how well they’re inserted). The downside is that they also block speech and other shop sounds you may want to hear, which makes communication in a shared shop difficult.
Passive earmuffs provide similar noise reduction levels (20 to 30 dB NRR) and are easier to put on and take off quickly, but they share the same limitation of blocking all sound equally. They can also be uncomfortable in hot shops due to the ear cups trapping heat.
Electronic earmuffs are the premium option, using built-in microphones and speakers to amplify ambient sound (including speech) while instantly cutting off loud impulse noise above a set threshold. This lets you hold a conversation, hear your phone, and listen for warning sounds while still being fully protected from the saw’s noise. They cost more — typically $40 to $100 for quality models — but the convenience factor means you’re more likely to actually wear them consistently, which is what matters most for long-term hearing health.
Reducing Shop Noise at the Source
Beyond hearing protection, several shop-level strategies reduce noise exposure over time. Placing a rubber mat or anti-vibration pad under the saw absorbs vibration that would otherwise transmit into the floor and resonate through the shop. Positioning the saw away from hard walls reduces reflected noise (concrete and bare drywall reflect sound efficiently; insulation, curtains, and acoustic panels absorb it). For woodworkers in attached garages or basement shops where noise carries into living spaces, scheduling heavy saw use during reasonable hours and closing doors between the shop and living areas makes a meaningful difference in household peace.
Frequently Asked Questions
What size table saw is best for a home woodworking shop?
For most home woodworkers, a 10-inch blade jobsite or contractor-style saw with at least a 25-inch rip capacity offers the best balance of power, price, and floor space. If you frequently break down full plywood sheets, look for models with 30+ inches of rip capacity.
Is a portable table saw powerful enough for hardwood?
Yes, most 15-amp portable table saws, including several on this list, handle hardwood like oak and maple without issue as long as you use a sharp blade and don’t force the feed rate faster than the motor can sustain.
What’s the difference between a jobsite saw and a cabinet saw?
Jobsite saws are lightweight, portable, and designed to fold down for transport, while cabinet saws are heavier, fully enclosed stationary machines built for maximum rigidity and dust control in a dedicated shop.
Is SawStop’s flesh-detection technology worth the extra cost?
For many woodworkers, especially those working alone or teaching beginners, the added safety margin is worth the premium. It’s a personal decision weighed against budget and how the saw will be used.
How often should I replace my table saw blade?
A quality blade can last anywhere from several months to a couple of years depending on use, material, and whether it hits nails or embedded debris. Signs it’s time to replace or sharpen include burning, tear-out, or excessive feed resistance.
Do I need a separate dust collector for a table saw?
A shop vac connected to the saw’s dust port handles most needs for hobbyist use. A dedicated dust collector becomes worthwhile if you’re running the saw frequently or working in an enclosed space with limited ventilation.
Can beginners safely use a table saw?
Yes, with proper safety gear, guards installed, and push sticks used consistently. Starting with a simpler, beginner-friendly model like the Skil TS6307-00 can also reduce the learning curve.
What accessories should I buy alongside a new table saw?
A quality push stick, a zero-clearance throat plate, an upgraded blade, and a mobile base or stand (if not included) are the most commonly recommended first additions.
How much rip capacity do I actually need?
If you regularly cut full plywood or MDF sheets, aim for at least 30 inches. For furniture and trim work at a smaller scale, 24-25 inches is typically sufficient.
Are contractor-style table saws accurate enough for fine furniture work?
Yes, especially models with rack-and-pinion fences like the DeWalt DWE7491RS or Bosch 4100XC-10, which deliver repeatable accuracy comparable to much more expensive cabinet saws.
What’s the safest table saw for someone working alone?
The SawStop Jobsite Saw Pro’s flesh-detection blade brake offers an added layer of protection specifically valuable for solo shop work.
Should I buy a used table saw instead of a new one?
A well-maintained used saw from a reputable brand can be a great value, but check fence alignment, motor condition, and safety guard completeness carefully before buying, since replacement parts can offset any savings.
Can I rip narrow strips of wood safely on these saws?
Yes, but narrow rip cuts are exactly when a push stick or push block becomes essential. Keep fingers well clear of the blade path and consider a dedicated thin-rip jig for consistently cutting strips under an inch wide.
Do jobsite table saws lose accuracy after repeated folding and transport?
Some drift is normal over time with any portable saw, which is why models with robust rack-and-pinion fences, like the DeWalt DWE7491RS or Bosch 4100XC-10, hold their calibration noticeably better than saws with lighter-duty fence hardware.
What amperage should I look for in a table saw motor?
Nearly all quality contractor and jobsite saws use 15-amp motors, which is the practical maximum for a standard 120-volt household circuit. Beyond that, look at how well a saw sustains RPM under load rather than amperage alone.
Can I use a stacked dado set on any table saw?
Most 10-inch table saws accept stacked dado sets, but always check your specific model’s arbor length and the manufacturer’s specifications. Some compact saws have short arbors that don’t accommodate full-width dado stacks safely. The arbor must have enough thread engagement to fully tighten the arbor nut with the dado set installed.
What’s the best way to cut plywood sheets on a table saw?
Use outfeed and side support to manage the full sheet, feed the material slowly with a steady push, and use a straightedge clamped to the sheet as a guide if your saw’s rip capacity doesn’t cover the full width. A sharp blade with at least 40 teeth reduces tear-out on plywood veneers. For sheets that are too large for your saw, consider cutting them roughly to size with a circular saw and straightedge first, then final-ripping on the table saw.
Should I wear a dust mask when using a table saw?
Yes. Even with good dust collection, fine particles remain airborne during and after cutting. A properly fitted N95 respirator or a powered air-purifying respirator (PAPR) protects your lungs from the fine dust that passes through standard shop vac filters. This is a long-term health issue — cumulative exposure over years of woodworking is what causes respiratory problems.
How do I know if my table saw’s fence is properly aligned?
Place a reliable straightedge against the fence and measure the distance to the miter slot at both the front and rear of the table. The measurements should be identical (within about 0.005 inches). Alternatively, lock the fence and measure from the fence face to the blade body at the front and back — any difference indicates the fence is toed in or out relative to the blade.
Final Thoughts: Choosing the Best Table Saw for Your Woodworking
There’s no single “best” table saw for every woodworker — the right choice depends on your shop space, budget, and how much you value portability versus raw rigidity. The DeWalt DWE7491RS remains our top overall pick for its balance of fence accuracy, power, and portability, while the SawStop Jobsite Saw Pro is the clear choice if safety technology is non-negotiable. Budget-conscious buyers will do well with the Skil SPT99-11, and anyone building a dedicated home shop should give the Grizzly G0869 a serious look.
Whichever saw you choose, pair it with good safety habits, routine maintenance, and a shop layout that supports safe material handling. Ready to upgrade your shop?
Shop Top Table Saws on Amazon