10 Best Chisel Sets for Beginners: A Complete Buying Guide
Sharp edges, honest reviews, and everything a new woodworker needs to know before buying a first chisel set.
Why Chisels Matter for Beginners
Every woodworker, whether they build furniture, cut dovetails, or simply hang cabinet hinges, eventually reaches for a chisel. It’s one of those tools that looks deceptively simple — a flat blade with a sharpened edge and a handle — yet the difference between a well-made chisel and a cheap one becomes obvious the moment steel meets wood. A quality chisel glides through a mortise cleanly, holds its edge through a full afternoon of work, and feels balanced in the hand. A poor one chips, dulls within minutes, and leaves ragged, torn grain behind instead of a crisp cut.
For someone just starting out, the chisel aisle (or, more realistically, the endless scroll of listings online) can be overwhelming. There are bevel-edge chisels, bench chisels, mortise chisels, butt chisels, Japanese-style chisels, and dozens of steel types ranging from basic carbon steel to chrome-vanadium alloys. Add in wildly different price points — anywhere from twenty dollars for an eight-piece set to well over a hundred for a premium six-piece set — and it’s easy to see why so many new woodworkers either overspend on tools they don’t yet need or underspend on chisels that hold them back before they’ve even learned to sharpen properly.
This guide exists to cut through that confusion. We tested, compared, and researched ten of the most popular beginner-friendly chisel sets currently available, looking closely at steel quality, handle comfort, edge retention, included accessories, and overall value for someone building their first woodworking toolkit. If you’re also assembling the rest of your shop, it’s worth pairing this guide with our breakdown of the best woodworking tools for beginners, since chisels rarely work alone — they’re most useful alongside a reliable mallet, a sharpening stone, and a stable workbench.
Whether you’re chopping mortises by hand, cleaning up joinery cut on a table saw, or paring down glue squeeze-out after assembly, the right chisel set will quietly become one of the most-used tools in your shop. Let’s walk through what actually matters when choosing one, then break down each of the ten sets in detail.
It’s also worth setting expectations early: no chisel set, no matter how expensive, will feel great in the hands of someone who hasn’t yet practiced basic sharpening and cutting technique. Part of what makes chisels such a rewarding tool to learn is the direct feedback loop — a properly sharpened edge paired with correct grain-direction awareness produces a satisfying, clean shaving almost immediately, while a dull edge or careless technique produces frustrating, torn results regardless of how much the tool cost. Keep that in mind as you read through the reviews below; even the most affordable set on this list can perform beautifully in practiced hands, and even the priciest set will disappoint if it’s dull and mishandled.
One more thing worth mentioning before diving in: chisels are a long-game purchase. Unlike consumables such as sandpaper or glue, a decent chisel set — properly cared for — can realistically last a lifetime. That makes the upfront research worth the extra few minutes, since the set you choose now may still be the one sitting in your toolbox decades from now, simply because there was rarely a compelling reason to replace it.
How to Choose a Beginner Chisel Set
Before jumping into the individual reviews, it helps to understand the handful of factors that actually separate a good beginner chisel set from a disappointing one. Manufacturers love to throw around words like “premium,” “professional-grade,” and “high-carbon,” but those words mean very little without context. Here’s what to actually look for.
Steel Type and Edge Retention
Most beginner-oriented sets use either carbon steel or chrome-vanadium (Cr-V) steel. Carbon steel tends to sharpen to a keener edge and is generally favored by more experienced woodworkers, but it requires more maintenance and can rust if left damp. Chrome-vanadium steel is more forgiving, resists corrosion better, and holds up well to the occasional beginner mistake — like chiseling into a stray nail — without chipping catastrophically. For a first set, chrome-vanadium or a similar alloy is usually the safer, lower-maintenance choice, while high-carbon steel is worth considering once you’re comfortable with sharpening and honing routines.
Handle Material and Comfort
Handles typically come in three flavors: hardwood (like beech or ash), polypropylene or other impact-resistant plastic, and a hybrid of wood with a rubberized grip. Plastic and polypropylene handles are common in beginner sets because they’re inexpensive, resist splitting under mallet strikes, and often include a metal striking cap or reinforced end. Wooden handles feel more traditional and often more comfortable for extended paring work, but cheaper wooden handles can crack if struck too aggressively without a proper mallet.
If you plan to do a lot of hand-chopping with a mallet, prioritize a handle with a reinforced striking end. If your work will mostly be light paring and trimming, handle comfort and grip texture matter more than impact resistance.
Number of Pieces vs. Actual Usefulness
It’s tempting to assume more chisels automatically means more value, but that’s not always true. A basic beginner project rarely requires more than four to six chisel widths — commonly 1/4″, 3/8″, 1/2″, 3/4″, and 1″. Sets that include eight or ten pieces often pad the count with widths you’ll rarely touch, like 1/8″ or 1-1/4″ chisels, while the core sizes you actually need are identical in quality to the four-piece version. That said, a larger set can be a good value if the price per chisel is still reasonable and the extra widths genuinely round out your capabilities.
Included Accessories
Many sets bundle in a honing guide, sharpening stone, storage roll, or protective blade guards. These extras matter more than people expect. A storage roll keeps edges from banging against each other in a drawer (which dulls them fast), and blade guards prevent accidental cuts when reaching into a toolbox. A basic honing guide, even a cheap one, makes learning to sharpen dramatically easier for a beginner who hasn’t yet developed a feel for maintaining consistent bevel angles freehand.
Pre-Sharpened Out of the Box?
This is one of the most overlooked factors. Almost no chisel — regardless of price — arrives perfectly sharp and ready for fine paring work. Manufacturers typically ship chisels with a rough factory edge meant to survive shipping and handling, not to cut cleanly. Beginners are often surprised (and frustrated) when a “sharp” new chisel struggles to slice through pine. Budget into your first purchase either a sharpening stone or a basic honing kit, because you will need to put a proper edge on these tools before they perform the way review photos suggest.
| Factor | What to Look For | Why It Matters |
|---|---|---|
| Steel Type | Chrome-vanadium for beginners; high-carbon for advancing skills | Affects edge retention and maintenance needs |
| Handle | Reinforced striking cap or comfortable wood grip | Prevents cracking, improves control |
| Set Size | 4-6 core widths minimum | Covers most beginner projects without overspending |
| Accessories | Storage roll, blade guards, honing guide | Protects edges and speeds up learning to sharpen |
| Factory Edge | Expect to sharpen before first real use | Sets realistic expectations for performance |
With those fundamentals in mind, and if you’re also setting up the rest of your shop, our guide on setting up a beginner woodshop covers how chisels fit into a broader starter toolkit, including where they rank in priority against power tools like a cordless drill or a random orbital sander. Now, let’s get into the ten sets themselves, starting with a quick side-by-side comparison.
Quick Comparison Table
Here’s a snapshot of how all ten sets stack up on the details that matter most to a first-time buyer.
| Set | Pieces | Steel | Handle | Best For |
|---|---|---|---|---|
| HURRICANE 4-Piece | 4 | Chrome-vanadium | Polypropylene w/ steel cap | Budget starter set |
| Jorgensen 4-Piece | 4 | Cr-V steel | Ergonomic composite | General purpose beginners |
| Amazon Basics 8-Piece | 8 | Carbon steel | Plastic w/ striking cap | Widest size range on a budget |
| REXBETI 10pcs | 10 | Cr-V steel | Comfort-grip plastic | Hobbyists wanting variety |
| Kirschen 1101000 | 6 | High-carbon steel | Beech wood | Traditional feel, better edge retention |
| GREBSTK 4-Piece | 4 | Cr-V steel | Non-slip rubberized | Comfortable extended use |
| Spec Ops Tools | Varies | Cr-V steel | Impact-resistant polymer | Rougher carpentry-style work |
| Narex Bevel Edge | Varies | Manganese-vanadium steel | Beech wood | Serious beginners investing early |
| DEWALT DWHT16063 | 4 | Cr-V steel | Polypropylene w/ steel end cap | Trusted brand, jobsite durability |
| Jorgensen 6-Piece | 6 | Cr-V steel | Ergonomic composite | Slightly wider range than the 4-piece |
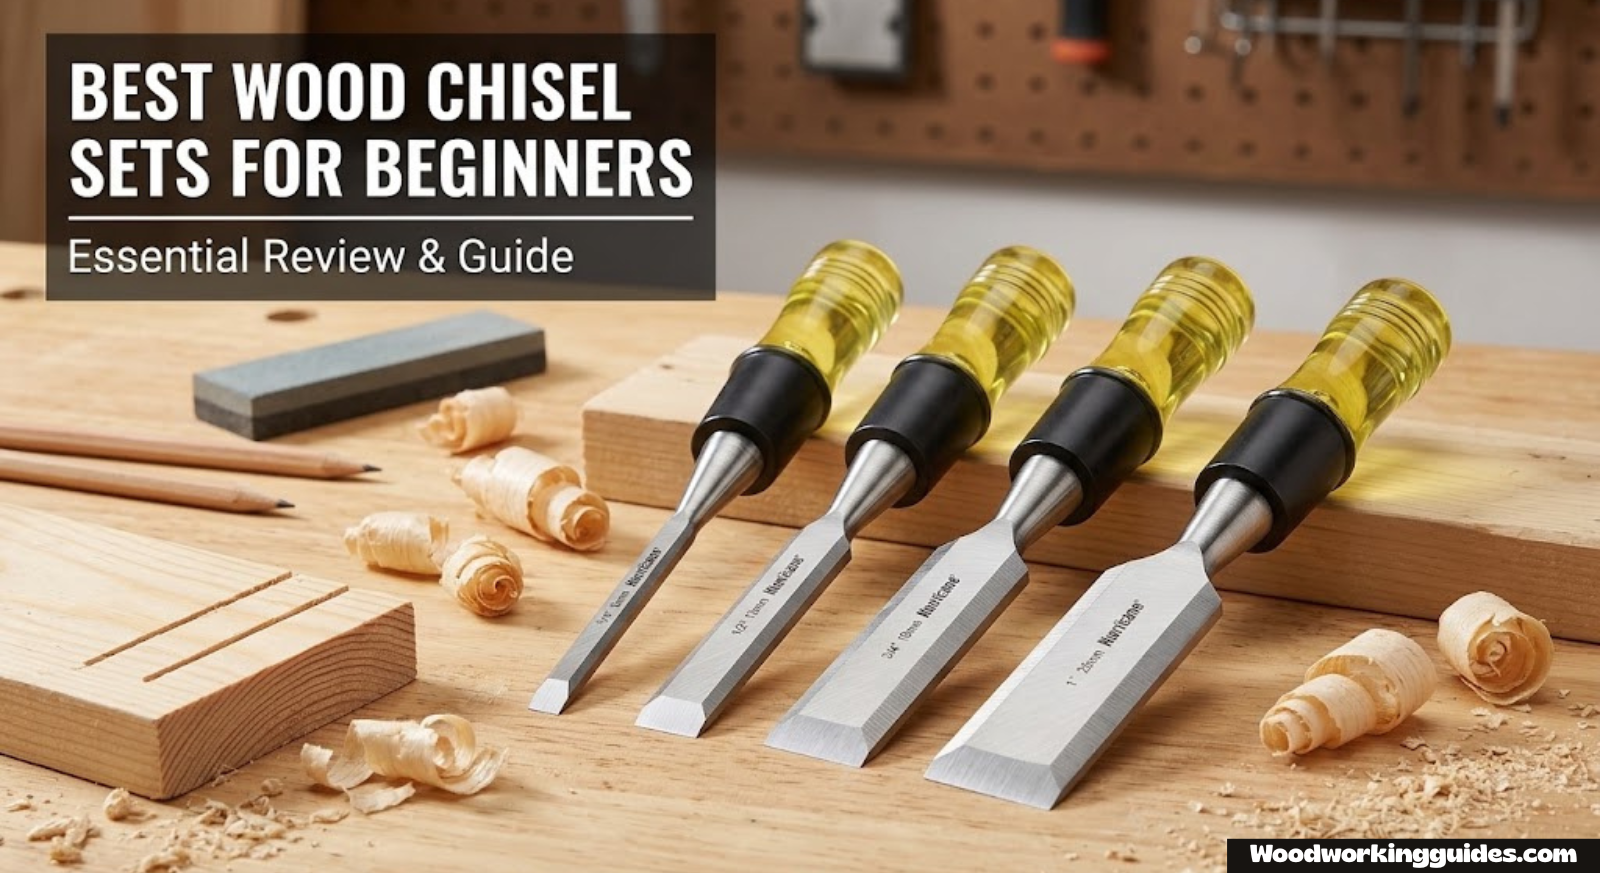
1. HURRICANE 4 Piece Wood Chisel Set
The HURRICANE 4-piece set is one of the most commonly recommended entry points for anyone picking up their very first chisels. It covers the four sizes most beginners actually use — typically 1/4″, 1/2″, 3/4″, and 1″ — in a chrome-vanadium steel that takes a reasonably keen edge without demanding constant maintenance. The polypropylene handles include a steel striking cap on the end, so light mallet work won’t mushroom or crack the handle the way it might with an all-plastic design lacking that reinforcement.
What stands out most about this set is how approachable it is. The bevel angle out of the box is workable, the blades are wide enough to see clearly what you’re doing when learning to pare a mortise wall, and the price point makes it an easy “try woodworking without a huge commitment” purchase. It won’t compete with a premium Narex or high-carbon Japanese-style chisel on pure edge-holding performance, but for the price, it’s a genuinely sensible starting point.
Pros
- Very affordable entry point
- Covers the four most-used chisel widths
- Steel striking cap tolerates light mallet use
- Comfortable grip for extended paring sessions
Cons
- Factory edge needs real sharpening before fine work
- Edge retention is modest compared to pricier steel
- No included storage roll in most listings

HURRICANE 4 Piece Wood Chisel Set
A budget-friendly, no-frills starter set covering the four essential chisel widths.
Check Price on Amazon2. Jorgensen 4-Piece Wood Chisel Set
Jorgensen has built a solid reputation among hobbyist woodworkers for clamps and workholding gear, and their 4-piece chisel set brings that same “no-nonsense, does the job well” philosophy to hand tools. The chrome-vanadium steel blades arrive with a cleaner factory grind than many budget competitors, which means less time spent flattening backs and establishing a fresh bevel before your first project.
The ergonomic composite handles are noticeably comfortable in extended use — something you’ll appreciate once you’re twenty minutes into cleaning up a row of dovetail sockets. The set doesn’t try to be everything to everyone; it sticks to the core four widths and does them well, which is exactly what a beginner needs before branching into specialty sizes.
Pros
- Cleaner factory grind than most budget sets
- Comfortable handle shape for long sessions
- Reputable brand with responsive customer support
Cons
- Only four sizes — no room to grow within the set
- Not ideal for heavy mallet chopping

Jorgensen 4-Piece Wood Chisel Set
A cleanly ground, comfortable-to-hold set from a trusted workholding brand.
Check Price on Amazon3. Amazon Basics 8-Piece Wood Chisel Set
For beginners who want a wider range of sizes without paying premium prices for each individual chisel, the Amazon Basics 8-piece set is hard to beat on pure size coverage. It includes narrower chisels suited to detail work alongside wider ones for hogging out waste quickly, giving new woodworkers room to experiment with different techniques without needing to buy additional pieces right away.
The carbon steel blades take a decent edge, though as with most budget sets, expect to spend some time on a stone before the first real project. The plastic handles with striking caps are functional rather than luxurious, but they get the job done and won’t crack under moderate mallet use.
Pros
- Widest size range in this price bracket
- Good value per chisel
- Includes narrower detail sizes rare in budget sets
Cons
- Handle finish feels basic compared to Jorgensen or GREBSTK
- Some users report inconsistent factory sharpening

Amazon Basics 8-Piece Wood Chisel Set
The widest size range for the price, ideal for beginners who want room to experiment.
Check Price on Amazon4. REXBETI 10pcs Wood Chisel Set
The REXBETI 10-piece set leans into variety, bundling both wider bench-style chisels and a couple of narrower carving-style blades in one box. This makes it appealing to hobbyists who might dabble in light carving or detail trim work in addition to standard joinery. The comfort-grip plastic handles are shaped to reduce hand fatigue, which matters when you’re working through ten different tools across a project.
Where this set shines is variety and accessibility; where it falls a bit short of dedicated joinery sets like the Narex or Kirschen is outright edge-holding performance under sustained, heavy use. For casual and semi-frequent use, though, it’s a well-rounded option.
Pros
- Great variety for both joinery and light carving
- Comfortable ergonomic grips
- Solid value across ten pieces
Cons
- Not built for heavy daily professional use
- Requires sharpening before serious work

REXBETI 10pcs Wood Chisel Set
A variety-packed set blending bench chisels with narrower detail blades.
Check Price on Amazon5. Kirschen 1101000 6-Piece Chisel Set
Stepping up from the budget tier, the Kirschen 1101000 set is where things start to feel noticeably more traditional and refined. Made with high-carbon steel and fitted with beech wood handles, this set takes and holds a genuinely sharp edge better than anything in the budget category, and the classic octagonal handle shape gives excellent control during precise paring cuts.
This isn’t a set built for beginners who want to abuse their tools while still learning proper technique — the wooden handles, while attractive and comfortable, aren’t quite as forgiving of hard mallet strikes as a reinforced polypropylene handle. But for a beginner who’s serious about developing real hand-tool skills and doesn’t mind a slightly steeper price, it’s a rewarding upgrade.
Pros
- High-carbon steel holds a superior edge
- Classic beech handles feel great in hand
- Excellent control for precision paring
Cons
- Pricier than typical beginner sets
- Wood handles require more care over time

Kirschen 1101000 6-Piece Chisel Set
A traditional high-carbon steel set with beech handles for serious beginners.
Check Price on Amazon6. GREBSTK 4 Piece Wood Chisel Set
The GREBSTK 4-piece set focuses heavily on comfort during extended use. Its non-slip rubberized handle grips are noticeably softer and more cushioned than most competitors in this price range, which makes a real difference during long paring sessions where hand fatigue can otherwise creep in fast. The chrome-vanadium steel blades perform comparably to other budget-tier sets — solid, dependable, but requiring a proper sharpening session before tackling fine joinery.
This set is a strong pick for anyone who prioritizes ergonomics, particularly those with smaller hands or anyone planning to spend a full weekend working through a furniture project.
Pros
- Excellent grip comfort for long sessions
- Solid Cr-V steel performance for the price
- Compact and easy to store
Cons
- Only four widths included
- Rubberized grip may wear faster than hard plastic over years of use

GREBSTK 4 Piece Wood Chisel Set
Comfort-focused handles make this a great pick for long working sessions.
Check Price on Amazon7. Spec Ops Tools Wood Chisel for Carpentry & Woodworking
Spec Ops Tools built its reputation on rugged jobsite gear, and their chisel offering reflects that background more than a traditional fine-joinery set would. The impact-resistant polymer handle is designed to take repeated, harder mallet strikes without cracking, making this a solid choice for beginners whose work leans more toward general carpentry, rough trim work, or door and hardware installation rather than delicate cabinetry joinery.
The chrome-vanadium steel edge holds up reasonably well under this kind of use, though it’s not the first choice if your goal is ultra-fine paring work like cleaning up hand-cut dovetails. Think of it as the chisel you reach for when you’re not worried about babying the edge.
Pros
- Built to survive harder, repeated impacts
- Great for general carpentry and installation work
- Durable, rugged construction
Cons
- Not optimized for fine, delicate joinery
- Handle bulk can feel less refined for detail paring

Spec Ops Tools Wood Chisel
A rugged, jobsite-ready chisel built for general carpentry rather than fine joinery.
Check Price on Amazon8. Narex Bevel Edge Chisel Set
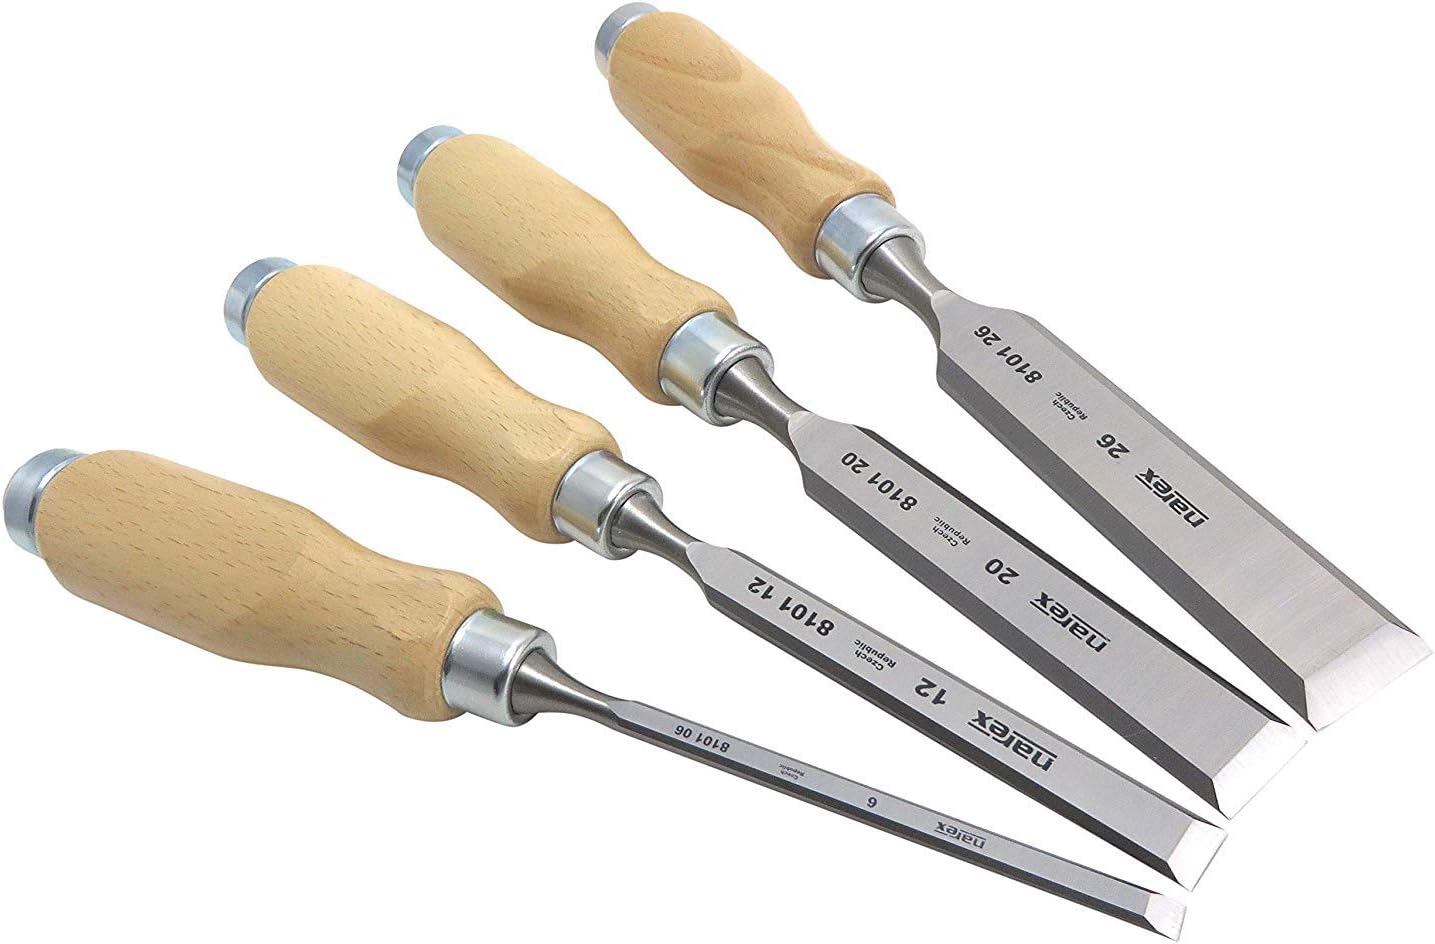
Narex chisels have earned a loyal following among hand-tool enthusiasts, and for good reason. Made from manganese-vanadium steel and fitted with genuine beech handles, these bevel-edge chisels sharpen to a very keen edge and hold that edge noticeably longer than most sets in the budget-to-mid range. The thin bevel edges make it easier to get into tight dovetail corners, a detail that matters once you start moving beyond basic joinery.
This is the set we’d point a genuinely committed beginner toward — someone who’s decided woodworking is a long-term hobby rather than a passing project. It costs more upfront than the plastic-handled budget options, but the steel quality and overall fit and finish mean you likely won’t feel the need to upgrade again for years.
Pros
- Excellent steel quality and edge retention
- Thin bevel edges ideal for detailed joinery
- Long-term investment — unlikely to need replacing soon
Cons
- Higher price point than most beginner sets
- Wood handles need proper care and occasional oiling
Narex Bevel Edge Chisel Set
A long-term investment set with excellent steel quality and precision bevel edges.
Check Price on Amazon9. DEWALT DWHT16063 Short Blade Wood Chisel 4-Piece Set
DEWALT’s name recognition alone gets this set a lot of attention, and thankfully the tools themselves back it up reasonably well. The short-blade design gives extra control and reduces flex during heavier chopping cuts, while the polypropylene handles with steel striking caps are built to withstand consistent mallet use without deforming over time.
This set leans toward general-purpose durability rather than ultra-fine paring performance, making it a solid pick for beginners who want a trusted brand name and don’t mind a slightly more utilitarian feel compared to the Narex or Kirschen options.
Pros
- Trusted, well-known brand
- Short blades reduce flex for controlled cuts
- Steel striking caps handle regular mallet use well
Cons
- Short blade length can limit reach in deeper mortises
- Not the sharpest factory edge out of the box

DEWALT DWHT16063 4-Piece Set
A trusted-brand set with short blades built for controlled, durable chopping.
Check Price on Amazon10. Jorgensen 6-Piece Wood Chisel Set
Rounding out the list is Jorgensen’s larger 6-piece set, essentially an expanded version of their well-regarded 4-piece offering. The same clean factory grind and ergonomic composite handles carry over, but with two additional widths that give beginners a bit more flexibility for varied project sizes without needing to buy chisels individually later.
If you liked the sound of the Jorgensen 4-piece set earlier in this guide but want a bit more range from day one, this 6-piece version is the natural upgrade — same quality, more options.
Pros
- Same reliable build quality as the 4-piece version
- Wider size range for varied projects
- Comfortable handles for extended sessions
Cons
- Costs more than the 4-piece set
- Extra sizes may go unused by casual beginners

Jorgensen 6-Piece Wood Chisel Set
An expanded version of the popular 4-piece set with two additional useful widths.
Check Price on AmazonTypes of Woodworking Chisels Explained
One of the most common sources of confusion for beginners is the sheer variety of chisel types available. Walk into any specialty woodworking store and you’ll find an entire wall dedicated to chisels — bench chisels, mortise chisels, paring chisels, framing chisels, butt chisels, fishtail chisels, corner chisels, skew chisels, and more. The good news is that a beginner only needs to understand a handful of these categories to make a smart purchasing decision. The rest are specialty tools you can add to your collection later, once you know exactly which type of work you do most often.
Bench Chisels
Bench chisels are the workhorse of the chisel world and the type most beginners should start with. They’re designed to be general-purpose — strong enough to handle light mallet chopping for mortises and tenons, yet refined enough for careful paring work along a layout line. Most of the sets reviewed in this guide are bench chisels or bevel-edge bench chisels, and they cover roughly 90% of the tasks a new woodworker will encounter. The blades are typically between 4 and 6 inches long, with beveled edges that allow the chisel to reach into tight angles and corners that a straight-sided blade cannot access.
Bevel-edge bench chisels differ slightly from standard bench chisels in that their sides are ground at an angle (the “bevel”) rather than being perfectly square. This bevel makes it easier to clean out the corners of dovetails, mortises, and other joinery where a flat-sided blade would leave material behind. For most beginners, bevel-edge bench chisels are the preferred starting point because of this added versatility.
Mortise Chisels
Mortise chisels are thicker, heavier, and built specifically for chopping deep, narrow mortises — the rectangular holes that receive a tenon in mortise-and-tenon joinery. Their thick cross-section resists the bending and flexing that a thinner bench chisel would experience under the repeated, heavy blows needed to chop through dense hardwood. The handles are typically reinforced with a steel hoop or ferrule at the top to absorb mallet impact without splitting.
While mortise chisels are invaluable for dedicated hand-tool joinery, they’re not essential for a beginner’s first set. Most bench chisels can handle light mortising work, and many beginners initially use power tools — such as a cordless drill with a Forstner bit or a wood router with an upcut spiral bit — to remove the bulk of the waste before cleaning up with a bench chisel. Once you find yourself hand-chopping mortises regularly, a dedicated mortise chisel becomes a justifiable upgrade.
Paring Chisels
Paring chisels are the opposite end of the spectrum from mortise chisels: long, thin, and flexible, designed for delicate, controlled slicing cuts rather than heavy chopping. Their extended blade length — often 8 to 10 inches — gives the user more control over the cut angle and allows for long, sweeping passes that leave a polished surface on the wood. Paring chisels are typically pushed by hand rather than struck with a mallet, and they excel at tasks like trimming tenon cheeks, refining hinge mortises, and cleaning up glue lines after assembly.
A dedicated paring chisel is a nice-to-have rather than a must-have for beginners. A sharp bench chisel in a comfortable handle can accomplish most paring tasks adequately, and many woodworkers never feel the need to buy a separate paring chisel at all. That said, if you find yourself doing a lot of fine fitting work — particularly hand-cut dovetails or close-fitting tenons — a paring chisel will noticeably improve the quality and precision of your results.
Framing Chisels
Framing chisels are the heavy-duty cousins of mortise chisels, originally designed for timber framing and large-scale construction joinery. They feature wide blades, thick cross-sections, and sturdy socket handles that can take repeated, forceful mallet blows without complaint. While they have their place in traditional timber framing, they’re not relevant for most beginning furniture makers or hobbyist woodworkers and can be safely ignored until your work specifically demands them.
Butt Chisels
Butt chisels are short-bladed bench chisels originally designed for hinge butt mortising — the shallow recesses cut into door frames and cabinet sides to receive hinges. Their short length gives them excellent control in tight spaces where a longer blade might be cumbersome. The DEWALT set reviewed earlier in this guide follows a similar short-blade philosophy. Butt chisels are handy to own but not essential for a beginner who already has a standard bench chisel set, since a regular bench chisel can handle hinge mortises perfectly well.
Specialty Chisels: Skew, Fishtail, and Corner
Beyond the core categories above, there’s a world of specialty chisels that address very specific tasks. Skew chisels have blades angled at roughly 25 degrees to one side, making them ideal for cleaning out tight corners and trimming end grain. Fishtail chisels have a blade that widens at the tip before narrowing back toward the handle, which allows the cutting edge to reach into areas where the handle would otherwise block access. Corner chisels have a V-shaped blade designed to square the rounded corners left by router-cut mortises. These are all useful tools, but they’re the kind of thing you buy one at a time as specific needs arise, not something to worry about when assembling your first set.
| Chisel Type | Primary Use | Beginner Priority |
|---|---|---|
| Bench / Bevel-Edge | General joinery, paring, light mortising | Essential — start here |
| Mortise | Chopping deep mortises by hand | Add later if doing hand-cut mortises |
| Paring | Delicate, long-stroke trimming cuts | Nice-to-have for fine fitting |
| Framing | Timber framing and large construction joints | Not needed for most beginners |
| Butt | Hinge mortises in tight spaces | Optional — bench chisels cover this |
| Skew / Fishtail / Corner | Specialty corner and angle work | Add individually as needs arise |
Japanese vs. Western Chisels: What Beginners Should Know
If you spend any time in online woodworking forums or watching YouTube tutorials, you’ll inevitably encounter passionate debate about Japanese chisels (nomi) versus Western-style chisels. Both traditions have produced exceptional tools over centuries of refinement, and both have devoted followings. Understanding the fundamental differences can help you decide which style aligns better with how you plan to work.
Construction and Steel
The most fundamental difference is in how the blades are made. Western chisels are typically made from a single piece of uniform steel — either carbon steel, chrome-vanadium, or a similar alloy — ground to a consistent thickness and bevel. Japanese chisels, by contrast, are traditionally forge-laminated, meaning a thin layer of extremely hard, high-carbon cutting steel (hagane) is forge-welded to a softer, more ductile iron or low-carbon steel body (jigane). This lamination creates a chisel that has the best of both worlds: a very hard cutting edge that takes and holds a razor-sharp edge, supported by a softer body that absorbs shock and resists cracking.
The lamination line — called the jigane — is visible on the back of a Japanese chisel as a distinct boundary between the darker iron body and the lighter, polished cutting steel. This isn’t a defect or cosmetic feature; it’s the hallmark of traditional forge-laminated construction and a sign that the chisel was made using time-honored methods.
Hollow Ground Back (Ura)
One of the most distinctive features of a Japanese chisel is its hollow-ground back, called the ura. Rather than being perfectly flat across the entire back face (as Western chisels are), Japanese chisels have a concave scoop ground into the back, leaving only a narrow perimeter land and the cutting edge in contact with the sharpening stone. This design has two practical benefits: it dramatically reduces the amount of steel that needs to be flattened during sharpening (since only the perimeter contacts the stone), and it helps the chisel track flat against a reference surface during paring cuts.
The trade-off is that the hollow back requires its own sharpening technique — you need to maintain the ura without grinding it away — which adds a layer of complexity that some beginners find intimidating. If you’re brand new to sharpening, the learning curve with a Japanese chisel is steeper than with a flat-backed Western chisel.
Handles and Mallet Use
Japanese chisel handles are traditionally made from Japanese white or red oak (shirogashi or akagashi), which is extremely hard and dense. A steel hoop (hoop or kiguchi) is pressed onto the top of the handle to prevent it from splitting under mallet blows. The handles are generally shorter and thicker than Western handles, and the ergonomics take some getting used to if you’ve only ever held Western tools.
Japanese chisels are designed to be struck with a Japanese wooden mallet (genno), which has a flat face rather than the domed or rounded face typical of Western joinery mallets. Striking a Japanese chisel with a steel hammer can crack the handle, and using a Western mallet with a rounded face concentrates force in a way the hoop wasn’t designed to distribute. If you invest in Japanese chisels, plan on buying or making a compatible genno-style mallet to go with them.
Which Should a Beginner Choose?
For most beginners, Western-style chisels are the more practical starting point. They’re easier to sharpen (no ura to maintain), more widely available in affordable sets, and compatible with the mallets and sharpening setups most beginner woodworkers already own. Japanese chisels reward patience and skill with extraordinary cutting performance, but they also demand more from the user in terms of maintenance knowledge and technique. There’s nothing wrong with starting with a Western-style set — like any of the ten reviewed in this guide — and exploring Japanese chisels later once you’ve developed confidence in your sharpening and hand-tool skills.
That said, if you’re drawn to Japanese woodworking traditions or plan to study under a teacher who uses Japanese tools, starting with Japanese chisels from the beginning is perfectly viable. Just be prepared to invest more time upfront in learning the specific sharpening and handling techniques they require.
| Feature | Western Chisels | Japanese Chisels (Nomi) |
|---|---|---|
| Steel Construction | Single uniform steel | Forge-laminated hard/soft steel |
| Back Profile | Flat | Hollow-ground (ura) |
| Handle Material | Beech, ash, polypropylene | Japanese white/red oak |
| Mallet Compatibility | Western mallets and hammers | Genno (Japanese flat-faced mallet) |
| Sharpening Complexity | Lower — flat back is straightforward | Higher — must maintain the ura |
| Beginner Friendliness | More accessible | Steeper learning curve |
| Edge Retention | Good (varies by steel) | Excellent (harder cutting steel) |
How Wood Species Affect Chisel Performance
Not all wood is created equal when it comes to chisel work, and understanding how different species behave under a sharp edge will save you a lot of frustration as a beginner. The wood you choose to practice on — and eventually to build with — has a direct impact on how your chisels perform, how quickly they dull, and how much technique is required to produce clean results.
Softwoods: Pine, Spruce, Fir, and Cedar
Softwoods are the most common starting material for beginner woodworkers, largely because they’re inexpensive and readily available at any home center. Pine, in particular, is the default practice wood for most new chisel users. The good news is that softwoods are easy to cut — a sharp chisel will glide through pine with minimal effort. The bad news is that softwoods are more prone to tear-out and fuzzy cuts than hardwoods, especially when cutting against or across the grain. The soft earlywood (the lighter, softer part of the growth ring) cuts easily, but the harder latewood (the darker, denser stripe) can catch the edge and cause the chisel to skip or dig in unpredictably.
When chiseling softwood, take lighter cuts and pay extra attention to grain direction. A freshly sharpened edge makes a dramatic difference in softwood — the difference between a clean cut and a torn, fuzzy surface often comes down to whether you honed your chisel before starting the cut. Budget chisels with adequate sharpness can perform surprisingly well in softwood, making species like pine a great equalizer for testing any of the sets in this guide.
Hardwoods: Oak, Maple, Cherry, and Walnut
Hardwoods behave very differently under a chisel. They require more force to cut, which means your edge retention matters more — a chisel that dulls quickly in pine will become nearly useless in hard maple or white oak before the end of a single project. At the same time, hardwoods generally produce cleaner, crisper cuts when the chisel is sharp, because the dense, uniform grain structure resists the kind of tearing and fuzziness that plagues softwood work.
Oak, with its prominent open grain and pronounced growth rings, is relatively forgiving to chisel along the grain but can be challenging to pare across it. Maple is extremely hard and dense, which means it dulls edges faster but rewards sharpness with glass-smooth surfaces. Cherry is a favorite among furniture makers for its warm color and moderate hardness — it cuts beautifully with a sharp chisel and is often recommended as a “sweet spot” hardwood for beginners developing their hand-tool skills. Walnut is slightly softer than oak or maple, cuts cleanly, and is forgiving of minor technique errors, making it another excellent practice species.
Interlocked and Figured Grain
Certain wood species — mahogany, sapele, and some figured maples, for example — have interlocked or reversing grain that changes direction multiple times across a single board. These species are significantly more challenging to chisel cleanly because the grain direction shifts mid-cut, causing the chisel to dig in or tear the surface unpredictably. If you encounter interlocked grain, switch to very light paring cuts, work from multiple directions, and accept that some tear-out may be unavoidable — it can usually be cleaned up with a sharp random orbital sander or hand-plane afterward.
End Grain vs. Long Grain
Cutting end grain — the exposed end of a board where you’re severing fibers rather than separating them along their length — is fundamentally different from cutting long grain. End grain requires a much sharper edge and benefits from a slightly steeper effective bevel angle. Tasks like paring the end grain of a tenon shoulder or trimming the proud pins of a dovetail joint require your chisel to be as sharp as possible, which is why experienced woodworkers often re-strop their edge immediately before making end-grain cuts. This is also where higher-quality steel — like the manganese-vanadium in the Narex set or the high-carbon steel in the Kirschen set — really pays dividends, because the edge stays keen through more end-grain cuts before needing touch-up.
Reclaimed and Pallet Wood
Many beginning woodworkers practice on reclaimed wood or pallet wood to save money. While this is a smart approach economically, it’s worth knowing that reclaimed wood often contains hidden contaminants — nails, screws, staples, sand, and even small stones embedded in the grain — that can destroy a chisel edge in a single cut. Before chiseling into reclaimed wood, run a strong magnet over the surface and inspect carefully for embedded metal. Hitting a hidden nail with a chisel, even a cheap one, can chip the blade badly enough to require significant regrinding to repair.
Chisels for Cutting Dovetails: A Beginner’s Walkthrough
Dovetails are the iconic joinery technique that many aspiring woodworkers dream of mastering. They’re strong, beautiful, and — when cut well — a genuine source of pride. They’re also one of the most chisel-intensive joints you’ll ever cut by hand, making your choice of chisel set and your sharpening routine directly visible in the finished result. If dovetails are on your list of goals, here’s what you need to know about selecting and using chisels specifically for this type of joinery.
What Makes a Good Dovetail Chisel?
The ideal dovetail chisel has a thin blade with beveled edges (bevel-edge bench chisel), a comfortable handle for extended hand paring, and steel that takes and holds a very keen edge. The thin bevel edges are critical: they allow you to reach into the acute angle between the tail and pin without leaving a ridge of uncut wood in the corner. A thicker, non-beveled chisel will leave material in the corner that’s nearly impossible to remove cleanly, creating a visible gap that weakens the joint and looks sloppy.
Among the sets reviewed in this guide, the Narex Bevel Edge set and the Kirschen 1101000 are both excellent choices for dovetail work. Their thin bevel edges, quality steel, and comfortable wooden handles make extended paring sessions more productive and less fatiguing. The budget sets — HURRICANE, GREBSTK, Amazon Basics, and others — can absolutely cut dovetails, but their thicker blade profiles and softer steel may require more frequent sharpening and more careful technique to achieve the same quality of result.
Dovetail Chisel Sizes
For most standard dovetail work, you’ll primarily use three chisel widths: a 1/4″ chisel for cleaning out the narrow pins between tails, a 1/2″ or 3/8″ chisel for paring the wider tail sockets, and a 3/4″ or 1″ chisel for cleaning the baseline and removing bulk waste. If you’re working on smaller-scale projects — jewelry boxes, drawer sides for small drawers — a 1/8″ chisel becomes useful for very narrow pin sockets, but for most furniture-scale dovetails, the three sizes above cover the job.
Cutting Technique Overview
A full dovetail tutorial is beyond the scope of this article, but here’s a brief overview of where chisels come into play during the process. After marking out your tails and pins with a marking gauge and dovetail marker or bevel gauge, you saw along the layout lines with a fine-toothed dovetail saw, stopping at the baseline. The chisel then comes in to remove the waste between the saw cuts, paring down to the baseline in controlled, shallow passes. The final step — and the one that separates clean dovetails from rough ones — is paring the baselines themselves to a crisp, flat surface that seats cleanly against the mating piece.
This final baseline paring is where sharpness and technique matter most. Use a chisel that’s wide enough to span most of the waste area, keep the bevel down for the initial passes, then flip to bevel-up for the final pass directly on the baseline. Work slowly, take thin shavings, and check your progress frequently against a square. A sharp chisel in practiced hands makes this process almost meditative; a dull one makes it an exercise in frustration.
Practice Progression
If dovetails are your goal, here’s a practical progression to build the skills you’ll need: start by practicing straight chisel cuts on a piece of scrap pine — just cutting to a line, maintaining depth control, and producing a flat surface. Once you’re comfortable with that, try simple through-dovetails in softwood using a dovetail saw and your chisels. After you’ve cut five or six sets of practice dovetails in pine, move to a medium hardwood like cherry or poplar, where the tighter grain will demand sharper edges and more precise technique. By the time you’ve completed a dozen practice sets across two or three species, you’ll have developed the muscle memory and sharpening habits needed to cut dovetails you’d be proud to show on a finished piece of furniture.
Chisels for Mortising: Technique and Tool Selection
Mortise-and-tenon joinery is the backbone of furniture construction — tables, chairs, doors, frames, and countless other projects rely on some variation of a tenon fitting snugly into a mortise. While many modern woodworkers cut mortises with a router or a dedicated mortising machine, hand-cutting mortises with chisels remains a valuable skill and, for many enthusiasts, a deeply satisfying one. Here’s what you need to know about using chisels for mortising work.
Bench Chisel vs. Mortise Chisel for Hand-Cut Mortises
The first question most beginners ask is whether they need a dedicated mortise chisel or whether their bench chisels will handle the job. The honest answer is that bench chisels can handle light to moderate mortising work — chopping mortises in softwood or smaller mortises in hardwood — but a dedicated mortise chisel is significantly better for repeated, heavy mortising in dense wood. The thicker blade of a mortise chisel resists deflection under heavy mallet blows, meaning the mortise walls stay straighter and the chisel is less likely to wander from the intended cut line.
For a beginner, we’d recommend starting with bench chisels — any of the reinforced-cap sets from this guide will work — and adding a dedicated mortise chisel in the most common width you use (typically 1/4″ or 3/8″) once you’ve confirmed that hand-cut mortising is a technique you want to continue developing.
Chopping Technique
Hand-chopping a mortise is a specific sequence of controlled mallet blows. Begin by positioning the chisel about 1/8″ from one end of the mortise, bevel facing toward the waste side, and drive it to the full depth of the mortise with firm mallet blows. Then back the chisel up about 1/8″ and chop again, working in a series of overlapping cuts across the mortise length. Once you’ve traversed the full length, flip the chisel so the bevel faces the other direction and repeat the process from the other end, meeting the previous cuts in the middle.
The key principles are: don’t try to remove too much material per blow, keep the chisel perfectly vertical (or at your intended angle for angled mortises), and use a proper mallet — not a steel hammer. The reinforced striking caps on the HURRICANE, DEWALT, and Spec Ops sets reviewed above are specifically designed for this kind of repeated impact work, though any set with a properly fitted handle will tolerate moderate mortising.
Cleaning and Fitting
After chopping the bulk of the mortise waste, switch to paring mode. Use a chisel slightly narrower than the mortise width to clean the walls, working in light passes to remove any remaining roughness and bring the walls to a flat, consistent surface. Check the fit with your tenon — it should slide in with firm hand pressure, not requiring a mallet to seat but not falling in loosely either. This final fitting is where the quality of your chisel edge shows most clearly: a sharp, well-maintained chisel produces a wall smooth enough that the tenon seats without gaps, while a dull one leaves ridges and irregularities that create visible gaps and weaken the joint.
Power-Assisted Mortising
If you have access to a table saw, you can cut tenon cheeks and shoulders on the table saw, then use a router with a straight bit or a drill press with a mortising attachment to hog out the bulk of the mortise waste. Your bench chisels then serve as cleanup and fitting tools rather than primary material-removal tools, which is how many modern woodworkers blend power tools and hand tools efficiently. This approach is faster and less physically demanding than fully hand-cut mortising, while still giving you the precision and satisfaction of chisel-fitted joinery in the final stages.
Chisel Safety: Protecting Hands, Fingers, and Workpieces
Chisels are among the sharpest hand tools in a woodworking shop, and they demand consistent respect and safe handling practices. A moment of carelessness — pushing toward an unguarded hand, leaving a chisel on a cluttered bench edge, or striking without securing the workpiece — can result in a serious cut that takes weeks to heal. This section covers the essential safety practices every beginner should internalize before spending significant time with chisels.
Always Secure Your Workpiece
One of the most common causes of chisel injuries is a workpiece that shifts or spins unexpectedly during a cut. Before making any chisel cut, clamp the workpiece firmly to a stable surface — ideally a proper workbench with a vise or holdfasts. If you’re working on the floor or a wobbly table, even a light chisel push can cause the workpiece to slide, sending the chisel (and your hands) in an unintended direction. Investing in a solid workbench is one of the highest-safety-impact decisions a new woodworker can make. Our picks for the best woodworking workbench cover options at every budget level, and even a simple bench with a face vise will dramatically improve your safety and control compared to working on a makeshift surface.
Cut Away From Your Body
The fundamental rule of chisel safety is to always direct the cutting force away from your body and away from any hand or limb that’s holding the workpiece. When paring, this means pushing the chisel away from you rather than pulling it toward your chest. When chopping with a mallet, this means ensuring your non-dominant hand (which steadies the chisel) is positioned to the side of the cut, not directly behind or below the blade path. If the chisel slips, it should travel into empty air or wood, not into flesh.
Use a Mallet, Not a Hammer
We’ve mentioned this several times already, but it bears repeating as a safety issue: using a steel hammer instead of a wooden or rubber mallet isn’t just bad for your chisel handles — it creates a safety risk. The sharp, concentrated impact of a steel hammer can cause the chisel to bounce or jump unpredictably, especially on a hard or unsecured workpiece. A mallet absorbs more of the impact energy, giving you better control over each blow and reducing the chance of the chisel jumping sideways into your hand.
Wear Eye Protection
Chiseling sends small chips and shavings flying, particularly when chopping across end grain or working with brittle hardwoods like oak. A pair of basic safety glasses protects your eyes from these projectiles and costs almost nothing. This is especially important when chopping mortises with a mallet, where the repeated impacts can launch small wood fragments with surprising force.
Carry and Store Chisels Safely
Never carry chisels loose in a pocket or toss them into a drawer with other tools. The exposed cutting edge is sharp enough to cause a deep cut from a momentary touch, and contact with other metal tools will chip and dull the edge. Use blade guards, a canvas or leather storage roll, or a dedicated chisel rack to keep edges protected when the tools aren’t in use. Many of the sets in this guide can be paired with an inexpensive canvas tool roll that provides organized, edge-protected storage for a few dollars more than the chisels themselves.
Keep Edges Sharp
Counterintuitively, a sharp chisel is safer than a dull one. A sharp edge cuts cleanly with less force, which means you have more control over the tool. A dull chisel requires more force to push through the wood, which increases the chance of the blade slipping, skating across the surface, or requiring an unsafe amount of hand pressure to maintain control. If you find yourself leaning hard into a cut or pounding a mallet with increasing force, it’s time to stop and re-sharpen — not push harder.
Protective Gear Summary
| Protection | Priority | Notes |
|---|---|---|
| Safety glasses | Essential | Protects from flying chips during chopping and mortising |
| Work gloves (for handling only) | Optional | Wear when carrying or storing, remove during precise cuts |
| Dust mask | Situational | Useful when working with treated wood or exotic species |
| Hearing protection | Not needed | Chiseling is quiet — save hearing protection for power tools |
A good apron also adds a layer of protection for your clothes and provides convenient tool pockets for keeping chisels within reach without setting them on cluttered surfaces. If you don’t already own one, our comparison of the best woodworking apron options covers everything from basic canvas to heavy-duty leather models.
Choosing the Right Mallet for Your Chisels
A mallet and a chisel are natural partners, and the quality of your mallet has a bigger impact on your chisel work than most beginners realize. The wrong mallet can crack handles, deliver inconsistent force, and make controlled chopping difficult. The right one feels like an extension of your arm — a confident, measured blow every time. Here’s what to look for when pairing a mallet with your new chisel set.
Wooden Joinery Mallets
The traditional wooden joinery mallet — typically made from dense hardwoods like beech, maple, or lignum vitae — is the most common pairing for bench chisels with wooden or reinforced handles. The wide, flat face distributes impact across the chisel handle’s striking surface, and the weight of the mallet head provides enough momentum to drive the chisel through moderate chopping cuts without requiring a violent swing. Most joinery mallets have heads weighing between 12 and 24 ounces, with 16 ounces being a popular middle ground for general-purpose work.
A good wooden mallet should have a handle long enough to provide a comfortable grip without crowding your knuckles against the head, and the head should be shaped so that the face strikes the chisel handle squarely. Some mallets have a slight taper from the face to the back of the head, which helps the face contact the handle at a natural angle. You can buy a quality joinery mallet for $15 to $40, or make one yourself from a scrap of hardwood — it’s one of the most popular first projects for new woodworkers and requires nothing more than a saw, a chisel (or router), and some sandpaper.
Rubber and Dead-Blow Mallets
Rubber mallets deliver softer, quieter blows than wooden mallets and are less likely to dent or mark a chisel handle. They’re a good choice for lighter chopping work or for use with chisels that have softer handle materials. Dead-blow mallets — which contain shot or sand inside the head to absorb rebound — provide even more controlled impact and virtually eliminate the bounce that can cause the mallet to jump off the chisel handle on a hard strike. These are particularly useful for beginners who are still developing their striking accuracy.
Rawhide and Brass Mallets
Rawhide mallets are occasionally recommended for chisel work, though they’re more commonly used for assembling joints and tapping pieces into alignment. Brass mallets deliver a sharp, concentrated blow similar to a steel hammer but with slightly more weight and less rebound — they’re not typically recommended for routine chisel use because they can damage wooden handles over time, but some woodworkers use them with polypropylene-handled chisels that have steel striking caps.
Matching the Mallet to the Chisel Handle
The general rule is simple: the softer the handle material, the softer the mallet face should be. Wooden handles pair best with a wooden mallet. Polypropylene or impact-resistant plastic handles with steel striking caps (like those on the HURRICANE, DEWALT, and Spec Ops sets) can tolerate harder impacts from wooden, rubber, or even rawhide mallets. The Kirschen and Narex sets, with their beech wood handles, benefit from a traditional wooden mallet — just avoid using a steel hammer, which can split the handle at the striking end or mushroom it beyond use.
Chisel Jigs and Accessories That Make Life Easier
While chisels are fundamentally hand tools that rely on skill and feel, several jigs and accessories can accelerate the learning process and improve consistency — particularly when it comes to sharpening, which is the area where most beginners struggle most. Here’s a look at the most useful accessories to consider alongside your first chisel set.
Honing Guides
A honing guide holds your chisel at a fixed, consistent angle while you push it across a sharpening stone. This eliminates the guesswork and wobble of freehand sharpening and ensures that every pass on the stone removes material at the same bevel angle. For beginners, a honing guide is arguably the single most impactful accessory you can buy, because it turns a frustrating, inconsistent sharpening process into a reliable, repeatable one. Basic roller-style honing guides cost $10 to $20 and work perfectly well. Higher-end guides (like the Veritas Mk.II or Eclipse-style guides) offer more precise angle adjustment and wider clamping capacity, but the budget options will get a beginner through the first year or two of sharpening without issue.
Sharpening Jigs and Fixtures
Beyond basic honing guides, there are more elaborate sharpening systems that take the process even further. Tormek-style wet grinders use a slowly spinning, water-cooled grinding wheel to sharpen tools at precise, repeatable angles with virtually no risk of overheating the steel. These are excellent for regrinding damaged bevels or establishing a primary bevel on a new chisel, though they’re overkill for routine touch-up sharpening. Work Sharp systems and similar belt-based sharpeners offer fast, guided sharpening at multiple grits and are popular among woodworkers who want speed and consistency without the learning curve of freehand or stone-based sharpening.
Marking Gauges and Mortise Gauges
While not chisel-specific accessories, marking gauges and mortise gauges are essential companions for any chisel joinery work. A marking gauge scribes a precise, consistent line parallel to a reference edge — this line becomes the baseline you chisel down to when cutting mortises, tenons, and dovetails. A mortise gauge has two pins and scribes both edges of a mortise or tenon simultaneously, saving time and improving accuracy. A good marking gauge costs $15 to $30 and will serve you for decades.
Chisel Trays and Racks
Proper storage protects your chisels and keeps them organized and accessible. A simple wooden chisel tray — a flat board with rows of angled slots cut to fit each chisel width — can be mounted on the wall above your bench or placed in a drawer to keep edges from contacting each other. Some woodworkers prefer magnetic tool strips, which hold chisels securely by the blade while keeping them visible and within reach. Whichever storage solution you choose, the key is preventing edge-to-edge contact and protecting the cutting edges from accidental nicks.
Combination Squares and Try Squares
Accurate layout is the foundation of accurate chisel work. A quality combination square or try square allows you to scribe perpendicular lines across your workpiece — lines that your chisel cuts will then follow. Cheap squares can be surprisingly inaccurate, which means your carefully chiseled joint may not fit properly despite flawless technique. A reliable 6-inch combination square from a reputable manufacturer is one of the best investments a beginner can make and will be used in virtually every project you build.
Where to Buy Chisels and How to Spot a Good Deal
Knowing where to buy your chisels can be just as important as knowing which ones to buy. Different retailers offer different advantages — price, selection, return policies, and shipping speed — and understanding the landscape helps you make the most of your budget.
Online Retailers
Online shopping has become the default way most beginners buy chisel sets, largely because of the convenience and competitive pricing. Large online marketplaces carry all of the budget and mid-tier sets reviewed in this guide, often at prices below what you’d find in a brick-and-mortar store. The main advantage is selection — you can compare ten different sets in the time it would take to visit one store — and customer reviews provide real-world feedback that helps separate genuinely good tools from marketing hype.
The main downside of buying chisels online is that you can’t hold them before purchasing. Handle comfort, blade balance, and overall fit are things you can only assess with the tool in your hand, and what feels comfortable to one person may feel awkward to another. If possible, check the return policy before buying, so you’re not stuck with a set that doesn’t suit your hands.
Specialty Woodworking Retailers
Specialty woodworking stores — both local shops and larger online retailers dedicated to hand tools — tend to carry higher-quality chisel brands that you won’t find at general retailers. Brands like Narex, Kirschen, Ashley Iles, Veritas, and Lie-Nielsen are commonly stocked by these specialty dealers. The staff at these stores is usually knowledgeable and can offer personalized advice based on your specific needs and budget, which is invaluable for a beginner navigating the options for the first time.
Big Box Home Improvement Stores
Large home improvement chains carry a limited selection of chisel sets, typically focused on the budget and utility tiers — brands like DEWALT, Stanley, and Irwin. The selection is smaller and the staff expertise is less specialized, but the advantage is immediate availability: you can walk in, buy a set, and start working the same day. If you need chisels for a specific project and can’t wait for shipping, a big box store will have something workable on the shelf.
Used and Vintage Chisels
Estate sales, flea markets, online auction sites, and used tool dealers can be treasure troves for chisel hunters. Vintage chisels from brands like Stanley, Marples, and Buck Brothers were often made with excellent steel that outperforms many modern budget offerings. The trade-off is that vintage chisels usually need significant restoration — rust removal, back flattening, handle repair or replacement, and full regrinding of the bevel — before they’re usable. For a beginner, this restoration process can be an excellent learning experience, but it also requires tools and time that a first-time buyer may not have. If you enjoy restoration projects and have access to a grinder and sharpening equipment, buying used can save money and yield tools that punch well above their price class.
How to Spot a Good Deal
A good deal on chisels isn’t just the lowest price — it’s the best value at a given quality level. Here are some tips for getting the most for your money: watch for bundle deals that include a storage roll, blade guards, or a honing guide, since these accessories would cost extra if bought separately. Check whether the listed set includes the sizes you actually need, or whether it’s padded with widths you’ll rarely use. And compare the per-chisel price rather than the total set price — a $30 four-piece set ($7.50 per chisel) may be better value than a $25 eight-piece set ($3.13 per chisel) if the latter’s steel and handle quality are significantly lower.
Seasonal sales events — particularly around the winter holidays and mid-year clearance periods — often feature discounts on tool sets, making them a good time to pick up a set you’ve been eyeing. If you’re not in a rush, setting a price alert on your preferred set and waiting for a sale can save 15 to 25 percent off the regular price.
Chisel Care & Sharpening Basics
Buying a good chisel set is only half the equation — how you maintain those chisels determines whether they perform well for years or dull and disappoint within a few projects. This section covers the fundamentals every beginner should know, regardless of which set from this list you end up choosing.
Flattening the Back
Before your first real sharpening session, most chisels benefit from having their back flattened on a coarse sharpening stone. This ensures the flat face of the chisel is genuinely flat, which is essential for clean paring cuts and consistent results when chopping mortises. This is a one-time process per chisel and doesn’t need to be repeated regularly afterward, just maintained with light touch-ups.
Establishing and Maintaining the Bevel
Most bench chisels use a bevel angle between 25 and 30 degrees. A honing guide, even an inexpensive one, makes it far easier for beginners to maintain a consistent angle than freehand sharpening, at least until you’ve built up muscle memory. Work through progressively finer grits, finishing with a strop or fine polishing compound for a mirror edge that will noticeably improve how cleanly your chisel slices through wood fibers.
Storage and Rust Prevention
Chisels should never be tossed loosely into a drawer with other metal tools — the edges will chip and dull from contact with other hard surfaces. A dedicated roll, blade guards, or a simple foam-lined tool box insert goes a long way toward preserving that hard-earned sharp edge. For carbon steel chisels especially, a light coat of oil after use helps prevent rust, particularly in humid shop environments.
Matching Chisel Choice to Project Type
As you build confidence, you’ll notice certain projects call for certain chisel types. Wide chisels are useful for quickly removing waste material, while narrow chisels excel at detail work like cleaning tight dovetail corners. If your woodworking involves a mix of joinery styles, it’s worth reviewing our guide on wood joinery tools explained, which breaks down how chisels fit alongside other joinery-focused tools.
Seasonal and Climate Considerations
If your shop isn’t climate-controlled — a common situation for garage and basement workshops — humidity can wreak havoc on carbon steel chisel blades. In humid summer months, surface rust can develop on an unprotected carbon steel blade in as little as a day or two. The simplest prevention is a light wipe with camellia oil, mineral oil, or even WD-40 after each use. Some woodworkers keep a small can of paste wax near their bench and give chisel blades a quick swipe before putting them away. Chrome-vanadium and stainless steel blades are more resistant to this kind of surface rust but are not immune — any steel will eventually corrode if stored in consistently damp conditions without protection.
When to Re-Grind vs. Re-Hone
Understanding the difference between honing and grinding will save you time and preserve your chisels’ longevity. Honing — the routine touch-up you do on a fine stone or strop — removes a microscopic amount of steel from the existing bevel to restore sharpness. This is what you should do every few uses, or whenever you notice the chisel isn’t cutting as cleanly as it was. Grinding — using a coarse stone, grinder, or belt sander to reshape the bevel — is only necessary when the edge is damaged (chipped, heavily rolled, or nicked) or when you need to change the bevel angle entirely. Avoid over-grinding, as it removes significant steel and shortens the chisel’s useful life. When in doubt, try honing first — many edges that seem hopelessly dull will come back to life with ten or fifteen strokes on a medium stone followed by a quick strop.
Don’t Forget the Rest of Your Kit
A great chisel set is only useful if the rest of your setup supports it. A stable workbench keeps your workpiece from shifting mid-cut — check our picks for the best woodworking workbench or, if space is tight, our roundup of the best portable woodworking workbench options. Protecting your clothing and hands matters too; our comparison of the best woodworking apron options, including a deeper look at the best leather woodworking apron and the waxed canvas apron review, can help you find the right fit alongside your new chisels.
If you’re building your bench from scratch, our article on the best wood for a workbench and the best plywood for a workbench top will help you plan a surface sturdy enough to handle the kind of mallet work these chisels are built for. It’s also worth browsing full apron reviews like the Rockler woodworking apron review and the Briteree woodworking apron review if you’re still deciding what to wear while working, since a well-fitted apron with tool pockets makes it much easier to keep chisels within reach without setting them down on cluttered surfaces where edges can get damaged.
Common Mistakes Beginners Make With Chisels
Even with a great set in hand, technique and habits play a huge role in how well a chisel performs and how long it lasts. Here are the mistakes we see most often among people picking up chisels for the first time, along with how to avoid them.
Skipping the Initial Sharpening
As mentioned earlier, almost no chisel arrives ready for fine work straight out of the packaging. New woodworkers often assume a dull first cut means the tool is low quality, when in reality it simply hasn’t been sharpened yet. Spending fifteen to twenty minutes flattening the back and establishing a clean bevel before your first project will completely change how the tool performs.
Using the Wrong Striking Tool
Grabbing whatever hammer is closest is a common shortcut that tends to backfire. Steel hammers deliver sharp, concentrated blows that can crack handles, especially wooden ones not designed to absorb that kind of shock. A wooden or rubber mallet spreads the impact more evenly across the handle and gives you better control over how much force actually reaches the blade.
Forcing the Cut Instead of Removing Waste in Stages
New woodworkers often try to remove too much material in a single pass, which increases the risk of tear-out, blade deflection, or an uneven surface. Chopping and paring in smaller, controlled increments — especially near the finish line of a cut — produces cleaner results and reduces strain on both the tool and the wood.
Ignoring Grain Direction
Wood grain direction has a major impact on how cleanly a chisel cuts. Paring with the grain generally produces a smoother surface, while cutting against it can cause the blade to dig in or tear fibers unpredictably. Take a moment to identify grain direction before making a paring cut, particularly on show surfaces where finish quality matters.
Neglecting Regular Maintenance
It’s easy to put chisels away after a project and forget about them until the next one, but skipping routine maintenance is one of the fastest ways to shorten a chisel’s usable life. A quick strop before storage, an occasional light oiling for carbon steel blades, and proper storage in a roll or guarded case will keep your set performing well for years rather than months.
Buying Based on Piece Count Alone
As covered in the buying guide above, more pieces don’t automatically mean more value. Beginners sometimes choose the largest set available assuming it’s the best deal, only to discover that half the included widths go untouched while the core sizes they actually use are no better than what a smaller, cheaper set would have offered. Focus on steel quality and handle comfort for the sizes you’ll actually use most.
Not Understanding Bevel Angles
Many beginners either don’t know what bevel angle their chisels are ground to or don’t understand why it matters. A steeper bevel (around 30 degrees) is more durable and better suited to heavy chopping and mortising, while a shallower bevel (25 degrees or less) slices more cleanly for paring work but is more fragile and prone to rolling or chipping if used for heavy chopping. Some experienced woodworkers use a two-bevel approach — a 25-degree primary bevel for cutting and a 30-degree micro-bevel at the very edge for durability — which combines the advantages of both angles. As a beginner, simply knowing your angle and maintaining it consistently is more important than agonizing over the “perfect” angle. A consistent 30-degree bevel, maintained with a honing guide on a regular schedule, will serve you well across virtually all bench chisel tasks.
Chiseling on an Unstable Surface
This is both a safety issue and a quality-of-work issue. Trying to chisel on a lightweight benchtop, a folding table, or a piece of plywood balanced on sawhorses means your entire work surface moves with every mallet blow, absorbing energy that should be going into the cut and causing the chisel to bounce or drift. A proper workbench — heavy, stable, and equipped with a vise or holdfast — transforms the chiseling experience from frustrating to satisfying. If you’re not ready to invest in a full bench yet, even clamping a sacrificial board to a sturdy table and working on top of it is a significant improvement over an unsecured surface.
Beginner-Friendly Projects to Practice With
Once your set is sharpened and ready, it helps to have a short list of low-pressure projects to build confidence before tackling something ambitious. These are commonly recommended starting points for practicing chisel technique.
Simple Half-Lap Joints
Half-lap joints are one of the most forgiving joinery types to practice with, since they involve straightforward, wide, shallow cuts rather than tight, deep mortises. They’re a great way to build confidence in controlling depth and keeping cut walls flat and square.
Basic Mortise and Tenon Practice Blocks
Rather than jumping straight into a full project, cutting a handful of mortise and tenon joints on scrap lumber lets you refine chopping technique, learn how your particular chisel set handles different wood densities, and build the muscle memory needed for consistent results.
Cabinet Hinge Mortises
Installing hinges on a scrap door or cabinet panel is a practical, low-stakes way to practice precise, shallow paring cuts. It’s also one of the most common real-world tasks a chisel gets used for, so it doubles as genuinely useful practice.
Cleaning Up Router or Table Saw Joinery
If you already own a wood router or table saw, practice using your chisels to clean up and square the corners of joinery cut by those power tools. This is one of the most common ways chisels get used in a modern shop that blends hand tools and power tools, and it’s a gentle, practical way to build comfort with fine paring cuts.
A Simple Wooden Mallet
Building your own mallet is a perfect first chisel project because it’s low-stakes, useful, and requires only basic cuts. Start with a block of dense hardwood like maple or oak for the head and a straight-grained handle blank. Shape the head with a random orbital sander or hand planes, cut the handle to a comfortable length, and fit it into a tapered mortise in the head using your chisels. The mortise fitting is excellent practice — you’ll learn to chop to a line, pare walls flat, and test-fit repeatedly until the handle seats tightly without gaps.
A Dovetail Practice Box
Once you’re comfortable with basic chisel technique, try building a small box with through-dovetail corners. Use an inexpensive softwood like pine or poplar to keep costs low, and focus on achieving tight-fitting joints rather than perfect aesthetics. A small box requires only four sets of dovetails (one per corner) and gives you a finished, functional object to show for your practice — much more motivating than cutting joints on anonymous scrap blocks. Sand the exterior smooth with your random orbital sander, apply a simple finish, and you’ll have both a useful object and tangible proof of your growing skills.
A Wall-Mounted Chisel Rack
Here’s a project that solves a real problem while building your skills: a wall-mounted chisel rack with angled slots sized to your specific chisel set. Cut the slots using your chisels (or a combination of chisels and a cordless drill for the initial waste removal), sand and finish the board, and mount it above your workbench. Now your chisels have a proper home, and you’ve practiced mortise-cutting and paring in a project where imperfect results don’t matter — the chisels will still sit securely even if a slot is slightly off-size.
An End-Grain Cutting Board
An end-grain cutting board is a popular intermediate project that gives you extensive practice squaring stock, aligning glue-ups, and — most relevant to this guide — trimming and paring end grain to a smooth finish after assembly. After gluing up the block, use your widest chisel to pare down any uneven joints, then finish with a random orbital sander working through the grits. The combination of chisel work and sanding in a single project reinforces both skill sets simultaneously.
Frequently Asked Questions
Do beginner chisel sets come sharp out of the box?
Rarely to a fine-cutting standard. Most sets, regardless of price, ship with a rough factory edge meant to survive shipping rather than perform ideal cuts. Plan on a sharpening session with a stone or honing guide before your first real project.
How many chisels does a beginner actually need?
Four to six widths cover the vast majority of beginner projects. The most commonly used sizes are 1/4″, 3/8″, 1/2″, 3/4″, and 1″. Larger sets with eight or ten pieces add convenience but aren’t strictly necessary at first.
What’s the difference between carbon steel and chrome-vanadium chisels?
Carbon steel typically sharpens to a keener edge but requires more careful maintenance and is more prone to rust. Chrome-vanadium is more forgiving, resists corrosion better, and tolerates beginner mistakes more gracefully, making it a common choice for entry-level sets.
Can I use a regular hammer instead of a mallet with these chisels?
It’s not recommended. A steel hammer delivers a sharper, more concentrated impact that can damage handles not designed for it, especially wooden ones. A wooden or rubber mallet distributes force more evenly and is the standard pairing for chisel work.
Are wooden handles better than plastic ones?
Neither is universally better — it depends on your use case. Wooden handles often feel more comfortable during precision paring and have a traditional appeal, while reinforced plastic or polypropylene handles tend to hold up better under repeated, heavier mallet strikes.
How often should I sharpen my chisels?
It depends on use frequency and the material you’re cutting, but most active woodworkers touch up their edges every few sessions and do a full re-sharpening every few months, depending on how much hardwood versus softwood they’re working with.
Is a honing guide necessary for beginners?
While not strictly required, a honing guide makes it significantly easier to maintain a consistent bevel angle while you’re still developing the muscle memory for freehand sharpening. Many beginners find it speeds up learning considerably.
What size chisel should I use for hinge mortises?
A narrower chisel, typically 1/2″ to 3/4″, works well for most standard door and cabinet hinge mortises, giving you enough control to define clean edges without removing too much material at once.
Can these beginner sets handle heavy mortising work?
Most beginner sets can handle light to moderate mortising, but sets with reinforced striking caps (like HURRICANE, DEWALT, or Spec Ops Tools) are better suited to repeated heavy mallet use than sets designed primarily for fine paring.
How do I prevent my chisels from rusting?
Keep them dry after use, store them away from moisture, and apply a light coat of oil periodically, especially with carbon steel blades. Avoid storing chisels loosely where they can knock against other metal tools and chip the edge.
Is it worth buying a premium set like Narex as a first chisel set?
If you’re confident woodworking will be a long-term hobby, investing in a higher-quality set like the Narex Bevel Edge can save money in the long run by avoiding an early upgrade. For casual or uncertain beginners, a budget set is a lower-risk way to start.
Do I need a full set, or can I buy individual chisels?
Buying a set is almost always more cost-effective than purchasing chisels individually, and it ensures you have a consistent range of sizes from day one. Individual purchases make more sense later, once you know which specific widths you use most.
What bevel angle should I grind my bench chisels to?
Most bench chisels perform well at a 25- to 30-degree bevel angle. A 25-degree angle cuts more cleanly for paring work, while a 30-degree angle is more durable for chopping and mortising. Many woodworkers compromise at 28 degrees for an all-purpose bevel that handles both tasks adequately.
Can I use chisels with a table saw or router jig?
Chisels and power tools are complementary, not competing. Many woodworkers use a table saw or router to cut the bulk of a joint, then use chisels for final fitting and cleanup. This “hybrid” approach combines the speed of power tools with the precision of hand tools.
How do I flatten the back of a chisel efficiently?
Start with a coarse stone (around 400-1000 grit) and work the chisel’s back in a figure-eight pattern, applying even pressure with your fingers near the cutting edge. Focus on the first inch or two behind the edge — the rest of the back doesn’t need to be perfectly flat. Finish on a medium stone (1000-3000 grit) to refine the surface.
What’s the best wood to practice chisel techniques on?
Softwoods like pine and poplar are inexpensive and easy to cut, making them ideal for initial practice. Once you’re comfortable, move to a medium hardwood like cherry or walnut for more realistic practice. Avoid very hard or figured woods (hard maple, figured cherry) until your technique is solid.
Should I buy a chisel set with a storage roll included?
A storage roll is a nice bonus but shouldn’t be the deciding factor. Many excellent sets don’t include one, and a quality canvas or leather roll can be purchased separately for $10 to $25. What matters more is that you have some form of edge protection — whether it’s a roll, blade guards, or a dedicated rack — to keep the cutting edges from getting damaged in storage.
Final Verdict: Which Chisel Set Should You Buy?
For most beginners simply looking to get started without overspending, the HURRICANE 4-Piece or Jorgensen 4-Piece sets are sensible, low-risk entry points. If you want more size variety without a big price jump, the Amazon Basics 8-Piece or REXBETI 10pcs sets offer excellent range for the money. And if you’re already confident woodworking is a hobby you’ll stick with, the Narex Bevel Edge or Kirschen 1101000 sets are worth the extra investment for their superior steel and long-term durability.
Whichever set you choose, remember that a chisel is only as good as the edge you put on it — budget a little time (and maybe a sharpening stone) into your first purchase, and you’ll be cutting clean joinery in no time.
See Today’s Best Chisel Set Deals