
How to Start Woodworking With No Experience: A Practical Beginner’s Guide
Almost every woodworker you admire started out the same way: with a borrowed saw, a crooked board, and zero idea what they were doing. The good news is that woodworking rewards patience far more than talent. This guide walks you from “I’ve never touched a tool” to finishing your first real project, in plain language and in the order you’ll actually need things.
1. What Woodworking Really Is (and Isn’t)
Woodworking is the craft of shaping wood into useful or beautiful things: cutting boards, shelves, stools, tables. It spans a huge range, from carving spoons with a knife to building cabinets with a table saw. If you want the big-picture definition, our primer on what woodworking is covers the main branches.
What it isn’t: an expensive, elite hobby. You can begin with a handful of tools and a weekend. The skills that matter most, measuring carefully, cutting to a line, and being patient with glue, cost nothing.
The Main Branches You’ll Run Into
Woodworking is really several crafts sharing one material. Furniture making focuses on tables, chairs, and cabinets. Carpentry deals with framing, trim, and structural work in buildings. Woodturning shapes bowls and spindles on a lathe, and carving removes material with gouges and knives. Many beginners drift toward furniture and general project building because the results are useful, and the skills transfer to almost everything else.
Why Beginners Stick With It
The appeal is partly practical: you end up owning shelves, benches, and gifts that cost far less than store-bought equivalents and often last longer. But the bigger draw is the pace. Woodworking forces you to slow down, think in sequence, and finish something physical. A rough pile of boards becomes a thing you can hold, and that feedback loop is addictive in a healthy way.
What to Expect in Your First Month
Expect gaps in your joints, a few crooked cuts, and at least one board you ruin. That’s normal. In the first month, your goal isn’t a masterpiece. It’s learning how a tape measure, a square, and a saw behave in your hands. Aim to complete one small project start to finish, then look honestly at what went wrong and what went right. That single loop of build, inspect, and adjust is the fastest way to improve.
It also helps to keep a small notebook. Write down dimensions, what glue you used, how long it dried, and any mistakes. Within a few projects you’ll have a personal reference that beats any video tutorial, because it reflects your tools and your shop.
Setting a Realistic Budget
Decide up front how much you’re willing to spend over the first three months, and treat it as a ceiling rather than a target. Many beginners overspend on gear in the excitement of week one, then discover which tools they actually reach for. Spend a little on safety and measuring, a moderate amount on a drill and saw, and let each project tell you what to buy next. This keeps the hobby affordable and keeps your shop full of tools you really use.
Finding Time to Practice
You don’t need entire weekends. Two or three focused sessions a week, even an hour each, build skill faster than an occasional marathon. Short sessions also reduce fatigue, which keeps you safer and your cuts cleaner. Break projects into small stages, such as marking on Tuesday, cutting on Thursday, and gluing on Saturday, so progress feels steady.
Want a simple starting point? Browse beginner woodworking kits and books.
Shop Beginner Books on Amazon2. Safety Gear Comes Before Tools
Before you buy a single saw, buy eye protection, hearing protection, and a dust mask. Sawdust is a lung irritant, and noise damage is permanent. Add snug clothing, closed shoes, and tied-back hair. Never wear loose sleeves near a spinning blade.
A good apron is more than fashion: it keeps clothes clear of moving parts and holds pencils, tape, and a square within reach. See our roundup of the best woodworking aprons if you want one that lasts.
Eye, Ear, and Lung Protection
Choose impact-rated safety glasses that fit snugly and don’t fog. Flying chips from a saw or a snapped drill bit are the most common way beginners hurt their eyes. For hearing, foam plugs or over-ear muffs are both fine, and you should wear them for any power tool that makes your ears ring. For dust, a simple N95-style mask handles light sanding, while fine dust from sanding hardwoods or MDF deserves a better-fitting respirator.
Safe Habits at the Bench
Good habits matter more than any gadget. Clamp your work instead of holding it with your free hand. Keep your fingers outside the path of the blade, and plan each cut before you start it. Keep the floor clear of offcuts, because tripping while holding a tool is a classic injury. Unplug corded tools or remove the battery before changing blades or bits.
Dust, Fumes, and Ventilation
Wood dust and finish fumes are easy to forget about because they don’t hurt immediately. Open a door or window, run a fan that pushes air outward, and sweep or vacuum rather than blowing dust around. Store rags soaked in oil-based finishes laid flat or in a metal container filled with water, since they can heat up and ignite on their own.
Know Your Limits
If a cut feels unsafe, it probably is. Break large boards down with a hand saw before they ever see a power saw, and don’t push small pieces through a machine with your fingers. Ask yourself what happens if the tool kicks back. If you don’t like the answer, rethink the setup. First aid supplies and a charged phone nearby are cheap insurance.
Protect yourself first. Safety glasses, ear muffs, and dust masks.
Shop Safety Gear on Amazon3. Your Starter Tool Kit
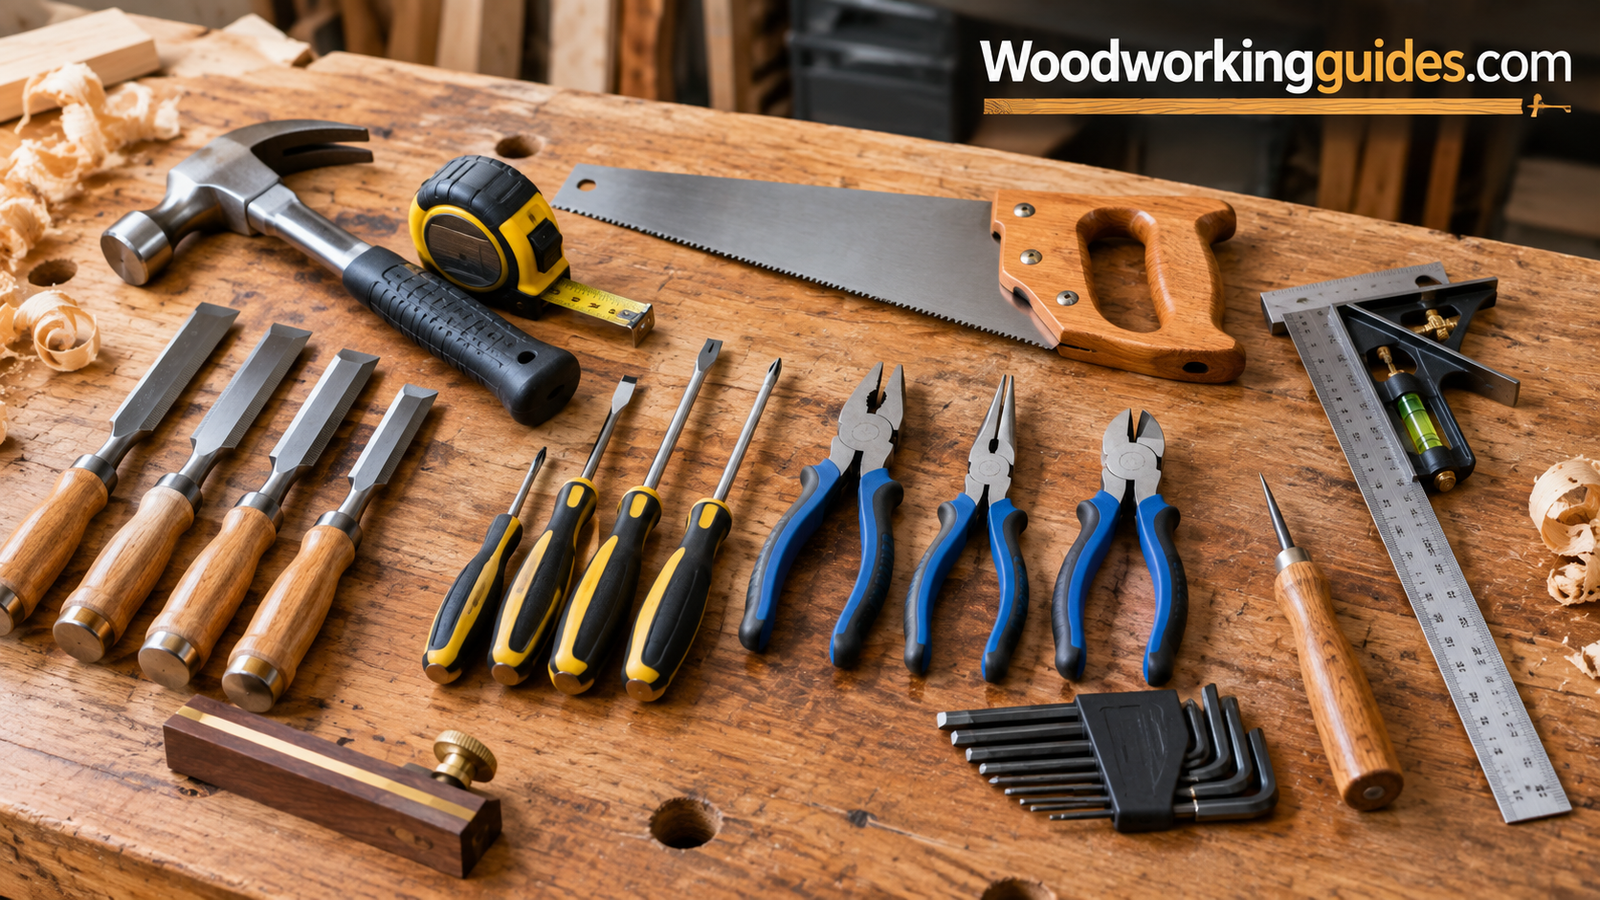
Resist the urge to buy everything. A small, decent kit will take you through your first ten projects. Our full list of the best woodworking tools goes deeper; here’s the short version.
| Tool | What it does | Priority |
|---|---|---|
| Tape measure & combination square | Accurate marking | Essential |
| Hand saw (or circular saw) | Straight cuts | Essential |
| Cordless drill | Holes and screws | Essential |
| Clamps (4+) | Hold work while glue dries | Essential |
| Chisel set | Clean joints | Soon |
| Random orbital sander | Smooth surfaces fast | Soon |
| Table saw or miter saw | Repeatable cuts | Later |
When you’re ready, we’ve reviewed the best cordless drills, chisel sets for beginners, and random orbital sanders. Thinking about stationary saws? Read how to choose a table saw and the best miter saws for a home shop first.
Measuring and Marking Tools
A good tape measure and a combination square are the quiet heroes of the shop. Buy a square that is actually square, which you can check by drawing a line, flipping the tool, and drawing a second line over it. A marking knife or mechanical pencil gives crisper lines than a flat carpenter’s pencil, and a small marking gauge helps you repeat dimensions without measuring every time.
Cutting Tools
For hand cutting, a Japanese-style pull saw is forgiving because it cuts on the pull stroke and stays straighter. A handheld circular saw or jigsaw covers many power cutting needs for a modest price. Resist buying a large stationary saw until you’ve outgrown these, and until you have space and a plan for dust collection.
Drilling, Fastening, and Clamping
A cordless drill is probably the most-used power tool you’ll own. Pair it with a set of twist bits, a countersink, and driver bits. For clamping, bar clamps and a few spring clamps are plenty to start. Most beginners underestimate how many clamps they need, and glue-ups with too few clamps lead to weak joints.
Buying Smart
Buy the best you can afford in the tools you touch every day, and go cheaper on the ones you’ll use rarely. Used tools from yard sales and online marketplaces can be bargains, particularly hand planes, chisels, and clamps. Just inspect for rust, cracks, and wobble before paying.
Sharpening Basics
A sharp tool is safer and more accurate than a dull one, because it cuts instead of crushing and needs less force. Chisels and plane irons benefit from a simple sharpening setup: a flat stone or diamond plate, a honing guide to hold the angle, and a bit of oil or water. Test sharpness by paring a thin shaving from end grain. If it leaves a clean, shiny surface, you’re ready to work.
Hand Planes and Sanding Blocks
A small block plane is a handy first plane for trimming edges, easing corners, and fitting parts. If planes feel intimidating, a sanding block with coarse paper does a decent job of the same tasks. Either way, having something to fine-tune a slightly oversized part is what turns near misses into tight joints.
Build your kit. Combination squares, clamps, and starter hand tools.
Shop Starter Tools on Amazon4. Hand Tools vs Power Tools
New woodworkers often agonize over this choice. The honest answer: start with whichever fits your space, budget, and noise tolerance, and add the other later. Our deeper comparison of hand tools vs power tools breaks it down.
Hand tool pros
- Quiet and low dust
- Cheaper to start
- Teaches fundamentals
Hand tool cons
- Slower
- Needs sharpening skill
- Tiring on big stock
Power tool pros
- Fast and repeatable
- Easier on hard woods
- Great for sheet goods
Power tool cons
- Loud and dusty
- Higher cost
- More safety risk
Cost and Learning Curve
Hand tools usually cost less up front, but they demand technique. Sharpening a chisel or tuning a plane takes practice before it feels natural. Power tools are quicker to produce a decent result on day one, though they bring a steeper safety responsibility and a higher bill, especially once you add dust collection and blades.
Space, Noise, and Neighbors
If you live in an apartment or share walls, hand tools are almost silent and produce shavings rather than clouds of fine dust. A garage or basement shop can handle the noise and mess of power tools, which suits people who want to build larger projects. Your living situation may decide this question for you.
The Hybrid Approach
Most experienced woodworkers end up in the middle. They use a power tool to do the heavy, repetitive work, such as breaking down plywood or drilling many holes, then switch to hand tools for fitting and fine finishing. A chisel pairing with a drill, or a hand saw backed up with a sander, is a practical combo that grows with you.
Whichever route you choose, learn the fundamentals of measuring, marking, and cutting by hand at least once. Understanding what a saw is doing makes you more confident, and more careful, when a machine takes over.
Not sure yet? A hand saw plus a drill is a perfect hybrid start.
Shop Hand Saws on Amazon5. Setting Up Your Space and Workbench
You need three things: a flat, solid surface, decent light, and somewhere to put sawdust. A garage corner, balcony, or basement bench all work. Our guide to setting up a beginner woodshop covers layout and storage.
Your workbench is the heart of the shop. Compare options in the best woodworking workbenches, or go compact with a portable workbench if space is tight.
The Work Surface
A solid, flat bench at a comfortable height, roughly at your hip or knuckle when standing, makes everything easier. It needs to be heavy or braced enough that it doesn’t wobble when you saw or chisel. If you can’t build or buy a full bench yet, a sturdy folding table with clamps can serve until you can.
Lighting and Power
Poor light hides pencil lines and finish defects. Position a bright, even light over the bench, ideally with a second source from the side to reveal flaws. Plan electrical needs too: a heavy-duty extension cord or a power strip with a breaker keeps tools safe and convenient, and you should never overload a single outlet.
Storage and Organization
Get tools off the floor. A pegboard, a wall cleat, or a simple rolling cart keeps your chisels, squares, and drills where you can find them. Store lumber flat or on edge with supports so it doesn’t warp, and keep it away from damp walls and concrete floors.
Dust Control on a Small Budget
You don’t need an industrial system. A shop vacuum connected to your sander, a small air filter, and regular sweeping handle most hobby needs. Cleaning up after each session also keeps you from digging through chaos next time.
Making Room for Your Projects
Plan your space around the largest thing you expect to build. A bench needs room to walk around it, and sheet goods need clear space to be cut down safely. If you only have a corner, think vertically with wall storage and fold-down surfaces. Even a small shop works well when each tool has a home and the floor stays free.
Temperature and Humidity
Wood absorbs and releases moisture, so a damp garage or an overheated room can cause boards to warp before you’ve finished a project. Let lumber sit in your workspace for several days before cutting so it acclimates. Keep tools dry too, with a light coat of wax or oil on cast iron surfaces to prevent rust.
Short on room? Foldable workbenches and clamp tables save space.
Shop Workbenches on Amazon6. Choosing Your Wood
For first projects, use forgiving, affordable lumber. Pine and poplar are soft and easy to cut. Oak and maple are tougher but more rewarding once you have sharper tools. Plywood is excellent for shelves and shop furniture.
| Wood | Hardness | Best for beginners because |
|---|---|---|
| Pine | Soft | Cheap, easy to cut, widely available |
| Poplar | Medium-soft | Stable, takes paint well |
| Red oak | Hard | Durable, classic grain |
| Plywood | Varies | Flat, stable, great for builds |
Planning a bench? See the best wood for a woodworking bench and the best plywood for a workbench top. Pick straight boards by sighting down the edge, and avoid twisted or cupped stock.
Softwoods vs Hardwoods
The terms come from botany, not hardness. Softwoods like pine, fir, and cedar come from conifers and are generally lighter, cheaper, and easier to cut. Hardwoods like oak, maple, walnut, and cherry come from broadleaf trees and tend to be denser, stronger, and more expensive. For a first project, softwood or an inexpensive hardwood such as poplar is the sensible choice.
Reading a Board
Look at the ends and faces before buying. Avoid boards that are bowed, twisted, or cupped, and watch for large knots, splits, and wet spots. Grain direction matters too: straight grain cuts and sands more cleanly than wild, swirling grain. Sight down the length of the board like you’re aiming a rifle, and reject anything that curves.
Nominal vs Actual Sizes
A common surprise is that a 2×4 isn’t actually two inches by four. Lumber is sold by its nominal size, and the real dimensions are smaller after milling. Always measure the board in your hand, and design your project around the real numbers instead of the label.
Plywood and Sheet Goods
Plywood is flat, stable, and efficient for shelves, cabinets, and shop furniture. Cabinet-grade plywood has attractive faces and fewer voids, while construction plywood is cheaper but rougher. Edges can look plain, so many builders cover them with solid wood strips or iron-on edge banding.
Where to Buy Lumber
Home centers are convenient and fine for pine, poplar, and plywood, though quality varies from board to board, so pick carefully. Local lumberyards offer wider selections and often better advice. Sawmills and reclaimed wood sellers can provide interesting stock at fair prices. Online retailers deliver small pieces, which is helpful for tiny projects or exotic species you can’t find nearby.
Moisture and Wood Movement
Wood swells across its width as humidity rises and shrinks as it falls, while its length barely changes. This is why solid tabletops are fixed with methods that allow movement, and why wide glued panels can crack if they’re locked rigidly in a frame. As a beginner, simply knowing this helps you avoid doors that stick and shelves that split after a season.
Practice stock. Pine boards and plywood sampler packs.
Shop Project Wood on Amazon7. Step 1: Measure and Mark Accurately
Most beginner errors start here. Measure twice, mark once, and use a sharp pencil. Mark a crisp “V” at each measurement and draw your line with a square, not by eye. Always cut on the waste side of the line.
Why Marking Matters So Much
A cut can only be as accurate as the line you drew. Even a one-millimeter mistake repeats itself across a project, leaving gaps and wobbly assemblies. Slow down here and you’ll save time later, because accurate parts fit together almost on their own.
Use a Reference Edge
Choose one straight face and one straight edge on each board as your references, and measure everything from them. Mark them with a pencil so you remember. This habit ensures matching parts line up, since every dimension comes from the same starting point rather than from random edges.
Account for the Blade
The saw removes a strip of wood called the kerf, usually around 2 to 3 millimeters. Cut on the waste side so your finished part keeps its full length. If you’re cutting several pieces from one board, add the kerf to each cut or you’ll end up short at the end.
Write It Down
Before cutting, make a simple cut list: part name, length, width, and quantity. Cross each item off as you go. Beginners who skip this step often cut the wrong piece or run out of wood halfway through a project.
Accuracy tools. Squares, marking gauges, and quality tape measures.
Shop Squares on Amazon8. Step 2: Cut Your Boards
Clamp the board so it can’t move, start the saw with short backward strokes to form a groove, then use long, steady strokes. Let the saw do the work. Keep your free hand well away from the blade path and support the offcut so it doesn’t tear.
Set Up for a Good Cut
Stability is everything. Clamp the board to the bench so the cut line hangs just past the edge, or use a sawhorse with the offcut supported. Stand so you can look straight down at the blade and the line. Relax your grip, because a death grip makes the saw wander.
Starting the Cut
Place the saw on the waste side, rest your thumb alongside the blade as a guide, and pull back lightly a few times to form a small groove. Then switch to smooth, full-length strokes at a steady rhythm. Don’t force the blade; if it binds, back off and check that the board isn’t pinching it.
Finishing Without Tear-Out
As you reach the end of the cut, slow down and support the falling piece so it doesn’t tear off a splinter. Marking the cut line with a knife first and taping the line with painter’s tape can also reduce splintering, especially on plywood.
Checking Your Work
After the cut, hold your square against the end. If it’s slightly off, don’t panic. A few passes with a sanding block or a hand plane can true the edge. Over time you’ll cut closer to the line and spend less time correcting.
Straight Cuts Without a Table Saw
You can get excellent straight cuts with a few simple aids. Clamp a straight board as a fence beside the line, then guide the saw along it. A speed square works well as a guide for crosscuts, and a circular saw with a clamped straightedge handles long plywood cuts. These jigs cost almost nothing and make you more accurate than freehand sawing.
Cutting Curves and Notches
A jigsaw or coping saw handles curves, and you can make interior cuts by drilling a hole inside the waste area first. Cut slowly and use a blade suited to the thickness of your wood. Rough curves can be smoothed afterward with a rasp or a sanding drum.
Clean cuts start with sharp blades.
Shop Saws on Amazon9. Step 3: Join the Pieces
Joinery is how separate boards become one object. As a beginner, start with butt joints reinforced by screws or pocket holes, then graduate to dados and mortise-and-tenon. For a full breakdown, see wood joinery tools explained. Drill pilot holes so the wood doesn’t split.
Start Simple
The simplest joint is a butt joint, where one board meets another and you reinforce it with screws or glue. It’s not the strongest, but it’s fine for shelves, boxes, and shop projects. Pocket-hole joinery is a beginner favorite because it creates strong joints quickly with a jig and a drill.
Next-Level Joints
Once you’re comfortable, try a dado, which is a groove that a shelf sits inside, or a rabbet, which is a notch along an edge. These offer more glue surface and alignment. Mortise-and-tenon joints are the traditional workhorse for tables and chairs, and learning them is a rite of passage.
Pilot Holes and Countersinking
Drilling a pilot hole slightly smaller than the screw’s thread prevents splitting, particularly near board ends. A countersink lets the screw head sit flush or slightly below the surface so you can fill it later. Using the right screw length is key: it should bite deeply into the second board without poking through.
Strength Through Glue
Good joinery relies on glue, not just fasteners. A glue joint on long grain is usually stronger than the wood itself, while end grain absorbs glue and bonds poorly. Design your joints so glue lands on side or face grain whenever you can.
Choosing the Right Fasteners
Wood screws grip better than nails for furniture and are easy to remove if you make a mistake. Use coarse-thread screws in softwood and finer threads in hardwood. Nails are quick for trim and framing, while dowels and biscuits provide alignment and added glue surface. Match the fastener to the load and look of the piece, and don’t mix mismatched hardware visibly.
Hiding Your Hardware
Plugs, filler, and pocket holes on the inside faces keep screws out of sight. Wood plugs cut from matching stock blend in nicely after sanding. If a screw must show, consider a clean, consistent pattern so it looks like a deliberate design choice rather than a repair.
Make joints easier. Pocket hole jigs and pilot bit sets.
Shop Joinery Aids on Amazon10. Step 4: Glue and Clamp
Dry-fit everything first. Spread an even layer of wood glue, press the parts together, and clamp until a thin bead squeezes out. Wipe it off with a damp cloth. Give the glue at least an hour of clamp time and a full day before heavy use.
Dry Fit Before You Glue
Assemble the project without glue first. Check that parts line up, clamps reach where you need them, and you know the order of assembly. Once glue is on, you have only a few minutes, so rehearsing removes panic and makes the final result cleaner.
Applying Glue and Clamping
Spread a thin, even layer on both mating surfaces, using a small brush or a scrap piece of wood. Too much glue makes a mess and doesn’t add strength. Apply even clamping pressure, and place scrap blocks beneath clamp jaws so they don’t dent the wood. A small bead of squeeze-out tells you there’s enough glue.
Check for Square
While the glue is still wet, measure the diagonals of a rectangular assembly. If both diagonals are equal, the frame is square. If not, gently adjust the clamps until they match. This ten-second check solves many wobbly-table problems before they happen.
Cleanup and Curing
Wipe squeeze-out with a damp rag, or let it firm up into a rubbery state and scrape it off. Dried glue blocks stain and finish, leaving pale patches. Let the glue cure fully before sanding or putting the piece to work.
Choosing the Right Glue
Standard yellow wood glue is the beginner’s best friend: strong, forgiving, and easy to clean. Waterproof versions suit outdoor or humid projects, while slower-setting glue gives more time to adjust complex assemblies. Polyurethane glue fills gaps but foams as it cures, so use it sparingly. Whatever you choose, check the expiration date, since old glue loses strength.
Fixing Gaps and Mistakes
Small gaps can be filled with a mixture of sawdust and glue, or with a color-matched filler. Larger problems may need you to cut a new part. Don’t try to hide a bad joint with excess glue, because it fails over time and shows through the finish.
Don’t skimp on clamps.
Shop Clamps & Glue on Amazon11. Steps 5 and 6: Sand and Finish
Step 5: Sand through the grits
Start at 80 or 120 grit to level surfaces, then move to 180 and 220. Always sand with the grain, and don’t skip grits. Wipe dust away before finishing.
Step 6: Apply a finish
Oil, wax, or polyurethane protects the wood and brings out the grain. Apply thin coats, let each dry fully, and lightly sand between coats for a smooth result.
Preparing Surfaces
Before sanding, scrape off any dried glue and fill nail or screw holes with wood filler. Sand flat surfaces first, then edges and corners, easing sharp edges slightly so they don’t chip or feel harsh in the hand. A light pass with a damp cloth raises the grain, which you then sand back for a smoother finish.
Choosing a Finish
Oil finishes soak in and give a natural, hand-rubbed look with easy repair. Polyurethane builds a harder, more water-resistant film, ideal for tabletops. Wax gives a soft sheen on low-wear pieces. Stain changes color, but test it on a scrap first, because pine in particular can turn blotchy.
Application Tips
Work in thin coats, wipe or brush along the grain, and avoid dust by cleaning the area first. Let each coat dry as directed, then lightly sand with very fine paper to knock down any nibs before the next coat. Patience pays off: three thin coats beat one thick one every time.
Finish Safety
Read the label for drying times, ventilation, and disposal guidance. Wear gloves, keep rags laid flat to dry outdoors, and keep finishes away from heat sources.
Smooth, protected results. Sandpaper assortments and beginner-friendly finishes.
Shop Finishing Supplies on Amazon12. Common Mistakes and Your Learning Path
- Buying too many tools too soon. Buy for the project in front of you.
- Skipping the dry fit. Surprises under glue are expensive.
- Rushing finishing. Thick coats run and bubble.
- Ignoring wood movement. Wood expands and shrinks with humidity, so allow for it.
A sensible path: build a cutting board or simple shelf, then a stool, then a workbench from workbench plans. Each project teaches one new skill without overwhelming you.
More Mistakes to Dodge
Beginners often use dull blades and bits, which burn wood and tempt you to push harder. They also forget to check for hidden nails in reclaimed lumber, skip test pieces when staining, or build to plans without confirming the real board thickness. Each of these is easy to avoid once you know to look for it.
A Sensible Project Ladder
Begin with a cutting board or a simple box to practice measuring and gluing. Move to a small shelf, which adds screws and squareness. Then try a step stool or a bench, which introduces stronger joinery and finishing. After that, a workbench is a satisfying milestone that improves every project that follows.
Keep Learning
Watch tutorials, but don’t only watch. Build alongside them. Visit local woodworking clubs, community workshops, or library tool programs where experienced people share tips and sometimes equipment. Asking questions is a sign of progress, not weakness, and most woodworkers love helping a newcomer.
Track Your Progress
Photograph each finished project and note what you’d change. In six months, you’ll see how far you’ve come, and the list of lessons will point you toward the next skill worth learning.
Building Good Shop Habits
End every session by sweeping up, putting tools away, and unplugging anything that was in use. A tidy shop makes the next session faster and safer, and you’ll notice dull blades or worn clamps before they cause trouble. Make it a habit to inspect your tools once a month for cracks, loose handles, and frayed cords.
Joining the Community
Online forums, local clubs, and maker spaces are full of people who share plans, offer feedback, and lend a hand when something goes wrong. Show photos of your projects and ask what you could improve. Feedback from experienced builders speeds up your learning more than almost anything you can buy.
Ready for project one? Pick up a beginner plan book.
Shop Project Plans on AmazonFrequently Asked Questions
Can I really start woodworking with no experience?
Yes. Start with a small project, basic hand tools, and good safety habits. Skills build quickly with practice.
How much does it cost to start?
A basic kit of a saw, square, drill, clamps, and safety gear can be assembled affordably, and you can upgrade gradually.
What is the easiest first project?
A cutting board, simple shelf, or small step stool teaches measuring, cutting, joining, and finishing.
What is the best wood for beginners?
Pine and poplar are inexpensive and easy to work. Move to oak or maple as your tools and confidence improve.
Do I need a table saw?
No. A hand saw or circular saw handles most beginner work. A table saw is a later upgrade.
Hand tools or power tools first?
Either works. Many beginners combine a hand saw with a cordless drill.
Where should I set up my shop?
Any space with a sturdy surface, good lighting, and ventilation, such as a garage corner or basement.
How do I avoid injuries?
Wear eye and ear protection, clamp your work, keep blades sharp, and stop when tired.
Why do my cuts come out crooked?
Usually from unclear marks or rushing. Use a square, a sharp pencil, and slow, steady strokes.
How long should glue dry?
Clamp for about an hour and wait roughly a day before stressing the joint.
What finish should a beginner use?
Penetrating oil or wipe-on polyurethane is forgiving and easy to apply in thin coats.
Conclusion: Make Your First Cut This Week
You don’t need a perfect shop or fancy tools. You need a plan, a few reliable basics, and the willingness to make small mistakes. Pick a simple project, work through each step, and enjoy the first time something you built holds together.
Looking back, the path is simple: stay safe, gather a modest kit, choose forgiving wood, and practice the six steps until they feel natural. Every skilled woodworker once struggled with the same crooked cuts and gappy joints. What separated them was that they kept building. Choose a small project this week, set aside a few hours, and enjoy the process as much as the result.
Start building today. Grab your starter essentials in one place.
Shop Woodworking Essentials on Amazon