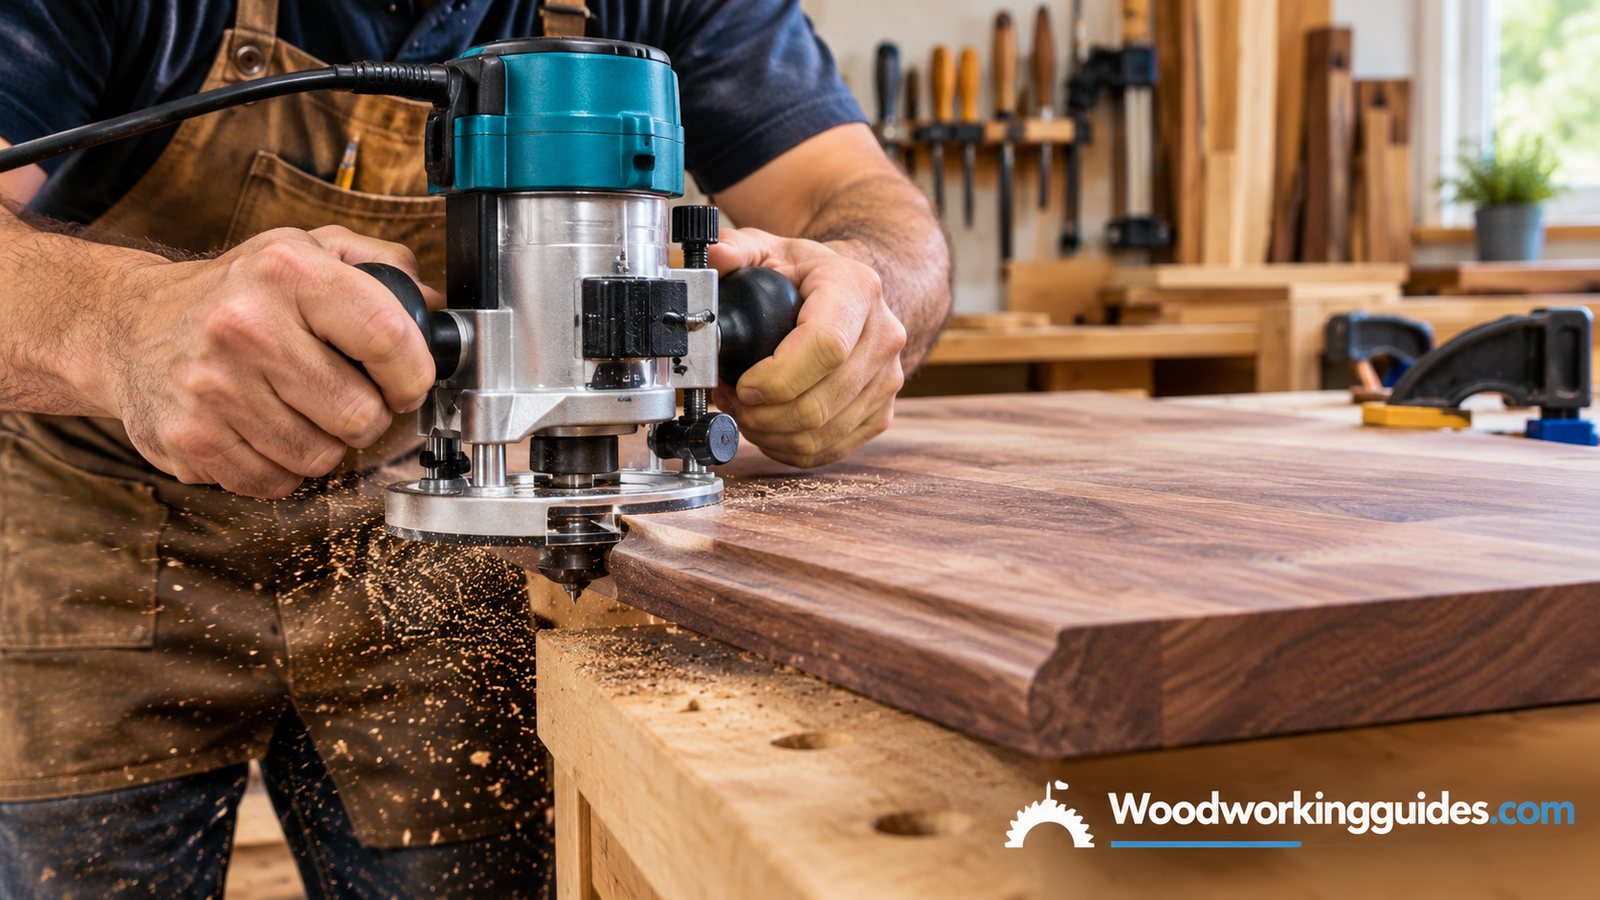
What Is a Woodworking Router Used For? A Complete Guide to Edges, Joints, Grooves, and More

1. What a Woodworking Router Actually Is
A woodworking router is a power tool that spins a cutting bit at very high speed to hollow out, shape, or trim wood. Think of it as a precision carving tool you can steer by hand or guide with a fence, template, or table. Where a saw cuts all the way through, a router removes material to a controlled depth, which is why it shows up in almost every kind of shop.
If you are still getting oriented in the craft, our primer on what woodworking is and our guide to starting with no experience are good companions to this article.
A Brief Look at Where Routers Came From
Hand-held routers grew out of older hand planes, specifically the router plane, a tool that levels the bottom of a recess. Once electric motors became compact enough to hold, the idea of spinning a cutter at high speed took over. Today the electric version is so common that many woodworkers say if they could own only one power tool besides a saw and a drill, it would be a router.
Why Every Shop Seems to Have One
Part of the appeal is range. The same machine can finish the edge of a coffee table, cut the slots for a bookcase, and shape the profile on a cabinet door. Another part is repeatability. Once a bit, depth, and guide are set, the tenth cut matches the first. That consistency is what separates hobby-looking work from pieces that look built by a professional.
Who Benefits Most
Beginners gain a way to add polish to simple projects. Intermediate woodworkers use it to move into real joinery and furniture. Professionals lean on it for production work like cabinet doors, moldings, and signs. Even a carpenter trimming a laminate countertop or fitting a door will reach for a compact router before anything else.
In short, the router bridges rough construction and refined craftsmanship. The sections below walk through each major use so you can decide which ones matter for your own projects.
Shopping for your first router? Browse popular models.
Shop Routers on Amazon2. How a Router Works
A motor spins a collet, which grips the shank of a bit. Most routers run somewhere between roughly 8,000 and 25,000 RPM. You set the bit depth, then move the tool (or the workpiece) so the spinning bit shaves away wood. Because the bit rotates clockwise as viewed from above, the direction you feed matters: pushing against the rotation gives control, while feeding with it can grab and run away.
The bit itself defines the result. A straight bit makes grooves, a roundover bit softens corners, and a dovetail bit cuts interlocking joints. Changing the bit changes the job, which is what makes the router so versatile.
The Main Parts
Every router shares a few basic components: the motor housing, the base that rides on the wood, the collet and collet nut that hold the bit, a depth adjustment system, and handles or knobs for control. Better models add variable speed dials, soft-start motors that reduce the jolt at power-up, and LED lights that illuminate the cut.
Why Speed Matters
Large bits have more surface moving at the outer edge, so they need slower speeds. A big panel-raising bit spun at full speed can be dangerous and burn the wood. Small straight bits can run fast. Variable speed lets you match RPM to bit diameter, which improves cut quality and extends bit life.
Feed Rate and Cut Quality
If you move too slowly, the bit rubs and leaves burn marks, especially in cherry and maple. If you move too fast, the cut gets rough and the motor bogs down. The sweet spot is a steady pace that produces fine, curled chips rather than dust or chunks. You will learn the sound and feel of a good cut with a little practice.
Collets and Shank Sizes
A collet is a precision sleeve that grips the bit. Keep it clean, and never tighten it without a bit installed. Insert the shank most of the way, then back it out a little before tightening, so the bit is not bottomed out in the collet. This simple habit prevents bits from slipping during a cut.
Bits are where the router gets its range.
Shop Router Bit Sets3. Shaping and Profiling Edges
The most familiar use is edge work. Run a roundover bit along a tabletop and sharp corners become comfortable and durable. Swap in a chamfer, ogee, cove, or bead bit and the same plain board gains character. Bearing-guided bits ride along the edge so the cut stays consistent, even on a long board.
Edge profiles do more than look good. Softened edges resist chipping, feel better in the hand, and hold finish more evenly than razor-sharp corners.
| Bit Type | What It Does | Typical Project |
|---|---|---|
| Roundover | Softens a square edge into a curve | Tabletops, shelves, cutting boards |
| Chamfer | Cuts a flat angled bevel | Frames, boxes, modern furniture |
| Ogee / Cove | Decorative S-curves or concave cuts | Cabinet doors, moldings |
| Rabbeting | Steps the edge for a lap joint | Cabinet backs, drawers |
Choosing the Right Profile
Match the profile to the piece. A generous roundover suits a child’s table or a bench seat where comfort matters. A small eighth-inch roundover reads as clean and modern. Chamfers feel crisp and architectural. Ogees and coves belong on traditional furniture, mantels, and trim. When in doubt, test on a scrap of the same species before touching your finished project.
Handling Tear-Out on End Grain
End grain tends to splinter as the bit exits. The fix is to rout the end grain first, then the long edges, so the long-grain pass cleans up any chipping. Another approach is to clamp a scrap block at the exit point as a backer. Both methods leave crisp corners.
Multiple Passes for Large Profiles
Deep or complex profiles put a lot of load on the bit. Take the cut in two or three increments, raising the bit slightly each time. The final pass should be light, because it determines the surface finish. A light last pass removes only a hair of material and leaves a surface that needs very little sanding.
Edge Work Around Curves
Bearing-guided bits follow gentle curves well, which makes them perfect for round tabletops and rounded shelves. Keep the base flat and move at a steady pace. Stopping in the middle of a curve can leave a dwell mark that is hard to sand out.
Testing Before You Commit
Keep a scrap box of offcuts from each project. Before profiling a finished piece, run the same bit on a matching scrap and look at the result under good light. Check how the profile reads from a few feet away, since details that look bold up close can disappear on a large table. This small habit saves many ruined edges and teaches you how different species respond to the same bit.
Roundover and chamfer sets cover most edge work.
Shop Edge Bits4. Cutting Grooves, Dados, and Rabbets
A groove runs with the grain, a dado runs across it, and a rabbet is a step cut along an edge. All three are staples of cabinet and shelf construction, and a router with a straight bit and an edge guide produces them cleanly. Plywood shelving, drawer bottoms, and cabinet backs all depend on these cuts.
For wide dados, make several passes, increasing depth a little each time. It is slower than one heavy cut, but it protects the bit, the motor, and your finish quality.
Guiding the Cut
There are several ways to keep a groove straight. An edge guide attaches to the router base and rides along the board’s edge, which works for grooves near the edge. A clamped straightedge works anywhere on a panel: measure the offset between the bit and the base edge, then clamp a guide that distance from your line. For repeated cuts, a simple shop-made T-square jig gives dependable results.
Undersized Plywood Problems
Modern plywood is often slightly thinner than its labeled size, so a standard three-quarter-inch bit may leave a loose joint. Many woodworkers use undersize bits made for plywood, or make the dado in two passes with a smaller bit to dial in the exact fit. Always test on an offcut of the actual plywood you are using.
Stopped Grooves and Hidden Joints
A stopped groove ends before reaching the edge of the board, so it stays invisible from the front. A plunge router is ideal for this: set stop blocks, plunge in, rout to the end, and lift out. Drawer bottoms, panel doors, and shelf supports often use this approach.
Rabbets for Backs and Drawers
A rabbeting bit with interchangeable bearings cuts steps of different widths. Cabinet backs sit neatly in rabbets, and drawer fronts and sides often join with them. Pair that with glue and a few brads, and you have a quick, sturdy construction method.
A good straight bit set makes clean dados.
Shop Straight Bits5. Making Strong Joinery
Routers cut some of the strongest joints in woodworking: dovetails, mortise-and-tenon, box joints, and tongue-and-groove. With the right jig, a plunge router can hollow a mortise in minutes, and a dovetail jig produces repeatable drawer corners that would take much longer by hand. For a broader look at the options, see our rundown of wood joinery tools explained.
The router also pairs well with the table saw and jointer: those machines prepare flat, square stock, and the router adds the joint details.
Dovetails with a Jig
Dovetails have long symbolized good craftsmanship. A router dovetail jig clamps the drawer front and side, then a template guides the bit through both pieces at once. The result is a tight, interlocking joint that resists being pulled apart. Fixed-spacing jigs are simple, while variable-spaced versions let you choose the look.
Mortise-and-Tenon Made Easier
A plunge router with an edge guide or a dedicated mortising jig removes the waste from a mortise quickly. You can then cut the matching tenon on a router table or with a saw. Chair frames, table aprons, and doors all depend on this joint, and the router saves hours of chisel work.
Box Joints and Finger Joints
On a router table with an indexing jig, a straight bit cuts evenly spaced fingers that interlock. Box joints are strong and attractive, and they suit toolboxes, storage chests, and small cases.
Tongue-and-Groove and Edge Joints
Matched tongue-and-groove bits join boards edge to edge for flooring, paneling, and tabletops. Rail-and-stile sets cut the frame joints for cabinet doors. These sets are sold as pairs, and the fit is usually precise enough to assemble with glue alone.
Fitting Joints Properly
A good joint should slide together with hand pressure, not a mallet. If it is too tight, the glue squeezes out and the wood can split. If it is too loose, the joint loses strength. Make tiny adjustments to bit height or fence position, test on scrap, and keep a record of the settings that worked so you can repeat them. Sharp bits and a clean setup matter just as much as the jig itself.
Jigs turn a router into a joinery machine.
Shop Joinery Jigs6. Template Routing and Duplicating Shapes
Need six identical table legs or a curved chair part? Make one template from MDF or plywood, attach it to your workpiece, and follow it with a flush-trim or pattern bit. The bearing rides the template while the cutter trims the wood to match. This is how shops make repeatable curves, cutouts, and sign letters.
Roughing close to the line with a jigsaw first leaves the router only a thin sliver to remove, which gives a smoother result and a happier motor.
Building a Good Template
A template is only as accurate as its edges. Cut it from stable material such as MDF or Baltic birch plywood, sand the edges smooth, and check curves by eye before using it. Any bump in the template gets copied onto every piece you make from it.
Flush-Trim vs Pattern Bits
A flush-trim bit has its bearing at the tip, so it follows a template that sits on top of the workpiece. A pattern bit has the bearing at the shank end, which works when the template is underneath. Both do the same job, so choose based on how your piece is clamped and which side is easiest to reach.
Trimming Edge Banding and Laminate
The same bits are also handy for trimming. After gluing solid-wood edging to plywood, a flush-trim bit levels the overhang in one pass. Laminate countertops get the same treatment with a trim router and a carbide laminate bit.
Sign Making and Letters
With a template guide bushing and a letter template set, you can carve names, house numbers, and shop signs. Practice on scrap first, because the bushing offset affects the finished letter size.
Flush-trim and pattern bits are template essentials.
Shop Flush-Trim Bits7. Flattening Slabs and Surfacing Wood
A router riding on a sled can flatten wide slabs that will not fit through a planer. Large-diameter surfacing bits skim the top in overlapping passes, leaving a surface ready for sanding. Workbench builders use the same method to level a bench top. If that is your next project, our workbench guide and portable workbench picks cover the surfaces you will be working on.
Follow the router with a good random orbital sander to clean up the tool marks.
Building a Router Sled
A router sled is a simple frame with two parallel rails and a carriage that slides across them. The rails sit on either side of the slab, set level with each other, and the router travels back and forth while you lower the bit a little at a time. Because the rails define the plane, the finished surface is flat even if the slab started warped.
Working in Passes
Start by flattening one face, then flip the slab and flatten the other. Take shallow passes, overlap each one slightly, and clear chips often so they do not build up under the bit. Hardwood slabs take patience, but the result is a smooth, flat surface that is ready for sanding.
Other Surfacing Jobs
The same idea works for flattening glued-up panels, thinning stock that is too thick, and leveling the tops of workbench legs so they sit evenly. Some woodworkers also use a sled to cut shallow recesses, such as a bowl-shaped dish in a board.
Dust and Noise
Surfacing throws a lot of chips and makes a lot of noise. Use hearing protection, a dust mask, and ideally a vacuum or dust shroud. A tidy setup keeps the work enjoyable and the shop clean.
Surfacing bits flatten slabs without a big planer.
Shop Surfacing Bits8. Inlay, Lettering, and Decorative Work
Routers excel at the decorative side of the craft. Using an inlay kit, you can cut a recess and a matching insert in contrasting wood for banding, stars, or monograms. Veining and V-groove bits carve lettering and signs. With a template guide and a steady hand, you can add personality to a plain box lid or a gift cutting board.
How Inlay Works
An inlay kit includes a guide bushing and a small bit. You cut the recess using a template, then cut the insert using the same template with the bushing removed or a different setup, so the two pieces fit like a puzzle. A little glue and a light sanding finish the job.
String and Banding Inlays
Thin strips of contrasting wood, called stringing, add a clean line around a tabletop or box lid. A narrow straight bit cuts a groove, and the strip is glued in and leveled. It is a small touch that makes a piece look custom.
Carving and Fluting
Core box bits cut rounded grooves for fluting on columns and legs, while V-groove bits make crisp lines. Combine them with a simple jig, and you can add repeating decorative details that look hand-carved.
Personal Touches
A routed name on a cutting board, a border around a picture frame, or a simple pattern on a shelf edge can turn a basic project into a gift. Start with scrap, keep the design simple, and build confidence before moving to your best wood.
Inlay kits are a fun step beyond basics.
Shop Inlay Kits9. Mortising for Hinges and Hardware
Hinge mortises, lock plates, and recessed hardware all need shallow, precisely sized pockets. A trim router with a hinge-mortising template cuts them quickly and consistently, which is far easier than chiseling each one. Many door and cabinet installers keep a small router just for this.
Hinge Mortises
A hinge fits best when it sits flush with the surface. A hinge template clamps to the door edge, and a bearing-guided bit or template guide cuts a shallow pocket to the exact depth of the hinge leaf. The corners come out rounded, so you either square them with a chisel or buy round-corner hinges.
Lock Plates and Latches
The same approach works for strike plates, lock faceplates, and drawer pulls that need a recess. Set the bit depth carefully, test on scrap, and cut a hair shallow, since you can always deepen a pocket but cannot fill one back in.
Why a Trim Router Shines Here
Compact routers are light enough to control with one hand, and their small bases fit on narrow door edges. That makes them a favorite for installers and cabinetmakers who need accuracy without wrestling a heavy tool.
Recesses for Magnets and Inserts
Shallow pockets also hold magnets, brass inserts, and small electronics. A small straight bit and a template make neat, consistent recesses that hide hardware cleanly.
A hinge mortising kit saves a lot of chiseling.
Shop Hinge Templates10. Fixed-Base, Plunge, and Trim Routers Compared
Different tasks favor different bodies. Here is a quick comparison.
| Type | Best For | Power | Weight |
|---|---|---|---|
| Fixed-base | Edge profiling, router tables | Medium to high | Moderate |
| Plunge | Mortises, stopped grooves, inlay | Medium to high | Heavier |
| Compact / Trim | Laminate, small roundovers, hinges | Low to medium | Light |
| Combo kit | Beginners wanting both bases | Medium to high | Moderate |
Pros of Owning a Router
- Enormous versatility from one tool
- Repeatable, professional results
- Works with jigs and tables
- Relatively affordable
Cons to Consider
- Loud and dusty
- Learning curve for safe feed direction
- Bits add up in cost
- Tear-out if cuts are too deep
For tested recommendations, check our top wood router picks.
Choosing Power and Size
Mid-size routers in the roughly two-horsepower range handle most shop tasks, including large bits. Smaller trim routers are great for light work but struggle with big profiles. If you plan to mount a router in a table, look for a model that accepts half-inch bits and has a strong, steady motor.
Comfort and Controls
Handle shape, switch placement, and depth adjustment matter more than they look on paper. A router you can adjust smoothly and hold comfortably will get used more often. If possible, hold a few in a store before buying.
Corded vs Cordless
Cordless trim routers have improved and are convenient for hinges and small edge work. For long sessions or heavy cuts, corded models still offer steadier power. Many woodworkers end up with one of each.
Bases and Accessories
Dust collection shrouds, edge guides, and clear subbases all make routing easier. A clear subbase lets you see the bit and the cut line, which helps with accuracy.
Matching a Router to Your Projects
Think about what you will build most. If you are mostly making shelves, boxes, and small furniture, a mid-size combo kit covers nearly everything. If you plan to build cabinets and doors, put more weight on power and a good router table. If you mostly hang doors and trim laminate, a compact router may be all you need. Matching the tool to your work avoids both overspending and frustration.
Combo kits are a great value for beginners.
Shop Router Combo Kits11. Using a Router Table
Mount a router upside down in a table and it becomes a small shaper. The workpiece moves across the bit, guided by a fence, which makes small parts safer and more controllable than holding a handheld tool. Cabinet door profiles, raised panels, and edge-banded stock are all easier on a table. It also compares well with other stationary tools, as discussed in our hand tools vs power tools breakdown, and sits nicely beside a table saw in a growing shop. If you are unsure which saw to choose, read how to choose a table saw.
Fences, Featherboards, and Push Blocks
A router table is only as safe as its setup. A straight fence guides the stock, featherboards hold it snug against the table and fence, and push blocks keep your hands away from the bit. Take the time to set these up, and the cut becomes smooth and predictable.
Cutting Raised Panels and Cabinet Doors
Rail-and-stile bit sets cut the frame of a cabinet door, and a panel-raising bit shapes the center panel. Take multiple passes and cut across the end grain first. The finished doors look like they came from a cabinet shop.
Small Parts Made Safe
Rounding the edges of a tiny piece by hand is awkward and risky. On a table, the part rides against the fence and a pushing aid, which keeps your fingers clear and the cut consistent.
Dust Collection
Router tables produce heavy chips. A fence with a dust port and a shop vacuum captures most of them. Cleaner air and a cleaner table also make it easier to see your work.
A router table adds control and dust collection.
Shop Router Tables12. Safety Basics and Choosing Your First Router
Wear safety glasses, hearing protection, and a dust mask. Clamp your work, keep both hands on the tool, let the bit reach full speed before cutting, and take shallow passes. Unplug the router before changing bits.
When choosing, look for variable speed, a comfortable grip, easy depth adjustment, and a collet that accepts both quarter-inch and half-inch shanks. Half-inch is stiffer and cuts smoother. Set the router up in a tidy space, as covered in setting up a beginner woodshop, and round out your kit with our best woodworking tools and a cordless drill. A sturdy woodworking apron is a nice shop-day extra too.
Before You Start Each Cut
Run through a quick checklist: the bit is sharp and clean, the collet is tight, the work is clamped, the path is clear, and the power cord is out of the way. Taking ten seconds for this habit prevents most routing accidents.
Feed Direction and Climb Cuts
Always feed against the rotation of the bit. A climb cut, where you feed with the rotation, can reduce tear-out in tricky grain but grabs easily, so it is best left to experienced users taking very light passes.
Looking After Your Bits
Pitch and resin build up on bits and cause burning. Clean them with a bit cleaner and a brush, and store them in a case so the edges do not knock together. Sharp, clean bits cut cleaner and safer.
Your First Purchase
A combo kit with fixed and plunge bases, a starter set of straight, roundover, and chamfer bits, and an edge guide covers most early projects. Add specialty bits only when a project calls for them, and your collection will grow naturally with your skills.
Building Good Habits Early
Routing rewards patience. Set up carefully, take light passes, and stop if something sounds or feels wrong. Keep the shop clean so chips never pile up under your work, and keep bits stored properly so you always reach for a sharp one. These habits do more for your results and safety than any single accessory, and they make every future project smoother.
Safety gear and a quality router go hand in hand.
Shop Shop-Safety GearFrequently Asked Questions
What is a woodworking router used for?
A woodworking router shapes and removes wood to a controlled depth. Common uses include rounding or profiling edges, cutting grooves, dados, and rabbets, making joints such as dovetails and mortise-and-tenon, duplicating shapes with templates, flattening slabs, and recessing hinges and hardware. Because the bit does the defining work, one tool can handle dozens of different jobs simply by changing bits, guides, or jigs.
Is a router worth buying for a beginner?
Yes, for most people. A router adds polish to simple projects right away, since even a basic roundover makes a plain board look finished. It also opens the door to joinery and decorative work as your skills grow. A combo kit with fixed and plunge bases is a smart starting point, because it covers both edge work and cuts that start in the middle of a board without a second purchase.
What is the difference between a plunge and fixed-base router?
A fixed-base router holds the bit at a set depth, so you adjust it before the cut and then move across the wood. A plunge router lets you lower the spinning bit into the wood during the cut, using spring-loaded posts. Fixed bases suit edge profiling and router tables. Plunge bases suit mortises, stopped grooves, inlay, and any cut that begins away from an edge.
Can a router cut through wood like a saw?
Technically it can cut through thin stock with a straight bit, and people do this when making template cutouts. But it is slower and rougher than a saw for general cutting, and it burns bits quickly. Use a saw to break down stock, and use the router for what it does best: shaping, grooving, jointing, and trimming to a line.
What size router bit shank is best?
Half-inch shanks are generally better because they are stiffer, vibrate less, and leave smoother cuts, especially with large bits. Quarter-inch shanks are common on compact routers and are fine for small profiles and light trimming. If your router has interchangeable collets, buy half-inch bits for big or deep cuts and keep quarter-inch bits for delicate work.
Do I need a router table?
Not at first. Many woodworkers handle years of projects with a handheld router alone. A table becomes valuable when you routinely shape small parts, cut cabinet door profiles, or need identical cuts on many pieces. It also improves dust collection and safety by holding the router steady while you guide the wood past the bit with a fence and push blocks.
Can a router make dovetail joints?
Yes. With a dovetail bit and a jig, a router cuts strong interlocking joints that look great on drawers and boxes. Fixed-spacing jigs are simple and quick. Variable jigs give you control over spacing and appearance, though they take more setup time. Practice on scrap first, because small adjustments to bit depth change how tightly the joint fits.
How deep should I cut in one pass?
As a general guide, shallow passes work best, often around an eighth of an inch or less in hardwood and a bit deeper in softwood. Smaller bits and harder woods call for lighter cuts. Taking several light passes protects the bit, reduces burning, and gives a cleaner surface. A very light final pass improves the finish and often saves sanding time.
Which direction should I move a handheld router?
Feed against the rotation of the bit. For an outside edge, that usually means moving the router counterclockwise around the piece. For an inside edge, such as a cutout, it is the opposite. Feeding in the correct direction gives you control and prevents the router from grabbing and pulling itself along the work.
Can I use a router on plywood?
Yes. Plywood is a common material for routing, especially for dados, rabbets, and template work. Use sharp carbide bits, make shallow passes, and maintain a steady feed rate to reduce chipping. Placing masking tape along the cut line or using a backer board can further limit splintering on the face veneer.
How do I prevent tear-out with a router?
Start with a sharp bit and take light passes. Rout end grain first so long-grain passes clean up any chipping, or clamp a scrap backer at the exit point. Climb-cutting a very shallow first pass can also help in tricky grain, though it should be done carefully. Matching feed speed and bit speed to the wood species makes a noticeable difference too.
How loud is a router, and do I need hearing protection?
Routers are among the louder tools in a shop, and prolonged exposure can damage hearing. Wear ear protection every time, along with safety glasses and a dust mask. Using a dust collection setup helps reduce airborne chips, while earmuffs or well-fitted earplugs make longer sessions far more comfortable.
Final Thoughts
A router is a shape-maker, joint-cutter, and finishing tool rolled into one. Whether you are rounding over a tabletop, cutting dados for a bookcase, or hollowing a hinge mortise, it gives you speed and repeatability that hand tools struggle to match. Start with a solid combo kit, learn the feed direction, and add bits as your projects demand them.
If you are just getting started, pick one small project that uses a single bit, such as a cutting board with a roundover edge or a simple shelf with a dado. Finish it, notice what you would do differently, and move to the next one. Each project adds a new technique, and before long the router goes from an intimidating machine to the tool you reach for first. The learning curve is gentler than it looks, and the payoff in cleaner joints, nicer edges, and more ambitious builds is well worth the early practice.
Ready to pick your router? See what is popular right now.
Find Your Router on Amazon