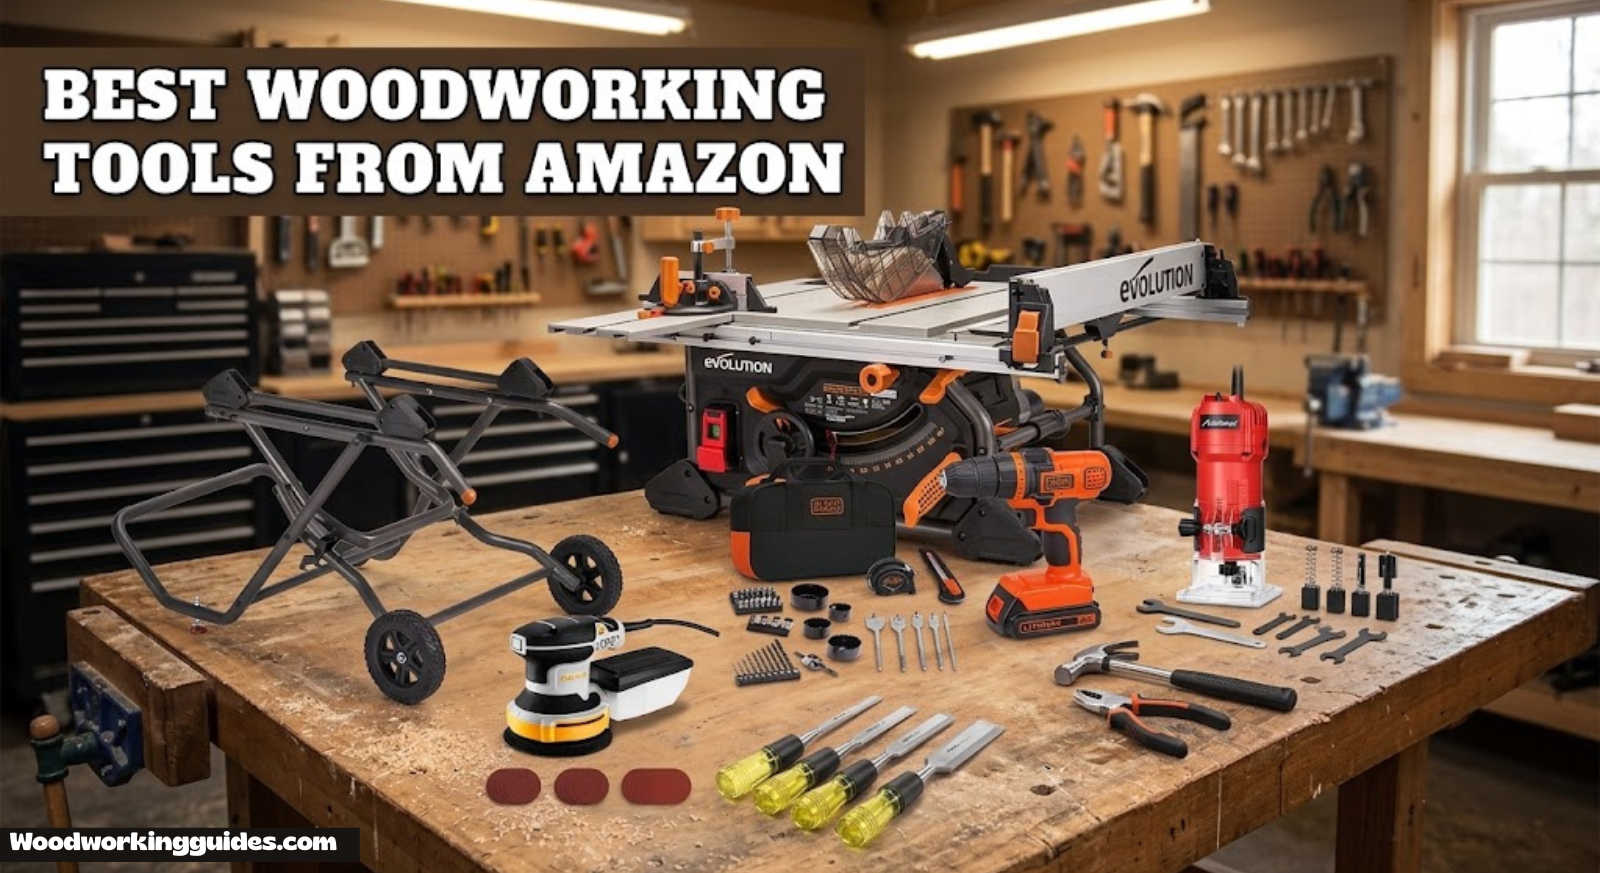
12 Best Woodworking Tools From Amazon (Tested & Reviewed)
A no-nonsense buying guide to the power tools, hand tools, and shop accessories worth adding to your bench this season.
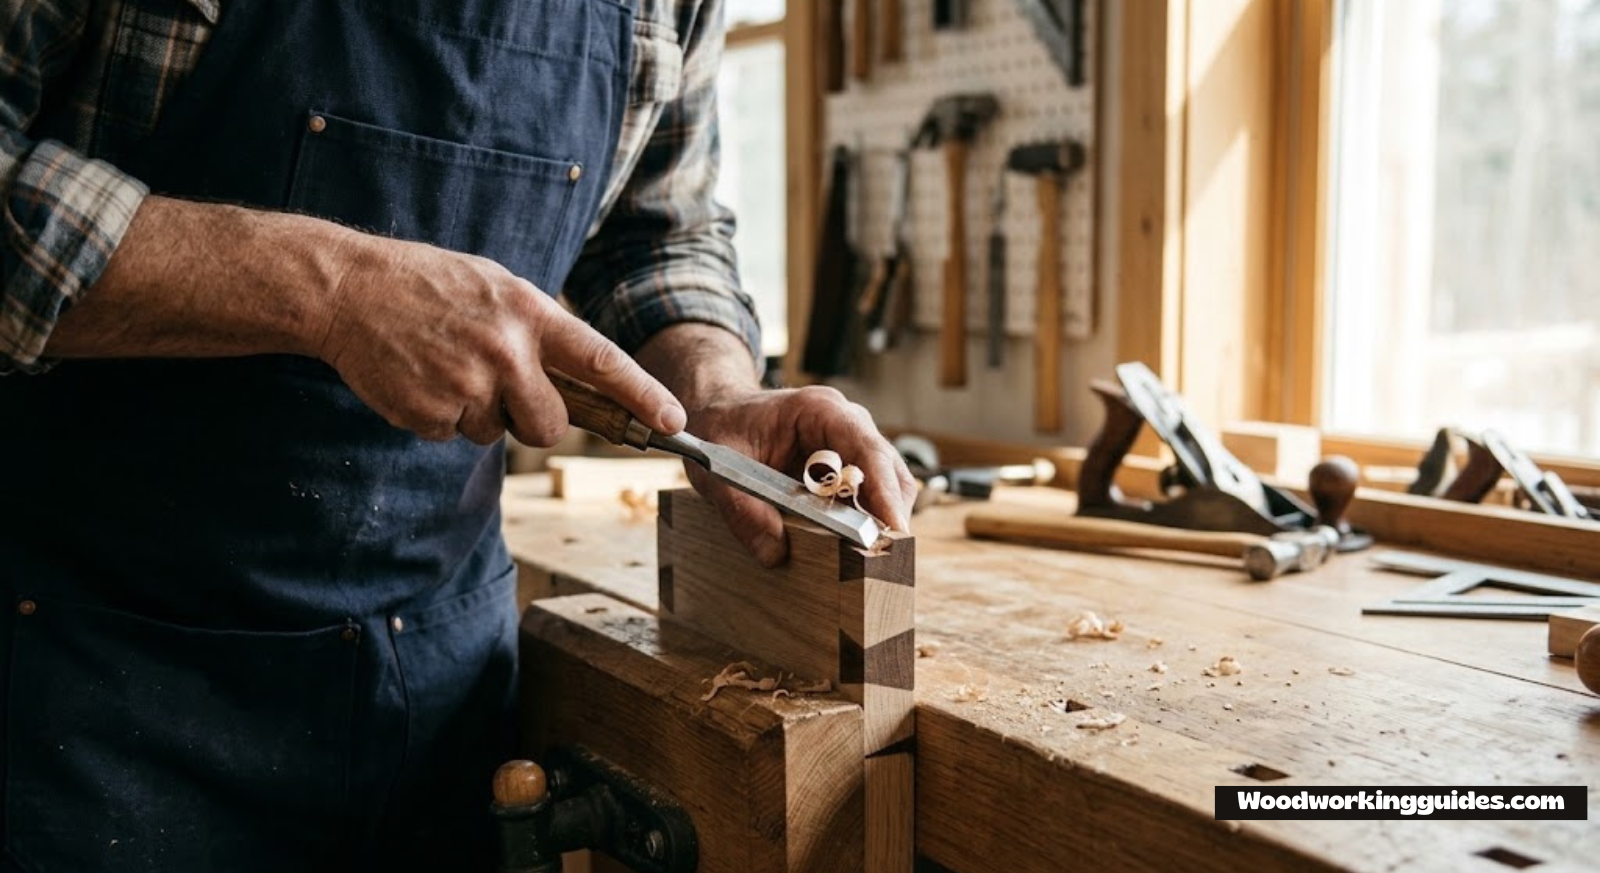
Why Your Tool Lineup Matters More Than Your Wood Choice
Ask any experienced woodworker what separates a frustrating weekend in the garage from a genuinely satisfying build, and the answer almost always comes back to tools — not talent, not the price of the lumber, and not even the plans you’re following. The right tool, matched to the right task, turns a fussy joint into a five-minute job. The wrong one turns that same joint into an afternoon of regret, wasted stock, and a workbench covered in sawdust and frustration.
Amazon has become one of the biggest marketplaces for woodworking gear, and that’s both a blessing and a curse. On one hand, you get instant access to nearly every major brand — DeWalt, Bosch, Makita, WEN, IRWIN, Milwaukee — often at competitive prices with fast shipping. On the other hand, the sheer volume of options makes it genuinely hard to tell a well-engineered tool from a flashy listing with great photography and mediocre performance.
That’s exactly the gap this guide is built to close. We’ve pulled together twelve tools that consistently show up in serious woodworking shops, cross-referenced them against real buyer feedback, and organized everything so you can quickly figure out what belongs in your shop first, second, and last. Whether you’re outfitting a garage workshop from scratch or filling a specific gap in your existing kit, you’ll find a clear recommendation here.
If you’re just getting your space together, it’s worth pairing this list with a broader look at setting up a beginner woodshop, since tool selection and shop layout tend to go hand in hand. And if you’re torn on whether to lean into power tools or build a more traditional hand-tool kit, our comparison of hand tools vs. power tools for woodworking is a useful companion read before you start spending.
There’s also a psychological side to this that doesn’t get talked about enough. A poorly matched tool doesn’t just slow you down physically — it erodes confidence. New woodworkers who struggle with a cheap, chattering router bit or a miter saw that can’t hold a consistent angle often assume the problem is their own skill level, when in reality the tool simply isn’t capable of the precision the task demands. Swap in a quality tool and the same person often produces dramatically better results within a single project. That’s not a coincidence; it’s the direct result of removing a mechanical obstacle that had nothing to do with technique.
It’s also worth acknowledging that “best” doesn’t mean “most expensive.” Some of the tools on this list — the combination square and the chisel set, for example — are genuinely inexpensive relative to their impact on your work. Others, like a cabinet-grade table saw or a full dust collection system, represent a much bigger investment that only makes sense once your shop time and project ambitions justify it. Part of the value of a guide like this is helping you sequence those purchases sensibly instead of either overspending early or under-investing in the tools that matter most.
One more thing worth setting expectations on: no tool list, however carefully researched, replaces hands-on time with the actual tool. Reviews and specs can tell you about power output, build materials, and reported reliability, but the way a tool feels in your hands — its balance, vibration, noise level, and how intuitive the controls are — only becomes obvious once you’re standing at the bench using it. Treat this guide as a strong starting point for narrowing your options, not as a substitute for reading user manuals, watching hands-on demonstrations, and paying attention to return policies in case a tool doesn’t feel right once it arrives.
What Most Beginners Overlook (But Pros Never Do)
Before diving into the actual tools, it helps to name a few hidden factors that shape everyday shop satisfaction more than raw specifications. First, vibration and noise are not just comfort issues; they directly affect accuracy. A router that buzzes aggressively or a sander that transmits vibrations up your arm will tire you out faster, make it harder to hold a line, and ultimately lead to rougher cuts. Tools with better balance and softer grips might cost a bit more but pay for themselves in fewer errors and less fatigue.
Second, the ease of adjustments matters enormously. Cheaper saws and routers often require you to loosen multiple knobs, fiddle with fragile scales, and re-check settings constantly. A more expensive tool with positive stops, micro-adjustments, and clear markings may seem like a luxury until you realize how much time you waste fine-tuning the budget version. Over months of use, those minutes add up to hours.
Third, think about the availability of replacement parts and accessories. Even excellent tools wear out blades, bearings, brushes, and batteries. Buying from brands with a robust parts network and widely available accessories means you won’t be stuck with a perfectly good tool that you can’t repair or upgrade. This is one reason we lean toward established names for power tools while being more open to smaller brands for simple hand tools.
Woodworking Tool Glossary: Terms You’ll See Repeatedly
If you’re new to tool buying, some of the terminology in this guide might look foreign. Here’s a quick cheat sheet to help you follow along:
- Rip cut: Cutting along the length of the board, parallel to the wood grain. Typically done on a table saw.
- Crosscut: Cutting across the width or length against the grain. Usually done with a miter saw or table saw with a crosscut blade.
- Dado: A groove cut into wood, often to fit a shelf or panel. Usually requires a table saw or router.
- Rabbet: A step-shaped cut along the edge of a board, often used for drawer boxes or cabinet backs.
- Collet: The clamping mechanism on a router that holds the bit. Typically available in 1/4-inch and 1/2-inch sizes.
- Arbor: The shaft on a saw that the blade mounts to.
- Riving knife: A metal plate behind a saw blade that prevents the cut from closing and causing kickback.
- Blade guard: The protective cover over a spinning blade, often paired with a riving knife.
- Bevel: An angled cut or edge that is not 90 degrees to the face of the wood.
- Mortise and tenon: A strong joinery method where a rectangular hole (mortise) receives a protruding piece (tenon).
- Workpiece: The piece of wood you are actively cutting or shaping.
- Kickback: A dangerous situation where a rotating blade grabs the wood and throws it back toward the operator.
How To Use This Guide When You’re Already Half-Set-Up
Many readers already own a circular saw, a basic drill, and maybe a jigsaw. That changes the order of priorities. If you already have a way to break down sheet goods roughly, your next upgrade should almost certainly be a table saw or a quality miter saw for repeatable accuracy. A router might come later if you’re more interested in joinery than construction. The point isn’t to follow a rigid sequence but to identify the biggest bottleneck in your current workflow. If you find yourself fighting to make square cuts, the fix is a table saw or a combination square, not another cordless tool. If your finishes look rough no matter how carefully you sand, a random orbital sander will likely change your results overnight.
How We Chose These Tools
Not every popular Amazon listing deserves a spot on a “best of” list. We filtered candidates using a handful of criteria that matter far more than star ratings alone:
- Build quality relative to price — does the tool use metal gearing, quality bearings, and durable housings, or does it feel like it’s built to fail after the warranty expires?
- Real-world versatility — can it handle multiple project types, or is it a one-trick tool that will sit unused after the first build?
- Safety features — blade guards, riving knives, kickback prevention, and ergonomic design that reduces fatigue and injury risk.
- Consistency of reviews over time — we weighted tools with a long track record of praise over newer listings riding a wave of early hype.
- Fit for a range of skill levels — from a first-time hobbyist to someone building furniture for resale.
We also leaned on dedicated deep-dive reviews for several categories, including our full breakdowns of the best table saw for woodworking and the best cordless drill for woodworking, so if a particular tool on this list grabs your attention, there’s more detail waiting for you there.
We also paid close attention to something that’s easy to overlook when comparing spec sheets: how a tool performs after the first few months of ownership, not just out of the box. Plenty of tools look great in a five-star unboxing review posted the week they arrived. Far fewer hold up to the same praise a year later, once bearings have logged real hours, batteries have gone through hundreds of charge cycles, and plastic housings have absorbed a few accidental bumps against a workbench edge. Wherever possible, we weighted longer-term ownership feedback more heavily than first-impression reviews, since that’s a far better predictor of whether a tool will still be earning its keep in your shop two or three years from now.
Warranty coverage was another factor we considered, even though it rarely gets mentioned in typical buying guides. A two-year warranty backed by a well-known brand with an established U.S. service network means something very different than a vague “manufacturer’s warranty” from a brand with no clear support infrastructure. When two tools are otherwise comparable on paper, the one backed by stronger support and a track record of honoring warranty claims usually deserves the tie-breaker vote.
Finally, we tried to account for the realities of a home shop rather than a professional job site. Noise level matters if you’re working in an attached garage with family nearby. Weight matters if you’re a smaller-framed woodworker holding a router or sander overhead for extended periods. Portability matters if your “shop” doubles as a parking spot on weekdays and has to be broken down and stored after each session. None of these factors show up clearly in a spec sheet, but they shape day-to-day satisfaction with a tool just as much as raw performance numbers do.
Testing Notes from Real Owner Feedback
While we can’t set up a full lab test in this guide, we did synthesize patterns from thousands of verified purchase comments across multiple retailers and tool forums. Recurring themes include the frustration of fences that don’t stay square on budget table saws, the surprising quality of mid-range cordless drills, and the near-universal advice to buy more clamps than you think you need. We’ve folded those lessons into the individual tool sections below so you get the benefit of aggregated experience rather than just one reviewer’s take.
We also differentiated between complaints that indicate a design flaw and complaints that indicate user error or lack of familiarity. For example, some buyers criticize a router for being “hard to plunge,” but when those same buyers have never adjusted the plunge depth properly, the issue may be one of setup rather than engineering. In those cases we looked for trends across many users before drawing conclusions.
How to Read the “Price Tier” Column
We use a simple three-tier system to give you an instant sense of budget: $ generally under $50, $$ around $50–$200, and $$$ over $200. These are broad ranges and can shift based on sales, bundles, and newer models. But the tiers help you see at a glance where the big investments are and which tools you can add without much financial strain.
1. Table Saw — The Anchor of Every Serious Shop
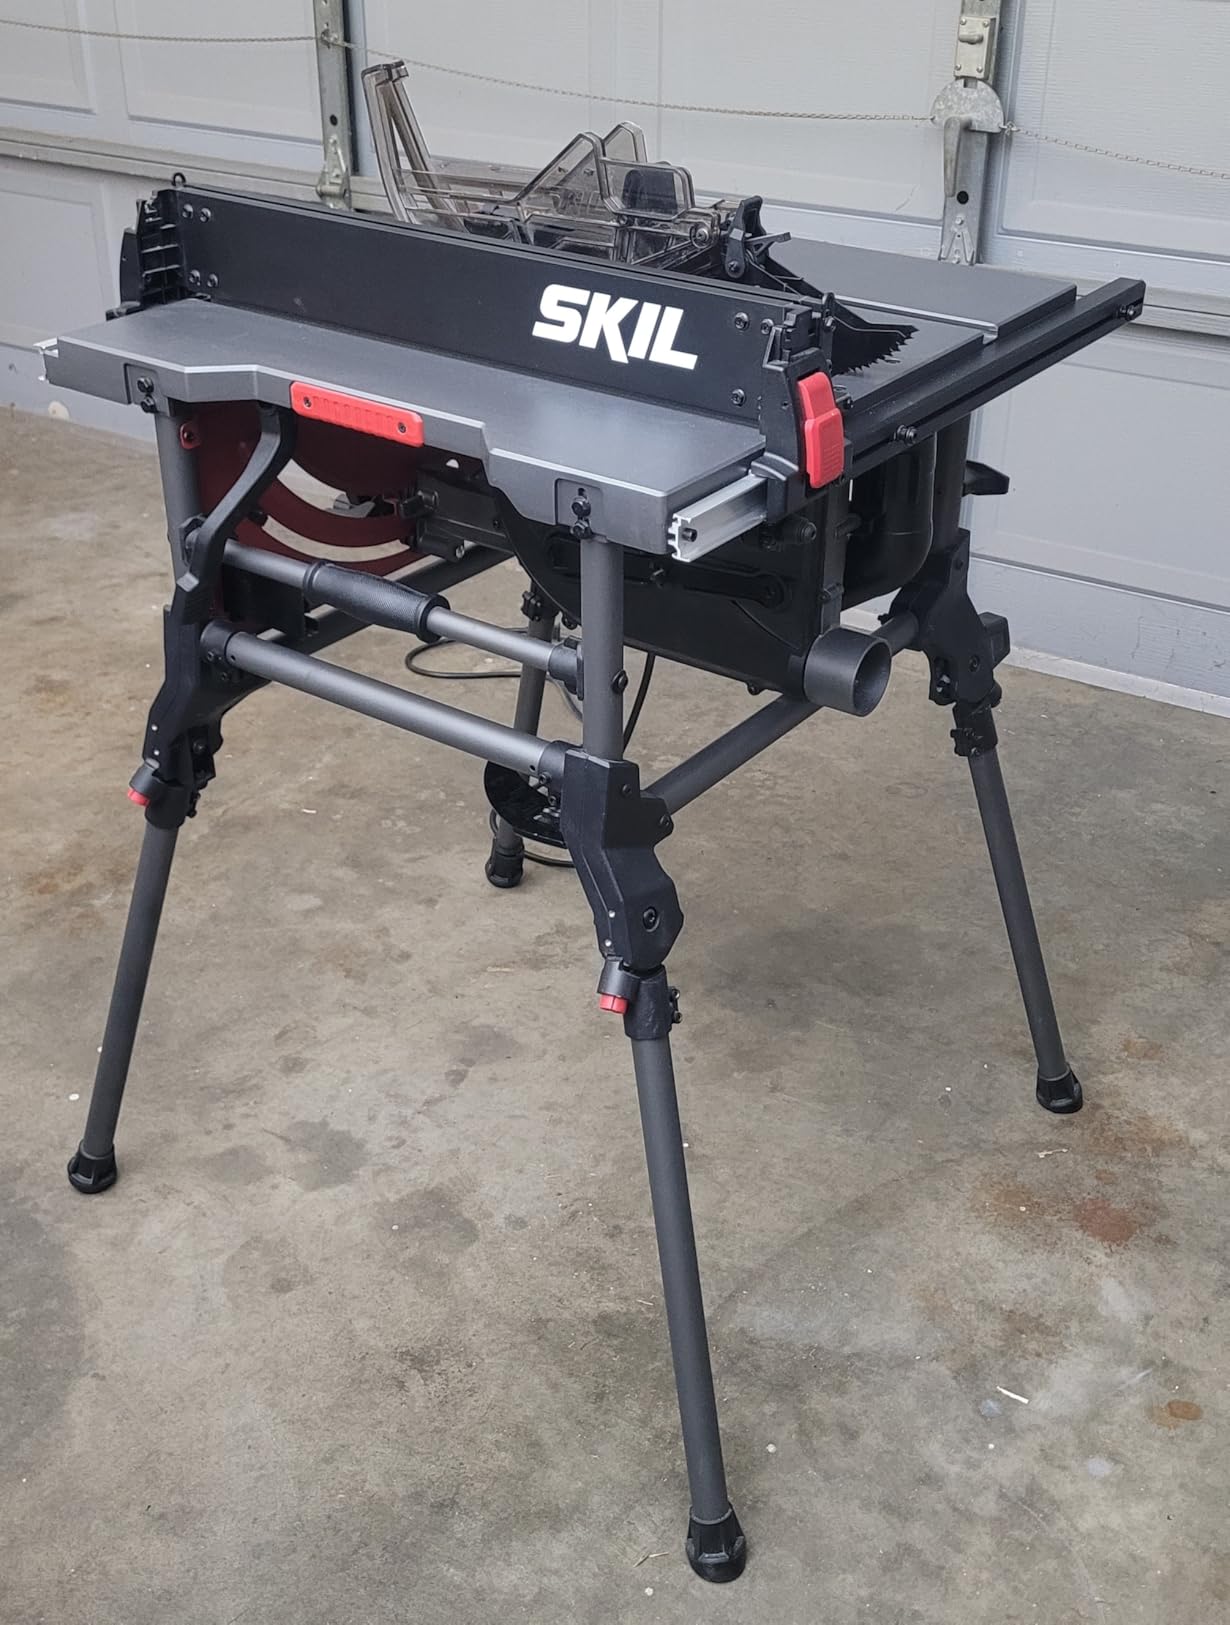
If you only buy one power tool this year, it should be a table saw. Nothing else in a woodworking shop delivers the same combination of speed, precision, and repeatability for ripping boards to width, crosscutting panels, and cutting joinery like dados and rabbets. A quality benchtop or contractor-style table saw with a cast-iron or aluminum table, a reliable rip fence, and a riving knife will outperform a circular saw and straightedge setup every single time once you factor in accuracy and safety.
Look for a model with at least a 15-amp motor, a fence that locks parallel to the blade without drifting, and a blade guard assembly you’ll actually keep installed rather than remove out of annoyance. Portability matters too if your shop doubles as a garage you still park a car in — folding stands with wheels have become the standard for good reason.
Pros
- Unmatched accuracy for rip and crosscuts
- Handles joinery cuts like dados and rabbets
- Scales from hobby projects to cabinetry
- Long-term value in any shop
Cons
- Steeper learning curve for safe operation
- Takes up more floor space than most tools
- Noise and dust require mitigation
Blade selection deserves more attention than most first-time buyers give it. The general-purpose combination blade that ships with most saws is fine for getting started, but swapping to a dedicated rip blade with fewer, larger teeth dramatically improves feed rate and reduces burning when you’re ripping long boards to width. A crosscut blade with more teeth, by contrast, leaves a cleaner edge on cross-grain cuts and reduces tearout on plywood and veneered panels. Keeping both on hand, along with a stiffener plate if your saw supports thin-kerf blades, is one of the cheapest upgrades that meaningfully improves cut quality.
Fence quality is worth dwelling on a bit longer too, because it’s the single most common source of frustration on budget saws. A fence that isn’t perfectly parallel to the blade — even by a fraction of a degree — will cause the workpiece to bind against the blade during a rip cut, leading to burning, kickback risk, and inconsistent widths across a batch of parts. Before your first project, it’s worth taking ten minutes to check and, if needed, adjust your fence for true parallel alignment using a dial indicator or even a simple straightedge and feeler gauge method. This single calibration step prevents more headaches than almost any other setup task in the shop.
For anyone working in a shared garage space, it’s also worth thinking through mobility from day one. Folding stands with locking caster wheels let you roll a full-size saw out for a project and tuck it against a wall afterward, which matters more than it seems like it will the first time you need your parking spot back on a Sunday evening.
Another consideration is table surface material. Cast iron tops are heavier and resist vibration better, but they can rust if not maintained. Aluminum tops are lighter and rust-resistant but may lack the mass needed for heavier work. Many benchtop saws use aluminum tables with a non-stick coating, which is perfectly fine for hobby use. If you plan to build large furniture or work with full sheets of plywood, a heavier saw with more table mass will feel more stable and accurate.
Safety accessories also matter. A push stick, featherboards, and a decent crosscut sled will do more for your confidence and accuracy than almost any upgrade to the saw itself. Most accidents happen when the operator’s hands get too close to the blade or the wood binds unexpectedly. Using a sled for small parts and a riving knife for through cuts dramatically reduces both risks.
For a full breakdown of specific models across budgets, our dedicated guide to the best table saw for woodworking covers benchtop, contractor, and hybrid cabinet saws in detail. If you’re still deciding what size and type fits your space, how to choose a table saw walks through the decision step by step.

Check current pricing and availability for top-rated table saws.
View Table Saws on Amazon2. Wood Router — For Edges, Joinery, and Detail Work

A router is one of the most versatile tools you can own, and it earns its keep the moment you start adding decorative edges, cutting mortises, trimming laminate, or building templates for repeatable joinery. Fixed-base routers are great for consistent depth work like edge profiles, while plunge routers let you start a cut in the middle of a board — essential for mortises and inlay work.
A combo kit that includes both bases on a single motor is often the smartest first purchase, since it lets you learn both techniques without buying two separate tools. Variable speed control is worth prioritizing too, since larger bits need slower RPMs to avoid burning the wood or losing control.
Pros
- Extremely versatile across joinery and edge work
- Combo kits offer two tools in one purchase
- Bit variety allows near-endless customization
- Precise depth adjustment on quality models
Cons
- Loud and dusty without a dust port attached
- Bit changes can be fiddly for beginners
- Potential for tearout on fragile edges
Choosing the right router bit matters as much as choosing the router itself. High-speed steel bits dull quickly, while carbide-tipped bits last many times longer and are worth the extra cost. You don’t need a 100-piece set on day one; a few high-quality bits — a straight bit, a roundover bit, a flush-trim bit, and a chamfer bit — cover most starter projects. Add a mortising bit later if you plan to build furniture with traditional joinery.
Router table setups are another step worth planning for. Even a basic router table turns a handheld router into a mini shaper, letting you run longer moldings, create stopped cuts, and work with small pieces much more safely. Many woodworkers start with a handheld router and later build or buy a table to expand its capabilities. The two approaches complement each other well.
Dust extraction from a router is notoriously incomplete, so pairing a router with a shop vacuum or dust collector is wise. Many router bases include a clear plastic dust port that captures a majority of chips when connected to a vacuum, keeping the cutting line visible and your lungs clearer.
Our detailed roundup of the top wood router picks breaks down which models perform best for edge profiling versus joinery-heavy work, along with recommended starter bit sets. If you’re unsure whether a fixed-base or plunge router is right for you, start with a combo kit — you’ll rarely regret having both bases.
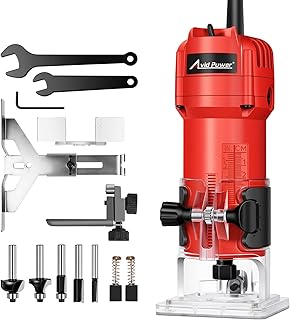
Compare wood router kits and bit sets currently in stock.
View Wood Routers on Amazon3. Cordless Drill/Driver — The Tool You’ll Reach for Daily

You’ll use a cordless drill more than any other tool in your shop, full stop. Drilling pilot holes, driving screws, countersinking, mixing finishes with a paddle attachment — it’s the workhorse that touches nearly every project from start to finish. Look for a brushless motor for better runtime and longer tool life, a two-speed gearbox for switching between high-torque driving and fast drilling, and a battery platform that’s shared across other tools from the same brand so you’re not juggling multiple chargers.
An 18V or 20V system tends to hit the sweet spot between power and weight for most furniture-scale woodworking, while 12V compact drills are worth adding later for tight spaces and lighter tasks.
Pros
- Used on nearly every project, every session
- Battery platforms expand into full tool ecosystems
- Brushless motors deliver strong runtime
- Ergonomic designs reduce wrist strain
Cons
- Batteries and chargers add ongoing cost
- Cheaper models overheat under sustained use
- Torque control can be inconsistent on budget units
Battery chemistry has improved dramatically in the last decade. Lithium-ion packs are lighter, charge faster, and hold their charge better in storage than older nickel-cadmium cells. But battery health still requires some care: avoid storing packs fully discharged, keep them at room temperature, and buy from brands that offer reasonably priced replacement cells. A second battery is often more valuable than a higher torque rating, since it eliminates downtime during long assembly sessions.
Clutch settings are another feature that separates real workhorses from toys. A drill with 15+ torque settings lets you drive screws to a consistent depth without stripping the head or burying the screw in soft wood. If you build a lot of cabinet boxes or pre-drill for fine furniture, a separate impact driver in the same battery platform is a valuable companion; impact drivers drive long screws and lag bolts much faster without twisting your wrist.
For a model-by-model comparison, our guide to the best cordless drill for woodworking covers torque ratings, battery life, and which kits give you the most value for the money. Pairing the drill with a quality set of driver bits and drill bits will also prevent more frustration than buying a bigger drill.

See top-rated cordless drill and driver combo kits.
View Cordless Drills on Amazon4. Chisel Set — Precision You Can’t Get from Power Tools Alone
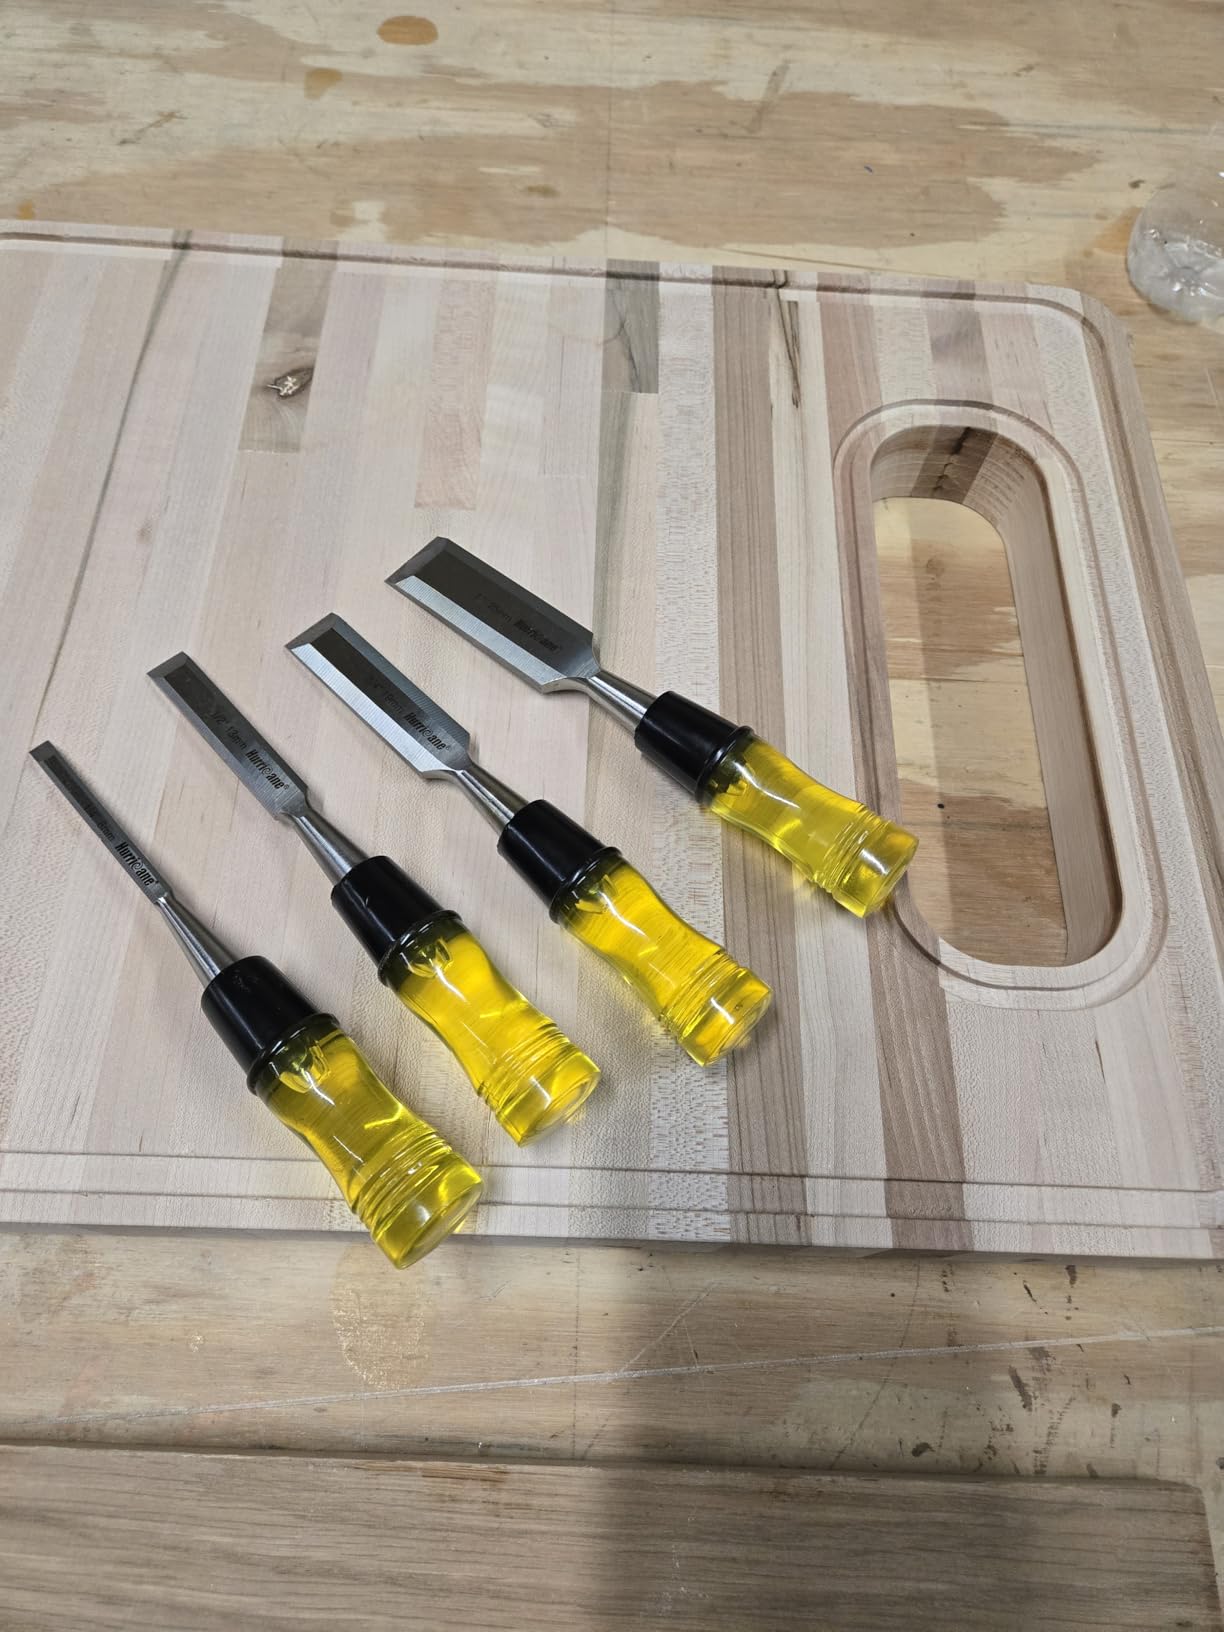
Even in a shop stacked with power tools, a good set of chisels earns constant use — cleaning up mortises, paring joints flush, chopping hinge recesses, and fine-tuning fits that no machine can replicate. Look for chisels made from high-carbon or chrome-vanadium steel that hold an edge well, with handles comfortable enough for extended mallet work.
A set with four to six sizes (typically ranging from 1/4 inch to 1 inch) covers the vast majority of furniture and cabinetry work. Beginners often underestimate how much a sharp chisel changes the experience — a properly honed edge glides through wood, while a dull one tears and requires far more force, increasing the risk of slips.
Pros
- Essential for clean, precise joinery
- Long-lasting with proper sharpening care
- Affordable compared to most power tools
- Quiet and dust-free
Cons
- Requires regular sharpening to stay effective
- Skill curve for controlled paring cuts
- Handle quality varies widely across brands
Sharpening is the hidden cost of owning chisels. You don’t need a $300 water stone setup to keep a working edge, but you do need some kind of sharpening system — diamond stones, oil stones, or even sandpaper on a flat granite block. A honing guide removes much of the frustration of maintaining a consistent bevel angle, and a simple leather strop keeps the edge razor-sharp between stone sessions. Ten minutes of sharpening before a project is usually enough to keep chisels performing at their best.
Chisel safety is mostly about controlling the direction of force. Keep your free hand behind the cutting edge, use a mallet for heavy chopping rather than pushing hard with your body, and never hold a workpiece in your lap while chiseling. These habits prevent the majority of chisel-related accidents, which tend to be deep cuts that happen quickly.
New to chisel work? Our best chisel set for beginners guide covers steel types, handle materials, and sharpening basics so your first set lasts for years rather than getting replaced after one dull, frustrating project.

Browse top-rated woodworking chisel sets.
View Chisel Sets on Amazon5. Random Orbital Sander — Finish Quality Starts Here

No matter how precise your joinery is, a rough or uneven finish will make a project look amateur. A random orbital sander combines rotating and oscillating motion to remove material quickly while minimizing the swirl marks that plague cheaper vibrating sanders. This makes it the go-to for flattening panels, smoothing curves, and prepping surfaces before staining or finishing.
Variable speed control lets you slow things down for delicate veneers and speed up for aggressive stock removal, while a built-in dust collection port keeps your shop air (and lungs) considerably cleaner. Hook-and-loop sandpaper discs make changing grits fast, which matters when you’re working through a full progression from 80 to 220 grit.
Pros
- Swirl-free finish compared to basic sanders
- Fast material removal with variable speed
- Lightweight for extended use
- Large pad options for bigger panels
Cons
- Dust collection bags fill quickly without a vacuum hookup
- Not ideal for aggressive shaping tasks
- Can round over edges if you aren’t careful
Grit progression is the biggest skill factor with sanding. Start with 80 or 100 grit to remove tool marks, then move through 120, 150, 180, and finally 220 for a silky pre-finish surface. Skipping grits leaves visible scratches that show up only after you apply stain or topcoat, so patience during sanding pays off later. A work light at a low angle across the surface reveals imperfections that flat lighting hides.
Dust management with a random orbital sander is best handled by connecting the dust port to a shop vacuum with a HEPA filter. The included bags work okay for a few minutes, but they fill quickly and vent fine particles back into the room. A vacuum hose also improves the sander’s balance slightly and keeps the abrasive disc cooler, which prolongs paper life.
For model comparisons across pad size, speed range, and dust collection efficiency, check our best random orbital sander guide. If you plan to sand a lot of large panels, a 6-inch pad removes material much faster than a 5-inch pad and is worth the extra cost.

Check current deals on random orbital sanders.
View Sanders on Amazon6. Miter Saw — Fast, Accurate Crosscuts and Angles
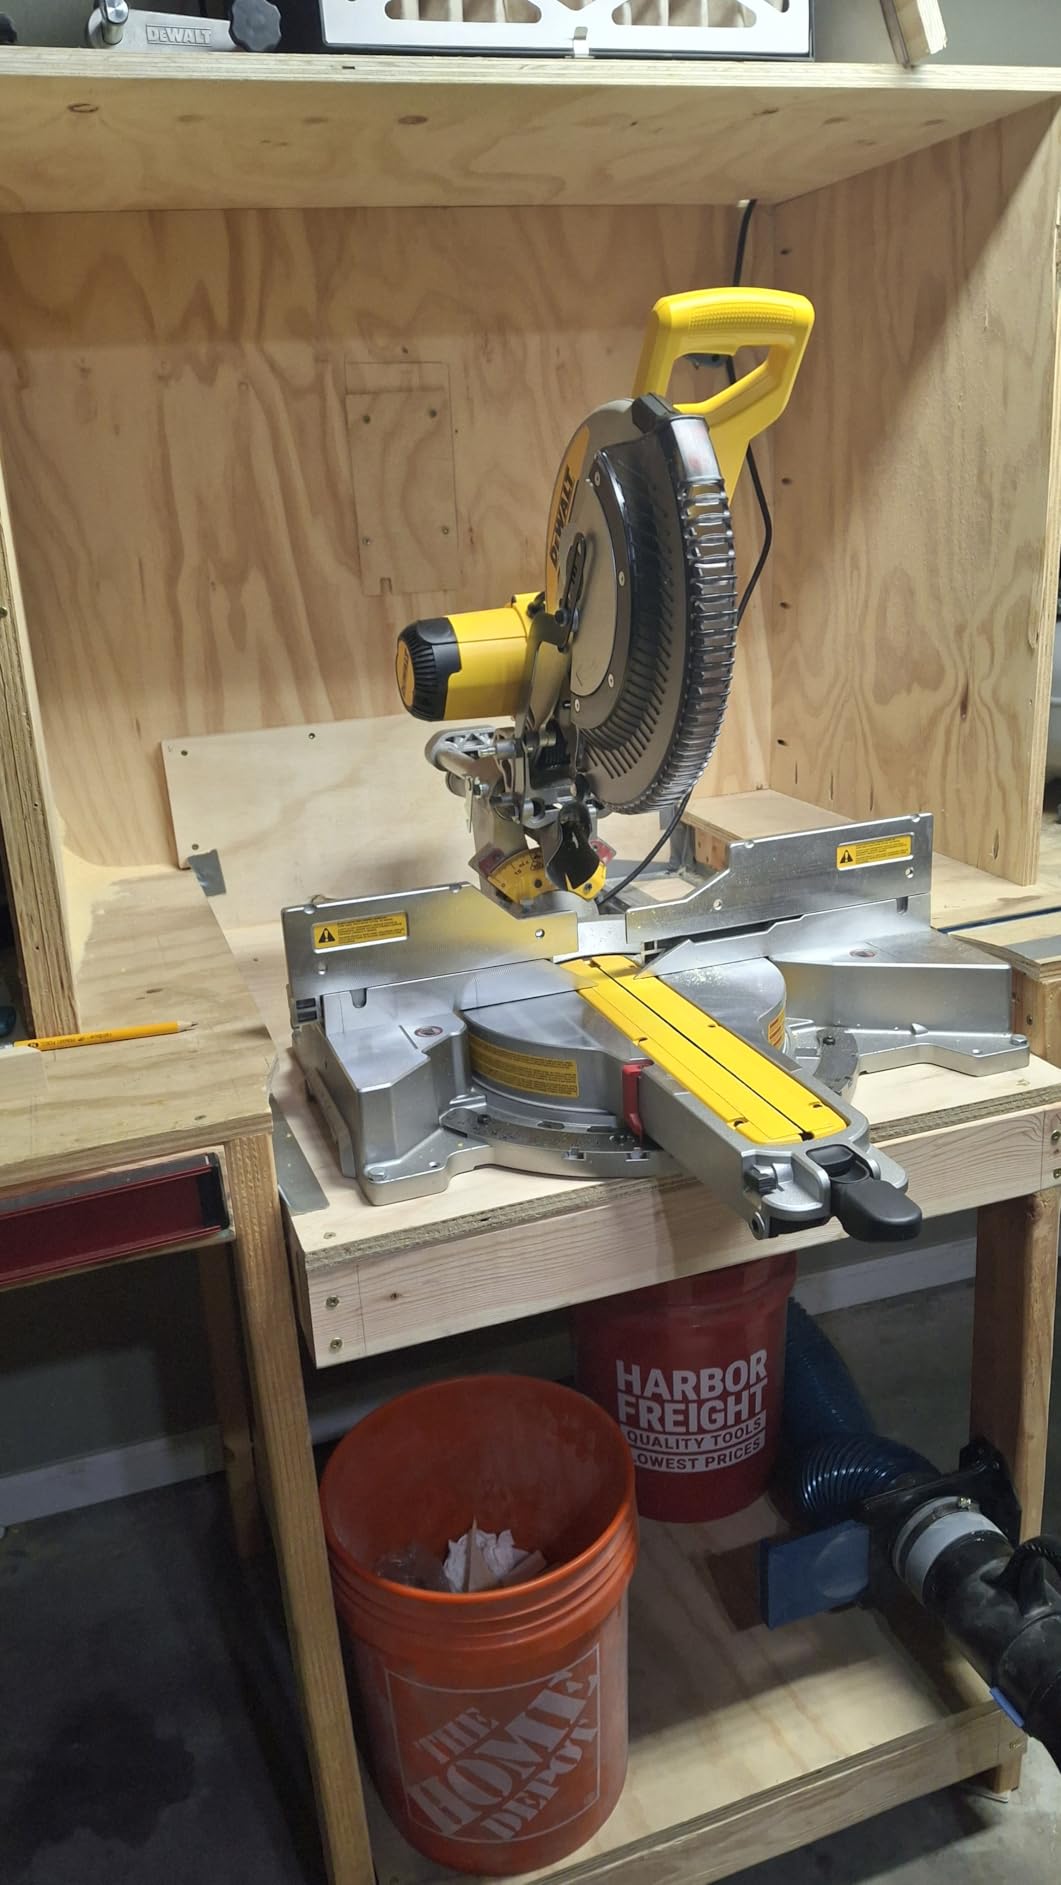
While a table saw handles rip cuts beautifully, a miter saw is the tool built specifically for fast, repeatable crosscuts and angled cuts — think picture frames, trim work, and cutting furniture components to length. A compound miter saw that tilts and pivots gives you the flexibility to cut compound angles in a single pass, which is invaluable for crown molding and angled joinery.
Blade size determines your maximum cut width, with 10-inch and 12-inch blades covering most home shop needs. A sliding feature extends the saw’s cutting capacity for wider boards, though it does add footprint to your bench.
Pros
- Extremely fast, repeatable crosscuts
- Compound models cut precise angles easily
- Safer learning curve than a table saw
- Benchtop size fits most shops
Cons
- Limited to crosscuts — can’t rip boards to width
- Sliding models need extra bench clearance
- Laser guides on budget models are often misaligned
Setting up a miter saw accurately is easier than most people think. A high-quality blade, a stable stand, and a few test cuts on scrap wood will get you within a fraction of a degree of perfect. If you plan to cut a lot of trim or build picture frames, a dedicated miter saw stand with material supports on either end makes long boards much easier to handle safely.
Blade quality matters here more than most people expect. The general-purpose blade included with many miter saws is fine for construction lumber, but a high-tooth-count crosscut blade leaves a cleaner edge on hardwood and trim, reducing the need for sanding. If you cut a lot of aluminum or composite materials, a blade designed for non-ferrous metals pays for itself quickly.
See our full comparison in the best miter saw for home shop guide, including which sizes are worth the extra cost for trim and furniture work. If you already own a table saw, a 10-inch non-sliding miter saw often covers 90% of crosscut needs without taking up much bench space.

Browse compound miter saws with strong buyer ratings.
View Miter Saws on Amazon7. Hand Plane — Old-School Precision That Still Wins
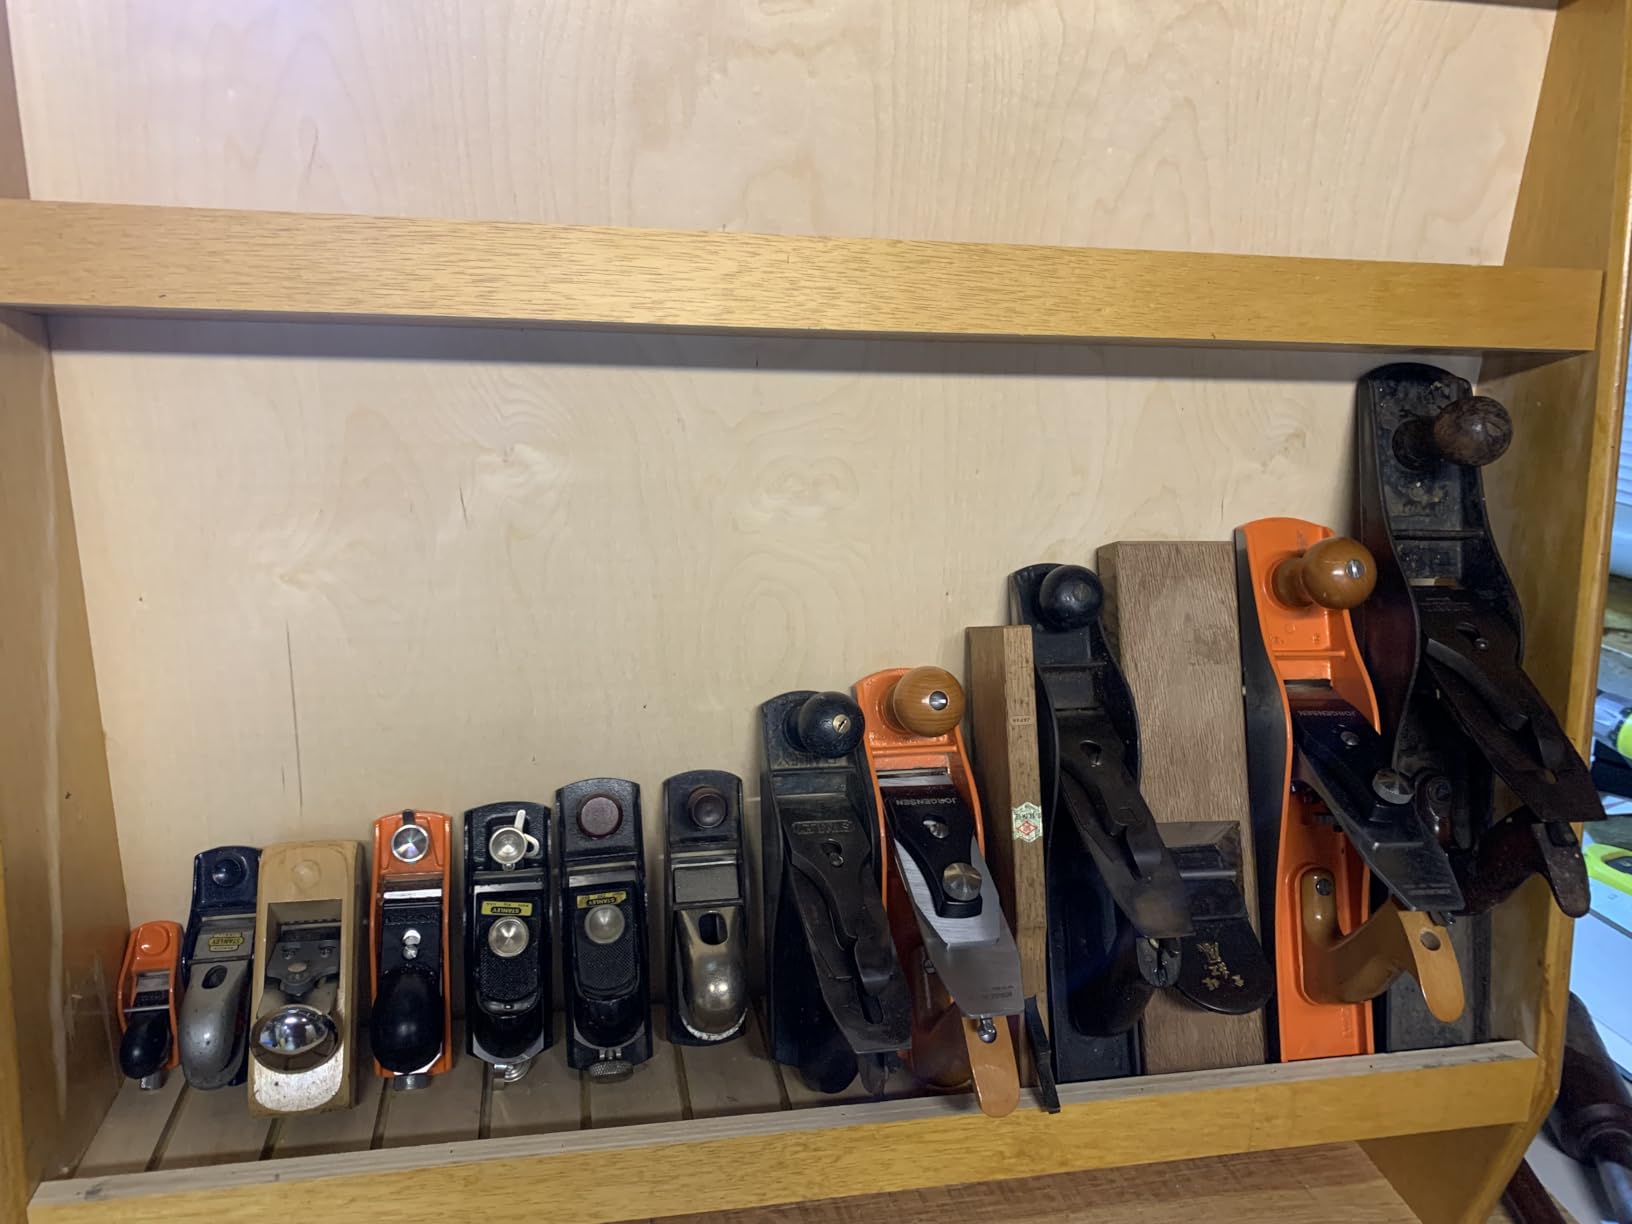
It might seem old-fashioned next to a shop full of power tools, but a well-tuned hand plane does things sandpaper and routers simply can’t match — flattening a slightly cupped board, fitting a drawer front with whisper-thin shavings, or cleaning up glue lines without leaving swirl marks. A No. 4 smoothing plane is the most versatile starting point, capable of everything from rough stock prep to final surface polishing.
The learning curve involves understanding blade sharpening, sole flatness, and grain direction, but once dialed in, a quality plane becomes one of the most satisfying tools in the shop to use.
Pros
- Silent operation — no dust, no noise
- Unmatched control for fine surface work
- No electricity or batteries required
- Meditative, low-cost practice
Cons
- Requires sharpening skill to perform well
- Slower than sanding for large surfaces
- Fettling a new plane takes time
Plane fettling — the process of flattening the sole, polishing the cap iron, and tuning the frog — sounds intimidating but is usually a one-time task that transforms a mediocre plane into a joy to use. A flat granite tile, some wet/dry sandpaper, and patience are all you need. Many vintage planes are excellent after a full tune-up, but new premium planes often work well out of the box if you hone the blade properly.
Grain direction is the main skill to learn with a hand plane. Planing against the grain causes tearout, while planing with the grain produces glassy surfaces. Reading the wood by looking at the edge and seeing which way the fibers run becomes second nature after a few projects. A low-angle block plane is also worth adding for end grain and small fitting tasks.
Pairing a hand plane with a solid chisel set rounds out your hand-tool joinery kit nicely — see our notes on wood joinery tools explained for how these tools work together on real furniture builds.

Shop bench hand planes for smoothing and jointing.
View Hand Planes on Amazon8. Combination Square — The Most Underrated Layout Tool
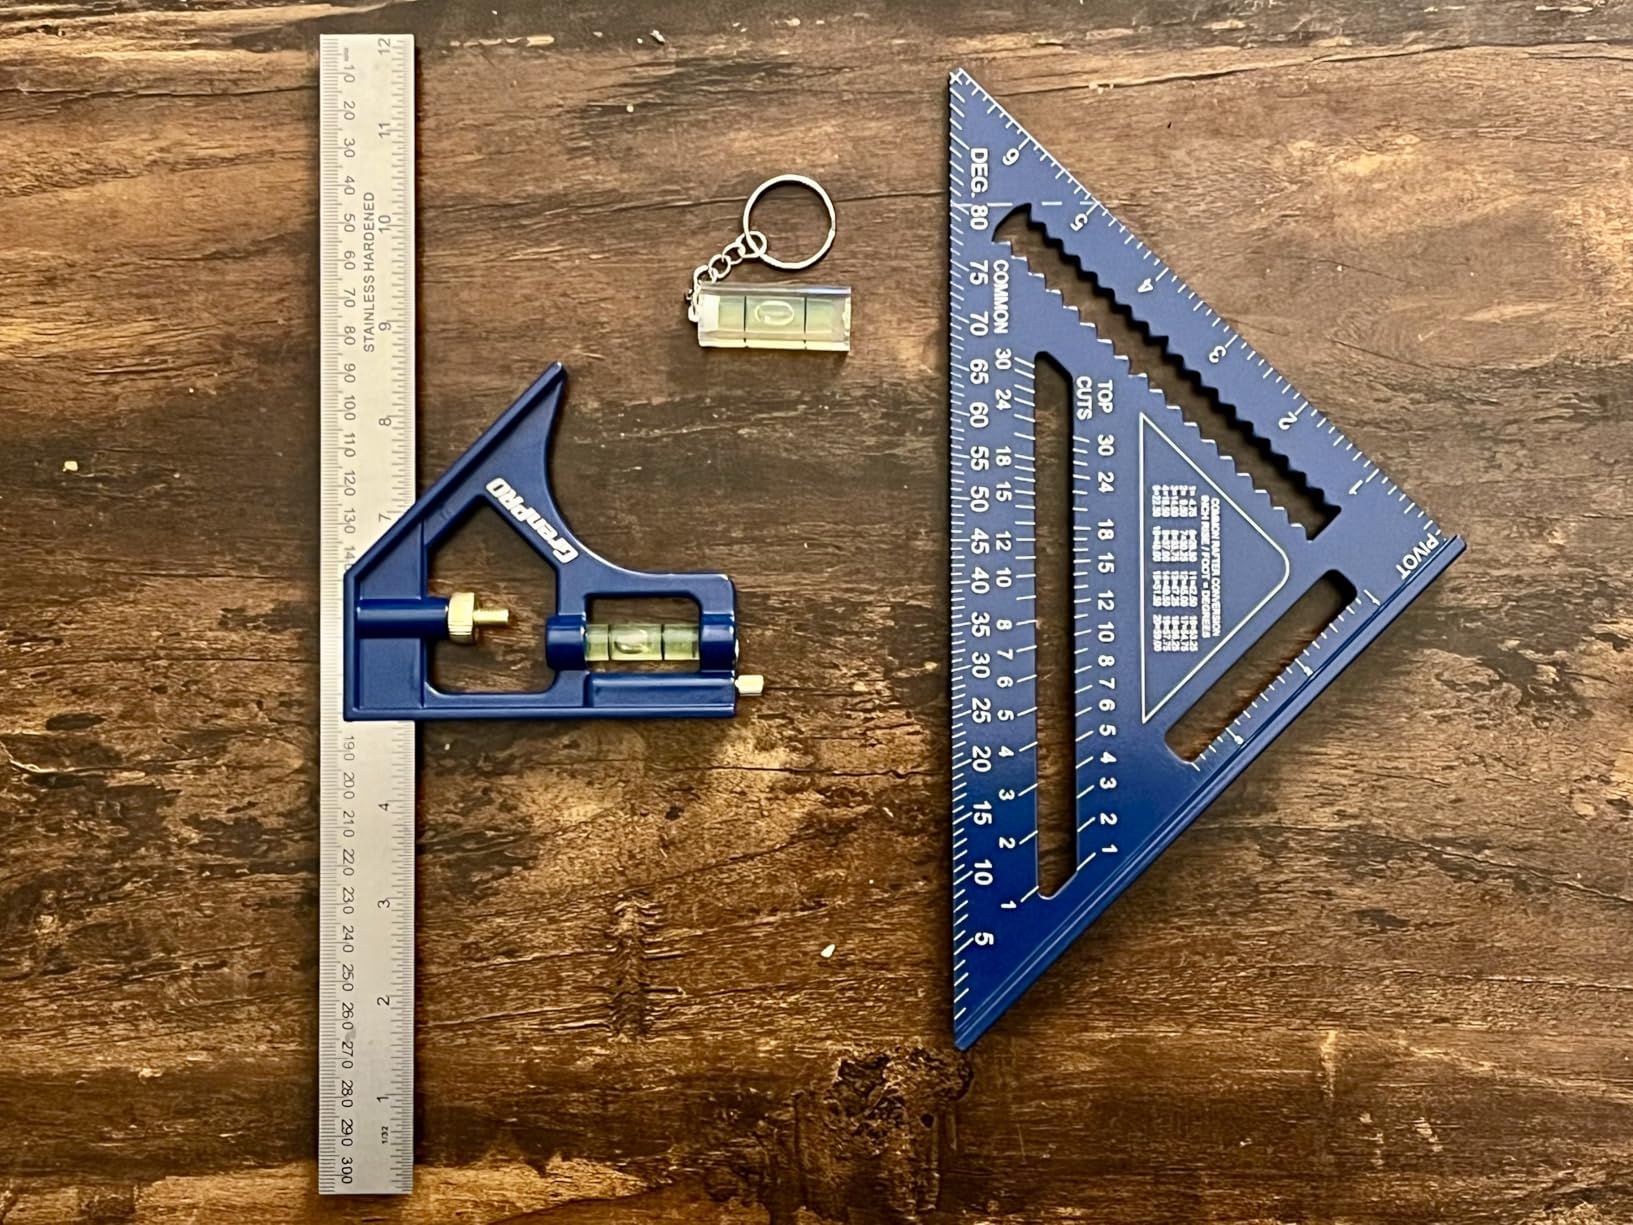
Nobody gets excited about a combination square, but ask any furniture maker and they’ll tell you accurate layout work is the foundation everything else depends on. A quality combo square checks for square edges, marks consistent lines, measures depth, and doubles as a straightedge — all from one compact tool. Cheap versions flex and drift out of true within weeks; a solid one with a hardened steel blade and cast head stays accurate for decades.
If you only buy one measuring tool beyond a tape measure, this is it. It gets used on literally every single project, from checking a table saw fence for square to marking mortise locations.
Pros
- Multi-purpose: square, depth gauge, marking tool
- Compact and inexpensive relative to its usefulness
- Stays accurate for years if kept quality-grade
- No batteries, no calibration drift
Cons
- Budget versions lose accuracy quickly
- Small parts can go missing in a cluttered shop
- Multiple sizes may be needed for different tasks
Testing a combination square for accuracy is simple: mark a line with the square’s blade against a straight edge, flip the square, and mark another line. If the lines don’t match, the square isn’t square. More expensive squares often come with a certificate of accuracy, but even many mid-range models pass the test out of the box. A 12-inch blade covers most furniture work, while a 6-inch square is handy for small joinery.
In addition to the standard square, a sliding bevel gauge and a marking knife are valuable companions for layout. A mechanical pencil works, but a knife leaves a cleaner line that won’t wander as you chisel or saw. Keeping your square clean and storing it away from moisture prevents rust that can affect accuracy.

Compare combination squares built for lasting accuracy.
View Squares on Amazon9. Clamps Set — You Can Never Own Too Many
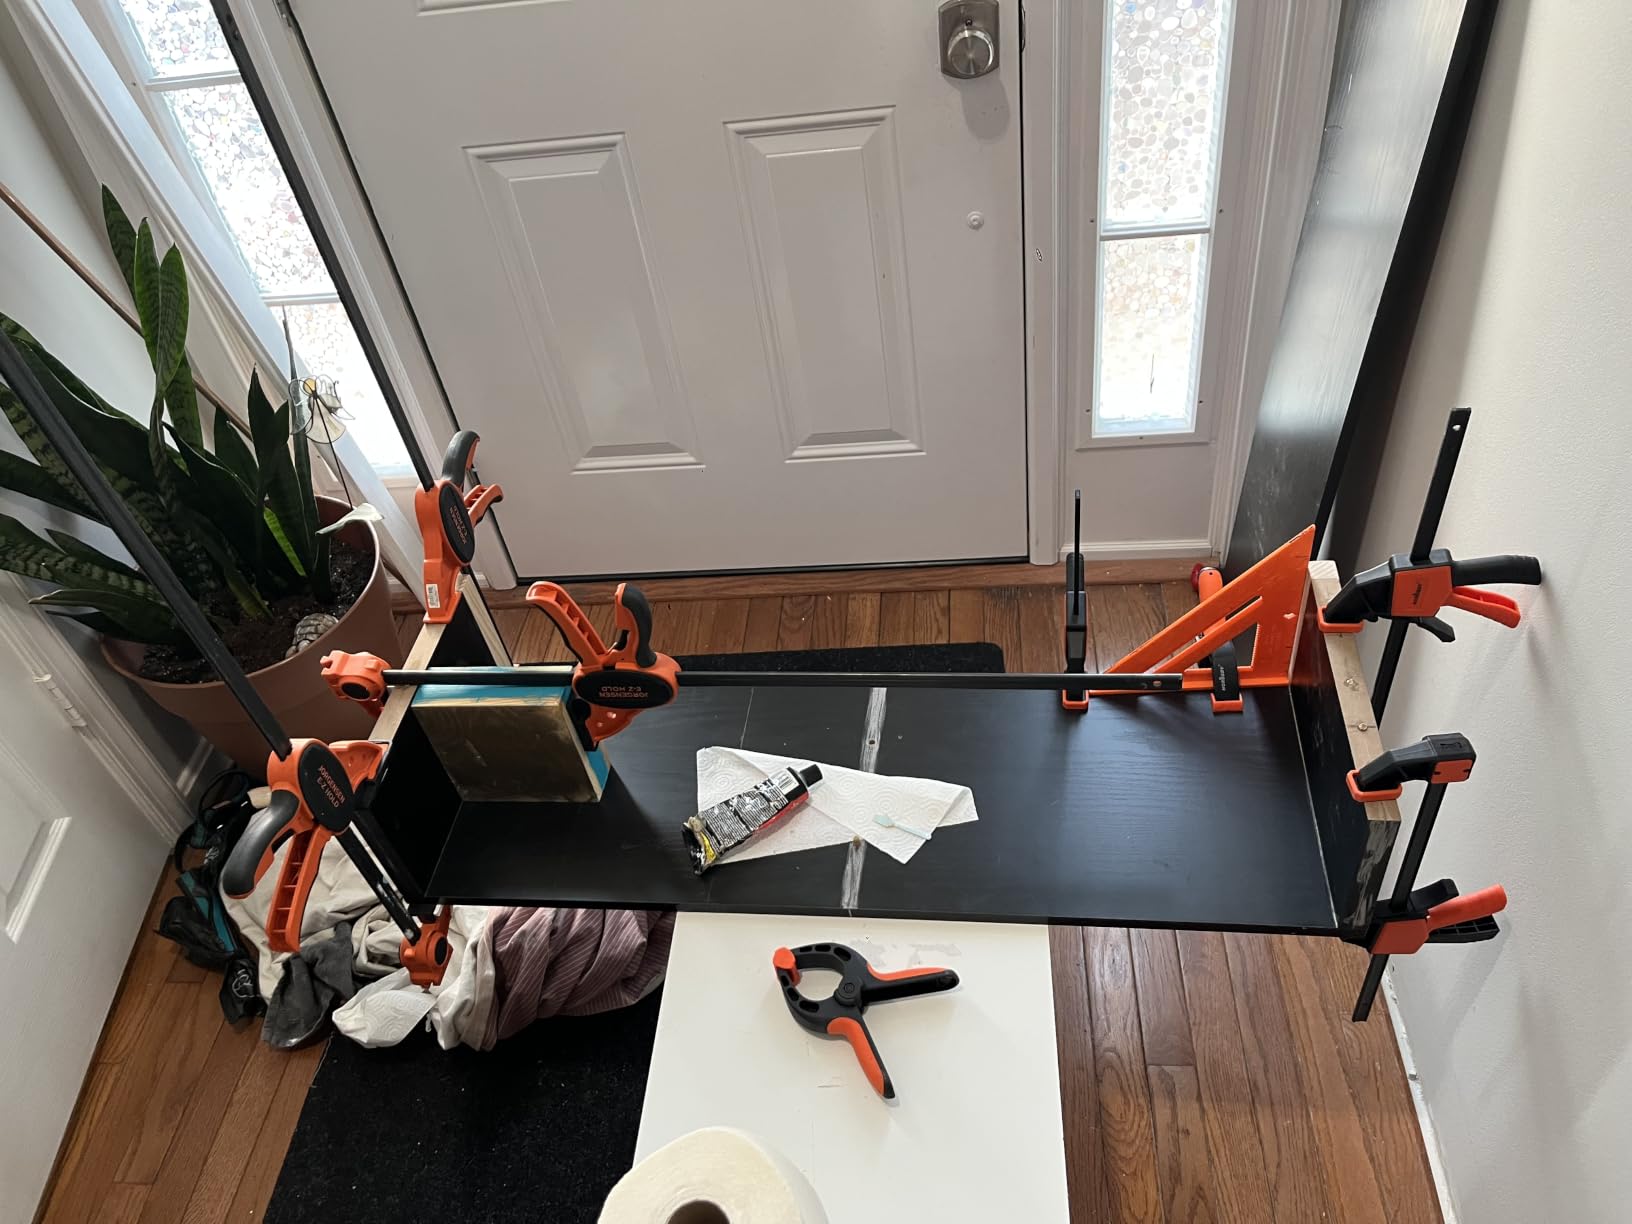
Every experienced woodworker will tell you the same joke: you can never have enough clamps. Glue-ups, jig setups, holding a workpiece steady for routing — clamps quietly do more work than almost any other tool category, and running short mid-glue-up is a genuinely stressful experience with fast-setting wood glue.
A mixed set of parallel-jaw bar clamps for panel glue-ups, quick-grip clamps for fast one-handed work, and smaller spring clamps for detail work covers nearly every scenario you’ll run into. Look for clamps with even pressure distribution across the jaw — cheap clamps often bow boards inward at the clamping point, throwing off your glue line.
Pros
- Essential for glue-ups and jig work
- Wide range of sizes for different project scales
- Long lifespan with basic care
- Inexpensive compared to power tools
Cons
- Storage space adds up quickly with a full set
- Cheap models can flex or slip under pressure
- Parallel clamps are pricey individually
Clamp storage is a real issue in small shops. A dedicated wall rack or a rolling cart with notched supports keeps clamps organized and accessible. If you’re buying your first set, prioritize 24-inch and 36-inch bar clamps, then add longer versions for larger panels. Pipe clamps offer a budget-friendly way to get longer capacity — you buy the fixtures and cut your own black pipe to length.
Alternating clamp direction during a panel glue-up helps keep the assembly flat. If all clamps apply pressure from the same side, the panel can bow upward. Flipping every other clamp so pressure alternates top and bottom counteracts this tendency and produces flatter panels with less cleanup work later.

Browse parallel-jaw and quick-grip clamp sets.
View Clamps on Amazon10. Dust Collection System — Protect Your Lungs and Your Shop
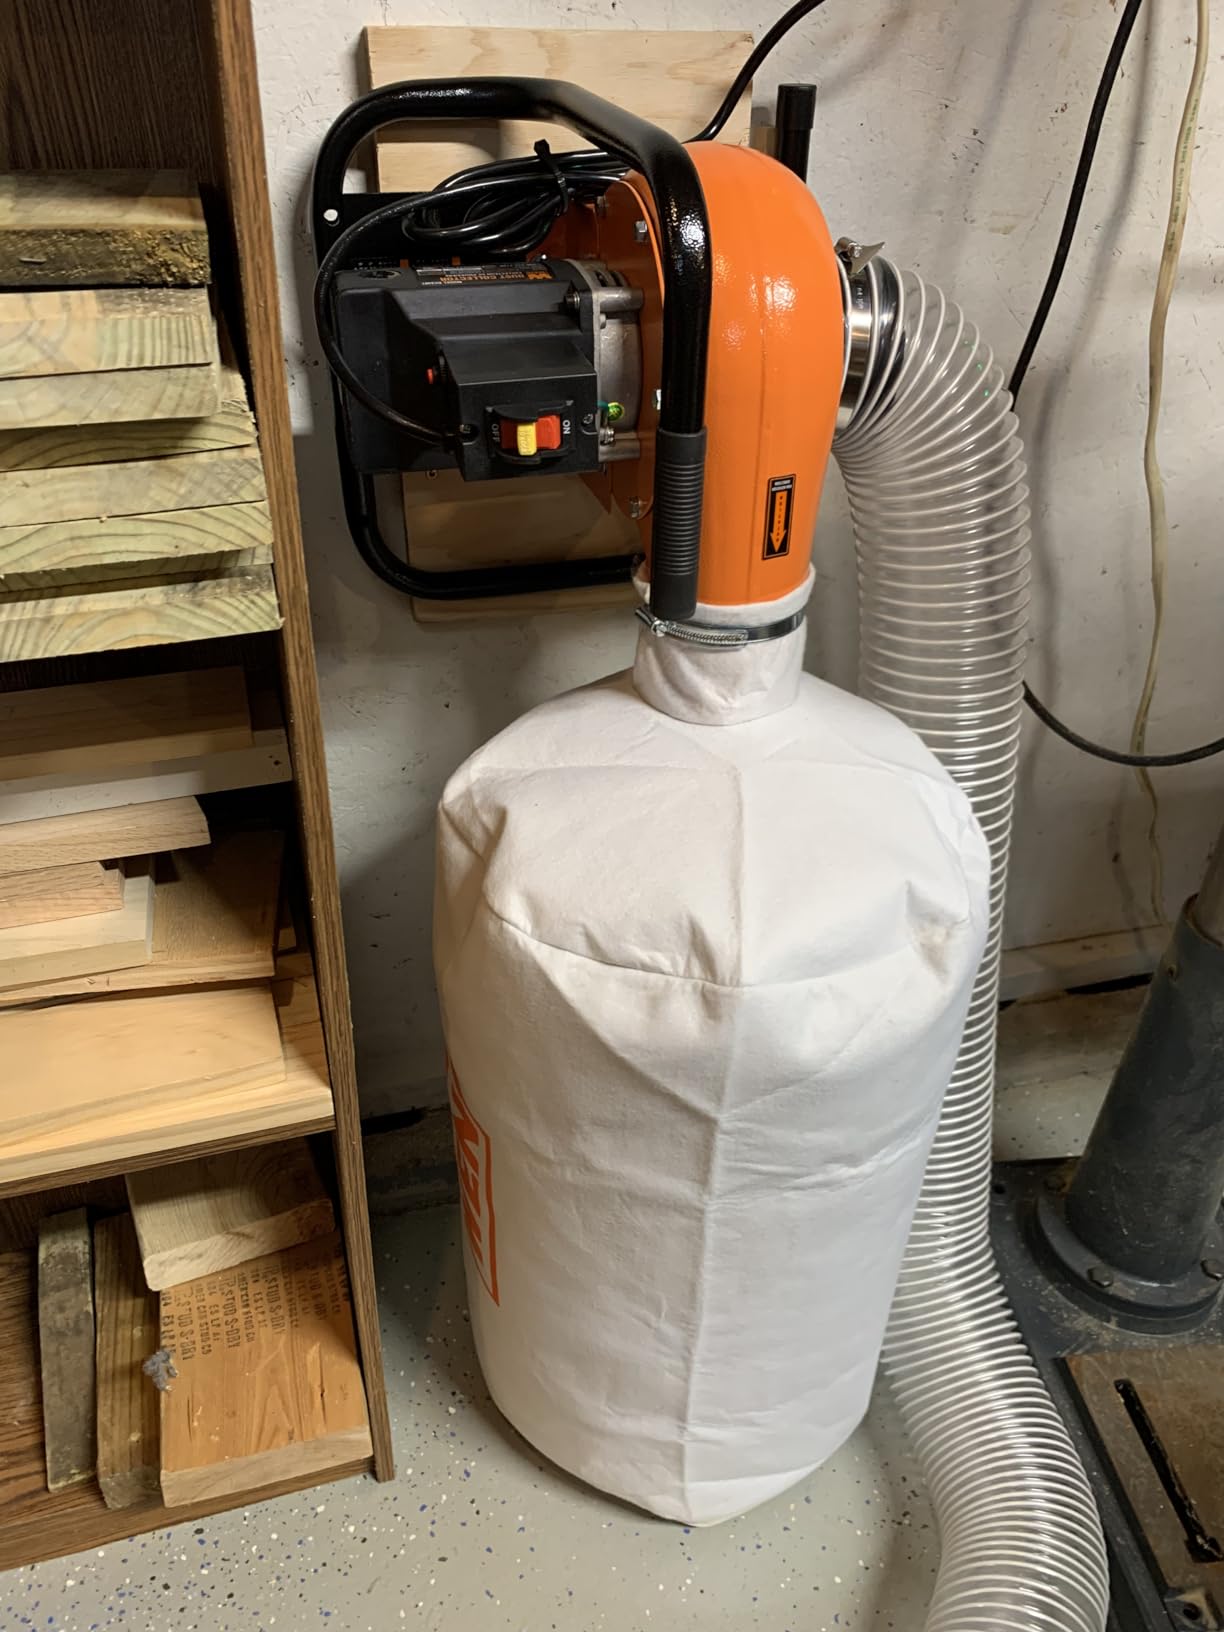
Fine wood dust isn’t just an annoyance — repeated exposure to airborne sawdust particles is a genuine long-term health concern, particularly with hardwoods and MDF. A dedicated dust collection system, even a basic single-stage unit connected to your table saw and miter saw, dramatically reduces airborne particulate compared to relying on a shop vac alone.
For smaller shops, a compact cyclone-style unit paired with flexible hose to your major tools is usually enough. Larger shops running multiple stationary tools benefit from a ducted system with blast gates so you can direct suction wherever it’s needed without repositioning hoses constantly.
Pros
- Significantly improves shop air quality
- Keeps floors and surfaces cleaner
- Reduces fire risk from dust accumulation
- Extends the life of your tools
Cons
- Larger units take up meaningful floor space
- Ducted setups require some planning to install
- Hoses and fittings add up in cost
Even a basic dust collector with a 1-micron bag makes a huge difference, but upgrading to a 0.5-micron canister filter captures the finest, most harmful particles. If you can’t afford a full system right now, at least wear a NIOSH-rated respirator when sanding or cutting MDF, and use a shop vacuum with a HEPA filter on your sander and router.
Cyclone separators are a smart intermediate step. They fit between your tool and a shop vacuum or dust collector and spin out the larger chips before they reach the filter, keeping suction strong and reducing how often you have to clean or replace the filter. Even a DIY version made from a bucket and a couple of fittings works surprisingly well.

Compare portable dust collection systems for small shops.
View Dust Collectors on Amazon11. Woodworking Apron — Small Investment, Daily Payoff

It’s easy to overlook an apron on a tool list dominated by saws and sanders, but ask anyone who’s worked a full day without one how their shirt held up against wood glue, stain, and flying sawdust. A good woodworking apron protects your clothing, keeps frequently used tools like pencils, tape measures, and marking knives within arm’s reach, and adds a layer of protection against splinters and sharp edges brushing against your torso.
Waxed canvas and leather are the two dominant material choices — canvas is lighter and more breathable for warm shops, while leather offers superior protection against sparks, sharp tool edges, and spills, at the cost of being heavier and pricier.
Pros
- Keeps essential small tools within reach
- Protects clothing from glue, stain, and dust
- Adds a layer of physical protection
- Cross-back designs reduce neck strain
Cons
- Leather versions require break-in time
- Can feel warm during long summer shop sessions
- Pocket layout isn’t always ideal for lefties
If you want to go deeper on material choice and pocket layout, our guides on the best woodworking apron and the best leather woodworking apron compare top picks side by side. We’ve also reviewed specific standouts individually, including the waxed canvas woodworking apron review, the Rockler woodworking apron review, and the Briteree woodworking apron review if you want a closer look before buying.

Browse leather and waxed canvas woodworking aprons.
View Aprons on Amazon12. Workbench — The Foundation Everything Else Sits On

A wobbly workbench undermines every tool on this list. If your bench flexes while you’re planing, shifts while you’re chiseling, or can’t securely hold a board while you’re routing an edge, the accuracy of everything downstream suffers. A proper workbench needs a flat, stable top — typically hard maple or beech — a sturdy base that doesn’t rack under lateral pressure, and at least one solid vise for holding work securely.
For smaller shops or those who need to reclaim floor space, a portable folding workbench with clamping jaws offers surprising versatility, though it won’t match the mass and stability of a traditional bench for heavy hand-tool work like planing and mortising.
Pros
- Stable foundation improves accuracy of every task
- Vises and dog holes expand holding options
- Lasts decades with basic maintenance
- Custom builds let you tailor the height
Cons
- Solid benches are heavy and hard to relocate
- Quality models require a real up-front investment
- Flatness must be maintained over time
Bench height is often overlooked. If the top is too low, you’ll hunch over and strain your back; too high and planing becomes exhausting. A good rule is to set the bench height so your palm rests flat on the top while standing straight with your arms relaxed. For hand-tool work, a slightly lower bench allows more downward force; for assembly and detail work, a bit higher reduces bending.
For a closer look at sizing, top material, and build options, see our guides to the best woodworking workbench and the best portable woodworking workbench. If you’d rather build your own, our woodworking workbench plans PDF is a solid starting point, and it pairs well with our notes on the best wood for a woodworking bench and the best plywood for a workbench top if you’re weighing solid wood against a plywood top.

Browse workbenches and portable clamping workstations.
View Workbenches on AmazonBuilding a Kit by Budget: Three Realistic Starting Points
You don’t need all twelve tools on day one. Here’s how to prioritize based on what you can spend right now.
Under $250 – The Essentials-Only Kit
Start with a combination square, a set of four chisels, a basic random orbital sander, two or three clamps, and a cordless drill if the budget allows. Add a portable workbench later; for now, a solid secondhand table or a work surface built from two sawhorses and a plywood top will get you started. You’ll be limited, but you can make real projects with these basics.
Under $600 – The Functional Shop
Add a benchtop table saw, a few more clamps, a dedicated miter saw if trim work matters to you, and a small dust collector or shop vacuum with a HEPA filter. At this stage you can handle most furniture-scale cuts, drill accurately, and finish surfaces well. The workbench can be a heavy-duty portable model or a DIY build.
$1,200+ – The Long-Term Setup
Invest in a contractor-style table saw with a cast-iron top, a router with both fixed and plunge bases, a full set of parallel clamps, a proper workbench with a vise, and a dust collection system with a canister filter. Add a hand plane and a leather apron once you’re regularly using the shop. This level supports years of serious hobby work and even some commission pieces.
Choosing the Right Wood for the Right Tool (and Vice Versa)
Tools don’t operate in a vacuum — the wood you feed into them changes how each tool behaves, how quickly blades and bits dull, and how forgiving a mistake will be. A brand-new woodworker who buys a stack of premium walnut for a first table saw project is setting themselves up for an expensive lesson. Understanding wood categories before you shop for tools (or lumber) will save you money and frustration on both fronts.
Softwoods vs. Hardwoods: What the Terms Actually Mean
“Softwood” and “hardwood” are botanical classifications, not literal hardness ratings, though the names do correlate reasonably well with real-world density in most common species. Softwoods come from coniferous trees — pine, fir, cedar, spruce — and tend to be lighter, cheaper, and easier to cut, which makes them a great training ground for new table saw and miter saw users. Hardwoods come from deciduous trees — oak, maple, walnut, cherry, ash — and are generally denser, more expensive, and more demanding on blades and bits, but they reward that extra effort with superior strength, figure, and finish quality.
For your very first projects, pine or poplar is almost always the smarter choice. Poplar in particular machines beautifully, takes paint well, and is inexpensive enough that mistakes don’t sting. Once you’re comfortable with your table saw’s fence, your miter saw’s angle settings, and basic sanding technique, stepping up to a mid-tier hardwood like soft maple or red oak is a natural next move. Save the premium hardwoods — walnut, cherry, quartersawn white oak — for projects where you’re confident in your process from cut list to final finish.
How Wood Choice Affects Blade and Bit Wear
Every pass through dense hardwood generates more heat and more resistance than the same cut in a softwood, which accelerates blade dulling and increases the odds of burning if your feed rate is too slow. This is one of the most common reasons a table saw that cut pine beautifully suddenly struggles and smokes when a beginner switches to oak — the tool hasn’t changed, but the demands placed on the blade have. Keeping a dedicated hardwood-rated blade, feeding at a steady and confident pace, and letting the saw do the work rather than forcing the board through are all habits that pay off the moment you move up in wood density.
Router bits behave similarly. Carbide-tipped bits handle hardwood far better than high-speed steel, and even carbide bits benefit from a slightly slower feed rate in dense material to avoid burning and excess bit heat. If you notice your router leaving scorched, glossy edges on a profile cut, that’s usually a sign you’re either feeding too slowly or trying to remove too much material in a single pass — take a lighter pass first, then a final cleanup pass at full depth.
Moisture Content and Why It Matters More Than Species
Even experienced woodworkers sometimes forget that moisture content, not species, is often the biggest variable affecting how wood behaves in the shop. Wood that hasn’t been properly dried will warp, cup, or crack after you’ve already invested hours into a project, regardless of how good your tools are. Kiln-dried lumber, typically brought down to somewhere around 6–8% moisture content, is far more dimensionally stable than air-dried stock that hasn’t had adequate time to equalize with your shop’s humidity.
A basic pin-style moisture meter is a worthwhile add-on once you’re buying lumber regularly, since it takes the guesswork out of whether a board is ready to use. Even without a meter, letting new lumber acclimate in your shop for a week or two before cutting it — stacked with spacers, or “stickers,” between boards to allow airflow — reduces the odds of unpleasant surprises after assembly.
Sheet Goods: Plywood, MDF, and Particleboard
Not every project starts with solid lumber. Plywood, MDF, and particleboard each have distinct strengths that make them the right choice for specific applications, and each interacts differently with your tools. Plywood offers excellent strength-to-weight ratio and resists warping better than solid wood, making it ideal for cabinet carcasses and large panels, but it can cause more tearout on the face veneer if you’re using a low-tooth-count blade — this is exactly why a dedicated crosscut or plywood blade earns its keep.
MDF (medium-density fiberboard) is dense, uniform, and takes paint exceptionally well, which makes it popular for painted furniture and shop jigs. However, it’s murder on cutting tools — the resin binder inside MDF dulls blades and router bits far faster than solid wood, and the fine dust it produces is genuinely harmful to breathe without a good dust collection setup and a respirator. Particleboard is the least expensive and least durable of the three, most often seen in low-cost flat-pack furniture, and it’s rarely a good substrate for serious shop projects since it doesn’t hold screws as securely as plywood or MDF.
A Quick Reference for Matching Wood to Project
- Learning cuts and jigs: pine, poplar, or construction-grade plywood — cheap, forgiving, widely available.
- Painted furniture: poplar or MDF — both take paint smoothly without visible grain telegraphing through.
- Stained furniture: soft maple, red oak, or ash — attractive grain that responds well to stain without excessive blotching.
- Heirloom-quality pieces: walnut, cherry, or quartersawn white oak — worth the cost once your technique is dialed in.
- Outdoor projects: cedar, teak, or pressure-treated pine — naturally rot- and insect-resistant.
Matching your wood choice to your current skill level and the tools you already own is one of the most overlooked ways to get more consistent results without spending another dollar on new equipment.
Joinery Methods Explained: Which Tools Handle Which Joints
Joinery is where woodworking shifts from “cutting boards to size” into genuine craftsmanship, and it’s also where your tool choices start to matter enormously. Different joints favor different tools, and knowing which joints your current kit can handle well — versus which ones will require a future purchase — helps you plan projects realistically instead of getting stuck halfway through a build.
Butt Joints: The Simplest Starting Point
A butt joint is exactly what it sounds like: two square-cut pieces of wood butted together and fastened with screws, nails, or glue. It’s the easiest joint to cut — a miter saw or table saw with a square crosscut is all you need — but it’s also the weakest joint on this list, relying entirely on the fastener or adhesive for strength. Butt joints are perfectly fine for shop jigs, shelving, and simple boxes where appearance and long-term strength aren’t critical, but they’re a poor choice for load-bearing furniture joints like table legs and aprons.
Pocket-Hole Joints: Fast, Strong, and Beginner-Friendly
Pocket-hole joinery uses an angled hole drilled with a dedicated jig, allowing a self-tapping screw to pull two pieces of wood together at an angle that resists pull-out far better than a straight screw into end grain. This method has exploded in popularity among hobbyists because it requires minimal tooling — a pocket-hole jig, a drill, and a driver bit — while still producing surprisingly strong joints for cabinet face frames, shelving units, and simple furniture frames. The main tradeoff is the visible screw holes, which are typically hidden with plastic plugs or simply placed on the back or underside of a project.
Dado and Rabbet Joints: Table Saw and Router Territory
Dados (grooves cut into the middle of a board) and rabbets (step-shaped cuts along an edge) are the backbone of cabinet and bookcase construction, letting shelves sit in a stable channel rather than relying solely on fasteners. A table saw fitted with a dado stack — a set of stacked blades and chippers that cut a wider kerf in one pass — makes quick work of these cuts, though a router with a straight bit and an edge guide accomplishes nearly the same result for smaller projects or when you don’t own a dado stack. These joints add real mechanical strength beyond what glue and screws alone provide, since the shelf is physically captured within the panel.
Mortise and Tenon: The Gold Standard for Strength
The mortise and tenon joint — a rectangular tenon on one piece fitting snugly into a matching mortise cavity on another — has been the backbone of strong furniture joinery for centuries, and for good reason. It offers enormous glue surface area and mechanical interlock, making it the go-to choice for table legs, chair frames, and door construction where racking forces are a real concern. Cutting a clean mortise and tenon traditionally relies on a chisel and mallet for the mortise and a hand saw or table saw for the tenon cheeks, though a dedicated mortising machine or a router with a mortising jig speeds up the process considerably for anyone building furniture regularly.
Dovetail Joints: Precision Joinery for Drawers and Boxes
Dovetails are instantly recognizable by their interlocking, trapezoidal “pins and tails,” and they remain one of the strongest joints for resisting pull-apart forces — which is exactly why they’ve been the traditional choice for drawer boxes for centuries. Hand-cut dovetails require a fine dovetail saw, a marking gauge, and sharp chisels, along with practiced technique; router-based dovetail jigs make the process far more approachable for beginners by guiding a template that a router bit follows to cut both pins and tails with consistent spacing. Either approach demands more precision than most other joints on this list, which is why many woodworkers treat dovetails as a milestone skill rather than a starting point.
Biscuit and Domino Joints: Modern Alignment Aids
Biscuit joiners cut small, matching crescent-shaped slots into two boards, into which a compressed wood “biscuit” is glued to help align panels during glue-up — they’re less about raw strength and more about keeping edges flush while clamping. Domino joiners, a more expensive but increasingly popular alternative, cut mortises for loose tenons that offer considerably more strength than biscuits, essentially delivering mortise-and-tenon-level joint strength with much less manual layout work. Neither tool is strictly necessary for a beginner’s kit, but both are worth considering once you’re gluing up wide panels or building furniture regularly and want to speed up alignment without sacrificing strength.
Matching Joints to Your Current Tool Kit
| Joint | Primary Tool Needed | Relative Strength | Good First-Project Joint? |
|---|---|---|---|
| Butt Joint | Table saw or miter saw | Low | Yes |
| Pocket-Hole | Drill + pocket-hole jig | Medium | Yes |
| Dado/Rabbet | Table saw or router | Medium-High | Yes, with practice |
| Mortise & Tenon | Chisels, table saw, or router | Very High | Intermediate |
| Dovetail | Hand saw/chisels or router jig | Very High | Advanced |
| Biscuit/Domino | Biscuit or domino joiner | Medium-High | Intermediate |
For a deeper walkthrough of how hand tools and power tools work together across these joints, our guide to wood joinery tools explained covers technique alongside tool selection in more detail.
Finishes & Stains 101: Making the Most of Your Sanding Work
All the sanding in the world won’t save a project if the finish is applied poorly — and conversely, a thoughtfully chosen finish can make even a modest wood species look genuinely impressive. Since a random orbital sander made this list specifically to prep surfaces for finishing, it’s worth spending some time on what happens after the sanding dust settles.
Oil-Based vs. Water-Based Finishes
Oil-based finishes — including traditional polyurethane, tung oil, and Danish oil — tend to produce a warmer, richer color and a slightly more forgiving application process, since they stay workable longer and are less prone to showing lap marks. The tradeoffs are longer dry times, stronger fumes that require good ventilation, and more involved cleanup using mineral spirits. Water-based finishes dry much faster, have far less odor, clean up with soap and water, and resist yellowing over time, but they can raise the wood grain slightly and typically require a light sanding between coats for the smoothest result.
Neither option is objectively “better” — the right choice depends on your timeline, ventilation, and the look you’re after. Many woodworkers use an oil-based stain for color and then a water-based topcoat for protection, combining the warmth of oil with the durability and low odor of water-based polyurethane.
Stains: Enhancing Grain Without Hiding It
Wood stain adds color while (ideally) allowing the natural grain pattern to show through, which is why sanding progression matters so much before staining — a surface sanded unevenly will absorb stain unevenly, creating blotchy patches that no amount of careful brushwork can fix afterward. Certain species, particularly pine, cherry, and birch, are notorious for blotching because of inconsistent grain density; a pre-stain wood conditioner applied before staining helps even out absorption and is a cheap insurance policy against a disappointing result.
Testing stain on an offcut from the same board you’re building with — not a random scrap of a different species — is one of the simplest habits that prevents costly surprises. Lighting also affects how a stain reads once dry, so testing under the same lighting conditions where the finished piece will live gives a more accurate preview than testing under shop fluorescents alone.
Topcoats: Protecting the Work You’ve Put In
A topcoat’s job is to protect the wood (and any stain color) from moisture, UV exposure, and everyday wear. Polyurethane remains the most common choice for furniture because of its durability and resistance to scratches and spills, available in satin, semi-gloss, and gloss sheens depending on how much shine you want. Lacquer dries faster and produces a glass-smooth finish favored by professional shops, but it requires spray equipment and good ventilation, making it less practical for a first-time home setup. Wipe-on finishes like Danish oil or wiping varnish offer an approachable middle ground — easy to apply with a rag, forgiving of minor mistakes, and requiring no spray equipment, though they typically offer less protection than a full-strength brushed or sprayed topcoat.
Between-Coat Sanding: Where Your Sander Comes Back Into Play
Most finishes benefit from a light scuff-sand between coats using a very fine grit — often 320 or higher — to knock down any raised grain or dust nibs before the next coat goes on. This is typically done by hand with a sanding sponge rather than with a power sander, since the goal is a light touch rather than material removal. Wiping the surface with a tack cloth or a slightly damp microfiber cloth afterward removes the fine sanding dust that would otherwise get trapped under the next coat.
A Simple Finishing Workflow for Beginners
- Sand through a full grit progression (80 to 220) using your random orbital sander, finishing by hand with the grain.
- Wipe away dust thoroughly with a tack cloth or vacuum brush attachment.
- Apply a pre-stain conditioner if using a blotch-prone species like pine or cherry.
- Apply stain, wiping off excess after the manufacturer’s recommended dwell time.
- Let the stain cure fully before applying a topcoat — rushing this step is one of the most common beginner mistakes.
- Apply two to three thin coats of your chosen topcoat, lightly scuff-sanding between coats.
- Allow full cure time (often several days longer than the “dry to touch” time on the can) before regular use.
Patience during the finishing stage pays off disproportionately compared to the time invested — it’s usually the very last step before a project is complete, and rushing it is the single most common way a beautifully built piece ends up looking amateurish.
Shop Layout & Organization: Making a Small Space Work Hard
Even the best tool lineup underperforms in a disorganized, cramped shop. Workflow, storage, and safety clearances matter just as much as which brand of table saw you buy, especially in the garage and basement shops most hobbyists actually work in.
Mapping Your Workflow Before You Arrange Anything
Most woodworking projects follow a rough sequence: rough-cutting lumber to size, machining (ripping, planing, jointing), joinery, assembly and glue-up, and finally sanding and finishing. Laying out your shop so tools roughly follow that sequence — even in a small space — reduces the amount of walking, board-carrying, and repositioning you do during a typical project. A table saw positioned in the center of the shop with a few feet of infeed and outfeed clearance on both sides, for example, is far more useful than one wedged into a corner where long boards can’t be fed through safely.
Mobile Bases: The Small-Shop Secret Weapon
If your shop doubles as a garage, laundry room, or storage space, mobile bases with locking casters turn stationary tools into tools you can roll out for a project and tuck away afterward. Nearly every benchtop and contractor-style tool on this list — table saws, miter saw stands, dust collectors — benefits from a mobile base. The upfront cost is minor compared to the flexibility it buys you, and locking casters mean the tool stays put once it’s positioned for a cut, addressing the common worry that mobility comes at the expense of stability.
Vertical Storage for Clamps, Squares, and Hand Tools
Horizontal surface space is always at a premium in a small shop, which makes wall-mounted storage one of the highest-value organizational upgrades available. A French cleat system — a simple angled wooden rail mounted to the wall that accepts matching cleats on the back of shop-built holders — lets you rearrange tool storage instantly as your kit grows, without drilling new holes every time you add a tool. Pegboard remains a budget-friendly alternative for lighter items like squares, marking tools, and driver bits, though it doesn’t handle heavier items like bar clamps as gracefully as a cleat system or a dedicated rack.
Lighting: The Most Underrated Shop Upgrade
Poor lighting hides mistakes until it’s too late to easily correct them — a slightly uneven sanding job or a stain blotch is often invisible under dim overhead lighting but glaringly obvious once the piece moves into natural light. LED shop lights are inexpensive, run cool, and provide far more even, color-accurate light than older fluorescent tubes. Positioning at least one light source at a low, raking angle across your workbench reveals surface imperfections during sanding and finishing that overhead lighting alone will miss entirely.
Dust and Noise Containment for Shared Spaces
If your shop shares space with a car, a laundry area, or living space on the other side of a wall, containing dust and noise becomes a household relations issue as much as a shop design one. A physical barrier — even a heavy plastic sheet on a track — between your cutting and sanding area and the rest of the garage keeps fine dust from settling on parked cars and stored items. Running your loudest tools (table saw, miter saw, router) earlier in the day when possible, and investing in the dust collection setup discussed earlier in this guide, go a long way toward keeping a shared space livable for everyone in the household.
A Simple Small-Shop Layout Checklist
- Position your table saw with at least 4 feet of clearance in front and behind for infeed/outfeed.
- Keep your workbench near natural light or a strong raking light source.
- Store clamps vertically on a wall rack, not tangled in a bin.
- Put mobile bases on anything you need to roll out of the way after use.
- Keep a dedicated “dirty” zone for cutting and sanding, separate from an “assembly and finishing” zone if space allows.
- Mount a fire extinguisher near the door — sawdust and finishing chemicals both raise fire risk.
For more on setting up a first-time shop from the ground up, our guide to setting up a beginner woodshop walks through layout, electrical considerations, and must-have infrastructure before you even get to tool selection.
Buying New vs. Used Tools: When Secondhand Makes Sense
Amazon isn’t the only place to build a woodworking kit, and for certain tool categories, buying used can stretch a budget significantly further without sacrificing performance. Knowing which tools age well and which ones don’t helps you decide where to save and where to spend on new.
Tools That Are Usually Safe to Buy Used
Cast-iron stationary tools — table saws, jointers, and planers in particular — are often excellent used purchases, since cast iron doesn’t wear out the way plastic housings and rubber components do, and a motor that still runs smoothly after decades of use will likely keep running for many more years. Hand tools are another strong category for secondhand shopping: a vintage hand plane or a set of chisels, once cleaned up and sharpened, frequently outperforms a budget new equivalent at a fraction of the price, since older tool steel is often of surprisingly high quality. Workbenches, being largely mechanical wood-and-metal assemblies, also hold up well secondhand as long as the top hasn’t warped or been damaged.
Tools Worth Buying New
Cordless tools are the clearest case for buying new, since battery technology and brushless motor efficiency have improved so much in recent years that an older cordless drill or driver, even a well-maintained one, will likely underperform a current budget model. Safety-critical components — blade guards, riving knives, and the internal safety mechanisms on newer table saws — are another reason to lean toward new for saws unless you’re confident in your ability to inspect and, if necessary, source replacement safety parts for an older used model. Consumables and near-consumables like sandpaper, router bits, and blades should obviously always be purchased new regardless of what else you’re buying secondhand.
What to Check Before Buying a Used Power Tool
- Motor sound and smell — run it if possible; grinding noises or a burning smell are red flags.
- Cord and plug condition — frayed cords are a fire hazard and a sign of neglect.
- Table and fence flatness — check for warping, rust pitting, or a fence that won’t lock square.
- Bearing play — spin the blade or bit by hand (unplugged) and feel for wobble or grinding.
- Availability of replacement parts — search the model number before buying to confirm parts are still sold.
Estate sales, local classifieds, and woodworking club forums tend to produce better-maintained used tools than general marketplace listings, since sellers in those channels are more likely to be woodworkers themselves who understand what they’re selling. Whatever the source, factor in the cost of a tune-up — new blades, a sharpening session, fresh belts — when comparing a used price against a new one, since a “bargain” that needs $150 in parts and labor may not be a bargain at all.
First Projects to Build With This Tool Kit
Tools are only useful once you put them to work, and choosing the right first few projects does more for your skill development than any amount of additional reading. Here are project ideas roughly ordered by the tools and joinery skills they require, so you can match a project to where your kit currently stands.
Project 1: A Simple Shop Stool or Step Stool
Built almost entirely with a miter saw or table saw, a drill, and a combination square, a basic stool is a forgiving first project since it’s small, uses inexpensive pine or poplar, and tolerates minor imperfections without looking obviously flawed. It’s also genuinely useful in the shop afterward, giving you extra reach for high shelves or a seat for detail work at the bench.
Project 2: A Floating Shelf With Dado Joinery
Once you’re comfortable with basic crosscuts and rip cuts, a floating shelf that uses a table-saw-cut dado to house a hidden cleat introduces you to precision joinery without the complexity of a full mortise and tenon. It’s a great excuse to practice fence calibration and to see firsthand how much stronger a dado joint is compared to screws alone.
Project 3: A Clamping Glue-Up Panel (Cutting Board or Small Tabletop)
Gluing narrow boards into a wider panel — the basis of cutting boards, small tabletops, and panel doors — is where your clamp collection earns its keep and where a hand plane or random orbital sander becomes essential for flattening and smoothing the glued-up surface. This project also teaches grain-matching and clamp-pressure distribution, two skills that carry forward into nearly every future glue-up.
Project 4: A Small Box With Rabbet or Mortise-and-Tenon Joinery
A small keepsake or tool box introduces router-cut rabbets for the corners (or, for the more ambitious, a simple mortise and tenon frame) along with a hinged or sliding lid. It’s small enough to complete in a weekend but complex enough to genuinely test your layout, joinery, and finishing skills together in one build.
Project 5: A Workbench Accessory (Bench Hook, Shooting Board, or Clamping Caddy)
Building shop furniture for your own bench is a genuinely underrated way to practice, since the stakes are lower (nobody’s judging your own bench hook) while still requiring accurate, square cuts. A shooting board in particular pairs directly with your hand plane, giving you a dedicated jig for planing end grain and mitered edges perfectly square — a skill that pays off on every future project involving picture frames or mitered boxes.
Project 6: A Small Table or Stand With Mortise-and-Tenon Legs
Once you’re confident with layout, chisel work, and glue-ups, a small side table or plant stand using true mortise-and-tenon leg-to-apron joints represents a genuine milestone project. It pulls together nearly every tool and technique covered in this guide — accurate crosscuts, dado or mortise joinery, clamped glue-ups, sanding progression, and a full finishing workflow — into a single, satisfying build you’ll likely keep using for years.
Tool Care & Maintenance: Keep Your Investment Sharp
Even the best tools lose performance without regular upkeep. Here’s a seasonal checklist that takes less than an hour.
- Clean and wax cast-iron surfaces — table saw tops, jointer beds, and hand plane soles rust if left untreated. Paste wax or a dedicated rust preventer keeps them slick and protected.
- Check alignment — a fence that drifts, a blade that’s no longer parallel, or a square that’s out of true will cause more problems than any dull blade. Check and adjust quarterly.
- Sharpen blades and bits — saw blades can be professionally sharpened for a fraction of replacement cost. Router bits also benefit from occasional sharpening or replacement when they start tearing.
- Inspect cords and batteries — frayed cords are a fire hazard. Battery packs should be stored at 40–60% charge if you won’t use them for months.
- Lubricate moving parts — router plunge posts, saw trunnion gears, and clamp threads all work better with a little dry lubricant or light machine oil.
Shop Safety Essentials That Go Beyond the Tools Themselves
No tool list is complete without the gear that keeps you safe. At minimum, you should own and use:
- Safety glasses — impact-rated, preferably with side shields. Wood chips and broken bits travel fast.
- Hearing protection — foam plugs are fine; earmuffs are better for long sessions with loud tools.
- Dust mask or respirator — N95 for occasional sanding, P100 or better for regular dust exposure and finishes.
- Push sticks and pads — keep your hands away from blades and cutters.
- Featherboards — hold stock against the fence and table, reducing kickback risk.
- First aid kit — keep it stocked and accessible, not buried under a pile of offcuts.
Common Buying Mistakes (And How to Avoid Them)
Even experienced woodworkers make these mistakes. Learn from them without paying the price.
- Buying the cheapest version of a precision tool. A $12 combination square or a $40 router will cost you more in wasted material and frustration than the “savings” justify.
- Overlooking blade quality. A great table saw with a dull, cheap blade cuts like a toy. Budget for quality blades from the start.
- Ignoring battery ecosystem. Buying a drill from a brand that doesn’t offer the other tools you’ll want later means multiple chargers and wasted money.
- Not accounting for accessories. A router isn’t useful without bits; a sander needs paper; a table saw needs a good blade and a stand. Factor these into your budget.
- Forgetting dust collection until it’s too late. Respiratory issues develop over years, not weeks. Start with a shop vacuum and a mask, then scale up.
Side-by-Side Comparison: All 12 Tools at a Glance
If you’re trying to prioritize what to buy first based on budget, use this table as a quick reference for typical price tier, primary use case, and who each tool suits best.
| Tool | Primary Use | Typical Price Tier | Best For |
|---|---|---|---|
| Table Saw | Ripping, crosscutting, joinery | $$$ | Every serious shop |
| Wood Router | Edge profiles, mortises | $$ | Detail and joinery work |
| Cordless Drill | Drilling, driving screws | $$ | Daily use, all skill levels |
| Chisel Set | Paring, cleaning joints | $ | Hand-tool joinery |
| Orbital Sander | Surface finishing | $ | Pre-finish prep |
| Miter Saw | Crosscuts and angles | $$$ | Trim and furniture parts |
| Hand Plane | Flattening, smoothing | $$ | Fine surface control |
| Combination Square | Layout and measuring | $ | Every project |
| Clamps Set | Glue-ups, jig holding | $$ | Every project |
| Dust Collector | Air quality, cleanup | $$$ | Health-conscious shops |
| Woodworking Apron | Protection, tool storage | $ | Everyday shop comfort |
| Workbench | Stable work surface | $$$ | Shop foundation |
Frequently Asked Questions
What is the single most important woodworking tool to buy first?
Most experienced woodworkers point to a table saw as the highest-impact first purchase, since it handles the widest range of core cuts. That said, if your projects lean more toward trim and small furniture pieces, a miter saw paired with a cordless drill can be a lighter, less intimidating starting point.
Do I need both a table saw and a miter saw?
Eventually, yes. A table saw excels at rip cuts and joinery, while a miter saw is faster and more accurate for crosscuts and angles. Many shops start with one and add the other once budget allows.
How much should I budget for a basic woodworking tool kit?
A functional starter kit covering a cordless drill, chisel set, combination square, clamps, and an orbital sander can be assembled affordably. Larger stationary tools like a table saw, miter saw, and dust collector represent a bigger investment and are often added over time as projects demand.
Are corded or cordless power tools better for woodworking?
Corded tools generally offer more consistent power for demanding cuts, particularly table saws and routers. Cordless tools have closed the gap significantly for drills and sanders, offering convenience without a major performance penalty for most hobby-level work.
How often do chisels and hand planes need sharpening?
It depends on use, but a good rule of thumb is to hone the edge whenever you notice it tearing wood fibers instead of slicing cleanly. Frequent light honing on a fine stone or strop is generally better than waiting until the edge is fully dull.
Is dust collection really necessary for a home shop?
Yes, especially for anyone spending regular hours in the shop. Fine airborne dust from sanding and cutting can accumulate in your lungs over time. Even a basic setup connected to your dustiest tools makes a meaningful difference.
What size clamps should I buy first?
A mix of 24-inch and 36-inch parallel-jaw clamps covers most panel and cabinet glue-ups, while a handful of smaller quick-grip and spring clamps handle detail work and jig assembly.
Do I need a dedicated workbench, or can I use a folding table?
A folding table works for light assembly, but it won’t hold up to planing, chiseling, or clamping pressure the way a proper workbench does. If budget is tight, a portable clamping workbench is a reasonable middle ground.
What material is best for a woodworking apron?
Waxed canvas is lighter and more breathable, making it a good fit for warmer shops or lighter tasks. Leather offers stronger protection against sparks, sharp edges, and spills, at the cost of extra weight and a break-in period.
Can beginners safely use a table saw?
Yes, with proper instruction and consistent use of safety features like the blade guard, riving knife, and push sticks. Taking time to learn safe technique before diving into complex cuts makes a significant difference in injury prevention.
How do I know if a router bit is compatible with my router?
Check the shank diameter — most routers accept either 1/4-inch or 1/2-inch shank bits, and many mid-range routers include collets for both. Always match the bit’s rated RPM to your router’s speed settings, especially for larger-diameter bits.
What’s the difference between a random orbital sander and a standard orbital sander?
A random orbital sander moves in a random elliptical pattern that virtually eliminates swirl marks, while a standard orbital sander moves in a fixed circular pattern that can leave visible marks on the finished surface, particularly on light-colored woods.
Should I buy a combo kit or individual cordless tools?
Combo kits almost always offer better value if you need the included tools. Even if you don’t use one immediately, having a matching battery and charger platform is worth it. Just avoid kits packed with older brushed motors if you expect heavy use.
Why do some hand planes cost $50 and others $300?
The difference is usually in the flatness of the sole, the quality of the blade steel, and the precision of the adjustment mechanisms. Premium planes often work well out of the box; cheaper ones need significant fettling to perform acceptably. Both can produce great results, but the journey to get there differs.
Should a beginner use hardwood or softwood for their first project?
Softwoods like pine or poplar are far more forgiving for early projects — they’re cheaper, cut more easily, and reduce the sting of a beginner mistake. Save denser hardwoods for once you’re comfortable with your tools’ fence, angle, and depth settings.
Is it worth buying secondhand power tools to save money?
For cast-iron stationary tools like table saws and jointers, yes — cast iron and motors tend to age well. Cordless tools and anything with critical modern safety features are usually better bought new, since battery technology and safety systems have improved substantially over time.
Final Verdict: Build Your Kit With Intention
There’s no single “correct” order to buy these twelve tools — it depends on the kind of projects you’re drawn to and how much shop space you’re working with. That said, a sensible progression for most beginners starts with a stable workbench, a combination square, a cordless drill, and a set of clamps, since these fundamentals support literally every future project. From there, a table saw and miter saw unlock faster, more accurate cutting, while a router, chisel set, and hand plane round out your joinery and finishing capabilities.
Don’t feel pressured to buy everything at once. Many experienced woodworkers built their shops one tool at a time over several years, adding each piece as a specific project demanded it. That approach also tends to produce a more thoughtfully curated kit than buying everything up front based on a list alone — including this one.
Whatever you decide to add next, prioritize build quality and safety features over flashy marketing, and lean on dedicated reviews (like the ones linked throughout this guide) before committing to a specific model. Your future self — standing over a clean, square joint with sawdust on the floor and satisfaction in the work — will thank you.

Ready to start building your kit? Browse today’s top-rated woodworking tools on Amazon.
Shop Woodworking Tools on Amazon