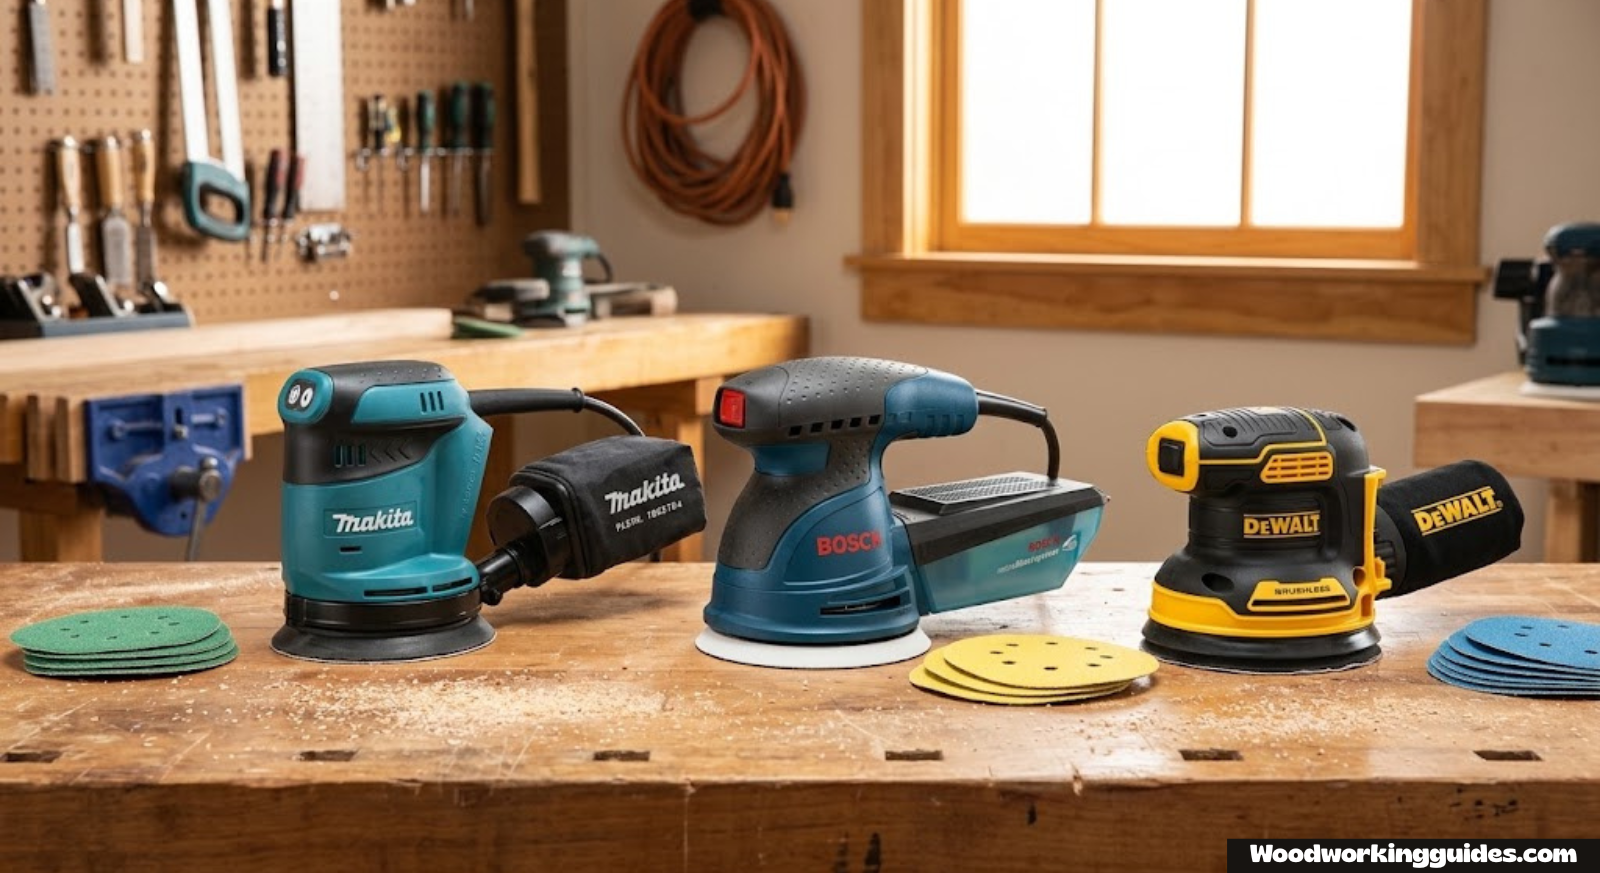
Best Random Orbital Sander: The Complete Buying Guide for Smooth, Swirl-Free Finishes
Whether you’re refinishing furniture, prepping cabinets, or knocking down welds on a metal project, the right random orbital sander turns hours of arm-numbing hand-sanding into minutes of smooth, even work. We tested and compared the top corded and cordless models to help you pick the one that fits your shop.
Why Your Sander Choice Matters
A random orbital sander is one of those tools that quietly separates a professional-looking finish from an amateur one. Unlike a simple orbital sander that moves in a fixed circular pattern, a random orbital sander combines rotation with an eccentric, wobbling motion. That randomness is the whole point — it prevents the tool from carving repeating swirl marks into your workpiece, which means you can sand aggressively without leaving telltale circles under a coat of stain or paint.
If you’ve ever spent a weekend hand-sanding a tabletop only to watch the scratch pattern show up the moment you wiped on finish, you already understand why this tool exists. A good random orbital sander removes material faster than hand sanding, blends adjacent grits more evenly, and dramatically reduces fatigue on long projects. But not every sander performs the same. Pad size, orbit diameter, variable speed control, dust collection, and battery ecosystem all affect how a sander feels in your hand and how clean your final surface turns out.
This guide breaks down seven of the most popular random orbital sanders on the market today — from budget-friendly cordless options to shop-grade corded workhorses — so you can match the right tool to your projects, whether that’s furniture refinishing, cabinet prep, automotive body work, or general woodworking shop tasks. If you’re building out a broader kit, our guide to essential woodworking tools is a good companion read.
Beyond the sander itself, the surrounding setup matters just as much. A stable, well-lit sanding station, a reliable way to collect dust, and a sensible progression through grits will do more for your finish quality than any single spec on a tool’s data sheet. Keep that in mind as you read through the comparisons below — the “best” sander is really the one that fits how, where, and how often you plan to use it.
How We Chose These Sanders
We evaluated each sander across the criteria that actually affect day-to-day use: material removal rate, vibration and comfort during extended use, dust collection efficiency, pad hook-and-loop quality, variable speed range, and — for cordless models — runtime and compatibility with existing battery platforms. We also weighed price against the tool’s build quality, because a sander that dies after eighteen months isn’t a bargain no matter what it cost upfront.
We paid close attention to how each tool behaves at the edges of a workpiece, since that’s where swirl marks and gouges are most likely to appear. A sander with poor pad control can dig in in ways that create more sanding work, not less. We also considered how well each unit pairs with common accessories, since many woodworkers already own cordless platforms from Milwaukee, Makita, DeWalt, or Ryobi and want a sander that shares batteries with their cordless drill or other tools.
Quick Comparison Table
| Model | Power Source | Pad Size | Orbit | Best For |
|---|---|---|---|---|
| Milwaukee M18 (2648-20) | 18V Cordless | 5″ | 3/32″ | Pro-grade cordless power |
| Makita XOB01Z | 18V Cordless | 5″ | 3/32″ | Low vibration, all-day use |
| DeWalt DCW210B | 20V MAX Cordless | 5″ | 7/64″ | Fast stock removal |
| Bosch ROS20VSC | Corded | 5″ | 3/32″ / 5/32″ | Dual-mode sanding & polishing |
| Makita BO5041 | Corded | 5″ | 3/32″ | Value corded workhorse |
| Black+Decker 20V MAX | 20V Cordless | 5″ | Fixed | Budget DIY projects |
| Ryobi ONE+ 18V | 18V Cordless | 5″ | Fixed | Homeowner & light shop use |
1. Milwaukee M18 Random Orbit Sander (2648-20)
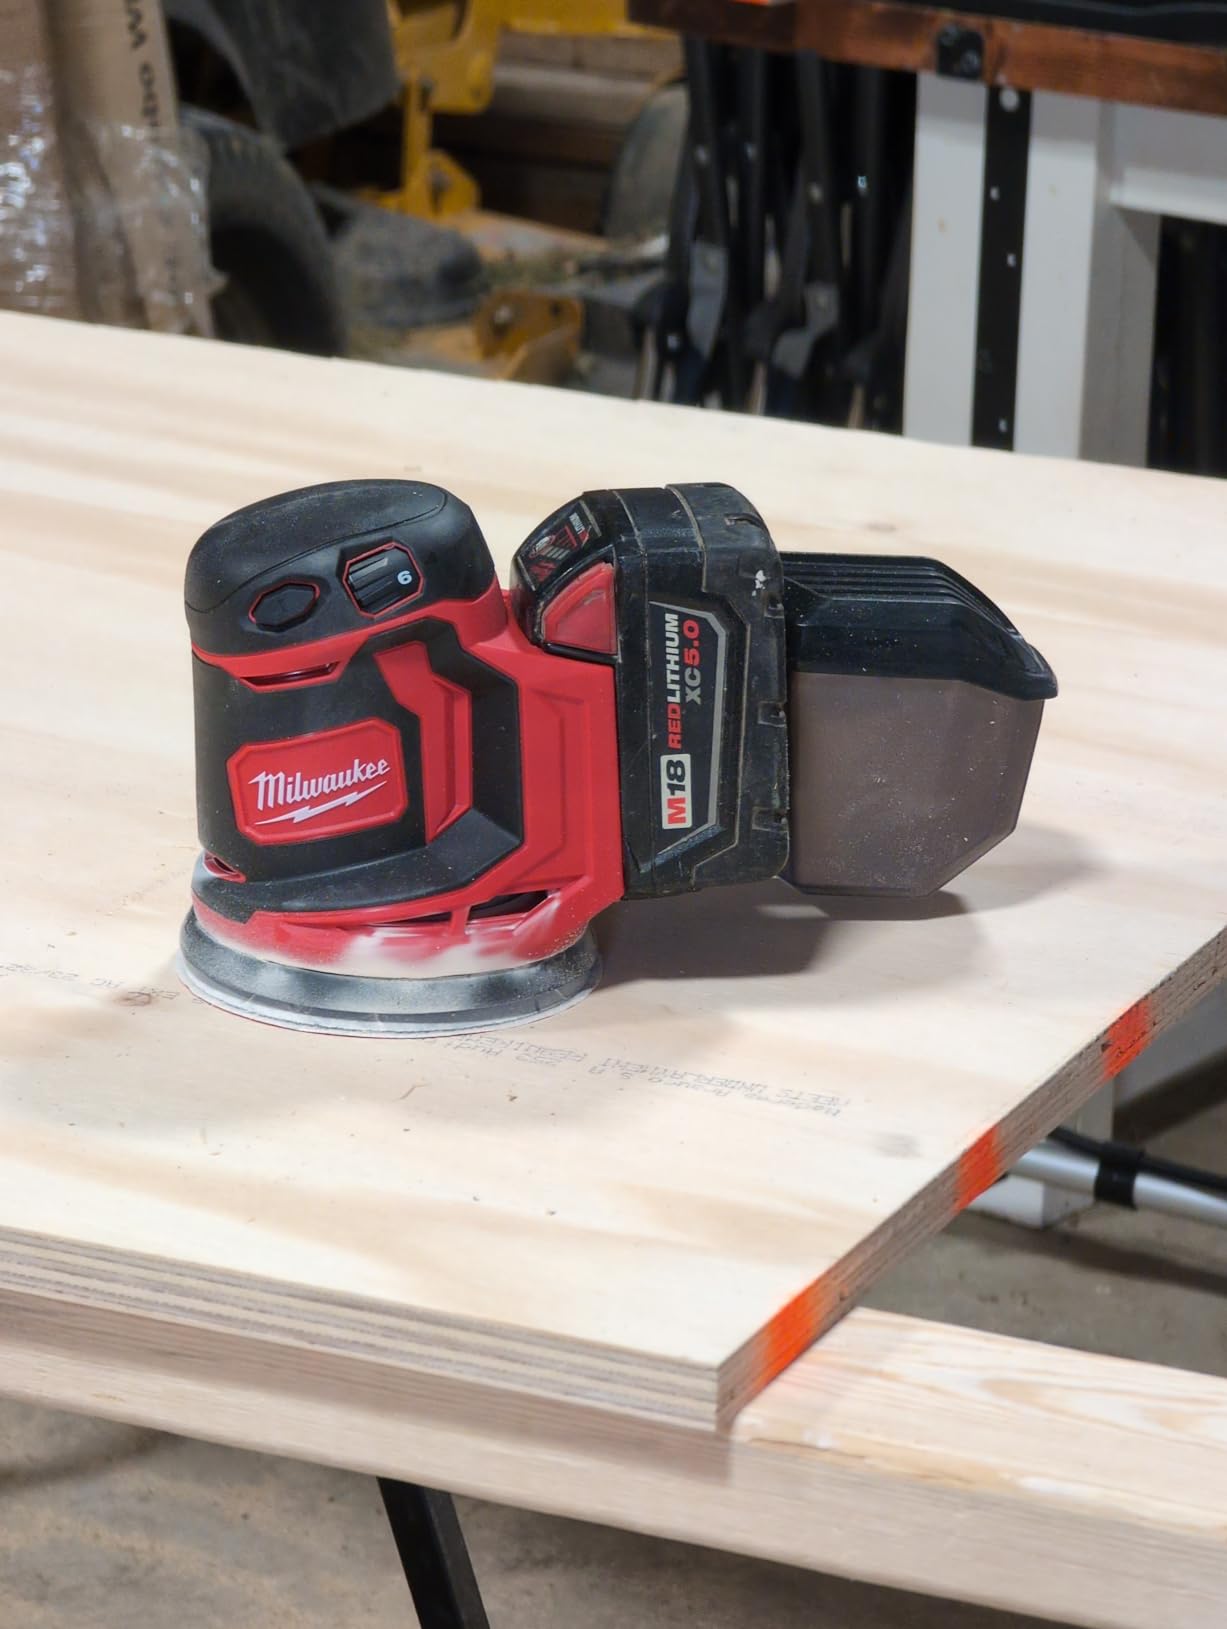
Milwaukee built its reputation on job-site durability, and the M18 random orbit sander carries that reputation onto the finishing bench. Powered by the M18 REDLITHIUM battery platform, this sander delivers 10,000 to 12,000 OPM with a brushless motor that keeps runtime consistent even under load. If you already run Milwaukee’s M18 batteries across your other tools, this is an easy addition to the lineup.
What stands out most in daily use is how little the tool bogs down when you push into denser hardwoods. Where some cordless sanders slow noticeably under pressure, the M18’s brushless motor holds its speed, which translates to a more consistent scratch pattern and less time spent going back over missed spots. The counterweight system is also well tuned, keeping vibration low enough for extended sessions without the hand fatigue that plagues cheaper units.
Key Features
- Brushless motor rated for extended tool life and consistent power under load
- 10,000–12,000 OPM with a 3/32″ orbit diameter for balanced material removal and finish quality
- Low-profile, ergonomic body designed to reduce user fatigue over long sessions
- Compatible with the full M18 battery ecosystem, including higher-capacity packs for extended runtime
- Integrated dust collection with a sealed switch to resist dust intrusion
Pros
- Excellent power-to-weight ratio
- Shares batteries with the wider M18 lineup
- Low vibration for a cordless unit
Cons
- Sold as bare tool — battery and charger not included
- Premium price compared to budget alternatives

Milwaukee M18 Random Orbit Sander (2648-20)
Check current pricing and availability on Amazon.
Check Price on Amazon2. Makita 18V LXT Cordless 5″ Random Orbit Sander (XOB01Z)

Makita has long been known for smooth-running power tools, and the XOB01Z continues that tradition in cordless form. It runs on the 18V LXT battery system, one of the most widely adopted cordless platforms among professional woodworkers, which makes it a natural fit if you’re already invested in Makita’s ecosystem through a Makita cordless drill or router.
The standout feature here is comfort. Makita engineered a rubberized palm grip and a counterbalanced design that noticeably reduces hand and wrist fatigue compared to older-generation sanders. For anyone doing repetitive finishing work — think cabinet doors, chair spindles, or large tabletop projects — that reduction in vibration adds up over the course of a full day.
Key Features
- Variable speed dial with a range suited to both aggressive stock removal and fine finishing passes
- Large, easy-access dust bag with a snap-on connection for quick emptying
- Compact, lightweight body designed for one-handed control on vertical surfaces
- Compatible with the extensive Makita 18V LXT battery and charger lineup
Pros
- Very low vibration for extended comfort
- Broad battery compatibility across the Makita lineup
- Compact and easy to control one-handed
Cons
- Dust collection is good but not as strong as a shop-vac hookup
- Bare tool only in most listings

Makita 18V LXT Cordless Random Orbit Sander (XOB01Z)
See ratings, reviews, and current price on Amazon.
Check Price on Amazon3. DeWalt 20V MAX Cordless Variable-Speed Random Orbital Sander (DCW210B)
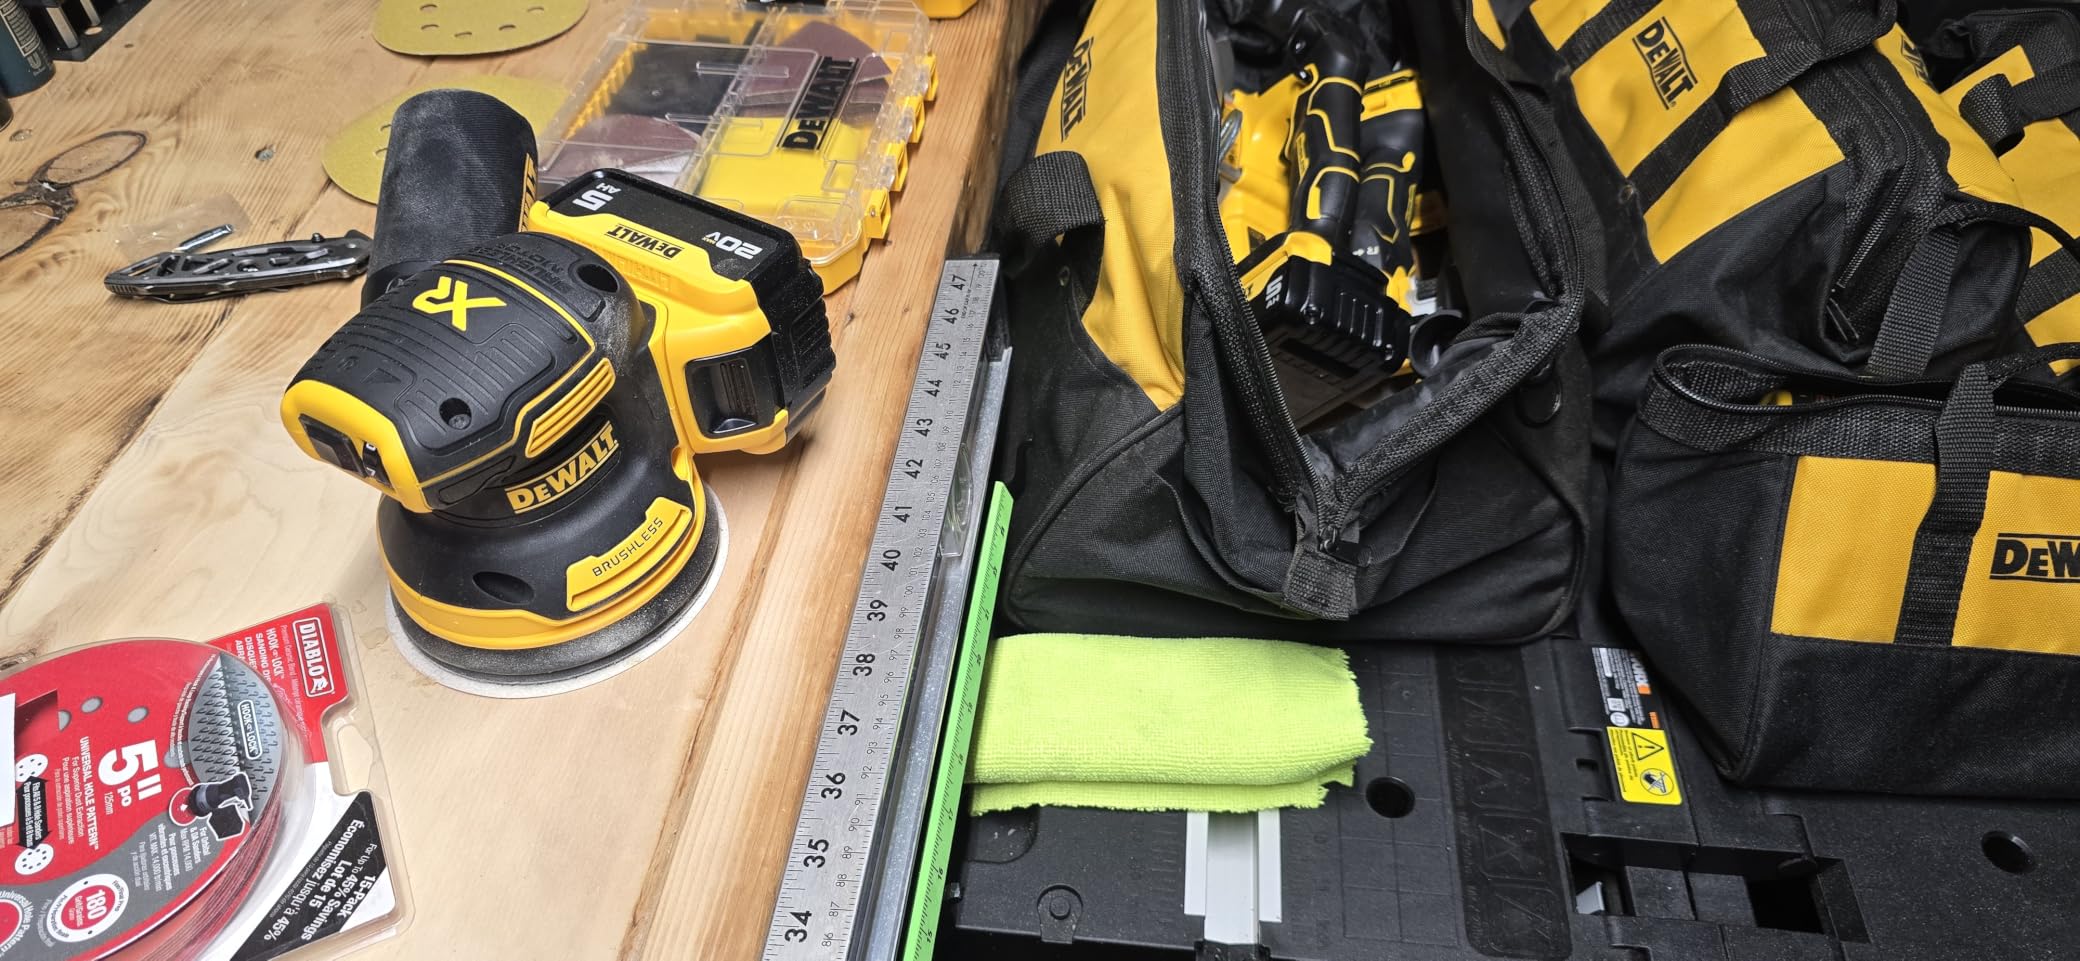
DeWalt’s DCW210B leans into raw sanding speed. With a larger 7/64″ orbit diameter than most competitors, it removes material noticeably faster, which makes it a strong choice when you’re stripping old finish, leveling glued-up panels, or working through a stack of rough-sawn boards. The tradeoff is that the larger orbit can leave slightly deeper scratch patterns at coarse grits, so you’ll want to step through your grits methodically before applying finish.
The tool includes a variable speed dial ranging roughly from 8,000 to 12,000 OPM, giving you room to dial back for delicate veneers or finish-grade passes. Its dust sealed switch and brushless motor are aimed squarely at job-site durability, and it runs on DeWalt’s massive 20V MAX battery platform — a major advantage if you already own a DeWalt cordless drill or a DeWalt router.
Key Features
- 7/64″ orbit diameter for faster material removal on rough stock
- Brushless motor with dust-sealed switch for extended durability
- Variable speed dial for adapting between coarse and fine grits
- Compatible with the full 20V MAX battery lineup
Pros
- Fast material removal on rough or painted surfaces
- Rugged, job-site-ready build
- Wide 20V MAX battery compatibility
Cons
- Larger orbit can leave coarser scratch patterns if you skip grits
- Slightly heavier than the Makita XOB01Z

DeWalt 20V MAX Random Orbital Sander (DCW210B)
View current pricing and customer reviews on Amazon.
Check Price on Amazon4. Bosch 5″ Random Orbital Sander/Polisher (ROS20VSC)
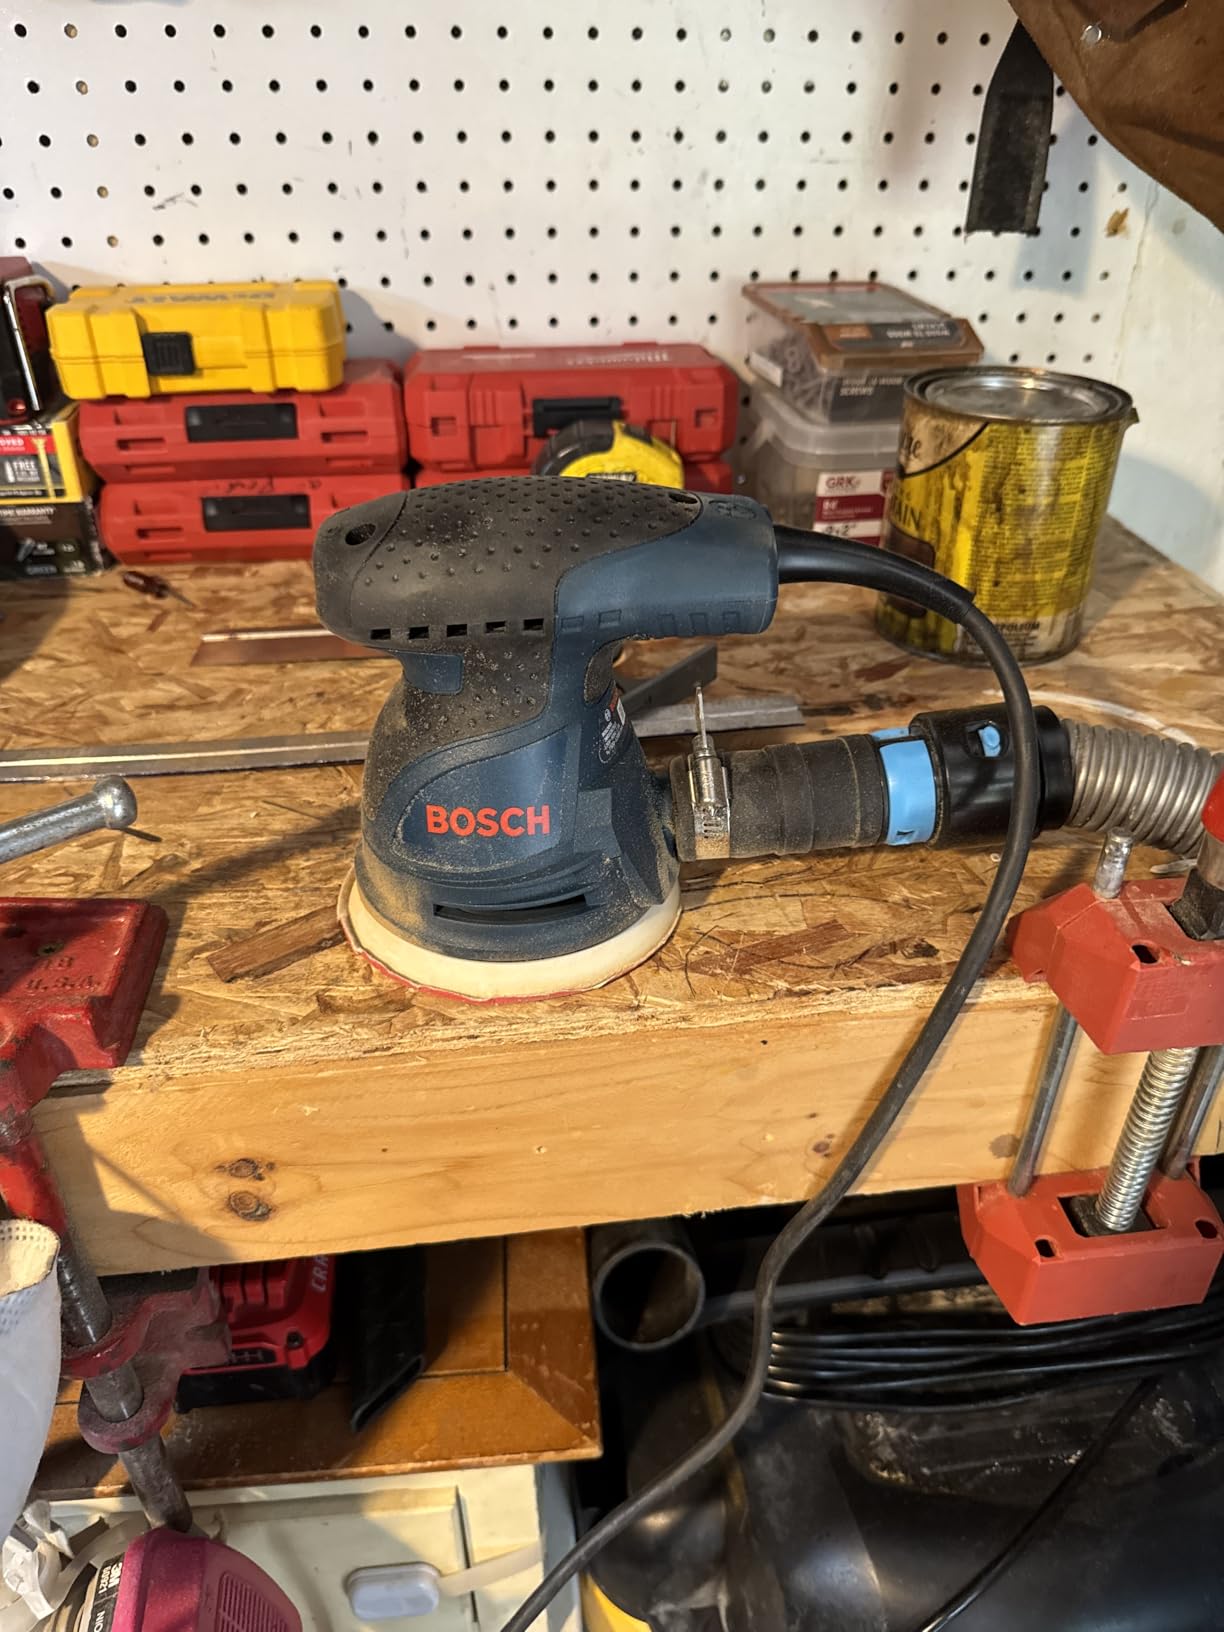
Bosch’s ROS20VSC is the only corded, dual-mode tool on this list, and that versatility is exactly why it earns a spot here. It ships with two interchangeable pads: one set up for standard 3/32″ orbit sanding, and another for a wider 5/32″ orbit that turns the tool into a capable polisher. For woodworkers who also dabble in automotive detailing or furniture wax finishing, that’s a genuinely useful two-in-one setup.
Because it’s corded, you never worry about runtime, which matters on long sanding sessions like leveling an epoxy tabletop or working through an entire cabinet’s worth of doors. The variable speed dial covers a wide range, and Bosch’s included storage case keeps both pad sets, sanding discs, and the dust canister organized between uses.
Key Features
- Two interchangeable pads: 3/32″ orbit for sanding, 5/32″ orbit for polishing
- Corded design for unlimited runtime on long jobs
- Included canister-style dust collection system
- Padded carrying case with storage for pads and accessories
Pros
- Doubles as a sander and a polisher
- No battery to manage or replace
- Comes with a storage case and accessories
Cons
- Cord limits mobility around large workpieces
- Heavier than most cordless models in this list

Bosch 5″ Random Orbital Sander/Polisher (ROS20VSC)
See the current price and included accessories on Amazon.
Check Price on Amazon5. Makita 5″ Variable Speed Random Orbit Sander (BO5041 / BO5030K)

The BO5041 (and its kitted sibling, the BO5030K) is a long-running favorite among woodworkers who want a corded sander without the higher price tag of the Bosch. Makita kept the design simple: a well-balanced barrel grip, a variable speed dial from roughly 4,000 to 12,000 OPM, and a reliable dust collection canister. It’s not flashy, but it’s proven — this model has been a shop staple for years because it just works.
For furniture builders and cabinet shops running a sander for hours at a stretch, the lightweight body and low-vibration design matter more than any spec sheet number. It pairs well with a broader shop setup — if you’re building out your bench, see our guide to the best woodworking workbenches for layout ideas that keep sanders and clamps within easy reach.
Key Features
- Variable speed control from roughly 4,000–12,000 OPM
- Lightweight, barrel-grip body for reduced fatigue over long sessions
- Dust collection canister with easy tool-free removal
- Corded reliability at a lower price point than premium dual-mode tools
Pros
- Excellent value for a corded professional-grade tool
- Proven reliability over years of shop use
- Low vibration for extended comfort
Cons
- No polishing pad option like the Bosch
- Cord management needed on larger projects

Makita 5″ Variable Speed Random Orbit Sander (BO5041)
Compare pricing and kit options on Amazon.
Check Price on Amazon6. Black+Decker 20V MAX Cordless Random Orbital Sander
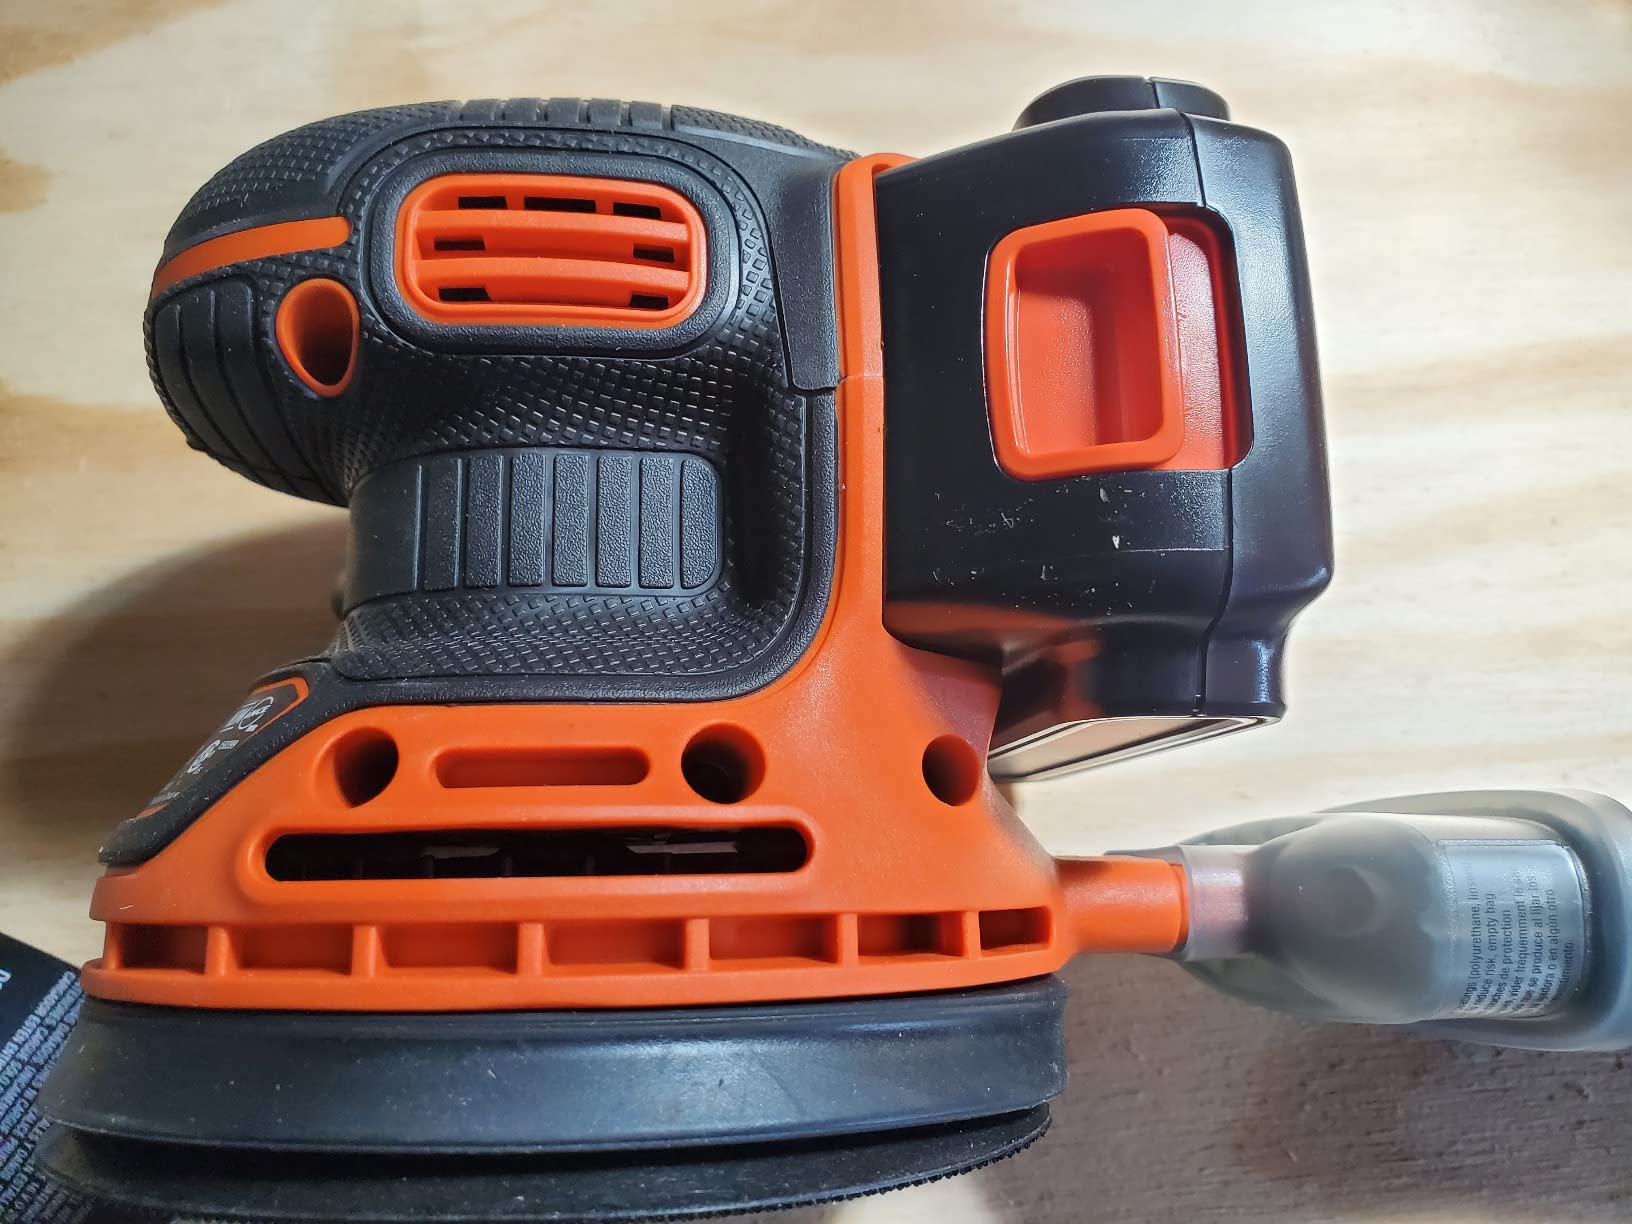
Not every project needs a professional-grade tool, and that’s where the Black+Decker 20V MAX earns its place. It’s built for homeowners and occasional DIYers who need to refinish a deck railing, smooth out drywall patches, or prep a piece of furniture for paint — tasks where you don’t need brushless motors or dual-mode pads, just a sander that gets the job done affordably.
It runs on Black+Decker’s 20V MAX battery platform, which is widely available and inexpensive to expand, and it includes a basic dust collection canister that handles light debris well enough for casual use. Don’t expect the runtime or vibration control of the Milwaukee or Makita models here — but for the price, it’s a genuinely useful starter tool.
Key Features
- Compact, lightweight design suited to one-handed control
- Basic dust collection canister for light-duty debris capture
- Runs on the widely available 20V MAX battery platform
- Budget-friendly price point for occasional users
Pros
- Very affordable entry point into cordless sanding
- Lightweight and easy to handle
- Good for occasional DIY projects
Cons
- No variable speed control on most versions
- Not built for daily professional use
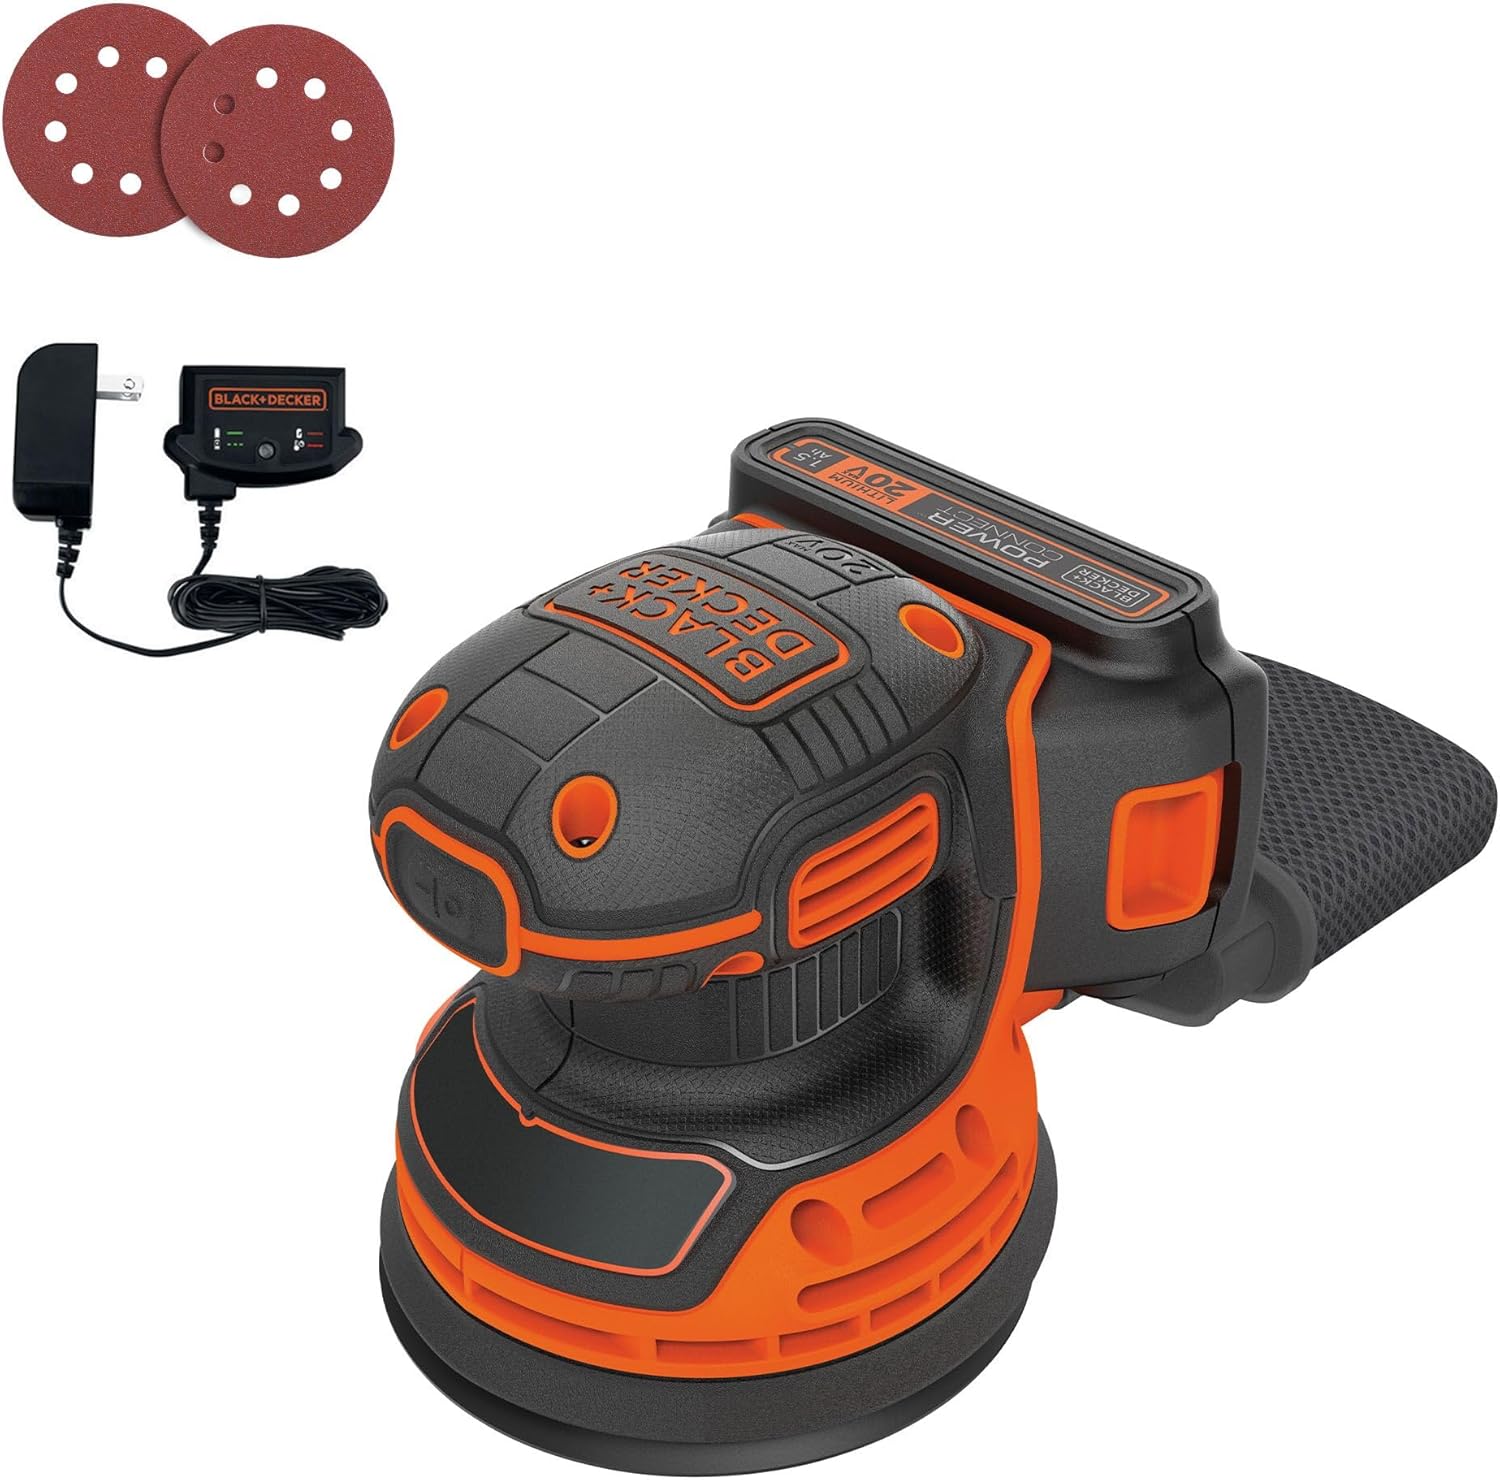
Black+Decker 20V MAX Cordless Random Orbital Sander
Check current price and bundle options on Amazon.
Check Price on Amazon7. Ryobi ONE+ 18V 5″ Random Orbital Sander
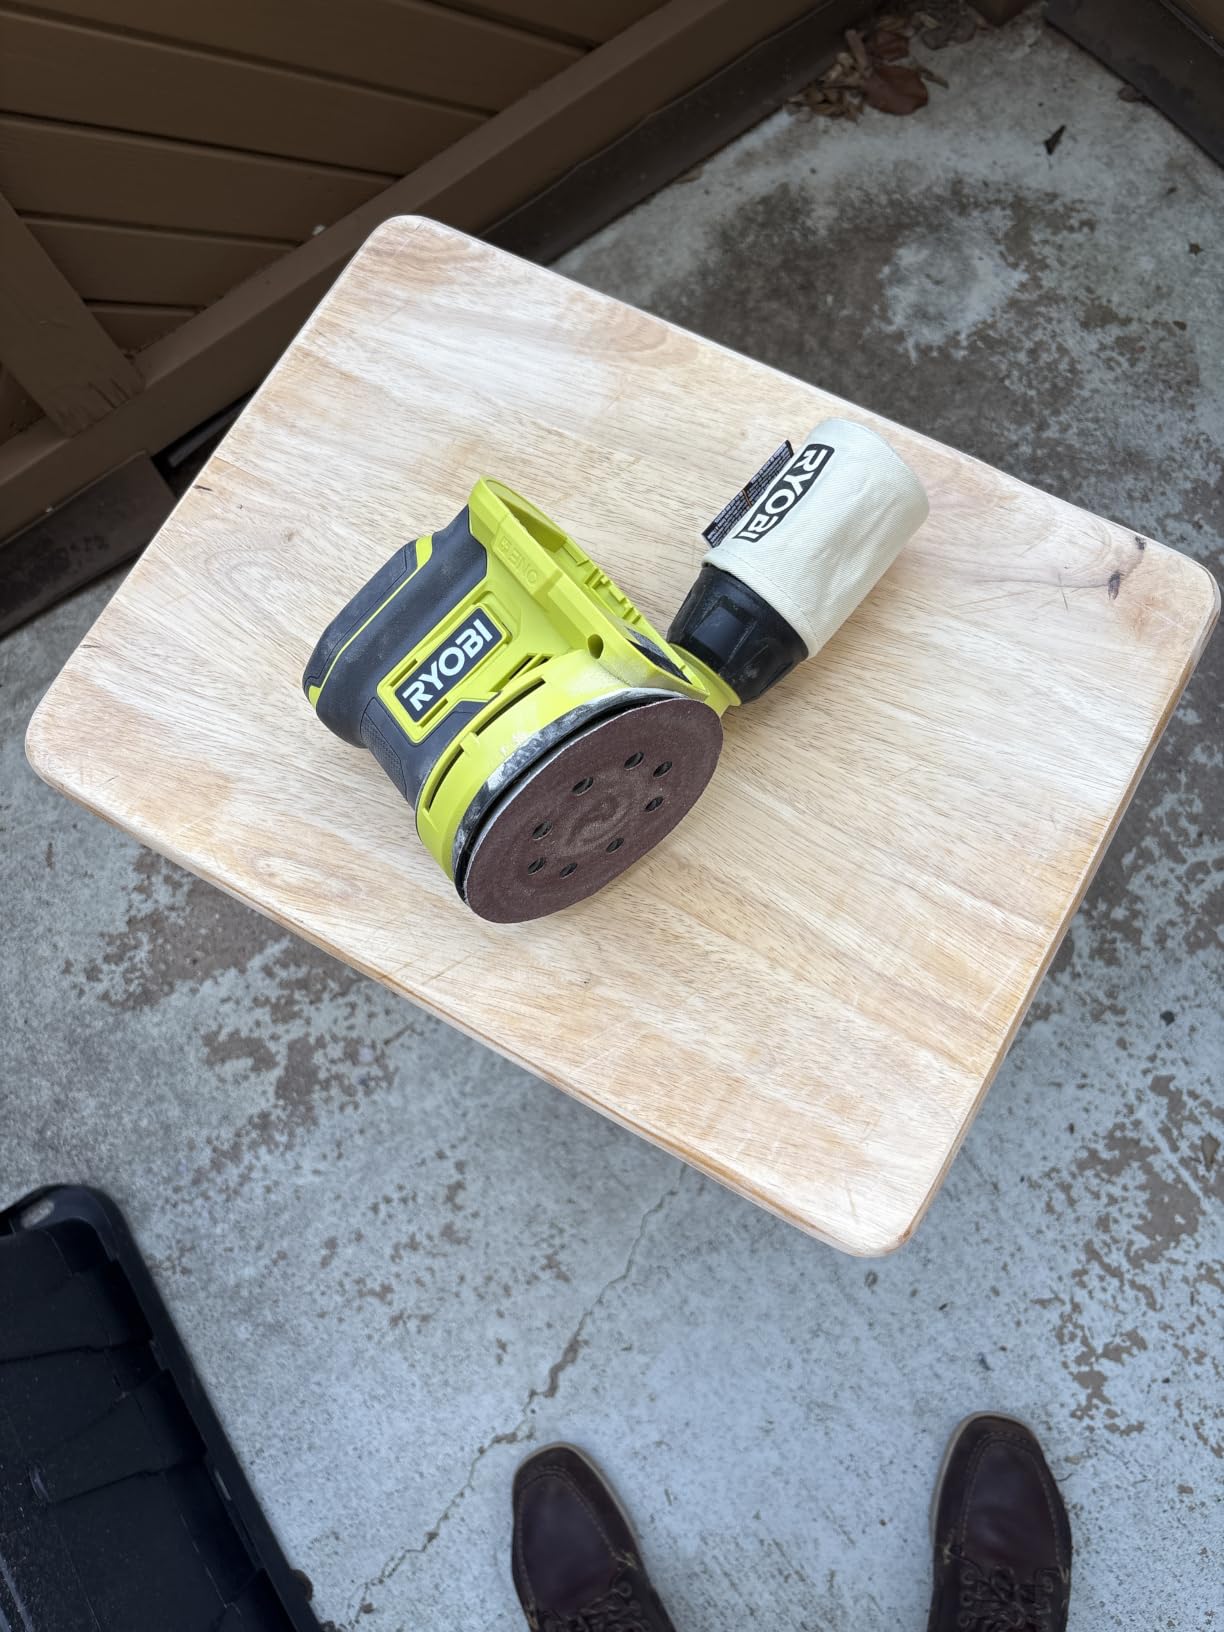
If you already own tools on Ryobi’s ONE+ 18V platform — and given how large that ecosystem has grown, there’s a good chance you do — this sander is a low-cost way to add sanding capability without buying a new battery system. It’s a straightforward, no-frills tool: a single-speed motor, a basic dust bag, and a comfortable grip that’s plenty capable for weekend projects, small furniture builds, and general home maintenance.
It won’t out-perform the Milwaukee or DeWalt on raw power, and it lacks the finish-quality edge of the Makita models, but for light-duty work it’s hard to beat the value, especially if you’re setting up a beginner woodshop on a budget and want tools that share one battery platform.
Key Features
- Compatible with the entire Ryobi ONE+ 18V battery lineup
- Lightweight body designed for comfortable extended use
- Basic dust bag for onboard debris collection
- Affordable entry point for homeowners already in the Ryobi ecosystem
Pros
- Shares batteries with the huge Ryobi ONE+ lineup
- Comfortable for light, extended use
- Budget-friendly
Cons
- Single speed limits control on delicate surfaces
- Not intended for heavy daily use

Ryobi ONE+ 18V 5″ Random Orbital Sander
See current pricing and kit bundles on Amazon.
Check Price on AmazonCorded vs. Cordless: Which Should You Choose?
This is the first fork in the road for most buyers, and it comes down less to power and more to how you work. Corded sanders like the Bosch ROS20VSC and Makita BO5041 offer unlimited runtime and, in many cases, slightly more consistent power delivery since they’re not drawing from a depleting battery. They’re a strong choice for shop-based work where you’re sanding for hours at a stretch and don’t want to interrupt a session to swap batteries.
Cordless sanders have closed the power gap significantly in recent years, and models like the Milwaukee M18 and DeWalt DCW210B genuinely rival corded performance while adding the freedom to move around a job site, work outdoors, or sand in spots where running an extension cord is impractical. The real advantage of going cordless is when you already own batteries for that brand’s platform — adding a sander to an existing Milwaukee, Makita, DeWalt, or Ryobi kit means one less charger and one less thing to buy separately.
If you’re building a shop from scratch, it’s worth thinking about your broader tool platform before committing. Standardizing on one cordless ecosystem across your drill, sander, and other handheld tools saves money over time and means you’re never caught with a dead battery and no backup.
Random Orbital Sanders vs. Other Power Sanders
The random orbital sander is arguably the most versatile sanding tool in a home or professional shop, but it’s not the only option, and understanding how it compares to other sander types helps you decide whether it deserves a spot as your primary finishing tool or whether you need a second sander alongside it. Each type of sander has a particular motion pattern, and that motion dictates what it does well and where it struggles.
Random Orbital Sander vs. Belt Sander
A belt sander uses a continuous loop of sandpaper stretched between two rollers, creating a linear sanding path that removes material aggressively and quickly. Belt sanders excel at heavy stock removal — leveling uneven glue-ups, stripping thick layers of paint, or flattening rough lumber before it goes through a planer. The tradeoff is control: a belt sander is hard to finesse, and it can dig a trough into a surface in seconds if you’re not careful. A random orbital sander, by contrast, is built for control and finish quality rather than raw aggression. Most woodworkers who own both tools use the belt sander for rough shaping and the random orbital sander for everything from mid-grit smoothing through final finishing.
If your projects rarely involve heavy stock removal, a random orbital sander can handle the full spectrum of your sanding needs on its own. But if you regularly work with rough-sawn lumber or need to strip paint from large surfaces, pairing a belt sander with a random orbital sander gives you the best of both worlds — speed on the front end and a clean finish on the back end.
Random Orbital Sander vs. Palm Sheet Sander
A palm sander (sometimes called a sheet sander or finish sander) uses a rectangular pad that accepts quarter-sheets of standard sandpaper, cut from full-size sheets. The motion is typically a small, straight-line oscillation — sometimes called a “jiggle” — which leaves a scratch pattern that’s more directional and linear than the random orbital’s swirling pattern. Palm sanders are lightweight, inexpensive, and great for light-duty finishing work on flat surfaces, but they clog quickly on painted or resinous surfaces and can leave visible linear scratches if you’re not careful with your grit progression.
A random orbital sander is superior for nearly every finishing task because its randomized motion prevents the predictable scratch patterns that sheet sanders leave behind. The main advantage of a palm sander today is its low cost and its ability to get into corners (since its rectangular pad reaches into 90-degree angles that a round-pad random orbital sander cannot). If you find yourself needing corner access frequently, a detail sander is a better complement to a random orbital than a palm sheet sander.
Random Orbital Sander vs. Detail Sander
A detail sander (sometimes called a mouse sander or multi-tool sander) uses a small, pointed or triangular pad that reaches into tight corners, grooves, and profiles that a round-pad random orbital sander simply cannot access. Detail sanders are essential for refinishing work on furniture with ornate profiles, chair spindles, window frames, and any surface where a standard 5″ pad would be too large. However, their small pad size means slow material removal over large surfaces, and they tend to vibrate more aggressively than full-size random orbital sanders due to their lighter weight and smaller counterbalance mass.
The best approach is to use a random orbital sander for the bulk of any flat or gently curved surface, then switch to a detail sander only when you encounter areas the larger tool cannot reach. Trying to use a detail sander for an entire project is possible but painfully slow, and the results are less consistent than what a properly used random orbital sander delivers.
Random Orbital Sander vs. Spindle and Drum Sanders
Spindle sanders and drum sanders are benchtop or floor-standing machines designed for specific tasks: spindle sanders excel at smoothing curved edges and inside radii, while drum sanders handle wide, flat stock to extremely uniform thicknesses. Neither overlaps meaningfully with the random orbital sander’s role as a handheld finishing tool. If your shop produces a lot of panels, tabletops, or wide boards, a drum sander paired with a random orbital sander creates a powerful two-step workflow — the drum sander brings the board to uniform thickness, and the random orbital sander prepares the surface for finish. For more on building out a balanced shop, see our guide on balancing hand tools and power tools.
When the Random Orbital Is the Right (or Only) Choice
For most home woodworkers and even many professionals, a quality random orbital sander is the single most-used sanding tool in the shop. It handles rough stock prep at coarse grits, mid-project smoothing, pre-finish preparation, and between-coat scuffing — all with the same tool and just a disc swap. If you’re buying your first power sander or replacing an aging one, a random orbital model covers the widest range of tasks with the fewest tradeoffs, which is why the models in this guide are the ones we recommend first.
Choosing the Right Sandpaper Grit for Your Sander
A great sander is only half the equation — the abrasive you load onto it determines the actual result. Random orbital sanders typically use hook-and-loop discs, which makes swapping grits fast compared to the clamp-style paper used on older sheet sanders.
| Grit Range | Use Case |
|---|---|
| 40–60 (Coarse) | Stripping old finish, leveling rough glue-ups, removing deep scratches |
| 80–120 (Medium) | General shaping and smoothing before finish-grit sanding |
| 150–180 (Fine) | Pre-stain or pre-paint smoothing on most hardwoods |
| 220–320 (Extra Fine) | Final pass before finish, sanding between coats |
| 400+ (Ultra Fine) | Polishing finishes, buffing lacquer or epoxy |
A common mistake is skipping grits — jumping straight from 60 to 220, for example — which leaves deeper scratches from the coarse grit that the finer paper can’t remove. Work through grits in reasonably small steps (roughly doubling each time) for the cleanest results, especially on projects headed for a stained or clear-coat finish where every scratch will show.
Sanding Different Wood Species and Materials
Not all wood sands the same way, and adjusting your approach for the species you’re working with is one of the easiest ways to improve your finish quality. Hardwoods, softwoods, manufactured sheet goods, and non-wood materials each interact with abrasives differently, and recognizing those differences prevents problems that show up only after the finish goes on.
Hardwoods: Oak, Maple, Walnut, Cherry, and Ash
Hardwoods are generally straightforward to sand with a random orbital sander, but each species has its own quirks. White oak and ash have open, prominent grain pores that can trap dust from coarser grits, so blowing out or wiping the surface between grit changes is especially important on these species. Red oak is particularly notorious for showing sanding scratches under stain if you skip grits, so a careful progression from 80 through 120, 150, and 220 is worthwhile.
Maple is dense and closed-grained, which makes it sand beautifully but also means it burns easily if you linger in one spot or press too hard. Keep the sander moving at a steady pace and let the tool do the work. Cherry and walnut are more forgiving — their warm tones hide minor imperfections better than lighter woods — but both benefit from a final hand-sanding pass with the grain to remove any cross-grain scratches left by the random orbital’s somewhat randomized pattern.
For any hardwood going under a clear finish, stopping at 180 or 220 grit is generally the right call. Sanding beyond 220 on bare hardwood can burnish the wood fibers so tightly that stain or finish has trouble absorbing, leading to blotchy or uneven coloring. If you’re building furniture from hardwood lumber, our guide to chisel sets for beginners pairs well with sander work for shaping joints and cleaning up tenons.
Softwoods: Pine, Cedar, Fir, and Spruce
Softwoods present a different challenge: their softer earlywood (the lighter, less dense growth rings) sands much faster than the harder latewood (the darker, denser bands), which means a random orbital sander can create a subtle undulating texture if you apply too much pressure or use grits that are too coarse early on. Starting at 100 or 120 grit rather than 60 or 80 helps avoid this problem, especially on pine and fir.
Pine is particularly prone to blotching under stain, and the sanding process plays a role in that. Over-sanding to very fine grits (above 220) closes the grain and makes blotching worse. For pine that will be stained, stopping at 150 or 180 and then applying a pre-stain wood conditioner is a more reliable approach than trying to sand your way to a perfect surface.
Cedar is softer still, and its aromatic oils can load up sandpaper quickly. Check discs frequently when sanding cedar, and replace them as soon as they feel smooth to the touch — a loaded disc stops cutting and starts generating friction heat that can scorch the surface.
Plywood and Veneer
Plywood requires extra caution because the face veneer is thin — sometimes only 1/32″ thick on economy-grade panels. Aggressive sanding with a random orbital sander can sand right through the veneer in seconds, exposing the cross-grained core ply beneath and ruining the panel. Use 150 grit or finer on plywood faces, keep the sander moving, and check your progress frequently by wiping the surface with a damp cloth to reveal any areas where you’ve gone too far.
Higher-quality hardwood plywood has a thicker face veneer and can tolerate more sanding, but even then it’s wise to use lighter pressure and finer grits than you would on solid lumber. If your project uses plywood for panels — cabinet cases, bookcase backs, or drawer bottoms — consider how much sanding each piece actually needs before you start. Often a single light pass at 150 grit is enough to prep the surface for paint or a clear coat.
MDF and Particleboard
Medium-density fiberboard (MDF) sands easily — almost too easily. A random orbital sander can remove material from MDF very quickly, which is helpful for shaping but dangerous if you’re trying to maintain a flat, uniform surface. Use light, even pressure and check your progress often. MDF dust is extremely fine, and it packs tightly into sandpaper discs, so you’ll go through more discs on MDF than on solid wood. A shop vac connected to the sander’s dust port is essentially mandatory when sanding MDF, both for visibility and for health — more on that in the health section below.
Particleboard is coarser and less uniform than MDF, and it doesn’t sand well at all — the large wood particles and resin binder create an uneven surface that’s difficult to smooth consistently. For particleboard, the goal is usually to prepare for paint or laminate, not to achieve a smooth bare-wood finish, so a single pass at 120 or 150 grit is typically sufficient.
Exotic and Oily Woods
Woods like teak, ipe, cocobolo, and purpleheart contain natural oils that load sandpaper rapidly and can interfere with finish adhesion. When sanding oily exotics, wipe the surface with a solvent like mineral spirits or acetone between grit changes to remove surface oils and unclog the abrasive. You’ll still go through discs faster than with domestic hardwoods, but the solvent wipe makes each disc last longer and produces a cleaner surface for finishing.
Some exotic woods also have silica content (teak is a well-known example) that dulls abrasives quickly. Ceramic or zirconia abrasive discs (discussed in the sanding disc section below) hold up better than standard aluminum oxide on these species, so spending a few extra dollars on a premium abrasive pays off in the long run.
Non-Wood Materials
Random orbital sanders are more versatile than many people realize. With the right discs, they handle light metal work — smoothing welds, removing surface rust, or preparing steel for paint. Use metal-rated discs and keep the speed moderate to avoid overheating thin sheet metal. For plastic and composite materials, standard aluminum oxide discs work well at low to medium speeds, but be careful about melting — high speed and heavy pressure can generate enough friction heat to soften or deform plastic surfaces. Drywall is another common non-wood application; a random orbital sander with a medium-grit disc and a shop vac connected makes quick work of feathering drywall mud patches smooth.
Sanding Technique and Safety Tips
Random orbital sanders are forgiving compared to belt sanders, but technique still matters. Let the tool’s weight do the work rather than pressing down hard — excess pressure can stall the random motion and turn your “random” orbital sander into a plain circular one, which is exactly the swirl-mark problem you bought this tool to avoid.
- Keep the pad flat against the surface at all times; tilting the edge digs in and creates gouges.
- Move the sander in slow, overlapping passes rather than lingering in one spot.
- Wear a dust mask or respirator, especially when sanding old paint that may contain lead, or MDF that produces very fine dust.
- Use eye protection — kicked-up debris and dust are a real risk even with good dust collection.
- Unplug corded models or remove batteries from cordless models before changing pads or sandpaper.
- Check your hearing protection on longer sessions; extended exposure to tool noise adds up over a workday.
If you’re working near other power tools like a table saw or miter saw, keep your sanding station separate where possible — fine dust settling on saw tables and fences can affect cut accuracy over time.
Complete Sanding Workflow: From Raw Stock to Final Coat
Knowing how to use a random orbital sander is one thing; knowing when and in what order to sand throughout an entire project is another. A complete sanding workflow starts before any finish is applied and extends through the final between-coat scuff. Here’s a step-by-step framework you can adapt to almost any woodworking project.
Step 1: Inspect and Plan Before You Sand
Before you load a single disc, examine every surface you plan to sand. Look for glue squeeze-out, dried drips, dents, and any areas where joints don’t sit perfectly flush. Scrape away dried glue with a sharp chisel or cabinet scraper first — sanding over dried glue clogs discs instantly and creates hard spots in the surface that absorb stain differently than bare wood, showing up as dull patches under your finish. Knock down any proud joints with a hand plane or a sharp card scraper before moving to the sander, since the sander will follow the existing contour rather than level it.
Step 2: Choose Your Starting Grit
Your starting grit depends on the condition of the raw stock. Smooth, planed lumber from a lumberyard may only need a 120-grit starting pass, while rough-sawn boards or panels with dried glue residue might need 80 or even 60 grit to level the surface. If you’re unsure, start at 100 or 120 — it’s always safer to work up from a finer grit than to start too coarse and spend extra time erasing deep scratches.
Load your disc, connect your dust collection (even a basic dust bag helps), and set the sander to a medium speed if your model has variable speed control. Place the sander on the workpiece before starting it — starting the sander while it’s already in contact can leave a swirl mark at the point of contact.
Step 3: Systematic Sanding with Consistent Pressure
Move the sander across the entire surface in overlapping passes, working methodically from one end to the other. Overlap each pass by about half the pad width to ensure no areas are missed. Maintain a steady pace — fast enough that you don’t linger and create a low spot, slow enough that the abrasive has time to cut. Let the tool’s weight provide the pressure; your hand guides direction and pace, not force.
On large surfaces like tabletops, work in sections but blend your sections together by making a final overlapping pass across the full length of the surface at the end of each grit. This prevents visible sanding lines between sections, which can show up clearly under a clear finish.
Step 4: Progress Through Grits
After each grit, wipe the surface with a tack cloth or blow it off with compressed air to remove dust. Examine the surface under a raking light (a light source held low to the surface, almost parallel) to reveal any remaining scratches from the previous grit. If you see scratches that the current grit isn’t removing, you may have skipped too far — go back one grit and work the surface again before moving forward.
A typical progression for hardwood furniture might be: 100 → 120 → 150 → 180 → 220. For pine or other softwoods destined for paint: 120 → 150 → 180. For a table headed for a stained and clear-coated finish: 100 → 120 → 150 → 180 → 220. Each grit should only need to remove the scratch pattern from the previous grit, so if you’re doing your grit progression right, each pass should be quick — one or two full sweeps of the surface.
Step 5: Final Hand-Sanding with the Grain
After your last machine-grit pass (typically 180 or 220), do a final hand-sanding pass with the grain using the same grit. This removes any subtle cross-grain scratches left by the random orbital’s somewhat randomized motion and leaves a surface that’s fully prepped for stain or clear finish. A cork or rubber sanding block makes this faster and more consistent than bare-hand sanding. For flat panels, a simple block of scrap wood wrapped in sandpaper works just as well.
Step 6: Between-Coat Sanding
After the first coat of finish dries, the surface typically feels rough because the finish raises the wood grain. Lightly sand with 220 or 320 grit — either by hand or with your random orbital sander set to its lowest speed and using very light pressure — to knock down the raised grain. This “de-nibbing” or “scuffing” pass creates a silky-smooth surface for the next coat. Wipe away dust with a tack cloth, and apply the next coat. Repeat this between every coat of finish for the smoothest possible final result.
Between-coat sanding is one of the most overlooked steps in finishing, and skipping it is the number-one reason DIY finishes feel rough compared to professional work. The extra few minutes it takes between coats makes an enormous difference in the tactile quality of the final surface.
Step 7: Final Inspection and Buffing
After your last coat of finish has fully cured (not just dried to the touch — check the manufacturer’s recommended cure time), inspect the surface under raking light for any remaining dust nibs, brush marks, or imperfections. If the finish is lacquer or a film-building polyurethane, you can wet-sand with 400-grit or finer followed by a polishing compound for a glass-smooth surface. Oil and wax finishes don’t build a film, so they don’t get this treatment — their beauty is in the wood, not in a glossy surface coat.
Sanding Curved and Contoured Surfaces
A 5″ random orbital sander is built for flat and gently curved surfaces, but many woodworking projects include curved elements — chair legs, turned spindles, arched aprons, round-overs, and chamfers. Knowing how to handle these areas without creating flat spots or uneven profiles separates clean, professional work from work that needs to be re-done.
Flat and Gentle Curves
For surfaces with a gentle, sweeping curve — like the belly of a chair seat or the shallow arc of a tabletop edge — a random orbital sander works fine if you let the pad flex naturally against the surface. The key is to reduce pressure even further than you would on a flat surface, and to keep the sander moving so the pad doesn’t conform to one spot and create a depression. Let the pad ride over the curve, following its contour with a light, gliding touch.
Tight Curves, Round-Overs, and Chamfers
For tighter curves and edge profiles, the round pad of a random orbital sander becomes a liability — the rigid backing plate can flatten a round-over, square off a chamfer, or create uneven sanding on a tight radius. In these areas, switch to hand sanding. A piece of sandpaper wrapped around a dowel, a flexible foam sanding pad, or a contoured rubber block conforms to the curve in a way that a machine pad cannot.
If you use a router to create a round-over or chamfer profile, the routed surface is usually smooth enough that it needs only a light hand-sanding pass at 180 or 220 grit to remove any minor router marks and prep for finish. Don’t try to run a random orbital sander over a routed profile — you’ll round it off further and lose the crisp definition of the shape. For more on routing profiles, see our wood router picks.
Turned Spindles and Cylindrical Shapes
For turned work — chair spindles, table legs, balusters — a random orbital sander is not the right tool. Spindle work is best sanded on the lathe itself using sandpaper held against the spinning workpiece, or by hand with a strip of sandpaper wrapped around the spindle. A detail sander with a pointed or finger-shaped attachment can help on elongated curves that your hand can’t easily wrap around, but for most turned work, on-lathe sanding produces the most consistent results.
Flexible Backing Pads
Some aftermarket backing pads for random orbital sanders are made from softer rubber or foam that flexes more readily over curved surfaces than the standard semi-rigid pad. These can help when you’re working on a piece with a mix of flat and gently curved areas and don’t want to switch tools mid-project. However, flexible pads sacrifice some of the rigidity that makes a random orbital sander effective on flat surfaces, so they’re a compromise — useful for curved work, less ideal as a permanent replacement for the standard pad.
Blending Machine-Sanded and Hand-Sanded Areas
On any project that mixes flat surfaces (sanded by machine) and curved surfaces (sanded by hand), the transition zone is where problems hide. After you’ve machine-sanded the flat areas and hand-sanded the curves, do a final pass at your last grit by hand across the entire piece — flat areas included — to blend the two sanding zones together. This removes any subtle difference in scratch pattern between the machine-sanded and hand-sanded areas, and ensures a uniform surface under stain or clear finish.
Maintenance and Longevity
Random orbital sanders are relatively low-maintenance, but a few habits extend their life significantly. Empty the dust canister or bag regularly — a packed dust collector reduces suction and can force fine particles back onto your workpiece. Periodically check the hook-and-loop pad for worn or matted hooks; a pad that can’t grip sandpaper securely will let discs slip and wear unevenly.
For cordless models, avoid letting batteries sit fully depleted for long periods, and store them at partial charge if you won’t use the tool for weeks at a time. For corded models, inspect the cord regularly for nicks or fraying, particularly near the strain relief where the cord enters the housing. Keeping your sander clean and dry — and storing it in a case away from moisture — will keep the motor and bearings running smoothly for years.
Setting Up a Dedicated Sanding Station
A random orbital sander performs best when the workspace around it is organized for sanding specifically. A dedicated sanding station — even a small one in a garage shop — makes the entire process faster, cleaner, and more consistent. Here’s what to consider when setting one up.
Work Surface and Height
Sanding is most comfortable when the workpiece sits at a height where your arms can work naturally without hunching or reaching. For most people, that’s around knuckle height when standing with arms relaxed at your sides — typically 32″ to 36″ from the floor, depending on your height. A sturdy workbench at this height prevents the workpiece from bouncing or shifting under the sander, which wastes time and can create uneven surfaces. If you’re building or buying a bench for this purpose, our guide to the best woodworking workbenches covers options at every budget. Choosing the right wood for your workbench and plywood for the benchtop also matters for stability and flatness.
For shops with limited space, a portable workbench that folds against a wall or stores under a larger bench can serve double duty. The key is that the surface is flat and rigid — sanding on a wobbly or uneven surface makes it nearly impossible to achieve consistent results.
Dust Collection at the Station
The single biggest upgrade you can make to a sanding station is connecting your sander to a dust collection system via a hose. Most random orbital sanders include a dust port (usually around 1″ to 1-1/4″ in diameter) that accepts a step-down adapter to a standard shop vac hose. Even a basic 5-gallon shop vac with a fine-particle filter captures significantly more dust than an onboard bag, keeping the work surface visible and reducing the fine particulate you’re breathing.
For a more permanent setup, a dedicated dust collector with a fine-filter cartridge or a cyclone separator upstream of the collector handles the volume of dust a sander produces during long sessions. Position the dust collection inlet close to the sanding area to minimize hose length — shorter hoses maintain stronger suction. We cover dust collection options in more detail in the dust collection section below.
Lighting
Good lighting at a sanding station is more important than most people realize. Overhead shop lights alone cast shadows across the workpiece that hide sanding scratches, glue residue, and uneven spots. A task light positioned low — aimed almost parallel to the surface — creates raking light that reveals surface imperfections clearly. A simple articulated LED work lamp clamped to the edge of the bench works well. Position it so the light rakes across the surface from the side, and you’ll catch scratches and missed spots that are invisible under overhead lighting.
Grit Organization and Disc Storage
Nothing slows down a sanding session like digging through a jumbled pile of discs trying to find the right grit. A simple wall-mounted rack, a set of labeled bins, or even a binder with labeled divider tabs (the kind used for index cards) keeps discs organized and immediately accessible. Label each section by grit number, and store discs face-up so the hook-and-loop backing doesn’t attract debris and lose grip.
Vacuum and Air Filtration
Even with excellent dust collection at the sander, some fine dust inevitably escapes into the shop air. A ceiling-mounted air filtration unit — the kind that cycles the room air through a fine filter multiple times per hour — captures the airborne particulate that the sander’s dust port and shop vac miss. Running one of these units during and after sanding sessions significantly improves air quality in an enclosed shop, and it’s especially valuable if you sand MDF, particleboard, or any material that produces very fine, easily respirable dust. Pair it with a properly rated respirator for the most complete protection — more on respiratory safety in the health section.
Buyer’s Guide: What to Look For
Orbit Diameter
A smaller orbit (around 3/32″) tends to leave a finer scratch pattern, better suited to finish work. A larger orbit (around 7/64″ to 5/32″) removes material faster but can leave a coarser pattern that requires more careful grit progression.
Variable Speed Control
A speed dial lets you slow down for delicate veneers or plastics and speed up for aggressive stock removal. If you work across a range of materials, prioritize a model with variable speed over a fixed-speed budget option.
Dust Collection
Onboard dust bags are convenient but limited; many sanders also include a port to connect a shop vac for significantly stronger suction, which keeps your work surface visible and reduces airborne dust in enclosed shop spaces.
Weight and Ergonomics
For long sessions, a lighter sander with good grip design will save your hands and wrists. Test the balance point if you can — a sander that’s front-heavy or has an awkward grip angle becomes tiring fast, no matter how powerful the motor.
Battery Platform Compatibility
If you’re already invested in a cordless ecosystem, sticking with that brand for your sander avoids the cost of a second charger and battery set. This is especially worth considering if you’re also shopping for a cordless drill or other handheld tools around the same time.
Pad Hook-and-Loop Quality
Look closely at the pad itself before buying. A high-quality hook-and-loop surface holds discs firmly through an entire sanding pass, while a worn or poorly designed pad lets discs slip, spin loosely, or shed prematurely. Cheaper sanders sometimes cut costs here, and it’s one of the first components to wear out under heavy use, so replacement pad availability is worth checking before you commit to a brand.
Noise Level
Sanders run for extended stretches, and noise fatigue is a real factor in shops without much sound dampening. Brushless motors tend to run quieter than older brushed designs, and corded tools are sometimes louder at the same power output than comparable cordless units. If you’re working in a shared space, garage, or near neighbors, it’s worth checking published decibel ratings before buying.
Warranty and Parts Availability
Established brands like Milwaukee, Makita, DeWalt, and Bosch typically offer stronger warranty coverage and easier access to replacement parts like pads, dust bags, and switches. That matters more than it might seem at first — a sander with cheap, hard-to-find replacement parts often gets tossed the moment one component fails, even if the motor itself is still fine.
Soft-Start and Electric Brake
Some mid-range and premium sanders include a soft-start feature that gradually ramps the motor up to speed when you pull the trigger, rather than jerking to full speed instantly. This prevents the sander from jumping or leaving a mark at the point where you set it down on the workpiece. An electric brake, less common on sanders than on saws, stops the pad quickly when you release the trigger, which helps prevent accidental marks when you lift the tool. Neither feature is essential, but both contribute to a more controlled, less error-prone sanding experience — particularly for less experienced users.
Dust Port Size and Compatibility
Before buying, check the sander’s dust port diameter and compare it to your shop vac’s hose inlet. Most sanders use a port between 1″ and 1-1/4″, while many shop vacs use 2-1/2″ or 1-7/8″ hose connections. A step-down adapter bridges the gap, but not all adapters seal tightly, and a leaky connection reduces suction significantly. Some manufacturers include an adapter in the box; others require you to buy one separately. If you plan to use dust collection — and you should — this compatibility check before purchase prevents a frustrating first session where the adapter doesn’t fit or falls off mid-sand.
Sanding Disc Deep Dive: Materials, Attachment, and Brands
The sanding disc is where the actual work happens, and choosing the right disc for your material and application has as much impact on your results as choosing the right sander. Abrasive discs vary in backing material, abrasive grain type, grit density, and attachment method — and each variable affects cut rate, disc life, and finish quality.
Abrasive Grain Types
Aluminum oxide is the most common and most affordable abrasive grain for random orbital sanding discs. It works well on wood, painted surfaces, and mild steel, and it’s the default choice for general-purpose woodworking. Aluminum oxide discs are available in a wide range of grits and from virtually every brand, making them easy to find and affordable to buy in bulk. For most woodworkers, aluminum oxide covers 90% of their needs.
Silicon carbide is harder and sharper than aluminum oxide, but it also wears faster. It excels on harder materials — plastics, fiberglass, solid surface countertops, and stone — and on surfaces where the abrasive needs to stay sharp rather than fracture into fresh cutting edges. It’s less common for pure wood sanding but useful if your work crosses into non-wood materials.
Ceramic alumina is a premium abrasive that stays sharp longer than standard aluminum oxide because it micro-fractures during use, constantly exposing fresh cutting edges. Ceramic discs cost more per disc but last significantly longer, which often makes them cheaper per unit of work done. They’re a strong choice for hardwoods, dense exotics, and any application where you’re burning through standard aluminum oxide discs quickly. Brands like 3M (Cubitron II) and Norton (Blaze) make excellent ceramic discs for random orbital sanders.
Zirconia alumina sits between aluminum oxide and ceramic in both performance and price. It’s durable, self-sharpening (like ceramic), and particularly effective on metal and aggressive stock removal on wood. Zirconia discs are often blue or green and are a solid upgrade from basic aluminum oxide for anyone doing frequent heavy sanding.
Hook-and-Loop vs. PSA (Pressure-Sensitive Adhesive)
Hook-and-loop is the standard attachment method for random orbital sanders today. Discs attach like Velcro — press them onto the pad, peel them off when you’re done. The convenience of quick grit changes makes hook-and-loop the obvious choice for most users. The downside is that the loop side of the hook-and-loop surface on the backing pad wears over time, especially if discs are removed carelessly (ripped off at an angle rather than peeled straight up). When the hooks lose their grip, discs start slipping during sanding, which wastes time and damages the workpiece. Replacement backing pads are available for most major-brand sanders and are worth keeping on hand.
PSA (pressure-sensitive adhesive) discs use a sticky backing that bonds to a smooth rubber pad. They hold more securely than hook-and-loop and don’t wear out the pad, but they’re less convenient to swap — removing a partially used PSA disc often tears it, and adhesive residue builds up on the pad over time. PSA discs are more common in industrial and auto-body settings where long uninterrupted sanding sessions at a single grit are the norm, rather than the frequent grit changes typical in woodworking.
Disc Brands Worth Considering
3M makes some of the highest-performing sanding discs on the market, particularly their Cubitron II line with precision-shaped ceramic grain. They’re priced at a premium, but for hardwoods, exotics, or high-volume production work, the extended disc life justifies the cost.
Norton offers a broad range from economy to professional-grade discs. Their Blaze line (ceramic) and their standard multi-purpose aluminum oxide discs are both well-regarded in professional shops.
Diablo (by Freud) is widely available at home centers and offers good mid-range performance. Their sanding discs are a solid step up from bargain multi-packs without the premium price of 3M or Norton.
Mirka is a Finnish brand known for high-quality abrasives, and their Gold and Abranet lines are popular among professional finishers. Abranet is a mesh-style disc that provides excellent dust extraction through the disc itself — a notable advantage for connected dust collection systems.
Budget multi-packs from generic brands can work fine for occasional use, but they tend to clog faster, tear at the edges sooner, and shed abrasive grains more quickly than mid-tier or premium options. If you sand frequently, buying a smaller quantity of a better disc usually costs less in the long run than buying large packs of cheap discs that you replace twice as often.
Storing Sanding Discs
Sanding discs last longest when stored flat in a cool, dry environment. Humidity can degrade the adhesive on PSA discs and cause the paper backing on hook-and-loop discs to curl or warp. Keep discs in their original packaging or in a sealed bin, and avoid leaving them in a hot garage or shed where temperature swings can shorten their shelf life. Properly stored, most sanding discs remain effective for years.
Dust Collection Systems: From Bag to Shop Vac to HEPA
Every random orbital sander produces dust, and how you collect that dust affects your health, your visibility, and your finish quality. There’s a wide range of dust collection approaches, from the basic cloth bag that ships with most sanders to professional-grade HEPA-filtered vacuum systems. Understanding the options helps you choose the setup that matches your shop and your sanding volume.
Onboard Dust Bags and Canisters
Every sander in this guide includes some form of onboard dust collection — usually a small cloth bag or a rigid canister that attaches to the sander’s dust port. These capture a portion of the dust produced during sanding, typically somewhere between 40% and 70% of total output depending on the design. They’re convenient (no hose to manage), and they’re better than nothing, but they have clear limits: they fill quickly, their filter media isn’t fine enough to capture the smallest particles, and they lose suction as they fill.
For light, occasional sanding — a quick scuff before a coat of finish, or a small DIY project — the onboard bag or canister is usually adequate. Empty it frequently, tap the filter to dislodge packed dust, and replace the bag or canister if the fabric develops holes or the seal degrades.
Shop Vac Connection
Connecting your sander to a shop vac through the dust port is the single most effective upgrade for most home woodworkers. A shop vac with a fine-particle filter (often called a HEPA-style filter, though true HEPA filtration requires a sealed system) captures significantly more fine dust than an onboard bag, and the continuous suction keeps the pad area clear during sanding, which improves visibility and prevents dust from settling back onto the workpiece.
Most random orbital sanders use a dust port between 1″ and 1-1/4″ in diameter, while shop vacs typically accept 1-7/8″ or 2-1/2″ hoses. A step-down adapter (available at hardware stores or online for a few dollars) bridges the gap. Make sure the adapter seals tightly — air leaks reduce suction and let fine dust escape at the connection point. Some sanders include an adapter in the box; check before buying separately.
The main downside of a shop vac connection is the hose itself — it adds stiffness and bulk that can tug on the sander and limit your range of motion, especially when sanding vertical surfaces or working at odd angles. Some woodworkers use a short whip hose (a 2-3 foot section of flexible hose) between the sander and the main vacuum hose to give the sander more freedom of movement while maintaining suction.
Dedicated Dust Collectors
A dedicated dust collector — the kind with a large impeller motor and a filter bag or cartridge — is designed for stationary tools like table saws and planers, but it can also serve a sanding station if plumbed with appropriately sized ductwork. However, most standard dust collectors move a high volume of air at relatively low static pressure, which isn’t ideal for the small-diameter ports on random orbital sanders. Shop vacs, which operate at higher static pressure with lower air volume, are actually better suited to the small-port, high-resistance connection on a sander.
If your shop already has a central dust collection system, you can tap into it for sanding with a blast gate and a reducer at the sanding station, but don’t expect it to outperform a good shop vac for this specific application. The exception is if you’re sanding near other tools that are already connected to the central system — in that case, the ambient dust reduction from the collector helps even if the sander itself isn’t directly connected.
Cyclone Separators
A cyclone separator sits between your sander and your shop vac, spinning incoming dust-laden air in a cone that drops the heavier particles into a collection bucket before the air reaches the vacuum’s filter. This dramatically extends the life of your shop vac’s filter and maintains stronger suction over long sanding sessions. Aftermarket cyclone lids that fit standard 5-gallon buckets are inexpensive and effective, and many woodworkers consider them an essential accessory for any shop vac that sees regular sanding duty.
HEPA Filtration and Fine Dust
Standard shop vac filters capture particles down to about 1 micron, which catches most visible dust but lets the finest, most harmful particles pass through. True HEPA filtration captures 99.97% of particles down to 0.3 microns — the particle size that penetrates deepest into lung tissue. If you sand frequently, work in an enclosed space, or handle materials like MDF that produce extremely fine dust, a HEPA-rated vacuum or a HEPA filter upgrade for your shop vac is worth the investment. Some premium shop vacs (including models from Festool, Bosch, and DeWalt) are designed specifically for tool-connected dust extraction with HEPA-level filtration and automatic filter cleaning.
Air Filtration Units
An air filtration unit hangs from the ceiling and cycles the shop air through a fine filter, capturing airborne dust that escapes both the sander’s onboard collection and the connected vacuum. These units don’t replace point-of-source dust collection, but they significantly reduce the background dust level in a shop, which benefits both your health and the cleanliness of your finishes — airborne dust that settles on a freshly applied coat of finish creates the rough, speckled surface that requires between-coat sanding to correct. Running an air filtration unit for 30 minutes after a sanding session clears most residual airborne particulate from the shop.
Matching a Sander to Your Project Type
The “best” random orbital sander really depends on what you’re building. Here’s how the models in this guide line up against the most common project categories.
Furniture Refinishing
Furniture work demands a fine finish and good edge control, since scratches and swirl marks are highly visible under stain or clear coat. The Makita XOB01Z and Makita BO5041 both shine here thanks to their smooth, low-vibration operation and finer 3/32″ orbit, which produces a cleaner scratch pattern that’s easier to sand out completely before finishing.
Cabinet Making and Shop Production Work
If you’re sanding dozens of cabinet doors or panels in a single session, comfort and consistency matter more than raw speed. A corded option like the Bosch ROS20VSC removes the need to manage battery swaps mid-batch, while its variable speed dial lets you standardize settings across an entire production run for a consistent result piece to piece.
Rough Carpentry and Job-Site Use
For general construction, deck refinishing, or job-site trim work, portability wins out over finish precision. The Milwaukee M18 and DeWalt DCW210B are both built for this kind of use, with rugged housings and battery platforms that already power drills, drivers, and saws on most job sites, which is convenient when you’re carrying tools between locations rather than working from a fixed shop.
Automotive and Polishing Work
The Bosch ROS20VSC’s dual-mode pad system makes it the only tool on this list that crosses over meaningfully into light automotive polishing, in addition to standard sanding. If polishing is a frequent task rather than an occasional one, though, a dedicated buffer will still outperform a converted sander.
Occasional DIY and Home Maintenance
For homeowners tackling the occasional deck railing, dresser, or trim piece, the Ryobi ONE+ and Black+Decker 20V MAX both deliver enough performance without the investment of a professional-grade tool, particularly if you already own other tools on either platform.
Whatever category your project falls into, it’s worth thinking about how the sander fits into your broader toolkit — see our guide on balancing hand tools and power tools for a wider view of building out a shop that doesn’t rely on any single tool to do everything.
Luthiery and Musical Instrument Building
Guitar bodies, ukulele tops, and other instrument components require extremely careful sanding because thin tonewoods are unforgiving of mistakes. A random orbital sander set to its lowest speed with 150- or 180-grit discs can shape and smooth instrument blanks efficiently, but you must keep the pad flat and avoid edges where the thin top or back could be sanded through. Many luthiers use the sander for bulk shaping and switch to hand sanding with a flexible pad for the final passes, especially on contoured tops and backs where the surface is radiused rather than flat.
Boat Building and Marine Applications
Marine woodworking involves a lot of fiberglass and epoxy sanding, which generates extremely fine, itchy dust that demands robust respiratory protection. A random orbital sander with a shop vac connection and HEPA filtration handles fiberglass sanding well, but plan to go through discs faster than you would on wood — fiberglass is highly abrasive and dulls standard aluminum oxide quickly. Ceramic or zirconia discs last significantly longer on fiberglass and epoxy surfaces.
Drywall and Home Renovation
A random orbital sander with a medium-grit disc (100-120) is an effective tool for feathering drywall compound patches smooth, especially on larger patches where hand-sanding is tedious. A shop vac connection is essential here — drywall dust is extremely fine and pervasive, and it can damage other tools and finishes if it spreads through a shop. Some manufacturers make dedicated drywall sanding attachments with larger pads and dust shrouds, but a random orbital sander handles smaller patch work without any special accessories.
Essential Accessories to Pair With Your Sander
A random orbital sander performs a lot better once you’ve built out a small kit of supporting accessories. None of these are strictly required, but each one solves a specific frustration that shows up the moment you start using the tool regularly.
A Range of Sanding Discs
Buy hook-and-loop discs in bulk across at least four or five grits — something in the 60–80 range for stock removal, 120–150 for general shaping, and 220–320 for pre-finish smoothing. Cheap, thin discs tend to clog quickly and tear at the edges, so it’s worth spending slightly more on a mid-tier abrasive brand rather than the bargain multi-packs, which often wear out mid-project and force you to stop and swap discs more often than a quality disc would.
A Shop Vac With a Sander Adapter
Onboard dust bags are fine for casual use, but connecting your sander to a shop vac dramatically improves visibility of your work and cuts down on airborne dust in an enclosed shop. Most sanders in this guide use a standard-size dust port, though you may need a step-down adapter hose to match your specific shop vac’s inlet diameter.
Extra Batteries and a Fast Charger
If you went cordless, a second battery pays for itself quickly. Sanding sessions tend to run longer than drilling or driving tasks, and running out of charge mid-panel is a common frustration. A fast charger also means less downtime between swaps if you only own one or two packs.
A Sanding Block or Backing Pad for Hand Touch-Ups
Even with a great power sander, some corners, inside edges, and detail areas are easier to finish by hand. A simple cork or rubber sanding block, paired with the same grit sequence you used on the machine, helps you blend hand-sanded spots seamlessly with machine-sanded areas.
Safety Gear
A properly rated dust mask or respirator, safety glasses, and hearing protection round out a sensible accessory kit. These are inexpensive relative to the tool itself, and skipping them is the most common regret among woodworkers who’ve spent years breathing fine sanding dust without protection.
If you’re assembling a broader kit around your sander, it’s worth reviewing our roundups on woodworking aprons and wood joinery tools to round out a well-equipped shop.
Sanding for Different Finishes: Stain, Paint, Oil, Lacquer, and Epoxy
The type of finish you plan to apply should directly influence your sanding strategy. Different finishes have different surface-preparation requirements, and sanding the same way regardless of finish leads to problems — blotchy stain, poor paint adhesion, visible scratches under clear coat, or an epoxy surface that doesn’t bond properly.
Sanding for Stain
Stain is the most revealing finish because it penetrates the wood rather than sitting on top of it, which means every scratch, glue spot, and sanding inconsistency in the surface will show through the stain as a difference in color. For stained projects, your sanding needs to be meticulous: progress through grits carefully (no skipping), remove all glue residue before you start, and do a final hand-sanding pass with the grain at your last grit to eliminate any cross-grain scratches.
Stop at 180 or 220 grit for most hardwoods — sanding beyond 220 burnishes the wood fibers so tightly that stain has trouble absorbing, resulting in a lighter, less even color. On woods prone to blotching (pine, cherry, birch, maple), applying a pre-stain wood conditioner after your final sanding pass and before the stain helps even out absorption. The conditioner partially seals the softer wood fibers so they don’t soak up more stain than the harder fibers surrounding them.
Sanding for Paint
Paint sits on top of the wood surface rather than penetrating it, so the sanding requirements are less stringent than for stain — but surface preparation still matters for adhesion. For bare wood headed for paint, sand to 150 or 180 grit. The slightly coarser final grit gives the primer and paint more “tooth” to grip onto compared to a surface sanded to 220 or finer.
Between coats of primer and paint, a light scuff with 220-grit on your random orbital sander (at low speed, with light pressure) knocks down any raised grain, dust nibs, or brush marks and creates a smooth surface for the next coat. This between-coat sanding is especially important on the primer coat, where a smooth base layer prevents surface imperfections from telegraphing through the topcoat.
When sanding previously painted surfaces (for repainting), start with a medium grit (120-150) to scuff the existing paint and create adhesion for the new coat. If the old paint is peeling or flaking, you may need to strip it first with a coarser grit (60-80) before smoothing the exposed surface and priming. For tips on choosing a sander for paint removal, see the FAQ section below.
Sanding for Oil and Wax Finishes
Oil finishes (tung oil, Danish oil, linseed oil) and wax finishes penetrate the wood like stain but build very little surface film. Because there’s no film to hide imperfections, the sanded surface quality matters as much as it does for stain. Sand to 220 grit, hand-sand with the grain at your last grit, and wipe the surface with a tack cloth to remove all dust before applying the oil.
After the first coat of oil dries, lightly sand with 320 or 400 grit to smooth any raised grain, then wipe on a second coat. Most oil finishes call for two or three coats, with a light sanding between each. The final surface won’t have the glossy sheen of a film finish, but it should feel glassy smooth to the touch when you’ve done your between-coat sanding properly.
Sanding for Lacquer and Polyurethane
Film-building finishes like lacquer, polyurethane, and water-based acrylics require the same careful pre-finish sanding as stain (180–220 grit, final hand pass with the grain), but the between-coat sanding becomes even more important because these finishes build a visible surface film that magnifies any texture underneath. After each coat dries, scuff the surface with 320 or 400 grit by hand or with your random orbital sander on its lowest speed setting. The goal is to knock down the raised grain and any dust nibs without cutting through the finish film entirely.
After your final coat has fully cured, a wet-sanding progression from 400 through 800, 1000, and 2000 grit followed by a polishing compound creates the mirror-gloss finish seen on professional furniture and musical instruments. Wet-sanding uses water as a lubricant to prevent the fine-grit paper from clogging, and it’s typically done by hand with a sanding block rather than with a power sander, since the very light pressure required is hard to control with a machine.
Sanding for Epoxy Finishes
Epoxy — whether used as a tabletop flood coat, a bar top finish, or a casting resin — sands differently than wood finishes. Cured epoxy is hard and generates heat quickly under friction, so sanding epoxy with a random orbital sander requires moderate speed, light pressure, and frequent pauses to avoid heat buildup that can soften or gum the surface. Silicon carbide discs are often preferred over aluminum oxide for epoxy because they stay sharper on the hard surface and produce a more uniform scratch pattern.
For a clear epoxy finish, the sanding progression typically starts at 120 or 150 grit to level the cured surface and remove any drips or unevenness, then progresses through 220, 320, 400, and upward depending on how glossy you want the final surface. Epoxy can be wet-sanded to very high grits (2000+) and then buffed with a polishing compound for a glass-clear result. The random orbital sander handles the lower grits efficiently; switch to hand-sanding for the finer grits to maintain control and avoid overheating.
General Rule: Match Your Final Grit to Your Finish
A simple framework: the more the finish sits on the surface (paint, polyurethane, epoxy), the less your final pre-finish grit matters, because the finish itself creates the final surface. The more the finish penetrates the wood (stain, oil, wax), the more your final grit matters, because the wood surface is the final surface. When in doubt, sand to 180–220 for penetrating finishes and 150–180 for film-building finishes, and always do a final hand pass with the grain at your last grit.
Common Sanding Mistakes to Avoid
Even with a high-quality sander, technique errors can undo a lot of the tool’s advantages. These are the mistakes we see most often, along with what to do instead.
Pressing Too Hard
It’s tempting to lean into the sander to speed things up, but excess downward pressure stalls the random orbit motion and effectively turns the tool into a plain circular sander — reintroducing the swirl marks you bought a random orbital sander to avoid. Let the tool’s own weight and motor speed do the work; guide it, don’t force it.
Skipping Grits
Jumping from a coarse 60-grit disc straight to a 220-grit finishing disc leaves deep scratches from the coarse pass that the fine grit simply can’t reach. Step through grits in a reasonably tight progression — 60 to 100 to 150 to 220, for example — so each grit only has to remove the scratch pattern left by the one before it.
Sanding Against the Grain on the Final Pass
Random orbital sanders are more forgiving of cross-grain movement than belt sanders, but on your final finishing pass, working roughly in line with the grain direction still produces a cleaner result, especially on open-grained woods like oak or ash where cross-grain scratches can telegraph through stain.
Ignoring Edge Control
Letting the pad hang off the edge of a workpiece, even briefly, tends to round over edges unevenly or create a slightly concave “dished” surface near boundaries. Keep the pad fully supported on the workpiece and ease off pressure as you approach any edge.
Not Checking the Disc for Wear
A worn, glazed sanding disc stops cutting effectively and instead generates heat, which can burnish wood fibers and make them resistant to stain absorption. If a disc feels smooth to the touch rather than gritty, it’s time to swap it out rather than pushing through with a dull abrasive.
Skipping Dust Removal Between Grits
Leftover dust from a coarser grit can get trapped under a finer grit disc and cause new scratches. Wipe the surface down with a tack cloth or blow it off with compressed air between grit changes to keep each pass clean.
Starting the Sander on the Workpiece
Placing a running sander onto the workpiece from a standstill, or starting the sander while it’s already resting on the surface, can leave an immediate swirl or divot at the contact point. Start the sander, let it reach full speed, and then set it down gently onto the workpiece. When you’re done with a pass, lift the sander off the surface before turning it off or releasing the trigger.
Neglecting the Pad Itself
Over time, the hook-and-loop surface on the backing pad wears down, losing its grip on sanding discs. A disc that slips or shifts mid-sanding creates uneven wear patterns and can gouge the workpiece. If you notice discs not sticking as firmly as they once did, replace the backing pad — it’s an inexpensive fix that restores the sander’s full performance. Most major brands sell replacement pads for their popular models, and swapping one takes only a few minutes with basic tools.
Sanders and Your Health: Protecting Your Lungs, Hands, and Hearing
Sanding produces fine particulate matter that’s easy to ignore in the moment but has cumulative, serious health consequences over time. A single sanding session without protection won’t cause visible harm, but years of unprotected exposure to wood dust — particularly the ultra-fine particles that random orbital sanders are especially good at producing — can lead to lasting respiratory problems, hearing damage, and hand-arm vibration issues. Taking health seriously isn’t about being cautious to a fault; it’s about adopting a few inexpensive habits that protect you for decades of woodworking.
Respiratory Protection: Masks, Respirators, and Why They Matter
Wood dust is classified as a known human carcinogen by major health organizations, including the International Agency for Research on Cancer (IARC). Long-term exposure to fine wood dust is linked to nasal and sinus cancer, chronic bronchitis, and reduced lung function. The risk isn’t limited to exotic or treated woods — even common domestic hardwoods like oak and beech produce dust that causes damage with prolonged exposure.
A disposable N95 dust mask is the minimum protection for any sanding session. N95 masks filter at least 95% of airborne particles when properly fitted (press the nose clip tight, and make sure there are no gaps around your cheeks). For extended sessions, a half-face respirator with P100 cartridges is more comfortable (the straps distribute pressure better than ear-loop masks) and provides a higher level of filtration. Replace cartridges when breathing becomes noticeably harder, which indicates the filter is loaded with captured dust.
MDF dust is especially concerning because it’s extremely fine and uniform — the particles are consistently small enough to penetrate deep into the lungs. When sanding MDF, always connect a shop vac to the sander’s dust port and wear a minimum of an N95 mask, preferably a P100 respirator. Running an air filtration unit during and after the session adds another layer of protection for residual airborne particles.
Hearing Protection
Random orbital sanders typically produce between 75 and 90 decibels (dB) of noise, depending on the model and the surface being sanded. Prolonged exposure above 85 dB can cause permanent hearing damage over time, and a sander running at 85 dB for several hours approaches the threshold where protection becomes necessary. Basic foam earplugs (rated at NRR 29-33) or over-ear hearing muffs are inexpensive and effective. If you listen to music or podcasts in the shop while sanding, use hearing protection with built-in speakers rather than turning up the volume on unprotected earbuds to overcome the sander’s noise — that just adds more sound energy to an already harmful level.
Hand-Arm Vibration Syndrome (HAVS)
Extended exposure to tool vibration can cause a condition known as hand-arm vibration syndrome (HAVS), sometimes called vibration white finger. Symptoms include tingling, numbness, and reduced grip strength in the fingers, and in severe cases, blanching (whitening) of the fingertips in cold temperatures. Random orbital sanders vibrate less than many other power tools (belt sanders and reciprocating saws are worse offenders), but marathon sanding sessions — several hours without a break — can still contribute to cumulative vibration exposure.
Taking a 10- to 15-minute break every hour of continuous sanding allows blood flow to recover in your hands and fingers. Anti-vibration gloves with padded palms absorb some of the vibration energy and are worth wearing on long sessions. Choosing a sander with low vibration ratings — like the Makita XOB01Z or Makita BO5041, both known for their smooth operation — reduces cumulative exposure significantly compared to cheaper, less-balanced tools.
Skin and Eye Protection
Sanding dust irritates skin, especially the fine dust from treated woods, MDF (which contains formaldehyde-based resins), and tropical hardwoods (which can cause allergic reactions in sensitive individuals). Wearing long sleeves and an apron keeps dust off your arms and clothes, and washing exposed skin after a sanding session removes irritating particles before they cause a reaction. Safety glasses or goggles prevent dust from irritating or scratching your eyes — an obvious precaution, but one that’s easy to skip when you’re “just doing a quick sand.”
Workspace Ventilation
Even with a shop vac and an air filtration unit, working in a space with no fresh air exchange allows fine dust and volatile organic compounds (VOCs) — especially from finishes applied near the sanding area — to accumulate. If your shop has windows or doors, open them during and after sanding to create cross-ventilation. If it doesn’t, an air filtration unit running for at least 30 minutes after you finish sanding captures most residual airborne particles. The goal is to leave the shop air cleaner than you found it each time you finish a session.
Lead Paint Considerations
If you’re sanding surfaces in a home built before 1978, the existing paint may contain lead. Sanding lead paint without proper containment creates highly toxic dust that’s dangerous to inhale and ingest. Test suspect paint with a lead-test kit before sanding, and if lead is present, follow EPA RRP (Renovation, Repair, and Painting) guidelines: contain the work area with plastic sheeting, use a HEPA-filtered vacuum for dust collection, wear a P100 respirator, and dispose of all debris as hazardous waste. This isn’t something to take lightly — lead dust exposure causes serious neurological damage, especially in children.
Troubleshooting Common Random Orbital Sander Problems
When a random orbital sander isn’t performing as expected, the cause is usually one of a handful of fixable issues. Before assuming the tool is defective, work through these common problems and their solutions.
Swirl Marks After Sanding
Swirl marks are the most common complaint with random orbital sanders, and they almost always come down to technique rather than the tool itself. The most likely causes are: pressing too hard (which stalls the random orbit motion and turns the sander into a fixed-orbit tool), a worn or slipping disc (which creates inconsistent scratch patterns), or skipping grits (which leaves deep scratches from a coarser grit that the finer grit can’t fully remove). Solutions: lighten your pressure, replace discs that aren’t gripping firmly, and progress through grits in smaller steps. If swirl marks persist even with good technique, check the backing pad — a worn hook-and-loop surface can let the disc shift slightly during sanding, creating irregular patterns.
Sander Vibrates Excessively
All random orbital sanders vibrate — that’s inherent to the tool’s design — but excessive or uneven vibration usually indicates a problem. First, check that the sanding disc is properly centered on the pad. A disc that’s off-center creates an imbalance that increases vibration significantly. Next, check the backing pad for damage — a cracked or warped pad wobbles as it spins, transmitting uneven vibration through the housing. If the pad is damaged, replace it. On cordless models, a partially charged battery can cause the motor to run unevenly, which increases perceived vibration — try a fully charged battery before diagnosing the tool itself.
Disc Keeps Falling Off
If your hook-and-loop disc won’t stay attached to the pad, the hook surface on the pad is likely worn smooth. This happens gradually over hundreds of disc changes, and you may not notice it until a disc pops off mid-sand. Replacement backing pads are inexpensive and easy to install — most attach with a single threaded bolt or a quick-release mechanism. In the short term, pressing the disc firmly onto the pad before starting and avoiding pulling the disc off at an angle (peel it straight up instead) preserves the hooks longer.
If the disc is new and the pad appears to be in good condition but the disc still won’t grip, check that you’re using the correct disc size. A 5″ disc on a 5″ pad fits perfectly; a disc that’s even slightly undersized (some 5″ discs are actually 4-1/2″ or 4-3/4″ depending on the manufacturer) may not engage enough of the hook surface to stay attached under the sander’s motion.
Motor Overheating or Shutting Down
Random orbital sander motors overheat when they’re overloaded — typically from pressing too hard, running continuously for too long without a break, or sanding with a clogged disc that forces the motor to work harder. If the motor feels hot to the touch or the sander slows down noticeably during use, stop and let it cool for 10-15 minutes. Check the disc for clogging, lighten your pressure, and give the sander periodic rest breaks during long sessions. Brushless motors handle heat better than brushed motors, but even they have limits in sustained, heavy use.
If the sander shuts off unexpectedly and won’t restart for several minutes, it likely has a thermal overload protection switch that tripped to prevent motor damage. Let it cool fully, then try again. If overheating happens frequently under normal use conditions, the motor windings or bearings may be wearing out — at that point, it’s time to evaluate whether repair or replacement is the better investment.
Uneven Material Removal or Dishing
If your sander removes more material in the center of the pad than at the edges (or vice versa), the pad may be warped or the backing plate may not be flat. Remove the sanding disc and inspect the pad — run your fingers across it to feel for high or low spots. A worn or deformed pad sands unevenly by design, and the only fix is a replacement pad. Uneven pressure from your hand can also cause dishing — consciously distribute your grip evenly across the sander’s body and avoid resting your weight on one side of the tool.
Dust Collection Not Working
If the onboard dust bag isn’t capturing much dust, check for a clog in the sander’s dust port or the bag’s filter mesh. Fine dust packs into the filter over time, reducing airflow. Remove the bag and tap out the accumulated dust, or rinse the filter mesh with water (if the manufacturer allows it) and let it dry completely before reinstalling. If you’re using a shop vac connection and suction seems weak, check for leaks at the adapter, ensure the vacuum’s filter isn’t clogged, and empty the vacuum’s collection drum — a full drum significantly reduces suction power. A cyclone separator upstream of the vacuum prevents the drum from filling with sanding dust and keeps the vacuum’s filter cleaner for longer.
Cordless Sander Runtime Is Shorter Than Expected
If your cordless sander drains batteries faster than the advertised runtime, a few factors are likely at play. First, published runtime numbers are usually measured under light load — real-world sanding, especially on hardwoods or with coarse grits, demands more power and drains batteries faster. Second, old or frequently cycled batteries lose capacity over time, so a battery that once lasted 45 minutes may only deliver 25-30 minutes after a year or two of regular use. Third, cold temperatures reduce battery performance — if you’re working in an unheated shop in winter, keep spare batteries warm until you’re ready to use them. Upgrading to a higher-capacity battery (5.0 Ah or larger instead of 2.0 Ah) is the most straightforward fix for short runtime.
Sanding Disc Clogging Quickly
If your discs clog (also called “loading”) after just a few minutes of use, the likely culprits are resinous wood species (pine, cedar, spruce), painted surfaces with soft or gummy paint, or finishes that haven’t fully cured. Anti-clog sanding discs with a stearate coating (often called “no-load” discs) resist clogging on soft, resinous materials by preventing wood residue from sticking to the abrasive surface. These discs cost slightly more but last significantly longer on the materials that clog standard discs. Sanding at lower speed also reduces clogging by generating less friction heat, which softens resin and makes it stickier.
Frequently Asked Questions
What’s the difference between a random orbital sander and an orbital sander?
A standard orbital sander moves in a fixed circular pattern, which can leave repeating swirl marks. A random orbital sander adds a secondary, randomized wobble to that rotation, which prevents predictable scratch patterns and produces a smoother, more even finish.
Can I use a random orbital sander on metal?
Yes, with the right abrasive discs, random orbital sanders can smooth metal surfaces, remove light rust, or blend welds. Use metal-rated discs and keep speeds moderate to avoid overheating the surface.
What size pad should I buy?
5-inch pads are the most common and versatile size, covered by all seven sanders in this guide. Larger 6-inch pads exist for bigger surfaces but require more powerful motors to run effectively.
Is a cordless sander powerful enough for furniture refinishing?
Modern cordless sanders like the Milwaukee M18 and DeWalt DCW210B are powerful enough for most furniture refinishing tasks, including stripping old finish and smoothing bare wood. For very large pieces or all-day sessions, a corded model avoids battery-swap interruptions.
How often should I change the sandpaper disc?
Replace a disc once it stops removing material efficiently or the abrasive grains visibly wear smooth — usually after moderate use on a single project, sooner on painted or resinous surfaces that clog the paper faster.
Do I need to connect a shop vac, or is the onboard dust bag enough?
Onboard bags handle light, occasional sanding well. For serious dust control, especially indoors, connecting a shop vac through the sander’s dust port captures significantly more fine particulate.
Can a random orbital sander remove paint?
Yes, with a coarse grit disc (40–60 grit), a random orbital sander can strip paint effectively. Be cautious with older painted surfaces that may contain lead, and use proper respiratory protection.
What’s the best sander for a beginner woodworker?
The Makita BO5041 or Ryobi ONE+ are both good starting points — the BO5041 for reliable corded performance at a fair price, and the Ryobi if you’re already building a ONE+ battery-powered shop.
How do I stop my sander from leaving swirl marks?
Avoid pressing down hard, which can stall the random motion. Keep the pad flat, move in slow overlapping passes, and progress through grits in small steps rather than skipping ahead.
Is a 3/32″ or 7/64″ orbit better?
A 3/32″ orbit generally produces a finer finish, better suited to furniture and cabinetry. A 7/64″ orbit removes material faster, better suited to rough stock prep or stripping old finish.
How long does a battery last on a cordless random orbital sander?
Runtime varies by battery capacity and how hard you’re pushing the tool, but most mid-size batteries (4.0–5.0 Ah) provide roughly 30–60 minutes of continuous sanding under moderate use.
Can I use a random orbital sander for polishing a car?
Dedicated dual-mode tools like the Bosch ROS20VSC can switch to a wider orbit pad suited to light polishing. For serious automotive detailing, a purpose-built polisher will still outperform a converted sander.
What grit sandpaper should I use between coats of polyurethane?
Use 320 or 400 grit with very light pressure — just enough to knock down raised grain and dust nibs without cutting through the finish film. A hand-sanding pass is safer than a machine pass for between-coat work, since it’s easier to control pressure.
Can I sand veneer with a random orbital sander without sanding through it?
Yes, but proceed with caution. Use 150 grit or finer, keep the sander moving at all times, and check your progress frequently. Veneer is thin — sometimes only 1/32″ — and a few seconds of concentrated sanding in one spot can cut through it. For veneered panels headed for paint, a single light pass at 150 grit is often sufficient.
Why does my sander leave deeper scratches near the edges of a workpiece?
When the pad overhangs an edge, the unsupported portion of the pad tilts slightly, concentrating pressure along the edge of the pad rather than distributing it across the full face. Keep the pad fully supported on the workpiece and ease off pressure as you approach edges to prevent this.
Should I sand with the grain or against the grain?
A random orbital sander’s randomized motion means you can sand in any direction on your first few grit passes without noticeable problems. On your final grit pass, sanding roughly with the grain direction produces a cleaner surface, especially on open-grained woods where cross-grain scratches can show through stain.
Is it worth buying ceramic sanding discs instead of standard aluminum oxide?
For occasional use, standard aluminum oxide discs are fine and much cheaper. For frequent sanding, especially on hardwoods or materials that clog standard discs quickly, ceramic discs from brands like 3M or Norton last long enough to justify their higher per-disc cost — you’ll go through fewer discs overall, which can make them cheaper per unit of work done.
How do I know when to replace the backing pad on my sander?
If sanding discs no longer stick firmly or you notice them shifting during use, the hook-and-loop surface on the backing pad is worn. Replacement pads are available from most major sander brands and are easy to swap — usually just one bolt or screw. Keeping a spare on hand avoids downtime.
Can a random orbital sander be used for wet sanding?
Most standard random orbital sanders are not designed for wet sanding — water can damage the motor and bearings. However, some professional-grade models with sealed housings and water-resistant components can handle wet sanding for applications like smoothing cured epoxy or automotive clear coats. Check the manufacturer’s specifications before introducing water to any sander not explicitly rated for wet use.
What’s the difference between OPM and RPM on a sander?
OPM stands for “orbits per minute” — the number of complete orbit cycles the pad makes in one minute. Some manufacturers also list RPM, which refers to the rotational speed of the motor. They’re related but not identical, because the eccentric orbit mechanism means the pad orbits at a slightly different rate than the motor shaft rotates. For random orbital sanders, OPM is the more relevant number, and most models range from 4,000 to 12,000 OPM.
Final Verdict: Which Random Orbital Sander Should You Buy?
If you want the best all-around cordless performance and don’t mind paying for it, the Milwaukee M18 (2648-20) is the strongest pick in this lineup, especially if you’re already running M18 batteries. If low vibration and all-day comfort matter more to you, the Makita XOB01Z is hard to beat. Shop-based woodworkers who don’t need cordless freedom will get outstanding value from the Makita BO5041, while anyone who wants a true sander-polisher hybrid should look at the Bosch ROS20VSC. For lighter, occasional use, the Ryobi ONE+ and Black+Decker 20V MAX both deliver solid results without the premium price tag.
Whichever model you choose, pair it with a sensible grit progression and good dust collection, and you’ll get finish-ready results in a fraction of the time hand-sanding takes. For more shop-building resources, check out our guides on choosing a workbench and setting up a beginner woodshop.

Ready to Upgrade Your Sanding Setup?
Check today’s price on our top pick, the Milwaukee M18 Random Orbit Sander.
Check Price on Amazon
Pingback: 12 Best Woodworking Tools: Essential Picks From Amazon