Best Miter Saw for Home Shop: 7 Top Picks Compared for Precision, Power, and Value
Whether you’re framing out a closet, building furniture, or cutting crown molding for the living room, the right miter saw turns a fussy, error-prone task into a fast, repeatable one. We tested specs, compared real-world feedback, and broke down what actually matters for a home shop — not a commercial job site — so you can pick the saw that fits your space, your budget, and the projects you actually build.
Quick Picks at a Glance
If you’re short on time, here’s the short version. Each of these seven saws earns its spot for a different kind of home shop, and we’ll explain exactly why as we go deeper into each review below.
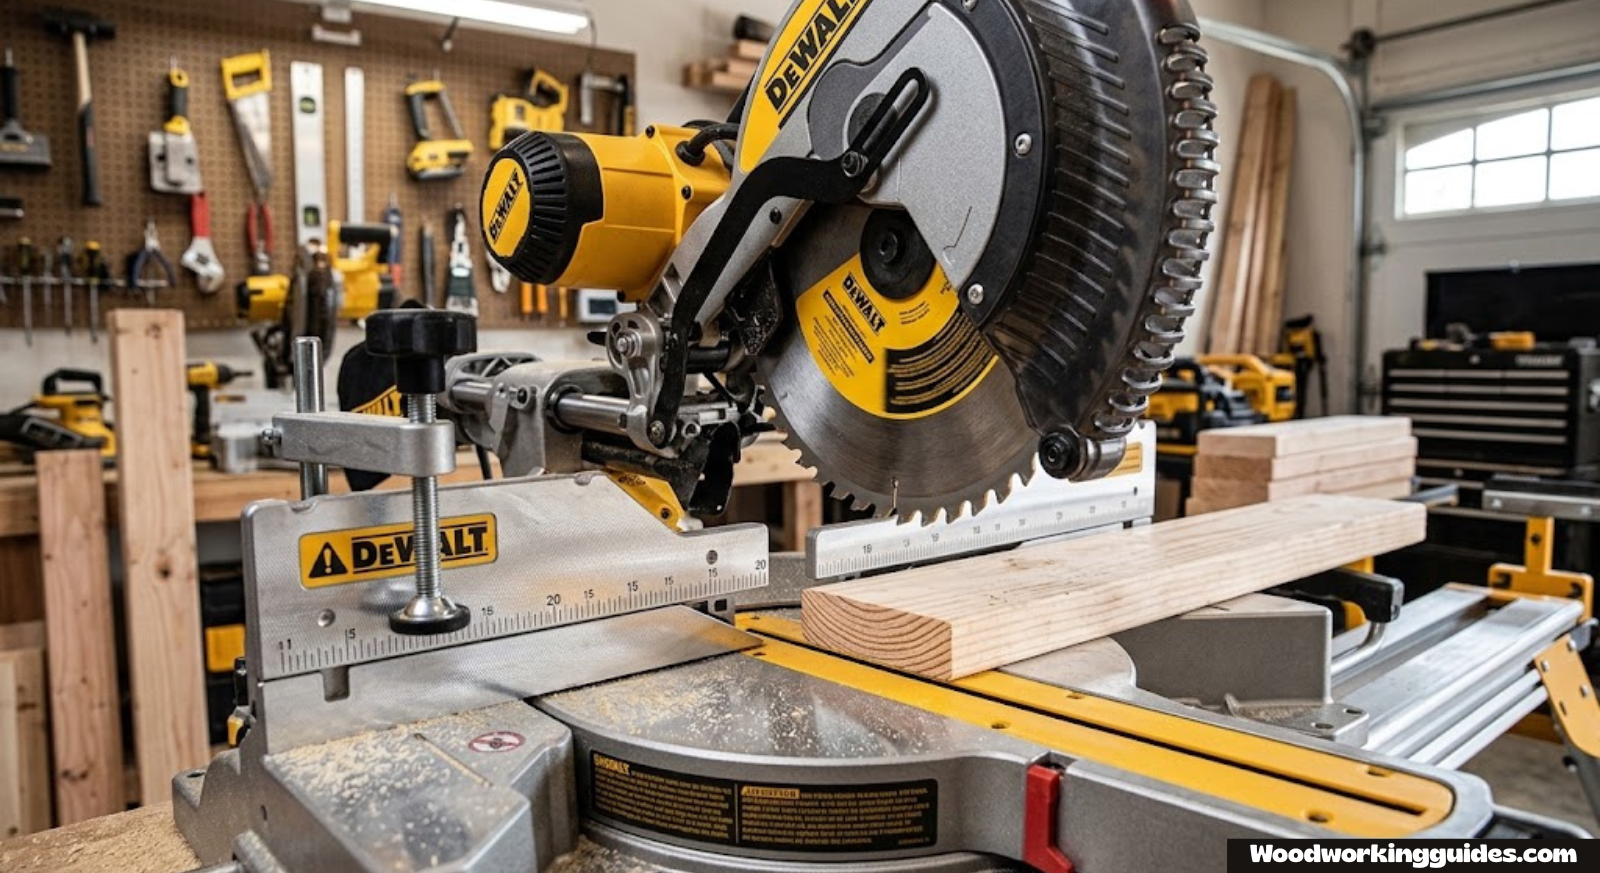
- Best Overall for a Home Shop: DeWalt DWS780 — the benchmark 12-inch sliding compound saw that balances precision, capacity, and price.
- Best for Finish Carpentry: Bosch GCM12SD — the axial-glide system fits against a wall without losing slide capacity.
- Best Budget Sliding Saw: SKIL MS6305-00 — genuinely usable accuracy at a fraction of the cost of the big brands.
- Best Compact Non-Sliding Saw: Metabo HPT C10FCGS — light, simple, and ideal for a small bench or a saw that gets stored between projects.
- Best for Dust Collection: Makita LS1019L — the cleanest-cutting saw in this lineup, with genuinely effective dust capture.
- Best Cordless Miter Saw: Ryobi ONE+ HP 18V — surprising capability from a battery-powered saw, ideal for garages without convenient outlets.
- Best Premium Cordless: Milwaukee M18 FUEL 12-Inch — corded-level power without the cord, for shops already invested in M18 batteries.

Check Price on Amazon
Why This Guide Focuses on Home Shops, Not Job Sites
A lot of miter saw roundups are written for contractors who haul a saw in and out of a truck every day. That’s a different set of priorities than someone setting up a permanent or semi-permanent station in a garage, basement, or spare room. For a home shop, portability usually matters less than cut capacity, fence accuracy, dust control, and how well the saw fits into a limited footprint.
We looked at seven saws that consistently show up as favorites among hobbyist woodworkers, DIY renovators, and weekend furniture builders. Each one was evaluated on the criteria that actually affect a home shop experience: cut capacity for common stock sizes, bevel and miter range, fence design, dust collection, noise level, footprint, and long-term reliability based on owner feedback patterns. If you’re also outfitting the rest of your shop, our guide to the best woodworking tools is a useful companion piece, and if a table saw is next on your list, our best table saw for woodworking roundup covers that decision in the same format.
How to Choose a Miter Saw for a Home Shop
Before diving into individual reviews, it helps to understand the handful of specs that actually change how a miter saw performs in daily use. Manufacturers love to bury the important numbers under marketing language, so here’s what to actually pay attention to.
Blade Size: 10-Inch vs. 12-Inch
Blade diameter determines maximum cut depth and, to a lesser extent, crosscut width. A 12-inch blade cuts deeper stock in a single pass — useful for thick base trim or 4×4 posts — while a 10-inch blade spins faster for a given motor size and tends to leave a slightly cleaner edge on trim-grade cuts. For most home shops building furniture, cabinetry, and trim, a 10-inch sliding saw covers 90% of projects. If you regularly cut thick dimensional lumber or wide baseboard, step up to 12 inches.
Sliding vs. Non-Sliding (Compound) Design
A sliding compound miter saw rides the blade head along rails, which dramatically increases crosscut capacity — often enough to cut a 2×12 or a wide piece of crown molding in one pass. A standard compound saw without sliding rails is more compact and usually cheaper, but limited to narrower stock. If your shop has the wall space, a slider is worth the extra footprint.
Bevel Type: Single vs. Dual
A single-bevel saw tilts the blade in one direction only, meaning you have to flip your stock to cut a bevel the opposite way. A dual-bevel saw tilts both directions, which saves time and avoids the risk of marring a finished face when you flip a workpiece. Dual-bevel is worth paying for if you do a lot of crown molding, angled joinery, or repeated bevel cuts in both directions.
Fence Height and Design
A tall, rigid fence supports crown molding standing vertically and prevents thin stock from flexing during the cut. Look for fences that are either sliding/adjustable or tall enough out of the box to support base and crown molding without an auxiliary fence.
Dust Collection
Miter saws are notoriously messy, and in a home shop — often attached to a house, basement, or shared garage — dust control matters more than on an open job site. Look for saws with an enclosed dust chute design or compatibility with a shop vac adapter, not just a fabric bag.
Footprint and Storage
Sliding saws need clearance behind them for the rails to travel, and for smaller shops that clearance can be the deciding factor. Some designs (like Bosch’s axial-glide system) fold the slide mechanism underneath the saw instead of extending backward, which lets you push the stand against a wall.
Power Source: Corded vs. Cordless
Corded saws deliver consistent power and never run out of charge mid-project, which is why most home shop stations are still corded. Cordless miter saws have improved dramatically, though, and are worth considering if your shop lacks convenient outlets or if you already own batteries from the same platform. We cover this trade-off in more depth in the corded vs. cordless section below.
Noise Level and Household Considerations
Miter saws are loud by nature, but there’s a real difference between the sharp, jarring startup of a budget saw and the soft-start motors found on premium models. If your shop shares walls with a bedroom, nursery, or home office, a soft-start motor and a slightly higher price tag can be worth it purely for household harmony. It’s a spec that rarely shows up in headline marketing but matters every single time you flip the switch.
Table and Base Stability
A wobbly table undermines every other spec on this list. Look at how the saw’s base is designed to mount — bolt holes for a permanent bench, quick-release clamps for a portable stand, or both. A saw that feels rock-solid in a showroom can still shift on an unsupported folding table at home, so plan your mounting surface at the same time you’re comparing saws, not as an afterthought once the saw arrives.
1. DeWalt DWS780 12-Inch Double-Bevel Sliding Compound Miter Saw
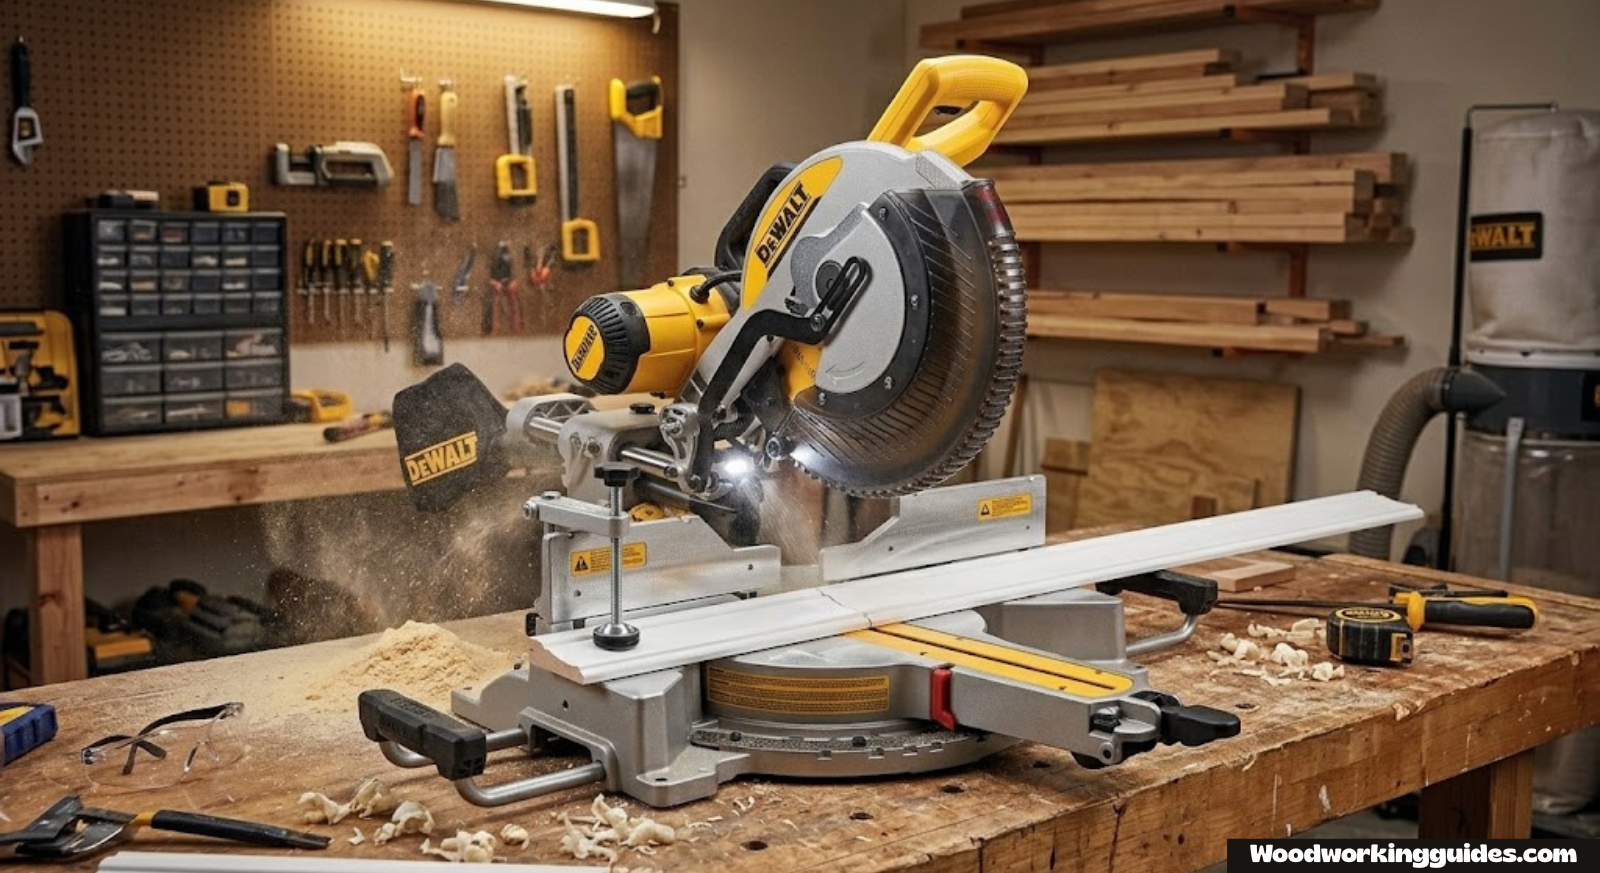
The DWS780 has been a fixture in home shops and job-site trailers for years, and it earns that reputation through consistency rather than flashy features. It’s a 12-inch dual-bevel slider with a back fence design and a tall aluminum fence rated to support wide crown molding without an auxiliary block.
- Blade Size: 12 inches
- Bevel: Dual, 0–48° both directions
- Miter Range: 60° right, 50° left
- Motor: 15-amp corded
- Max Crosscut (90°): Approximately 2×16 dimensional lumber
- Weight: Around 56 lbs
What sets the DWS780 apart in daily use is the miter detent system — 10 positive stops with a cam-lock handle that locks precisely without the wiggle you get on cheaper saws. The back fence design also gives it a smaller footprint than saws with rails that extend forward, which matters if your bench is pushed against a wall.
Pros
- Excellent factory-calibrated accuracy out of the box
- Tall fence handles crown molding vertically without add-ons
- Back fence rails save bench depth
- Widely available parts and accessories
Cons
- Heavier than compact non-sliding options
- Stock dust collection is only fair without a shop vac
- No laser guide included on base model

Check Price on Amazon
2. Bosch GCM12SD 12-Inch Dual-Bevel Glide Miter Saw
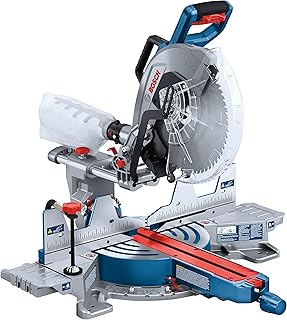
Bosch’s axial-glide system is the standout feature here: instead of rails that slide forward like a traditional slider, the GCM12SD uses an articulating arm tucked underneath the saw. The result is slider-level crosscut capacity in a footprint closer to a stationary compound saw, which is a genuine advantage for a home shop pushed up against a wall.
- Blade Size: 12 inches
- Bevel: Dual, 0–47° both directions
- Miter Range: 52° both directions with detents
- Motor: 15-amp corded
- Max Crosscut (90°): Around 14 inches
- Weight: Around 65 lbs
Bosch also fitted this saw with a square lock fence system that’s easy to verify and re-square without tools, plus an upfront bevel lock and squarelock fence rail system that many owners cite as faster to adjust than DeWalt’s comparable saws. The trade-off is weight — the axial-glide mechanism adds mass, so this isn’t the saw to move frequently between job sites, but that’s a non-issue for a fixed home shop station.
Pros
- Compact footprint despite full slider capacity
- Easy-to-verify square lock fence system
- Smooth, low-vibration cut quality
- Excellent for shops set against a wall
Cons
- One of the heavier saws in this lineup
- Premium price point
- Bulkier to store if you don’t have a dedicated stand
Check Price on Amazon
3. SKIL MS6305-00 10-Inch Dual-Bevel Sliding Compound Miter Saw
SKIL isn’t usually mentioned in the same breath as DeWalt or Bosch, but the MS6305-00 earns its place here as the value pick for anyone setting up a first home shop on a tighter budget. It offers dual-bevel capability and a sliding rail system — features that usually cost significantly more — at a price closer to a basic compound saw.
- Blade Size: 10 inches
- Bevel: Dual, 0–45° both directions
- Miter Range: 0–50° both directions
- Motor: 15-amp corded
- Max Crosscut (90°): Around 12 inches
- Weight: Around 32 lbs
Build quality doesn’t match the premium brands, and the fence isn’t as tall, but for cutting studs, furniture parts, and moderate trim work in a home shop, it holds accuracy well enough for most projects once properly calibrated. Its light weight also makes it easier to move between a bench and a folding stand if your shop does double duty as a garage.
Pros
- Dual-bevel and slider features at a budget price
- Lightest saw in this roundup, easy to move around
- Built-in laser guide on most versions
- Good value for occasional/hobbyist use
Cons
- Fence height is limited for tall crown molding
- Less rigid than premium saws under heavy stock
- May need re-calibration more often over time

Check Price on Amazon
4. Metabo HPT C10FCGS 10-Inch Compound Miter Saw
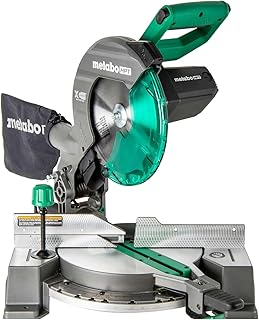
Not every home shop needs a slider. If your projects are mostly narrower stock — furniture components, picture frames, standard baseboard — a compact non-sliding compound saw like the Metabo HPT C10FCGS (formerly branded Hitachi) is lighter, cheaper, and takes up noticeably less bench space.
- Blade Size: 10 inches
- Bevel: Single, 0–45° left
- Miter Range: 0–52° both directions
- Motor: 15-amp corded
- Max Crosscut (90°): Around 4.5 inches (non-sliding)
- Weight: Around 24 lbs
At under 25 pounds, this is easily the most portable saw in the lineup, which matters if your “home shop” occasionally means a workbench that gets cleared off and packed away. It won’t handle wide crosscuts in a single pass, but for a huge share of furniture and trim tasks, that’s simply not a limitation you’ll notice.
Pros
- Very light and easy to carry or store
- Compact footprint fits small benches
- Simple, low-maintenance design
- Budget-friendly for occasional use
Cons
- Single bevel only — no left/right tilt
- Limited crosscut width without a slider
- Not ideal for wide crown or base molding
Check Price on Amazon
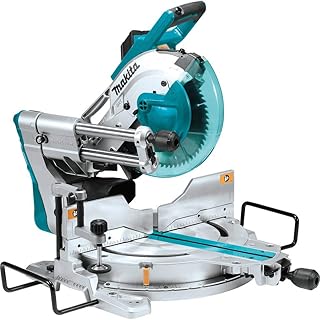
5. Makita LS1019L 10-Inch Dual-Bevel Sliding Compound Miter Saw
Makita built a reputation for clean, controlled cuts and quiet motors, and the LS1019L delivers on both. What really stands out for home shop use, though, is dust collection — Makita’s dual dust-collection system captures noticeably more debris than most competitors, which matters a lot if your shop shares space with living areas.
- Blade Size: 10 inches
- Bevel: Dual, 0–45° both directions
- Miter Range: 60° right, 52° left
- Motor: 15-amp corded, soft start
- Max Crosscut (90°): Around 12 inches
- Weight: Around 54 lbs
The soft-start motor also reduces the jarring kick you get when powering up cheaper saws, and the built-in laser marker system helps line up cuts without squinting at the blade. Combine that with Makita’s reputation for durability, and it’s easy to see why this saw shows up so often in finish carpentry shops.
Pros
- Best-in-class dust collection for a home environment
- Smooth, quiet motor with soft start
- Precise laser guide for line-up accuracy
- Reputation for long-term durability
Cons
- Premium price for a 10-inch saw
- Slightly less crosscut capacity than 12-inch sliders
- Rail system needs clearance behind the saw
Check Price on Amazon
6. Ryobi ONE+ HP 18V Brushless Cordless Sliding Compound Miter Saw
Cordless miter saws used to be a compromise, but Ryobi’s ONE+ HP brushless platform closes most of that gap for home-shop-scale projects. The PBLMS01K delivers genuinely usable power for trim, furniture, and light framing work, without a cord tethering you to an outlet — useful in detached garages or basements where extension cords are a hassle.
- Blade Size: 7-1/4 inches (compact-class saw)
- Bevel: Single, 0–45° left
- Miter Range: 0–45° both directions with detents
- Motor: Brushless, 18V (or 36V with two batteries)
- Max Crosscut (90°): Around 4.5 inches, sliding
- Weight: Around 22 lbs (tool only)
Because it’s a smaller-diameter blade, this isn’t a direct capacity match for the 10- and 12-inch saws on this list, but for a home shop that values flexibility over maximum crosscut width — especially one already invested in Ryobi’s ONE+ battery platform — it’s a genuinely compelling option. Battery life on a single high-capacity pack is enough for a full afternoon of typical trim and furniture cuts.
Pros
- No cord required — ideal for outlets-limited spaces
- Shares batteries with the wider ONE+ tool ecosystem
- Compact and easy to relocate around the shop
- Brushless motor holds up well under repeated use
Cons
- Smaller blade limits maximum crosscut width
- Battery and charger often sold separately
- Not intended for heavy dimensional lumber

Check Price on Amazon
7. Milwaukee M18 FUEL 12-Inch Sliding Dual-Bevel Compound Miter Saw
At the top of the cordless category sits the Milwaukee M18 FUEL 2739-21HD — a full-size 12-inch dual-bevel slider that competes directly with corded saws on capacity, not just convenience. It’s the choice for a home shop owner who’s already committed to the M18 battery ecosystem and doesn’t want to compromise on cut capacity.
- Blade Size: 12 inches
- Bevel: Dual, 0–48° both directions
- Miter Range: 60° right, 50° left
- Motor: Brushless, dual 18V (36V) FUEL system
- Max Crosscut (90°): Around 14 inches
- Weight: Around 63 lbs (with batteries)
Milwaukee paired the FUEL motor with a redesigned rail and fence system that most reviewers say matches or beats comparable corded 12-inch sliders. The trade-off is cost — this is the most expensive saw in the lineup once you account for batteries and a charger — but for a shop already running M18 tools, it eliminates a cord entirely without sacrificing crosscut capacity.
Pros
- Corded-level power and capacity, fully cordless
- Shares batteries across the M18 tool lineup
- Redesigned fence and rail system rated highly by owners
- No cord to manage around the saw station
Cons
- Highest total cost, especially without existing batteries
- Heavier than most corded 12-inch saws
- Battery runtime is finite on large projects

Check Price on Amazon
Side-by-Side Comparison Table
Here’s how all seven saws stack up on the specs that matter most for a home shop.
| Saw | Blade Size | Bevel | Power | Weight | Best For |
|---|---|---|---|---|---|
| DeWalt DWS780 | 12″ | Dual | Corded | ~56 lbs | Overall home shop use |
| Bosch GCM12SD | 12″ | Dual | Corded | ~65 lbs | Wall-mounted stations |
| SKIL MS6305-00 | 10″ | Dual | Corded | ~32 lbs | Budget-conscious buyers |
| Metabo HPT C10FCGS | 10″ | Single | Corded | ~24 lbs | Small benches, portability |
| Makita LS1019L | 10″ | Dual | Corded | ~54 lbs | Dust control, quiet shops |
| Ryobi PBLMS01K | 7-1/4″ | Single | Cordless | ~22 lbs | No-outlet garages |
| Milwaukee 2739-21HD | 12″ | Dual | Cordless | ~63 lbs | M18 shops, max cordless power |
Once your saw is picked out, it’s worth rounding out the rest of your bench setup — see our guides to the best random orbital sander and best cordless drill for woodworking for the next tools most home shops add.
Corded vs. Cordless Miter Saws: Which Fits a Home Shop Better?
For most fixed home shop stations, corded remains the practical default — consistent power, no charging downtime, and typically a lower total cost since you’re not paying for batteries. But cordless has closed the gap enough that it’s worth considering in specific situations.
Choose cordless if your shop lacks a convenient outlet near the saw station, if you already own batteries from the same platform (Ryobi ONE+ or Milwaukee M18, in this lineup), or if you frequently move the saw between a garage, driveway, and outdoor project sites. Choose corded if you want the lowest total cost, the widest selection of saws at every price point, or if your projects involve long, continuous cutting sessions where battery swaps would slow you down.
10-Inch vs. 12-Inch: Which Blade Size Do You Actually Need?
This is one of the most common questions home shop owners ask, and the honest answer is that most people overbuy on blade size. A 10-inch sliding compound saw covers the vast majority of furniture, trim, and general home shop crosscutting needs, and tends to leave a slightly cleaner cut on hardwood and trim-grade material because the blade spins at a higher RPM for the same motor size.
A 12-inch saw earns its keep when you’re regularly cutting thicker dimensional lumber, wide baseboard or crown molding in a single pass, or framing lumber like 4×4 posts. If you’re not sure which category you fall into, look back at your last few projects — if you’ve never needed to cut something wider than about 7-8 inches at 90°, a 10-inch slider will serve you well and save some money, bench space, and weight.
Setting Up a Miter Saw Station at Home
A miter saw is only as accurate as the surface it’s mounted on. Even the best saw on this list will disappoint you if it’s sitting on a wobbly folding table with no support on either side of the blade.
Support on Both Sides
Long stock needs support in-feed and out-feed, or it will tip and throw off your cut angle. A dedicated miter saw stand with extendable wings solves this in one purchase, or you can build a simple flanking bench setup at the same height as the saw table.
Stable, Level Mounting
Bolt or clamp the saw down rather than letting it sit loose — even small shifts during a cut degrade accuracy and are a safety risk. Check that the mounting surface is level in both directions before you calibrate the saw’s fence and miter scale.
A quick-release mounting plate is worth considering if you expect to move the saw between a bench and a stand seasonally — for example, moving it outside for a summer deck project and back to an indoor bench for winter trim work. It adds a small upfront cost but saves the hassle of re-drilling mounting holes every time the saw changes locations.
Lighting and Dust Management
A simple task light aimed at the cut line pays for itself the first time you’re lining up a tight joint. Pair your saw’s dust port with a shop vac rather than relying solely on the bag — it makes a dramatic difference in a home shop where dust settles onto nearby storage, tools, and living spaces.
If you’re building out your station from scratch, our guide on setting up a beginner woodshop and our roundup of the best woodworking workbench options are both good next reads. For those building their own miter station surface, check free woodworking workbench plans and our comparison of best portable woodworking workbench options if space is limited.
Essential Accessories and Blade Upgrades
The blade that comes with most miter saws is a general-purpose combination blade — usable, but not optimized for fine trim work or clean crosscuts in hardwood. A few upgrades make a noticeable difference:
- An 80-tooth crosscut blade for noticeably cleaner cuts on trim, plywood, and hardwood.
- Stop blocks for repeatable cuts when you need multiples of the same length.
- An auxiliary fence board to protect your saw’s fence and support thin or delicate trim.
- A dedicated shop vac or dust collection hose sized to your saw’s port.
- A digital angle gauge for verifying bevel and miter accuracy beyond the built-in detents.
For hand-finishing joints after the saw work is done, it’s worth pairing your setup with a decent chisel set for beginners and understanding how your miter saw fits into the bigger picture described in our wood joinery tools explained guide.
Safety Tips for Home Shop Use
Miter saws are one of the more approachable power tools, but they’re still capable of serious injury if used carelessly. A few habits go a long way, and they cost nothing beyond a little discipline at the saw table:
- Always keep hands at least a few inches clear of the blade path, even with the guard in place.
- Let the blade come to a complete stop before lifting it out of the cut.
- Use a clamp or stop block for small pieces instead of holding them by hand near the blade.
- Wear eye and hearing protection — even a 10-inch saw generates significant noise and debris.
- Check that the workpiece is fully supported and not resting only on the fence at one end.
- Unplug or remove the battery before changing blades or adjusting the fence.
A tool apron with dedicated pockets also helps keep stop blocks, pencils, and a tape measure within reach without leaving them near the saw table — see our comparison of the best woodworking apron options, including the best leather woodworking apron and waxed canvas woodworking apron if you want something more rugged for daily shop use.
Maintenance and Care
Good habits at the saw compound over time — a well-maintained miter saw holds its factory accuracy for years. The basics are simple but easy to neglect: keep the blade clean of pitch buildup, check the fence and miter scale for square periodically using a reliable square, and lubricate the slide rails on sliding models per the manufacturer’s recommendation so they don’t develop play over time.
Store the saw with the blade guard functioning properly and, if possible, under a cover to keep dust out of the motor housing between uses — especially relevant in a garage shop exposed to seasonal humidity changes.
For cordless saws, remove the battery when storing the tool for extended periods, and check the manufacturer’s guidance on partial-charge storage — most lithium-ion packs last longer over the years if they’re not left sitting at a full charge for weeks at a time. Corded saws should have their cord checked periodically for nicks or fraying, particularly if the saw gets moved around a shared garage space.
Common Mistakes Home Shop Owners Make When Buying a Miter Saw
After comparing owner feedback across all seven of these saws, a few recurring regrets show up again and again. Knowing them ahead of time can save you from an expensive re-purchase down the line.
Buying More Saw Than the Space Can Handle
A full-size 12-inch slider needs real clearance behind it to extend the rails through a cut. Buyers who skip this step often end up pushing the saw forward off the wall every time they use it, or worse, discover they can’t fully extend the slide at all in their allotted space. Measure your bench depth and compare it to the manufacturer’s fully-extended slide dimension before buying, not after.
Underestimating the Importance of the Fence
It’s tempting to focus entirely on blade size and horsepower, but the fence is what determines whether your crown molding sits flat and your joints close up tight. A short or flexible fence undermines an otherwise capable saw. If you do a lot of trim work, prioritize fence height and rigidity as much as raw cutting capacity.
Skipping the Calibration Step
Even premium saws can arrive slightly out of square from shipping and handling. Owners who skip an initial calibration check — verifying 90° and 45° stops against a reliable square — sometimes spend months chasing joints that never quite close, assuming it’s a technique problem rather than a setup problem. Five minutes with a square when the saw is new prevents this entirely.
Ignoring Noise and Dust in Shared Spaces
If your shop is attached to the house — a garage, basement, or spare room — dust and noise matter more than they would on an open job site. Buyers who choose the loudest or messiest saw purely on price sometimes find themselves restricted to using it only when the rest of the household is out, which defeats the purpose of a convenient home shop. Saws like the Makita LS1019L, with its dual dust ports, are worth the premium in these situations.
Which Saw Fits Which Home Shop? A Quick Decision Guide
With seven strong options on this list, the “best” saw really depends on the shape of your projects and your shop. Here’s a fast way to narrow it down based on common home shop profiles.
- You build furniture and cabinetry as a serious hobby: The DeWalt DWS780 or Makita LS1019L both offer the accuracy and repeatability that furniture joinery demands, with the Makita edging ahead on dust control and cut smoothness.
- You’re renovating your own home — trim, doors, baseboards: A dual-bevel slider with a tall fence, like the DeWalt DWS780 or Bosch GCM12SD, will save you time on crown molding and repeated angle cuts throughout the project.
- Your shop is a single-car garage or smaller: The Bosch GCM12SD’s axial-glide design or the compact Metabo HPT C10FCGS both solve the footprint problem in different ways — choose the Bosch if you need slider capacity, or the Metabo if narrower stock is fine.
- You’re just getting started and want to keep costs down: The SKIL MS6305-00 delivers slider and dual-bevel functionality without the premium price, making it a smart entry point.
- You already own batteries from a specific platform: Staying on-platform with the Ryobi ONE+ HP or Milwaukee M18 FUEL saves money on batteries and chargers you’d otherwise duplicate.
- Your shop doesn’t have a convenient outlet: Either cordless option solves this, with the Milwaukee M18 FUEL giving you full 12-inch capacity if budget allows, and the Ryobi ONE+ HP covering lighter-duty needs more affordably.
What You’ll Actually Spend: Total Cost Beyond the Saw
The sticker price on a miter saw rarely reflects the total investment needed for a functional home shop station. Budgeting for these extras up front avoids surprises and helps you compare saws on a more apples-to-apples basis.
| Item | Typical Need | Why It Matters |
|---|---|---|
| Stand or bench mount | One-time purchase or DIY build | Stability directly affects cut accuracy |
| Upgraded blade | 80-tooth crosscut blade | Cleaner cuts on trim and hardwood |
| Dust collection | Shop vac and hose adapter | Keeps dust out of living spaces |
| Batteries and charger | Cordless models only | Often sold separately from the tool |
| Stop blocks and jigs | Shop-made or purchased | Speeds up repeated identical cuts |
Factoring these into your budget from the start — rather than treating the saw price as the whole project cost — leads to a more realistic comparison between, say, a bare-tool cordless saw and a fully-equipped corded model.
Frequently Asked Questions
What size miter saw is best for a home shop?
A 10-inch sliding compound miter saw covers the vast majority of home shop projects, including furniture, trim, and cabinetry work. Step up to 12 inches only if you regularly cut thick dimensional lumber or very wide molding in a single pass.
Do I need a sliding miter saw, or is a compound saw enough?
If most of your cuts are on narrower stock — furniture parts, standard trim, picture frame material — a compact non-sliding compound saw is lighter, cheaper, and takes up less bench space. A slider is worth the extra footprint if you regularly need to crosscut wide boards or crown molding.
Is a dual-bevel miter saw worth the extra cost?
For crown molding and repeated angled cuts in both directions, yes — a dual-bevel saw saves time and avoids flipping your stock, which can be risky with a finished face. For general furniture and framing work, a single-bevel saw is often perfectly adequate.
Are cordless miter saws powerful enough for real projects?
Modern brushless cordless miter saws, like the Ryobi ONE+ HP and Milwaukee M18 FUEL models covered above, deliver power comparable to corded saws for typical home shop work. The main trade-off is finite battery runtime on very long cutting sessions, not a lack of cutting power.
How much dust does a miter saw actually produce?
More than most people expect — miter saws are among the messier tools in a home shop. Pairing the saw’s dust port with a shop vac rather than relying on the included bag makes a substantial difference, especially with saws like the Makita LS1019L that are designed around dual dust-collection ports.
Can a miter saw replace a table saw in a small home shop?
Not entirely. A miter saw excels at crosscuts and angled cuts but can’t rip boards to width the way a table saw can. Most home shops eventually want both — see our guide to the best table saw for woodworking and our overview of hand tools vs. power tools for woodworking for how they complement each other.
What’s the difference between a laser guide and a LED shadow line?
A laser guide projects a line onto the workpiece to mark the cut path, while an LED shadow line casts the blade’s actual shadow onto the stock for a more literal preview of the cut. Both help with accuracy; shadow lines are generally considered slightly more precise since they reflect the blade’s real position rather than a projected line that can drift out of calibration.
How often should I check my miter saw’s calibration?
Check the fence-to-blade squareness and the miter scale’s zero position every few months with regular use, and always after transporting the saw or if you notice cuts drifting out of square. A basic engineer’s square is enough to spot-check accuracy in under a minute.
Do I need a stand, or can I mount a miter saw directly on a workbench?
Either works, as long as the mounting surface is stable, level, and provides support on both sides of the blade for long stock. A dedicated stand is convenient if you need to fold the saw away between projects; a fixed bench mount is often more rigid for a permanent station.
What blade should I use for the cleanest trim cuts?
An 80-tooth crosscut or fine-finish blade produces noticeably cleaner cuts on trim, plywood, and hardwood compared to the general-purpose combination blade most saws ship with.
Is it worth buying a used miter saw for a home shop?
It can be, if you inspect the fence and table for damage, verify the miter and bevel detents still lock firmly, and check that the blade guard moves freely. Sliding models are worth testing on the rails for play or binding before buying secondhand.
How much bench space should I plan for a sliding miter saw?
Plan for at least the saw’s fully extended slide depth plus a few inches of clearance behind it, along with support surfaces on both sides at table height for long stock. Compact designs like Bosch’s axial-glide system need less depth clearance than traditional rail-based sliders.
Final Verdict: Which Miter Saw Should You Buy?
If you want one saw that handles nearly everything a home shop throws at it, the DeWalt DWS780 remains the safest, most well-rounded recommendation — accurate out of the box, widely supported, and capable of wide crosscuts and tall crown molding. If your shop is tight on space and pushed against a wall, the Bosch GCM12SD‘s axial-glide design solves that problem without sacrificing capacity. Working with a tighter budget? The SKIL MS6305-00 delivers sliding, dual-bevel performance that punches well above its price.
For smaller projects and smaller shops, the Metabo HPT C10FCGS is hard to beat on weight and simplicity. If dust control and cut quality top your priority list, the Makita LS1019L is the standout. And if you’d rather leave the cord behind entirely, the Ryobi ONE+ HP covers lighter-duty needs affordably, while the Milwaukee M18 FUEL 12-inch gives you full corded-level capacity without a cord at all.
Whichever saw you choose, pair it with a stable station, solid support on both sides of the blade, and a dust collection setup that fits your space — those three things will improve your results more than any single spec on the saw itself. Take the time to calibrate the saw when it’s new, invest in a decent crosscut blade if trim work is a priority, and budget for a stand or mounting solution from the start rather than treating it as an afterthought. A well-set-up mid-range saw will consistently outperform a premium saw bolted to a shaky table.
Check Latest Price on Amazon
Next up for your shop: browse our picks for the top wood router picks, round out your bench with the best plywood for a workbench top, or compare the best wood for a woodworking bench if you’re still building your station from scratch.
Essential Miter Saw Cutting Techniques Every Home Shop Owner Should Know
Buying the right miter saw is only half the equation — knowing how to use it correctly is what turns raw lumber into furniture-grade joints and tight-fitting trim. This section walks through the core cuts you’ll make most often in a home shop, along with the technique tips that separate clean, accurate work from frustrating rework.
The Basic Crosscut
A crosscut is the simplest and most common miter saw cut — a straight 90° cut across the width of a board. To execute it well, hold the workpiece firmly against the fence with one hand (keeping it well away from the blade path) while the other hand operates the saw handle. Press the board flat against the table and back against the fence before starting the cut — even a small gap between the stock and the fence introduces angle error that compounds over a project.
Let the blade reach full speed before it contacts the wood, then lower it steadily through the cut without forcing it. A sharp blade does the work; pushing hard only increases tearout and heat buildup. On wider stock, pull a sliding saw toward you first (if your model’s design allows it), then push the spinning blade through the cut in one smooth motion. If your saw doesn’t have a laser or shadow line, you can touch the spinning blade’s teeth gently to the marked line on the workpiece before committing to the full cut — this gives you a visual reference point for where the blade will land.
Miter Cuts (Angled Crosscuts)
A miter cut angles the blade left or right relative to the fence, which is essential for picture frames, door and window casings, and any project that joins two boards at a corner. The most common miter angle is 45° for a standard 90° corner, but many projects demand other angles — 22.5° for octagonal frames, 30° for hexagonal shapes, and custom angles for rooms where walls don’t meet at true right angles.
Here’s a tip many home shop owners learn the hard way: before making a miter cut at any angle, release the miter lock and physically check that the detent is seating fully. Cheap saws sometimes have detents that sit a fraction of a degree off, which is invisible on a single piece but produces a visible gap on a four-sided frame. A digital angle gauge placed on the blade or table is the fastest way to verify your angles before you start a batch of cuts.
For picture frames and four-sided assemblies, always cut opposing pieces in pairs without adjusting the miter angle between them. This way, any slight inaccuracy in the angle is complementary — one piece’s error cancels the other’s — and the assembled joint closes tightly even if the angle isn’t a mathematically perfect 45°.
Bevel Cuts
A bevel cut tilts the blade relative to the table surface, cutting an angle through the thickness of the board rather than across its width. You’ll use bevel cuts for chamfered edges, compound-angle joinery, and certain types of trim installations where the piece meets a sloped surface.
On a single-bevel saw, you can only tilt the blade in one direction — usually to the left. To cut a complementary bevel, you have to flip the workpiece end-for-end. On a dual-bevel saw, you simply rotate the head to the other side, which is faster and eliminates the risk of scratching or marring a finished face when you flip the stock. If you’re working with pre-finished trim or material with a visible face, a dual-bevel saw pays for itself quickly in time saved and rework avoided.
Compound Cuts (Miter + Bevel Combined)
Compound cuts combine both a miter angle and a bevel angle simultaneously — the blade is tilted and rotated at the same time. The most common use case is cutting crown molding, which requires compound angles because the molding sits at a “spring angle” against the wall and ceiling rather than lying flat on the saw table. We cover crown molding technique in much more detail in the dedicated section below, but the key point here is that compound cuts demand extra care in setup: verify both the miter and bevel settings before every cut, and always make test cuts on scrap stock before committing to your actual workpiece.
Other uses for compound cuts include hip and valley roof rafters, where both the pitch angle and the horizontal angle must be cut simultaneously, and decorative furniture joints where two mating pieces meet at compound angles in three-dimensional space.
Cutting Small and Narrow Stock Safely
Small pieces are the most dangerous work on a miter saw — they’re hard to hold steady and the cutoff fragment can become a projectile if it gets caught by the blade. Never hold a small piece with your fingers near the blade. Instead, clamp the workpiece to the table or against the fence, or use a dedicated stop block that traps the short piece between the block and the blade.
For very small cutoffs — shorter than about 3 inches — consider cutting the piece slightly oversize and then trimming to final length using a hand saw, a bench hook, or a small miter box. It adds a step but keeps your fingers far from a spinning blade.
Repeatable Cuts: Using Stop Blocks for Production Work
One of the biggest time-savers in any home shop is cutting multiple pieces to exactly the same length — legs for a table, shelves for a cabinet, trim pieces for a room. A stop block clamped to your miter saw stand or fence at a fixed distance from the blade gives you a positive reference point: push the stock until it hits the block, make the cut, and every piece comes out identical.
A critical safety rule: never clamp a stop block on the blade side of the cut. Always position the stop block on the waste side or on an auxiliary fence behind the blade. If the block is on the blade side, the cutoff piece gets trapped between the blade and the block, which can launch the small fragment at high speed. Position the block on the keep side of the cut for measuring purposes, but ensure the waste piece has room to move freely away from the blade after being severed.
For a deeper look at the jigs and accessories that make repeatable work easier, see our shop-made jigs and accessories section below, and for more on hand tools that complement miter saw work, our guide to hand tools vs. power tools for woodworking covers where each category shines.
Miter Saw Blades: A Complete Guide to Choosing the Right Blade
The blade that ships with your miter saw is usually a general-purpose combination blade designed to do everything acceptably and nothing exceptionally. For many home shop projects that’s fine — framing, rough carpentry, and dimensional lumber don’t demand a precision finish. But the moment you move into trim work, furniture parts, or hardwood crosscuts, upgrading your blade is the single most cost-effective improvement you can make. A good blade on a mid-range saw will outperform a cheap blade on a premium saw every time.
Understanding Tooth Count
Tooth count is the first number most people look at, and it does matter — but not in the way many assume. A higher tooth count generally produces a smoother cut because each tooth removes less material, leaving a finer finish. For crosscuts on trim, hardwood, and plywood, an 80-tooth blade is the standard recommendation and produces clean, ready-to-finish cuts. A 60-tooth blade splits the difference between speed and finish quality and works well for general-purpose home shop use. A 24-tooth or 32-tooth blade cuts faster but leaves a rougher edge — it’s designed for framing lumber and rough carpentry, not furniture or trim.
Tooth Geometry: ATB, TCG, and FTG
Beyond tooth count, the shape of the teeth affects how the blade cuts. The three most common geometries on miter saw blades are:
- ATB (Alternate Top Bevel): Adjacent teeth are beveled in opposite directions, creating a shearing action that slices wood fibers cleanly. This is the most common geometry for crosscut blades and produces the smoothest finish on natural wood. An 80-tooth ATB blade is the go-to for trim and finish work in a home shop.
- TCG (Triple Chip Grind): A combination of a flat-topped tooth and a trapezoidal chipping tooth alternates around the blade. TCG blades excel at cutting laminates, melamine, and other materials that chip easily because the flat tooth cleans up the edge left by the chipping tooth. If you cut a lot of pre-finished shelving, laminate countertop material, or MDF, a TCG blade is worth having in your blade drawer.
- FTG (Flat Top Grind): Every tooth has a flat top, which cuts aggressively but leaves a rougher surface. FTG blades are primarily designed for ripping on table saws, not crosscutting on miter saws, so they’re rarely the right choice for a miter saw application.
Blade Diameter and Arbor Size
Miter saw blades come in diameters that match the saw’s rated size — a 12-inch saw uses 12-inch blades, a 10-inch saw uses 10-inch blades. Some compact cordless saws use 7-1/4-inch blades, which are the same diameter as circular saw blades and therefore widely available and affordable. The arbor hole — the center hole that fits over the saw’s spindle — is typically 5/8 inch on 10-inch and 12-inch miter saw blades, and 5/8 inch or smaller on 7-1/4-inch blades. Always verify your saw’s arbor size before buying a replacement blade.
Carbide-Tipped vs. Steel Blades
Nearly all modern miter saw blades use carbide-tipped teeth — small tungsten carbide tips brazed onto a steel body. Carbide stays sharp much longer than high-speed steel (HSS) and handles hardwoods, plywood, and composites without dulling quickly. HSS blades are cheaper upfront but dull faster and can’t be re-sharpened as many times as carbide. For a home shop, carbide-tipped blades are the only sensible choice: they last long enough that the per-cut cost is negligible, and many can be professionally sharpened for a fraction of the cost of a new blade.
When to Replace or Sharpen a Blade
A dull blade doesn’t just produce rough cuts — it forces the motor to work harder, generates more heat, and increases the risk of burning the wood. Signs that your blade needs attention include: increased feed resistance (you have to push harder to complete the cut), burn marks on the wood surface, rough or fuzzy edges on the cut face, and visible chipping or missing carbide tips on the blade teeth.
Professional blade sharpening typically costs $10–$25 per blade depending on diameter and tooth count, which is significantly cheaper than buying a new blade. Most home shops keep a dedicated crosscut blade for fine work and a general-purpose blade for rougher tasks, sending the crosscut blade out for sharpening when it starts to dull rather than replacing it. A clean blade also cuts better — use a blade cleaning solution or a brass brush to remove pitch and resin buildup every few weeks of active use.
Matching Blade to Material
Different materials perform best with different blade types. Here’s a quick reference for home shop owners:
| Material | Recommended Blade | Tooth Count |
|---|---|---|
| Hardwood trim and molding | ATB fine-finish | 80–100 |
| Softwood and dimensional lumber | ATB or combination | 40–60 |
| Plywood and veneered panels | ATB with high tooth count | 80–100 |
| Melamine and laminates | TCG (triple chip grind) | 80 |
| MDF and particleboard | ATB or TCG | 60–80 |
| Non-ferrous metals (aluminum) | TCG carbide, non-ferrous rated | 60–80 |
Having two or three blades in rotation — a dedicated fine-finish crosscut blade, a general-purpose combination blade, and a TCG blade for laminates — covers nearly every material a home shop encounters without breaking the budget.
How to Calibrate and Square a Miter Saw: A Step-by-Step Guide
Even the best miter saw is only as accurate as its calibration. Shipping, bumps, temperature changes, and normal use can knock a saw out of square over time, and the result is joints that don’t close, trim that doesn’t fit, and frustration that feels like a skill problem but is actually a setup problem. Calibrating a miter saw is straightforward, requires nothing more than a reliable square and a few minutes, and should be done when the saw is new, after transporting it, and periodically throughout the year.
What You Need
- A machinist’s square or combination square (a reliable, known-accurate square — not a cheap framing square with worn edges)
- A straight scrap board, 3/4 inch thick and at least 6 inches wide
- A pencil or marking knife
- Your saw’s owner manual (for the specific adjustment screw locations)
Step 1: Check the Blade-to-Table Squareness
With the saw unplugged (or the battery removed), lower the blade to its lowest point. Place your square flat on the saw table with the blade of the square against the flat side of the saw blade — not the teeth, which may be set at a slight angle. There should be no gap between the square and the blade. If there is a gap, the blade is tilted relative to the table, and you’ll need to adjust the bevel zero-stop per your manual’s instructions. This is the foundation of all other adjustments — if the blade isn’t square to the table at the zero-bevel position, every cut you make inherits that error.
Step 2: Check the Fence-to-Blade Squareness
With the blade still lowered, place your square against the fence and extend it toward the blade. The square’s blade should touch the flat face of the saw blade with no gap at either the front or back of the blade. If the gap is wider at the front or back, the fence is out of parallel with the blade, and you’ll need to adjust the fence alignment per your manual. On most saws, this involves loosening the fence mounting bolts, nudging the fence into alignment, and re-tightening.
A fence that’s not parallel to the blade produces cuts that are square at one end of the board but angled at the other — a maddening error that’s hard to diagnose if you don’t know to check the fence.
Step 3: Verify the 90° Miter Detent
Lock the miter at the 0° (90° to the fence) detent. Make a crosscut on a flat scrap board and check the resulting cut with your square. If it’s off, adjust the 90° detent stop per your manual — usually a small set screw near the miter detent plate. This is the most-used position on any miter saw, so getting it right has the biggest impact on daily work.
Step 4: Check the 45° Miter Detents
Repeat the cut-and-check process at 45° left and 45° right. Most saws have adjustment screws for each detent position. A perfect 45° cut is essential for picture frames and standard 90° corners, so take the time to dial this in precisely. A useful trick: cut two pieces at 45° and butt them together on a flat surface. If the joint is seamless, your 45° detent is accurate. If there’s a visible gap or overlap, one or both angles need adjustment.
Step 5: Check the Bevel Stops
Tilt the blade to 45° bevel and check it against your square or a protractor. Adjust the bevel stop screw if the angle is off. Check the 0° bevel stop again after adjusting any other bevel positions to make sure you haven’t shifted it inadvertently.
Step 6: Verify with a Test Assembly
After all adjustments, make a four-sided test frame from scrap material — four pieces mitered at 45° and assembled into a square or rectangle. If all four corners close tightly and the assembly sits flat on a reference surface, your saw is properly calibrated. If any corner shows a gap, re-check the corresponding miter detent. This test assembly takes five minutes and saves hours of frustration on a real project.
Ongoing Calibration Habits
Mark a reminder to check your saw’s squareness every two to three months during active use. A quick verification with a square takes less than a minute and catches drift before it shows up as gaps in your work. Always re-check calibration after moving the saw, after any impact (like dropping a heavy board onto the table), or after changing blades — sometimes a blade change can shift the assembly fractionally if the arbor washer isn’t seated perfectly.
Miter Saw Techniques for Crown Molding: A Home Shop Guide
Crown molding is the single most intimidating project for many home shop owners, and it’s also the one where a good miter saw — set up correctly and used with the right technique — makes the biggest difference. The difficulty comes from the compound angles involved: crown doesn’t sit flat against a single surface the way baseboard does. It’s installed at a “spring angle” — typically 38°, 45°, or 52° — between the wall and the ceiling, and every cut has to account for that three-dimensional geometry.
Method 1: Cutting Crown Molding Nested (Upside Down and Backward)
This is the most common technique for home shop owners and the method most miter saw manuals describe. You place the molding upside down and backward on the saw table, with the bottom edge (the part that will touch the wall) against the fence and the top edge (the part that will touch the ceiling) resting on the saw table. In this position, the saw table acts as the ceiling and the fence acts as the wall, so a straight 90° crosscut produces a cut that fits into a 90° corner when the molding is installed in its actual orientation.
Miter cuts in this nested position work the same way: setting the saw to 45° left or right produces the corresponding inside or outside corner cut for the installed molding. The advantage of this method is that you don’t need to know or calculate the spring angle — you just set the molding against the fence and table and cut it in the orientation it will be installed.
The practical challenge is holding the molding steady in this somewhat awkward position. A tall fence helps — the DeWalt DWS780 and Bosch GCM12SD both have fences tall enough to support standard crown molding without an auxiliary board. For shorter fences, clamp or tack a flat auxiliary board to the existing fence to extend its height, giving the molding a stable vertical surface to rest against.
Method 2: Cutting Crown Molding Flat (Compound Miter)
The alternative method is to lay the molding flat on the saw table and use compound miter settings — a specific combination of miter angle and bevel angle — to produce the correct cut. This method requires knowing your crown molding’s spring angle and then looking up or calculating the compound angles for each type of joint (inside corner left, inside corner right, outside corner left, outside corner right).
For 38° spring angle crown (the most common in North American homes), the compound settings are:
| Joint Type | Miter Angle | Bevel Angle |
|---|---|---|
| Inside corner, left piece | 31.6° left | 33.9° left |
| Inside corner, right piece | 31.6° right | 33.9° right |
| Outside corner, left piece | 31.6° right | 33.9° right |
| Outside corner, right piece | 31.6° left | 33.9° left |
These numbers vary for 45° and 52° spring angles, so always verify with a crown molding chart specific to your molding profile. The flat-cut method is preferred by some professionals because it’s easier to support long pieces flat on the table, and it works well on saws with limited fence height. The trade-off is that you need a dual-bevel saw for efficiency — flipping the stock on a single-bevel saw to reverse the bevel direction is cumbersome and risks marring the visible face.
Which Saw Is Best for Crown Molding?
For crown molding specifically, prioritize: dual bevel (so you don’t have to flip the stock), a tall fence (to support the molding vertically in the nested position), and a wide miter range (some rooms have corners that deviate from true 90° and need custom angles). Based on these criteria, the DeWalt DWS780 and Bosch GCM12SD are the strongest choices in this roundup — both offer dual bevel, tall fences, and wide miter ranges with reliable detents. The Makita LS1019L also performs well for crown work and adds the advantage of superior dust collection, which matters when you’re cutting many pieces in a room-adjacent shop.
Coping Inside Corners
Professional trim carpenters often cope inside corners rather than mitering them. A cope cut involves cutting one piece at a 45° miter to reveal the profile, then using a coping saw to cut along the exposed profile line, creating a shape that fits snugly against the adjoining piece’s face. The result is a tighter joint that stays closed even as the wood moves seasonally, whereas a mitered inside corner can open up over time as the wood expands and contracts.
To use the cope technique, you still need the miter saw for the initial 45° cut that exposes the profile, and for cutting the mating piece square. The coping itself is done with a hand coping saw or a rotary tool with a cutting bit. If you’re investing in quality hand tools, a good coping saw and a set of needle files make the process faster and more precise.
Miter Saw for Trim and Finish Carpentry: Tips for Tight Joints
Trim carpentry — baseboards, door and window casings, chair rails, wainscoting, and shoe molding — is where a miter saw earns its keep more than in any other home improvement task. The margin for error is small: a 1/32-inch gap on a baseboard joint might be invisible from across the room, but a 1/16-inch gap reads as sloppy work from ten feet away. Here’s how to get consistently tight joints with the saws in this roundup.
Inside Corners: Miter vs. Cope
For inside corners on baseboard and casing, you have two choices: miter both pieces at 45°, or cut one piece square to butt into the corner and cope the adjoining piece to fit its profile. Mitering is faster but less forgiving — if the wall corner isn’t exactly 90° (and most aren’t), the miter joint opens up. Coping takes more time but produces a tighter joint that accommodates out-of-square corners because the coped piece conforms to the profile of the adjoining piece rather than relying on a matching angle.
If you choose to miter inside corners, scribe-fit each piece by holding it in place and marking the actual wall angle rather than assuming 45°. A sliding T-bevel transferred from the actual corner angle to your miter saw’s scale gives you the real angle to cut.
Outside Corners
Outside corners on baseboard and casing are almost always mitered — a coped outside corner isn’t practical. The key to tight outside miters is back-cutting: after making the 45° miter on the saw, slightly tilt the piece so the back edge of the cut (the wall side) is just barely shorter than the front face. This ensures the visible front face of the joint closes tightly, even if the wall corner isn’t perfectly 90°. Most experienced trim carpenters do this by hand with a block plane or a utility knife after the miter saw cut, taking a shaving off the back edge.
Sequencing Your Cuts
When trimming an entire room, work methodically: start at the door and work counterclockwise (or clockwise, but consistently one direction). Cut each piece slightly long and sneak up on the fit with a tiny trim cut — it’s much easier to shave off 1/16 inch than to add it back. This approach works best with a sharp, high-tooth-count blade that produces a finished surface directly off the saw, so you don’t need to sand or plane the cut face.
For casings around doors and windows, always cut the head piece first, then the side pieces to fit beneath it. This way, if the head piece’s miter is slightly off, you can adjust the side pieces to compensate rather than having to redo the longer head piece.
Blade Selection for Trim Work
Trim work demands the cleanest cuts in a home shop, and an 80-tooth or 100-tooth ATB crosscut blade is the right tool for the job. The investment is modest — typically $30 to $60 for a quality blade — and the difference in cut quality compared to a general-purpose blade is immediately visible, especially on stain-grade trim where every fiber shows. For a deeper dive into blade selection, see the blade guide section above.
If you’re outfitting your shop for a major trim project, pairing your miter saw setup with a good cordless drill for nailing and pilot holes and a reliable random orbital sander for final finishing covers the full workflow from cutting to installation to finishing.
Miter Saw Stands Compared: Which Type Fits Your Home Shop
A miter saw sitting on an unstable surface is a miter saw that won’t cut accurately — no matter how good the saw is. The stand or mounting solution you choose is almost as important as the saw itself, and there are several distinct approaches, each with trade-offs for a home shop environment.
Fixed Bench Mount
The most rigid option for a permanent home shop is bolting or clamping the miter saw directly to a workbench or dedicated miter saw station. This approach gives you the most stability and allows you to build outfeed support wings at the same height as the saw table, which is essential for long stock. The downside is that the saw occupies permanent bench space, and if your shop does double duty as a garage or multipurpose room, that commitment may not be practical.
A well-built fixed miter station also lets you integrate dust collection directly — routing a hose from the saw’s dust port through the bench to a shop vac below keeps the setup tidy and efficient. Our guide to free woodworking workbench plans includes several designs with miter saw integration in mind.
Dedicated Miter Saw Stand (Folding)
Folding miter saw stands are the most popular option for home shops that need to reclaim floor space when the saw isn’t in use. Good stands include extendable support wings for long stock, quick-release mounting plates so you can detach the saw for storage, and roller supports on the wings that let you slide long pieces smoothly. The trade-off is that a folding stand is less rigid than a fixed bench, and cheaper stands can wobble under the vibration of a 12-inch slider cutting hardwood.
When evaluating folding stands, look at the maximum weight rating (make sure it exceeds your saw’s weight plus the heaviest stock you’ll cut), the leg-locking mechanism (pins or latches that feel solid, not flimsy), and the wing support length (wings that extend to support at least 8 feet of stock on each side cover most home shop needs).
Rolling Miter Saw Stand
Rolling stands combine portability with a more robust frame than basic folding stands. They typically have larger wheels that handle rough garage floors and can be rolled to a storage corner when not in use. Some models include built-in material supports and even integrated dust collection fittings. The larger footprint and higher cost are the trade-offs, but for a shop that reorganizes frequently or shares space with a vehicle, rolling capability is a real convenience.
DIY Miter Saw Station
Many home shop owners eventually build their own miter saw station, typically a long bench or cabinet system with the saw recessed into the surface so the table sits flush with the surrounding work area. This approach gives you the most control over height, outfeed support, dust collection routing, and storage for blades, squares, and accessories. The main investment is time and lumber rather than money.
If you’re considering a DIY build, our roundups of the best wood for a woodworking bench and the best plywood for a workbench top help you choose the right materials for a flat, durable surface. For portable alternatives, see our comparison of best portable woodworking workbench options.
Matching the Stand to the Saw
The key compatibility issue is weight: a 65-pound Bosch GCM12SD on a flimsy folding stand will bounce and shift, while the same saw on a heavy-duty rolling stand or a fixed bench stays rock-stable. The 24-pound Metabo HPT C10FCGS, by contrast, works fine on a lightweight portable stand because its compact size and lower cutting forces don’t demand the same rigidity. Before buying a stand, check the stand’s weight rating against your saw’s weight, and consider the heaviest stock you’ll ever cut resting on the stand’s wings at full extension.
Miter Saw vs. Table Saw vs. Circular Saw: Which One Do You Need First?
If you’re setting up a home shop from scratch, deciding which saw to buy first is one of the most consequential choices you’ll make. Each type of saw excels at different tasks, and understanding those strengths helps you avoid buying the wrong tool for your actual projects — or buying one when you really needed the other.
When a Miter Saw Is the Right First Saw
A miter saw is the best first saw if your primary projects are crosscut-based: trimming out rooms (doors, windows, baseboard, crown molding), building picture frames, cutting furniture parts to length, and general home renovation work that involves cutting boards to specific lengths. It’s also the most approachable saw for beginners — the workpiece stays stationary while the blade moves, which is inherently safer than feeding material into a spinning blade (as with a table saw). For an overview of how miter saws fit into the broader tool landscape, see our guide to best woodworking tools.
When a Table Saw Is the Better First Buy
A table saw is the better first saw if your projects involve ripping boards to width — cutting plywood sheets into panels, sizing lumber from rough stock, making repeatable rip cuts, or building cabinets and casework where many parts start as wide boards that need to be narrowed. A table saw also handles crosscuts with a miter gauge or crosscut sled, though it’s less convenient than a dedicated miter saw for that specific task.
The downside of a table saw as a first saw for a home shop is the learning curve and the safety considerations — kickback is a real risk if the saw is used improperly, and the blade is exposed in a way that demands more attention to technique. Our best table saw for woodworking guide walks through what to look for, and how to choose a table saw covers the decision factors in more depth.
When a Circular Saw Fills the Gap
A circular saw is the most versatile handheld saw and the tool most homeowners already own. It crosscuts, rips, bevels, and handles sheet goods that are too large for a miter saw or a small table saw. For a home shop on a very tight budget or with very limited space, a circular saw paired with a straightedge guide can handle both crosscuts and rip cuts adequately, though not with the speed, precision, or repeatability of dedicated miter and table saws.
The practical answer for most home shop owners is: start with the miter saw if trim, furniture, and crosscuts dominate your project list. Add a table saw when ripping becomes a regular need. Keep the circular saw for sheet goods, demolition cuts, and on-site work where neither the miter saw nor the table saw is practical.
Shop-Made Jigs and Accessories That Make Your Miter Saw More Capable
You can buy a surprising number of aftermarket jigs and accessories for a miter saw, but some of the most useful ones are shop-made — built from scrap plywood, MDF, and a few hardware-store supplies in an afternoon. These jigs extend the saw’s capability, improve safety, and produce better results than the factory setup alone.
Zero-Clearance Fence Insert
A zero-clearance fence is a sacrificial board clamped or attached to the saw’s existing fence, positioned so the blade just barely cuts into it when making a full-depth cut. The result is a fence surface that supports the wood fibers right up to the cut line, dramatically reducing tearout and splintering on the back side of the cut — the side that the blade exits. This is especially valuable for trim work and any material where the cut face is visible.
To make one, clamp a flat piece of MDF or hardboard to the saw’s fence, lower the blade through it at a 90° cut, and you have a zero-clearance reference surface. Repeat the process at your most-used miter angles (45° left and right) to have zero-clearance fences for those cuts as well. Replace the sacrificial board when it gets chewed up from repeated cuts.
T-Track Stop Block System
A length of aluminum T-track mounted to a shop-made auxiliary fence gives you infinitely adjustable stop blocks that slide along the track and lock in position with a knob. This is the professional’s approach to repeatable-length cuts: set the block once, and every piece that slides against it comes out identical. It’s faster and more precise than measuring and marking each piece individually.
To build one, mount a length of T-track along the top edge of a flat auxiliary fence board, then make T-track-compatible stop blocks from hardwood with a T-bolt and knob. The total cost is usually under $20 in hardware, and the time savings on any project that involves multiple identical-length cuts is enormous.
Crown Molding Support Shelf
For cutting crown molding in the nested position, a simple shelf attached to the auxiliary fence at the correct height supports the bottom edge of the molding and keeps it from sliding down during the cut. This is especially useful on saws with shorter fences that don’t fully support standard 3-5/8-inch crown molding. A strip of plywood or MDF cut to the right width and screwed to the auxiliary fence is all it takes.
Dust Hood or Dust Box
Most miter saws capture 50–70% of dust at best through their factory dust ports. A shop-made dust hood that surrounds the back and sides of the blade area and connects to a 4-inch dust collection port or a shop vac hose can increase capture rates significantly. The simplest version is a plywood box mounted behind and below the saw table with a port for a shop vac hose. More elaborate versions include a hinged hood that lifts for blade access and seals when the saw is in use.
If you’re connecting to a dedicated dust collector rather than a shop vac, ensure the collector’s airflow rating matches the volume of the hood — miter saw hoods don’t need high static pressure, just steady airflow to carry the lightweight dust particles away from the cutting area.
Sacrificial Table Surface
A piece of hardboard or thin MDF cut to fit the saw table and held in place with double-sided tape protects the factory table from nicks and scratches when the blade cuts through thin material. It also gives you a zero-clearance surface at the table level, which reduces small offcuts from falling into the gap around the blade and becoming projectiles. Replace it when it gets too chewed up — hardboard is cheap and it’s a two-minute job to cut a new one.
Troubleshooting Common Miter Saw Problems
Even a well-maintained miter saw can develop issues over time. Knowing how to diagnose and fix common problems saves you from unnecessary frustration — and from blaming your technique when the real issue is a mechanical one.
Cuts Aren’t Square
This is the most common complaint and the one most likely to be blamed on operator error when it’s actually a calibration issue. Before adjusting your technique, check the saw’s calibration using the step-by-step process in our calibration guide above. The most frequent culprits are a fence knocked out of alignment, a miter detent that’s shifted slightly, or — on older saws — play in the miter pivot that allows the head to drift under cutting pressure.
If the saw checks out as square with a test cut on scrap but your project joints still don’t close, the issue may be in how the stock is supported. A board that tips or rocks during the cut because it’s only supported on one side can introduce angle error. Make sure both the infeed and outfeed sides of the workpiece are supported at table height before you cut.
Burn Marks on the Wood
Burn marks indicate excessive friction between the blade and the wood. The most common causes are a dull blade (replace or sharpen it), a blade clogged with pitch and resin buildup (clean it with a blade cleaning solution), or feeding the blade too slowly through the cut (let the blade do the work at its natural pace rather than hesitating mid-cut). Hardwoods like maple and cherry are especially prone to burning, so a sharp, clean blade is particularly important when working with those species.
Burn marks on only one side of the cut usually indicate that the blade is deflecting slightly — either because the blade is warped (replace it), the arbor bearings have developed play (a repair issue), or the blade is not seated flat against the arbor flange (check that the arbor washer is clean and properly oriented).
Tearout and Splintering
Tearout — ragged fibers on the exit side of the cut — happens when the blade’s teeth push wood fibers outward rather than slicing them cleanly. The most effective fix is a higher-tooth-count blade with ATB geometry (see the blade guide above). A zero-clearance fence insert also helps by supporting the wood fibers right at the cut line.
On crosscuts in plywood and veneered material, applying a strip of painter’s tape along the cut line before cutting can reduce tearout by holding the surface fibers in place. Cut through the tape with the blade, then peel it away cleanly after the cut.
Vibration and Wobble
Excessive vibration during a cut usually indicates one of three issues: the saw isn’t securely mounted to its surface (tighten the mounting bolts or clamps), the blade is warped or imbalanced (replace it), or the arbor bearings are worn (a more serious repair). A small amount of vibration is normal when the blade first contacts the wood, but persistent vibration throughout the cut is not. Start by checking the mounting and blade — those are the most common and easiest fixes.
Motor Bogging Down Under Load
If the motor slows noticeably when cutting thick or dense stock, check the blade first — a dull blade forces the motor to work much harder than a sharp one. Also check that you’re not feeding too aggressively; let the blade reach full speed before engaging the wood, and don’t force the cut. On cordless saws, a battery that’s running low can also cause reduced motor speed — swap to a fresh pack and see if the problem resolves.
If the motor bogs down even with a sharp blade and a fresh battery (on cordless) or a good power supply (on corded), the motor brushes may be worn (on brushed motors) or the motor itself may be developing a problem. Consult the manufacturer’s service guide or take the saw to a service center.
Slide Rails Sticking or Binding
On sliding miter saws, rails that stick or bind during the slide make the cut jerky and inaccurate. Clean the rails with a dry cloth to remove sawdust buildup, then apply a light coat of dry lubricant (a silicone-free dry PTFE spray works well) per the manufacturer’s recommendation. Avoid heavy oils or grease, which attract sawdust and make the problem worse over time. If the rails still bind after cleaning and lubricating, check for dents or burrs on the rail surfaces that may have resulted from an impact — these can usually be dressed out with fine sandpaper.
Miter Saw Ergonomics and Workshop Layout for Comfortable, Safe Use
A miter saw that’s mounted at the wrong height or placed in a cramped corner of the shop isn’t just inconvenient — it’s a safety risk. Poor ergonomics lead to awkward body positions, fatigue, and shortcuts in technique that increase the chance of mistakes or injury. A few layout principles make a miter saw station more comfortable and productive for hours of use.
The Right Working Height
The ideal miter saw table height is roughly at your wrist when you’re standing upright with your arms at your sides. For most people, that’s between 34 and 38 inches from the floor. If the saw is too high, your shoulders fatigue from reaching up to operate the handle. If it’s too low, you bend at the waist and strain your back. A common mistake is setting the saw on a standard workbench (typically 36 inches) without accounting for the saw’s own table height — a miter saw adds 2 to 4 inches of effective work surface above whatever it’s sitting on.
Test the height before committing to a permanent installation: place the saw on the proposed surface and make a dozen cuts on scrap material. If you feel yourself reaching up or bending down, adjust the surface height. Some dedicated miter saw stands are adjustable; for bench mounts, you may need to shim the saw up or recess it into the bench surface.
Standing Position and Stance
Stand squarely in front of the saw with your feet shoulder-width apart and your weight evenly distributed. Your dominant hand operates the saw handle; your other hand holds the workpiece against the fence (well clear of the blade). Never reach across the blade path to hold stock — if you need to support a long piece on the far side of the saw, use a support stand or have a helper hold it, or position yourself on the correct side before lowering the blade.
Clearance and Workflow
Plan your miter saw station so there’s at least 4 to 6 feet of clear space on both sides of the saw for handling long stock. If the saw is against a wall, make sure the wall doesn’t interfere with the slide mechanism or the blade head’s travel. Keep the floor around the saw clear of offcuts, cords, and debris — tripping hazards are especially dangerous near a spinning blade.
The ideal workflow has raw material coming from one side (the infeed side), being cut on the saw, and the finished piece and offcuts going to the other side (the outfeed side). This prevents you from reaching over completed work to grab new stock and keeps the station organized throughout a cutting session. For general shop layout advice, our guide to setting up a beginner woodshop covers placement of the miter saw relative to other tools.
Lighting the Cut Zone
Overhead shop lighting is usually positioned for general visibility, not for precise work at the miter saw table. A dedicated task light — an adjustable LED lamp mounted above or to the side of the saw — aimed at the blade and cut line area eliminates shadows and makes it much easier to align the blade with your mark. If your saw has a built-in LED shadow line (like some DeWalt models), supplement it with additional lighting from above for the best visibility.
Hearing and Dust Protection at Arm’s Reach
Keep hearing protection and a dust mask or respirator within arm’s reach of the saw station — not in a drawer across the room. If protection is inconvenient, you’ll skip it, and miter saws produce both significant noise (typically 95–105 dB) and fine dust that’s harmful to breathe over time. A pair of ear muffs hanging on the saw stand and a box of N95 masks next to the shop vac remove the friction between you and protecting yourself.
A shop apron with tool pockets keeps these essentials plus your pencil, tape measure, and square organized at your waist — see our recommendations for the best woodworking apron for options suited to daily shop use.
Best Miter Saw by Project Type: Matching the Saw to What You Build
Different home shop projects stress different saw capabilities. A saw that’s perfect for cutting picture frames may struggle with wide crown molding, and a saw that excels at trim carpentry may be overkill for cutting dowels and small furniture parts. Here’s a project-by-project breakdown of which saw from this roundup fits best — and why.
Picture Frames and Small Joinery
Picture frames demand precise 45° cuts on narrow stock, and even tiny angle errors show up as visible gaps at the corners. Any saw on this list can cut picture frames, but the ones with the most reliable detents and the least play in the miter mechanism produce the best results. The DeWalt DWS780 and Makita LS1019L both have tight, precise detent systems. For small stock, the compact Metabo HPT C10FCGS is also excellent — its lighter head and simpler mechanism mean less play, and the smaller blade actually leaves a slightly cleaner edge on thin, delicate material.
A dedicated picture frame clamp — the type that holds the four pieces together while glue dries — is a worthwhile accessory. See our guide to wood joinery tools explained for more on how miter joints fit into the bigger joinery picture.
Deck Building and Outdoor Construction
Deck building involves cutting a lot of pressure-treated lumber, composite decking, and sometimes 4×4 posts and 6×6 posts. The key requirements are crosscut capacity (wide boards and thick stock), power (pressure-treated lumber and composites are dense and resinous), and durability (the saw will get used heavily for a concentrated period). A 12-inch slider is the right tool for deck work: the DeWalt DWS780 cuts through pressure-treated 2x12s and 4×4 posts without straining, and the Milwaukee M18 FUEL offers the same capacity with the convenience of cordless operation on an outdoor project site where outlets may be limited.
For composite decking specifically, a TCG blade (see the blade guide above) reduces chipping on the finished surface, which matters because composite boards show cut edges more visibly than natural wood.
Furniture Making
Furniture projects range from simple shelf units (straight crosscuts at 90°) to complex chairs and tables with angled joinery. The core requirements are accuracy, repeatability, and clean cuts on hardwoods. The DeWalt DWS780, Makita LS1019L, and Bosch GCM12SD all handle furniture work well. The Makita stands out for its soft-start motor and superior dust collection, which matters when you’re cutting many pieces in a shop that’s also serving as a finishing area.
For furniture work, pair your miter saw with a quality table saw for ripping stock to width — our best table saw for woodworking guide covers options at every price point — and a good wood router for edge profiles and joinery. The three tools together — miter saw, table saw, router — form the core of a capable home furniture shop.
Flooring Installation
Hardwood and laminate flooring installation requires fast, repeated crosscuts, often at 90° but sometimes at angles for herringbone or chevron patterns. A miter saw at the center of the cutting station — with stop blocks set to the room’s plank length — turns what would be hours of measuring and marking into a quick pull-and-cut rhythm. Any of the 10-inch saws in this roundup work well for flooring cuts, and the compact Ryobi ONE+ HP or Metabo HPT C10FCGS are easy to position in a room doorway or hallway where a larger saw would be impractical.
Home Renovation: Doors, Windows, and Trim Packages
A whole-house trim package — dozens of door casings, window casings, baseboards, crown molding, and shoe molding — is the ultimate test of a miter saw’s capabilities and endurance. You need accurate repeated cuts, easy angle changes, dual bevel for efficient crown molding work, and dust control that keeps the living space habitable during the project. The DeWalt DWS780 is the most common choice for serious renovation work, with the Bosch GCM12SD as the runner-up for shops where space is tight. If the renovation involves rooms where sawdust would be particularly unwelcome (near a kitchen, nursery, or home office), the Makita LS1019L’s superior dust collection justifies its premium price.
Understanding Miter Saw Specifications and Ratings: What the Numbers Really Mean
Miter saw spec sheets are full of numbers, but not all of them are equally useful — and some are measured in ways that don’t reflect real-world performance. Here’s a decoder for the specs that actually matter and what to watch out for when comparing saws.
Motor Amperage
Most corded miter saws are rated at 15 amps, which is essentially the maximum draw from a standard 120V household circuit. Because nearly every corded miter saw is rated at 15 amps, this number is less useful for comparing saws against each other than it might seem. The real differences in cutting power come from motor efficiency, gear ratio, and blade speed, which are harder to quantify from a spec sheet. In practice, all seven corded saws in this roundup have enough power for the materials a home shop typically encounters. Cordless saws are rated by voltage (18V or 36V) and battery capacity (Ah), where higher voltage and higher Ah translate to more power and longer runtime.
No-Load Speed (RPM)
No-load speed is the blade’s rotation speed measured with no wood being cut. It’s typically in the range of 3,800 to 5,000 RPM for miter saws, with smaller blades spinning faster than larger ones for a given motor speed. The number that matters more than raw RPM is the blade’s linear speed at the tooth tip — the speed at which the teeth actually contact the wood. A 10-inch blade at 4,800 RPM has a similar tooth tip speed to a 12-inch blade at 4,000 RPM because the larger diameter compensates for the lower RPM.
Higher tooth-tip speed generally produces cleaner cuts on hardwoods and trim materials. This is one reason why 10-inch saws sometimes leave a slightly cleaner edge than 12-inch saws of the same quality — the smaller blade spins faster for the same motor speed, giving each tooth a cleaner slicing action.
Crosscut Capacity
Crosscut capacity is usually listed as a maximum width at 90° and at 45° miter. These numbers describe the widest board the saw can cut in a single pass. On sliding saws, the 90° crosscut capacity is determined by the slide travel — typically 12 to 16 inches for full-size sliders. On non-sliding saws, it’s determined by blade diameter — a 10-inch non-sliding saw can crosscut a board roughly 5.5 to 6 inches wide at 90°.
Manufacturers sometimes list crosscut capacity using a single board width, and sometimes using a dimensional lumber designation (like “cuts a 2×12 at 90°”). The dimensional lumber designation is more intuitive but less precise — a 2×12 is actually 1.5 x 11.25 inches, so a saw rated to “cut a 2×12” has a crosscut capacity of at least 11.25 inches.
Miter and Bevel Range
Miter range describes how far left and right the blade can rotate on the table. Most miter saws offer at least 50° in both directions, with some going to 60° on one side. Wider miter range is useful for unusual angles — bay windows, custom furniture, and rooms where walls don’t meet at 90° — but the vast majority of cuts happen at 0°, 22.5°, and 45°, which every saw covers.
Bevel range describes how far the blade tilts. A single-bevel saw tilts 0–45° or 0–48° in one direction only. A dual-bevel saw tilts the same range in both directions. The bevel number matters more for compound cuts (like crown molding) than for general crosscutting, where the bevel stays at 0° for most cuts.
Dust Collection Rating
Unlike table saws and routers, miter saws don’t have standardized dust collection testing, so manufacturer claims about “90% dust capture” or similar should be taken with some skepticism. The most reliable way to evaluate dust collection is through owner feedback patterns — saws like the Makita LS1019L consistently receive high marks for dust capture in real-world use, while others are described as “fair” or “needs a shop vac to be usable.” The dust port diameter matters for compatibility with your vacuum or dust collector — most miter saws have a 2.5-inch or 1.5-inch dust port, and adapters are available to connect them to standard 2.5-inch or 4-inch dust collection fittings.
Weight
Weight is listed as a simple number but has different implications depending on how you use the saw. For a fixed home shop station, weight is largely irrelevant — a heavier saw actually tends to be more stable. For a saw that gets moved between a bench and a folding stand, or carried between rooms, weight becomes a real factor. The saws in this roundup range from about 22 lbs (Ryobi ONE+ HP, tool only) to about 65 lbs (Bosch GCM12SD), which is a significant difference when you’re carrying the saw up basement stairs or loading it into a vehicle for an off-site project.