Top Wood Router Picks: The Best Routers for Serious and Weekend Woodworkers
From plunge routers to compact trim routers and cordless models, here’s a deep, practical breakdown of the routers actually worth buying — and why.
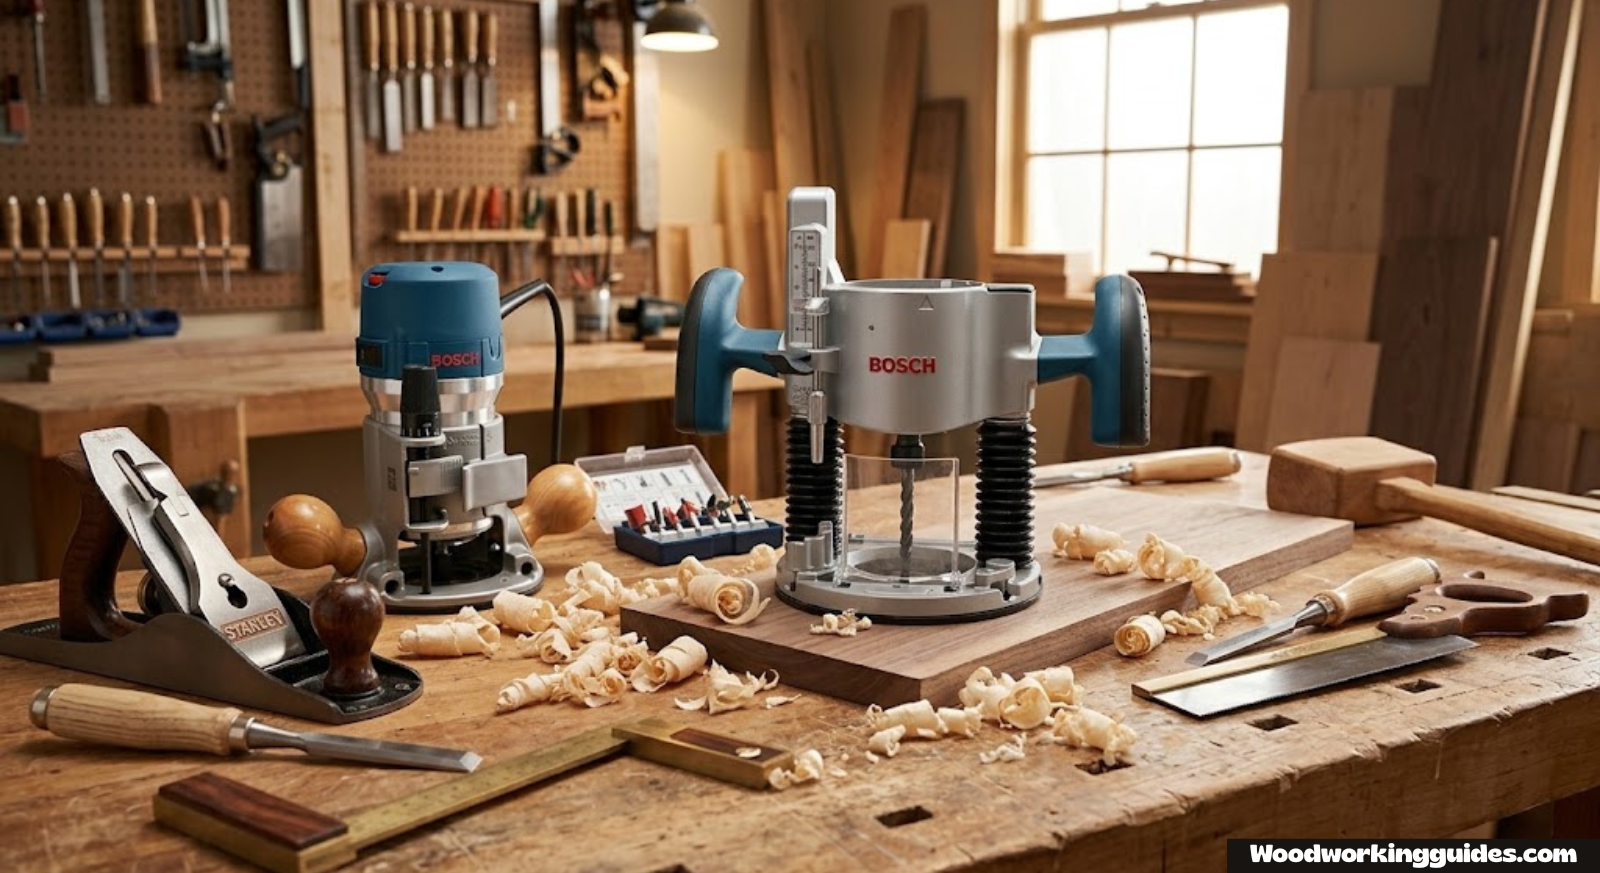
Why Your Router Choice Matters
A wood router is one of those tools that quietly does more work in a shop than almost anything else. It shapes edges, cuts joinery, hollows out signs, trims laminate flush, and turns a plain board into something that looks genuinely finished. Yet most woodworkers — even ones who have been at this for years — end up owning the wrong router for their actual projects, because they bought based on price or brand loyalty rather than how the tool is actually going to be used.
This guide breaks down seven routers that consistently show up as favorites among cabinet makers, furniture builders, sign makers, and weekend DIYers alike. Some are full-size plunge routers built for heavy joinery and template work. Others are compact trim routers meant for one-handed edge work, laminate trimming, and detail cuts. A few are cordless, which matters more than people expect once you’ve spent a Saturday tripping over an extension cord.
Before diving into individual reviews, it’s worth setting up a shop properly — if you’re still setting up a beginner woodshop, a router should be near the top of your tool list, right alongside a reliable table saw for woodworking and a decent set of chisels for beginners.
Router Buying Guide: What Actually Matters
Routers are deceptively simple tools — a motor spins a bit at very high RPM — but the differences between models show up the moment you start doing real work with them. Here’s what separates a router that frustrates you from one that disappears into your hands.
Fixed-Base vs. Plunge-Base
A fixed-base router holds the bit at a set depth and is ideal for edge profiling, roundovers, and chamfers. A plunge-base router lets you lower the spinning bit straight down into the middle of a workpiece, which is essential for mortises, inlays, and stopped dado cuts. Many of the best kits, like the Bosch and DEWALT combo kits below, give you both bases with one motor, so you’re not choosing one over the other.
Motor Power and Collet Size
Full-size routers typically run 2 to 3.25 horsepower and accept both 1/4-inch and 1/2-inch shank bits. Larger shank bits flex less under load, which means cleaner cuts in hardwood and less bit vibration. Compact trim routers are usually under 1.5 HP and 1/4-inch collet only, which is plenty for edge work but not for hogging out deep mortises in hard maple.
Corded vs. Cordless
Cordless routers have improved dramatically. They’re not going to replace a corded plunge router for cabinet-grade joinery, but for trim work, on-site installs, and quick edge passes, not fighting a cord is a genuine quality-of-life upgrade. If you already run an 18V or 20V battery platform for a cordless drill, staying within that same ecosystem for your router saves money on batteries long term.
Variable Speed Control
Different bits and materials call for different RPM. A 3-inch diameter panel-raising bit needs to spin much slower than a small roundover bit, or you’ll risk burning the wood and losing control. Every router on this list has variable speed, but the range and the quality of the dial differ, and that matters more once you start using larger-diameter bits.
Dust Collection
Routing throws a genuinely impressive amount of fine dust and chips. A router with a usable dust port, especially combined with a shop vac, keeps your lungs and your shop floor considerably happier.
Ergonomics and Grip Style
Routers come with either D-handle grips or knob-style twin handles, and the choice affects control more than most buyers expect before trying both. D-handle routers, common on compact trim routers, feel closer to a handheld drill and give you a trigger switch under your index finger, which is convenient for quick on/off control during detail work. Twin-knob routers, more common on full-size plunge models, distribute grip across both hands symmetrically, which tends to feel more stable when pushing through hardwood or controlling a heavier plunge base. Neither style is objectively better — it comes down to what feels natural in your hands over a long session.
Noise and Vibration
Because router motors spin at extremely high RPM, they’re inherently one of the louder tools in a home shop, often in the 85–95 decibel range depending on the bit and material. Vibration matters too, since prolonged exposure to a poorly balanced tool contributes to hand fatigue over a long project. Better-built routers use balanced armatures and quality bearings to minimize this, which is part of why premium models from Bosch, Makita, and Milwaukee tend to feel noticeably smoother in extended use compared to bargain-bin alternatives.
Base Plate and Sub-Base Considerations
The sub-base — the flat plate that contacts the workpiece — affects both visibility and how easily the router glides across the surface. Clear polycarbonate sub-bases, like the one DEWALT includes on the DWP611PK, make it much easier to see the bit and follow a layout line accurately. Some routers also support quick-change or oversized sub-bases for use with template guide systems, which is worth checking if you plan to do a lot of pattern or template routing down the line.
Router Bit Profiles Explained: What Each Cut Looks Like and When to Use It
Before you can choose the right router, it helps to understand what the bits themselves actually do. A router is only as versatile as the bits you put in it, and knowing the difference between a chamfer bit and a beading bit — and when each one is the right choice — separates a woodworker who buys bits randomly from one who builds a deliberate, efficient collection.
Straight Bits
Straight bits are the workhorses of any router bit collection. They have a flat-bottomed cutting profile and come in a wide range of diameters, from as small as 1/8 inch up to 1 inch or more. Their primary jobs are cutting dadoes (grooves across the grain), grooves (grooves with the grain), rabbets (a step-shaped notch along an edge), and mortises (rectangular holes for tenon joinery). A good set of straight bits in 1/4″, 3/8″, 1/2″, and 3/4″ diameters covers the vast majority of joinery cuts a hobbyist will ever make. Spiral straight bits — either upcut, downcut, or compression — are a significant upgrade over standard straight bits for joinery work because their shearing action produces cleaner cuts and evacuates chips more efficiently, especially in plywood and melamine where tear-out is a constant concern.
Roundover Bits
A roundover bit creates a smooth, rounded edge on a sharp corner, and it’s probably the single most-used decorative bit in most shops. The radius of the curve is determined by the bit’s bearing diameter and cutter height — common sizes include 1/8″, 1/4″, 3/8″, and 1/2″ radius. A 1/4″ roundover is subtle enough for a tabletop or shelf edge that feels comfortable to the touch without looking overly decorative, while a 1/2″ roundover makes a more pronounced, furniture-grade profile on thicker stock. If you leave the bearing riding below the workpiece surface, the roundover bit also creates a small step or fillet at the top of the curve, which adds a decorative detail some woodworkers prefer for traditional furniture profiles.
Chamfer Bits
Chamfer bits cut a flat, angled surface along an edge, creating a beveled profile rather than a curved one. They come in various angles — 15, 22.5, 30, and 45 degrees are the most common — with 45-degree chamfers being the standard choice for breaking sharp edges on tabletops, frames, and boxes. Chamfers are popular in contemporary and modern-style furniture because they create clean, geometric lines that complement minimalist design. They’re also the fastest way to ease a sharp edge for safety and comfort without adding a rounded profile that might not suit the piece.
Flush-Trim Bits
A flush-trim bit has a bearing mounted at the tip (top-bearing) or at the shank end (bottom-bearing) that rides against a template or an adjacent surface while the cutter trims the workpiece perfectly flush. These are essential for template routing — where you’ve shaped a master pattern and want to duplicate it exactly — as well as for trimming edge banding, veneer, or laminate flush with the substrate. Top-bearing flush-trim bits are the more common style for template routing with the template on top of the workpiece, while bottom-bearing bits are preferred when the template is underneath. A good-quality flush-trim bit with a sharp carbide cutter is one of the most satisfying bits to use, because the results — a perfectly clean, perfectly flush edge — are immediately visible.
Rabbeting Bits
A rabbeting bit is specifically designed to cut rabbets — the stepped notches along a board’s edge that form the joints for cabinet backs, drawer bottoms, and frame-and-panel assemblies. Many rabbeting bits come as a set with interchangeable bearings of different diameters, allowing you to adjust the rabbet depth without changing the bit. A typical rabbeting set lets you cut rabbets from roughly 1/16″ to 1/2″ deep with a single bit, which is a huge convenience for cabinet work where rabbet dimensions vary depending on material thickness.
Ogee and Decorative Profile Bits
Ogee bits (both classical and cyma variations) create the S-shaped curves you see on traditional molding, picture frames, and furniture edges. They produce an elegant, formal profile that’s been a staple of furniture-making for centuries. Beyond ogee, there’s a whole world of decorative profiles — roman ogee, thumbnail, cove, classical, colonial, and many more — each creating a distinct visual profile. These bits are typically larger in diameter and require slower router speeds to operate safely. If you’re building picture frames, raised-panel doors, or crown molding, investing in a few specific decorative profiles makes sense; otherwise, a single ogee bit covers a surprising range of traditional edge treatments.
Edge-Banding and Beading Bits
Edge-banding bits are small-profile bits designed specifically for applying decorative edges to plywood or particleboard shelves and panels. Beading bits create a small rounded profile with a crisp shoulder on each side, producing a bead-like detail that works well on Shaker-style furniture, drawer fronts, and door frames. These are detail bits — not everyday workhorses — but they add a level of craftsmanship that separates a handmade piece from a store-bought one.
Raised-Panel Bits
Raised-panel bits are large-diameter bits — often 2 to 3 inches or more — used to shape the decorative profile on door panels for frame-and-panel cabinet doors. Because of their size, they require slower router speeds (typically 8,000–12,000 RPM) and more powerful motors (2+ HP minimum), and they should only be used in a router table for safety and control. A raised-panel bit paired with a matching stile-and-rail set gives you everything you need to build professional-looking cabinet doors entirely with a router, which is one of the more rewarding long-term uses of a full-size router and table setup.
Spiral Bits: Upcut, Downcut, and Compression
Spiral bits deserve special attention because they represent a meaningful upgrade over standard straight bits for certain tasks. An upcut spiral pulls chips upward and out of the cut, making it excellent for deep mortises and grooves in solid wood where chip evacuation is critical. A downcut spiral pushes chips downward, which leaves a perfectly clean top surface edge and is the go-to choice for dados and grooves in plywood or melamine where tear-out on the show face is unacceptable. A compression spiral combines both actions — upcut at the tip and downcut at the top — producing clean edges on both faces of sheet goods, which makes it the standard choice for CNC work and any plywood routing where both sides are visible.
Router Speed Chart: Matching RPM to Bit Diameter and Material
One of the most underappreciated variables in clean routing is spindle speed. Running a large-diameter bit too fast creates heat, burns wood, and can cause the bit to fail catastrophically. Running a small bit too slowly produces a rough, choppy cut with visible scallop marks. The relationship between bit diameter and safe operating speed is straightforward in principle — larger bits need slower RPMs because the outer edge of the cutter travels a longer arc per rotation — but getting it right in practice means understanding the guidelines for each bit size range.
| Bit Diameter | Recommended RPM Range | Common Bit Types | Notes |
|---|---|---|---|
| Under 1″ | 22,000–28,000 RPM | Small roundovers, flush-trim, straight bits up to 3/4″ | Use high speed for cleanest cut on small profiles |
| 1″ to 2″ | 16,000–22,000 RPM | Large roundovers, chamfer, rabbeting, 1″ straight bits | Reduce speed in dense hardwoods to avoid burning |
| 2″ to 2-1/2″ | 12,000–18,000 RPM | Ogee, medium raised-panel, wide chamfer bits | Always take multiple shallow passes at these sizes |
| 2-1/2″ to 3-1/2″ | 8,000–12,000 RPM | Large raised-panel bits, wide crown molding profiles | Router must support low-speed range; use in router table only |
Material-Specific Speed Adjustments
The chart above assumes standard hardwoods like oak, maple, cherry, and walnut. When you’re routing different materials, speed adjustments help:
- Softwoods (pine, cedar, fir): Run at the higher end of the recommended range. Softwood fibers are more forgiving and less prone to burning, but they’re also more susceptible to tear-out at low speeds, so higher RPM with a sharp bit and a steady feed rate typically produces the cleanest results.
- Hardwoods (maple, oak, hickory): Run at the middle to lower end of the range, especially with larger bits. Dense hardwood generates more friction and heat, and maple in particular is notorious for burning if the bit speed is too high or the feed rate is too slow.
- Plywood and sheet goods: Run at moderate speeds. Plywood’s alternating grain layers tear out unpredictably, and using a spiral bit (especially a downcut or compression spiral) at moderate RPM produces cleaner edges than high-speed straight bits.
- MDF and particleboard: Run at moderate speeds and expect bits to dull faster. These materials are highly abrasive due to the resin and glue content, and they generate very fine, powdery dust that clogs bits and bearings more quickly than solid wood.
- Plastics and composites: Run at lower speeds to prevent melting. Thermoplastics like acrylic and solid-surface countertop material melt and gum up bits at high RPM, so dropping to the low end of the speed range and using a single-flute or spiral bit with good chip evacuation helps keep the cut clean.
Feed Rate and Its Relationship to Speed
Spindle speed and feed rate work together — changing one without adjusting the other throws off the cut quality. In general, the relationship is simple: if you slow down the router RPM, you should also slow down how fast you push the router through the material, and vice versa. Moving too fast at low RPM causes the bit to chatter and skip across the surface; moving too slowly at high RPM lets the bit sit in one spot too long, generating friction heat and burn marks. The ideal feed rate produces a consistent stream of chips — not fine dust (too slow) and not chunky, torn-out pieces (too fast). With practice, you learn to read the chips and adjust on the fly, which is one of those skills that separates experienced router users from beginners.
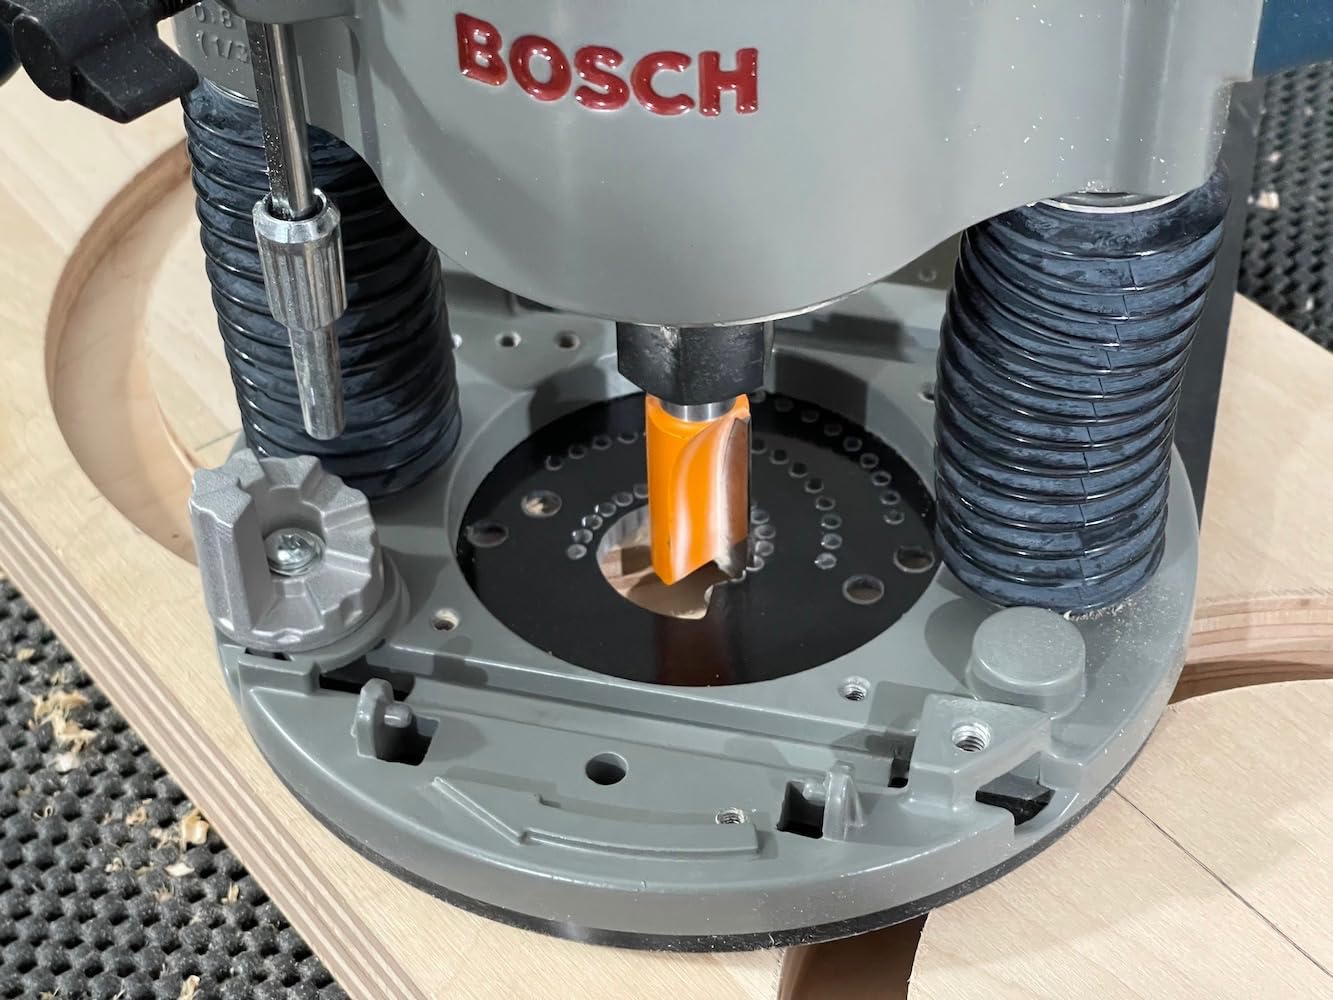
Bosch 1617EVSPK Plunge- and Fixed-Base Router Kit
The Bosch 1617EVSPK has been a shop staple for years, and it earns that reputation honestly. This is a 2.25 HP, 12-amp motor housed in a design that swaps cleanly between plunge and fixed bases, so you get two distinct tools built around one motor unit. That alone makes it one of the smartest first-router purchases you can make, because you’re not choosing between joinery work and edge profiling — you get both.
The plunge base uses a smooth, well-damped plunge mechanism with a depth-adjustment ring that lets you fine-tune cut depth in small increments, which matters enormously when you’re sneaking up on a mortise depth or a stopped dado. The fixed base, by contrast, is compact and easy to control one-handed, making it a natural fit for router-table mounting or handheld edge work with a guide bushing.
Performance in Real Use
Where this router shines is consistency. The variable speed dial runs from roughly 8,000 to 25,000 RPM, and the constant-response circuitry keeps the bit speed steady even when you push it through dense hardwood or a wide bit profile. Bit changes are simple thanks to the spindle lock, and the 1/2-inch collet (with a 1/4-inch reducer included) covers the vast majority of router bits you’ll ever buy.
If you’re building face-frame cabinets, cutting dovetails with a jig, or doing sign-making work that needs deep, controlled plunge cuts, this router handles it without complaint. It also pairs extremely well with a router table setup if you eventually build or buy one.
Pros
- Two bases, one motor — genuinely versatile
- Smooth, precise plunge mechanism
- Strong 2.25 HP motor handles hardwood easily
- Excellent aftermarket accessory support
Cons
- Heavier than compact trim routers
- Corded only
- Premium price point
| Spec | Detail |
|---|---|
| Motor | 2.25 HP, 12 Amp |
| Speed Range | 8,000–25,000 RPM |
| Collet Size | 1/2″ and 1/4″ |
| Bases Included | Plunge + Fixed |
| Weight | ~11.5 lbs (plunge base) |


DEWALT DWP611PK Variable Speed Combo Kit
The DEWALT DWP611PK is the router most likely to sit next to the Bosch in a “which one should I buy” debate, and for good reason — it’s lighter, arguably more comfortable for extended handheld work, and still gives you both a fixed and plunge base in one kit. At 1.25 HP, it’s less powerful than the Bosch on paper, but in practice it handles the vast majority of edge-profiling and template-routing tasks without breaking a sweat.
What stands out most is the ergonomics. DEWALT built this around a soft-start motor and a low center of gravity, so it feels noticeably more controllable one-handed than most routers in its class, especially when doing detail work like sign lettering or inlay work with a template guide.
Where It Fits Best
This router is an excellent match for anyone doing furniture-scale work — edge treatments, dado cuts, template routing for drawer boxes, or flush-trimming laminate and veneer. It’s not the tool you reach for when hogging deep mortises in 8/4 hard maple all day, but for the majority of hobbyist and semi-pro projects, it’s more than capable, and its lighter weight makes long sessions far less fatiguing.
The clear sub-base and integrated LED work light are small touches that add up during detail work where visibility around the bit really matters, particularly when following a pencil line freehand.
Pros
- Lightweight and comfortable for long sessions
- Clear sub-base improves bit visibility
- Soft-start motor, smooth power delivery
- Great value combo kit
Cons
- Less power than full-size 2+ HP routers
- Plunge base depth adjustment is less refined than Bosch’s


Makita RT0701C 1-1/4 HP Compact Router
The Makita RT0701C is a compact router built for one-handed precision — edge banding, laminate trimming, roundovers, and detail work where a full-size router would be overkill and awkward to control. At just over 1.25 HP and a fraction of the weight of the plunge routers above, it’s the tool you grab for quick, repeatable tasks rather than heavy joinery.
Makita’s variable speed control (10,000–30,000 RPM) is genuinely useful here, since compact routers are often used with small-diameter bits that need to spin fast for a clean cut. The rack-and-pinion depth adjustment is smooth and precise, letting you dial in shallow chamfers or roundovers without fuss.
Best Use Cases
This router earns its spot in almost every serious woodworker’s shop as a second router, not necessarily a first. It’s ideal for flush-trimming edge banding on plywood cabinet parts, rounding over table edges, or doing quick pattern work with a bearing-guided bit. It also accepts an optional plunge base and offset base, which extends its usefulness considerably if you’re willing to buy into the accessory ecosystem.
If you’re doing detailed edge work regularly, pairing this with a solid random orbital sander for cleanup afterward rounds out a very efficient edge-finishing workflow.
Pros
- Extremely light and easy to control one-handed
- Smooth, precise depth adjustment
- Wide 10,000–30,000 RPM range
- Optional plunge/offset bases available
Cons
- 1/4″ collet only — no 1/2″ shank bits
- Not suited to deep or heavy joinery cuts


DeWalt 20V Max XR Brushless Cordless Compact Router (DCW600B)
The DCW600B takes the compact-router formula and cuts the cord entirely, running on DEWALT’s 20V Max battery platform. If you’re already invested in DEWALT’s cordless ecosystem — say, you own their cordless drill or an 18V/20V miter saw — adding this router costs you nothing but the bare tool, since it shares batteries and chargers across the line.
The brushless motor is the real story here. It delivers up to 16,500 RPM with far better battery efficiency than a brushed motor would manage, and DEWALT’s variable speed dial gives you real control across that range rather than just an on/off switch pretending to be variable speed.
When Cordless Makes Sense
This router isn’t trying to replace a corded plunge router for cabinet shop joinery. It’s built for job-site trim work, quick on-site adjustments, outlet-box cutouts, and countertop template routing where dragging a cord and extension reel around isn’t practical. For installers and finish carpenters, that freedom is worth more than raw horsepower.
Battery life is respectable for typical trim tasks — expect well over an hour of intermittent use on a mid-size XR battery, though continuous heavy routing will drain it faster, as with any cordless power tool.
Pros
- No cord — ideal for job-site and install work
- Brushless motor is efficient and durable
- Shares batteries with the DEWALT 20V lineup
- LED work light built in
Cons
- Sold bare (no battery/charger) in most listings
- Lower max RPM than corded compact routers
- Runtime limited under continuous heavy use


Milwaukee M18 Fuel Compact Router (2723-20)
Milwaukee’s M18 Fuel Compact Router is built for the tradesperson who already lives inside the M18 battery ecosystem. Like the DeWalt cordless model above, its main appeal is convenience and consistency across your existing tool lineup rather than being a standalone reason to switch brands from scratch.
The POWERSTATE brushless motor delivers strong torque for a compact router, and Milwaukee’s RPM range (usually cited around 10,000–31,000 RPM depending on firmware/version) gives it enough top-end speed for small trim bits while still having the low-end torque to handle slightly larger profile bits without bogging down.
Build Quality and Handling
Milwaukee’s ergonomics on this router lean toward job-site durability — a metal motor housing, a comfortable secondary grip, and a depth adjustment mechanism that’s easy to operate even with work gloves on. The tool-free depth adjustment is a genuinely nice touch for anyone swapping bit heights frequently during install work.
If you’re doing cabinet installs, closet systems, or on-site trim carpentry and already carry M18 batteries for your other tools, this is close to a no-brainer addition to the bag.
Pros
- Strong torque from the POWERSTATE brushless motor
- Tool-free depth adjustment
- Rugged, job-site-ready build
- Shares batteries with the huge M18 lineup
Cons
- Bare tool only — battery sold separately
- Heavier than the Makita or DeWalt compact routers


Triton TRA001 3-1/4 HP Dual Mode Precision Plunge Router
The Triton TRA001 is a different animal from most of the routers on this list — a big, 3.25 HP plunge router designed from the ground up with router-table mounting in mind. If you’re building or already own a router table, this is one of the most frequently recommended motors to drop into it, because Triton engineered several table-specific features directly into the tool.
The standout feature is above-table bit-height adjustment: a winder on top of the motor lets you change bit height and even swap bits without reaching underneath the table, which is a genuine convenience most other router-table setups lack unless you buy a separate lift mechanism.
Power and Versatility
With 3.25 HP on tap, the TRA001 shrugs off large panel-raising bits and wide dado cuts that would bog down smaller routers. It also functions as a capable handheld plunge router, though its size and weight make it best suited to stationary or table use for most people.
The “dual mode” in the name refers to its ability to operate as both a plunge router and, with the micro-winder, essentially function like a fixed-base router table motor with fine depth control from above. For anyone running a serious router table setup alongside a table saw and a miter saw, this router is worth the investment.
Pros
- 3.25 HP — handles large bits with ease
- Above-table height adjustment and bit changes
- Excellent for router table mounting
- Precision micro-adjustment winder
Cons
- Large and heavy for handheld freehand work
- Higher price point than compact routers
- Overkill for simple edge-profiling tasks


Metabo HPT 36V Cordless Variable Speed Plunge Router
Cordless plunge routers are still relatively rare, which makes the Metabo HPT 36V model worth knowing about even if it’s not always the first name that comes to mind. It combines the flexibility of a true plunge base with the freedom of running on Metabo HPT’s MultiVolt battery system, which can operate at 18V or step up to 36V for more sustained power.
Because it runs on the 36V setting for full power, this router can handle plunge cuts and mortising tasks that would strain a typical 18V-only cordless tool, while still giving you the option to drop to 18V if you’re sharing batteries with smaller tools in the same lineup.
Practical Use
This is the router to consider if you want plunge-router capability — mortises, stopped dados, template routing — without being tied to an outlet, particularly for on-site furniture repair, remote workshop setups, or job sites without reliable power access. It won’t quite match the raw output of a corded 2.25–3.25 HP plunge router, but it closes that gap more than most cordless competitors.
Battery runtime depends heavily on the MultiVolt battery you pair it with — larger capacity packs obviously extend working time, at the cost of added weight on the tool.
Pros
- True plunge base, fully cordless
- MultiVolt 18V/36V flexibility
- Good for mobile or on-site joinery work
- Variable speed with solid low-end control
Cons
- Less powerful than top corded plunge routers
- MultiVolt batteries are a smaller ecosystem than 18V/20V rivals
- Heavier when paired with a 36V battery

Side-by-Side Comparison
Here’s how all seven routers stack up when placed next to each other on the specs that matter most for real project work.
| Router | Type | Power | Speed Range | Corded/Cordless | Best For |
|---|---|---|---|---|---|
| Bosch 1617EVSPK | Plunge + Fixed | 2.25 HP | 8,000–25,000 RPM | Corded | All-around versatility |
| DEWALT DWP611PK | Plunge + Fixed | 1.25 HP | 16,000–27,000 RPM | Corded | Lightweight everyday use |
| Makita RT0701C | Compact/Trim | 1.25 HP | 10,000–30,000 RPM | Corded | Edge & trim work |
| DeWalt DCW600B | Compact | 20V Max Brushless | Up to 16,500 RPM | Cordless | Job-site trim work |
| Milwaukee 2723-20 | Compact | M18 Fuel Brushless | ~10,000–31,000 RPM | Cordless | M18 ecosystem users |
| Triton TRA001 | Plunge (table-focused) | 3.25 HP | 8,000–21,000 RPM | Corded | Router tables & big bits |
| Metabo HPT 36V | Plunge | 36V MultiVolt | Variable | Cordless | Mobile plunge/joinery work |
How to Choose the Right Router for Your Shop
With seven strong options on the table, narrowing it down comes down to matching the router to the work you actually do, not the work you imagine yourself eventually doing.
If This Is Your First Router
Get a combo kit — the Bosch 1617EVSPK or DEWALT DWP611PK. Having both a plunge and fixed base means you’re not stuck buying a second router the first time a project calls for a mortise or a stopped dado.
If You Already Own a Full-Size Router
Add a compact trim router like the Makita RT0701C. Keeping a full-size router mounted in a table while using a compact router freehand for trim and edge work is one of the most common two-router setups in serious hobby shops.
If You’re Building a Dedicated Router Table
The Triton TRA001 is purpose-built for this. Its above-table adjustment alone will save you real time on every single project once you’ve used it.
If You Do On-Site or Mobile Work
Go cordless — the DeWalt DCW600B or Milwaukee 2723-20 for trim tasks, or the Metabo HPT 36V if you need actual plunge capability without a cord. Match it to whichever battery platform you already own to avoid paying twice for batteries.
Whatever you land on, a router is only as good as the setup around it — a stable woodworking workbench or a portable workbench for job-site work makes a measurable difference in cut quality and safety, since router work depends heavily on a stable, vibration-free surface.
Budget Considerations
It’s worth resisting the urge to buy the cheapest router that technically does the job. Budget routers often use lower-quality bearings, which shows up as increased vibration and bit runout over time, leading to slightly rougher cuts and faster bit wear. Spending a bit more upfront on a well-reviewed model from an established brand — every router covered in this guide qualifies — typically pays for itself in smoother cuts, longer tool life, and better resale value if you ever upgrade. That said, you don’t need to buy every router on this list at once; start with a solid combo kit, and add a compact or cordless router later once you know exactly what gap you’re filling.
Router Table Setup and Use: Turning Your Router Into a Stationary Tool
A router table transforms a handheld router into a small stationary shaper, and for many woodworkers it becomes the single most-used station in the shop after the table saw. The basic concept is simple: mount the router upside-down beneath a flat table surface with the bit poking through a hole, and then move the workpiece across the spinning bit instead of moving the router across the workpiece. That reversal gives you both hands on the workpiece, which dramatically improves control, consistency, and safety for many types of cuts that are awkward or dangerous to make freehand.
Why a Router Table Changes What You Can Build
Certain cuts are practically impossible to make safely or accurately with a handheld router. Running narrow stock — anything under about 2 inches wide — across a spinning bit with a handheld router is a recipe for the bit grabbing the workpiece and launching it. On a router table, the workpiece is guided by a fence and supported by the table surface, so even small pieces can be profiled or jointed safely. Additionally, repeated identical cuts — like profiling the edges of 20 door stiles — are far faster and more consistent on a table than with a handheld router, because you’re simply feeding each piece through the same setup without resetting depth, angle, or fence position between cuts.
A router table also lets you use the router as a light-duty jointer. By setting the fence so one side is offset from the bit by a few thousandths of an inch, you can run a board’s edge along the fence and across the bit to produce a perfectly straight, square edge — a trick that’s enormously useful for edge-joining boards for glue-ups when you don’t own a dedicated jointer or when the board is too long to manage easily on a benchtop jointer.
Choosing a Router Table
Router tables range from simple, shop-made setups — a router mounted to a piece of MDF with a hole drilled through it, clamped to a workbench — to commercial tables with precision-machined aluminum tops, adjustable fences, and built-in dust collection. For most hobbyists, a mid-range commercial table like those from Kreg, Bosch, or Rockler offers a significant upgrade in flatness, fence quality, and dust collection over a shop-made version, without the expense of a full production-grade shaper table.
The three features that matter most in a router table are:
- Table flatness. A table surface that isn’t flat causes inconsistent cut depths and makes it impossible to joint edges accurately. Cast aluminum or phenolic resin tops tend to be flatter and more dimensionally stable than MDF or plywood tops, especially over time as humidity changes.
- Fence quality. The fence needs to be straight, easy to adjust, and rigid enough not to deflect under pressure from feeding a workpiece. Split fences — where each half adjusts independently — let you offset the infeed and outfeed sides for jointing operations, which is a significant advantage.
- Dust collection. A router table generates a lot of chips, and most of them fly out below the table or get thrown backward by the spinning bit. A table with a dust port below the bit opening and a fence-mounted dust collection hood catches the majority of debris before it fills the shop air.
Setting Up the Router in the Table
Mounting a router in a table requires a mounting plate — a flat plate (usually aluminum, phenolic, or steel) that sits flush with the table surface and holds the router from below. Most commercial router tables include a compatible plate, or you can buy one separately sized to fit your specific router model. The plate needs to sit perfectly flush with the surrounding table surface; even a few thousandths of an inch of unevenness catches workpieces and produces inconsistent results.
Once the router is mounted, bit height adjustment becomes your primary control. With routers like the Triton TRA001, you can adjust bit height from above the table using the built-in winder, which eliminates the awkward reach-underneath routine that most router table setups require. If you’re using a different router, a router lift — a separate mechanism that raises and lowers the router motor from above the table — is a worthwhile investment that provides micro-adjustable height control without reaching below the table for every change.
Essential Router Table Techniques
Once the table is set up, there are several core techniques that cover the vast majority of router table work:
- Edge profiling with a fence. Set the bit height and fence position for the desired profile, then run the workpiece along the fence and across the bit. This is the table equivalent of handheld edge routing, but with far more control on narrow or small pieces.
- Edge profiling without a fence (bearing-guided bits). For bits with a built-in bearing — like roundover, chamfer, or ogee bits — you can remove the fence entirely and let the bearing ride against the workpiece edge. The workpiece moves freely across the table surface, guided by your hands and the bearing contact.
- Dado and groove cuts. Set the bit height for the desired groove depth and use the fence to control the groove’s distance from the workpiece edge. For stopped grooves that don’t run the full length of the board, mark the start and stop points on the table or fence and feed the workpiece carefully between those marks.
- Jointing edges. Offset the outfeed side of a split fence by about 1/32″ from the infeed side. The bit removes that small amount of material from the infeed side, and the outfeed fence supports the freshly cut edge, producing a straight, square edge ready for glue-up. This technique is one of the most valuable things a router table can do for a woodworker who doesn’t own a dedicated jointer.
- Coping cuts on frame pieces. For frame-and-panel doors, the cope (the end-grain profile on rail ends that mates with the stile profile) is cut on a router table by holding the rail end against the fence and sliding it across the spinning cope bit. A coping sled — a shop-made or commercial jig that holds the small workpiece flat and square — makes this cut safer and more accurate.
Feeding Direction on a Router Table
This is critical for safety and cut quality, and it’s the opposite of handheld routing: on a router table, you feed the workpiece from right to left (moving the workpiece against the bit’s rotation). Feeding the wrong direction — left to right — causes the bit to grab the workpiece and pull it out of your hands, which is one of the most common router table accidents. If you remember nothing else about router table technique, remember: right to left, feeding into the bit’s rotation.
Routing Softwood vs. Hardwood: Technique Adjustments That Make a Real Difference
Not all wood behaves the same way under a spinning router bit, and the differences between softwoods and hardwoods go beyond just hardness ratings. Understanding how each material responds to router speed, feed rate, and bit selection helps you produce cleaner cuts and avoid the most common quality problems — burning, tear-out, fuzzy grain, and chatter marks — regardless of what species you’re working with.
Softwoods: Pine, Cedar, Fir, and Spruce
Softwoods are the first material most beginning woodworkers learn to route, and they’re more forgiving in some ways than hardwoods — but trickier in others. The soft, open grain structure means the wood compresses more under the bit’s cutting pressure, which can cause the bit to sink slightly deeper than intended if your feed rate isn’t consistent. This compression effect is most noticeable on end grain, where softwood fibers crush and tear rather than shear cleanly, leaving a fuzzy or torn surface that requires significant sanding to clean up.
The key techniques for clean softwood routing are:
- Use higher RPM — at the top end of the recommended range for your bit diameter. Faster bit speed shears the soft fibers more cleanly before they have a chance to crush or fold.
- Maintain a steady, moderate feed rate. Moving too slowly lets the bit spin in one spot and generate friction heat, which causes resin in the softwood to melt and gum up the bit. Moving too fast causes tear-out, especially on figured or irregular grain. Aim for a consistent stream of chips — not fine dust, not chunky fragments.
- Take lighter passes on end grain. Because softwood end grain tears easily, routing the end grain of a board in very shallow passes — 1/16″ or less — produces much cleaner results than trying to cut the full profile in one or two passes. Some woodworkers also use a backer board clamped behind the workpiece to support the trailing edge and prevent blowout.
- Keep bits clean. Softwoods, especially pine, are high in natural resin that accumulates on router bit cutters and bearings much faster than hardwoods do. A resin-caked bit cuts poorly, generates heat, and burns the wood. Cleaning bits regularly with a commercial bit cleaning solution or a citrus-based degreaser keeps them cutting cleanly and extends their useful life between sharpenings.
Hardwoods: Oak, Maple, Cherry, Walnut, and Beyond
Hardwoods resist the cutting action of the bit more firmly, which generally means cleaner shearing action — the bit’s carbide edge slices through the dense fibers rather than crushing them — but also means more load on the motor, more heat generation at the cutting edge, and a higher tendency toward burning on dense species like hard maple and cherry.
Key techniques for hardwood routing include:
- Run RPM at the mid to lower end of the recommended range. Dense hardwood generates more friction heat than softwood, and lowering the spindle speed reduces that heat while still allowing the bit to cut cleanly. This is especially important with larger-diameter bits where the outer edge of the cutter is moving through a lot of material per rotation.
- Take multiple shallow passes. For full-depth profiles, don’t try to cut the entire depth at once — take 1/8″ to 1/4″ passes, sneaking up on the final depth. This keeps the motor from bogging down, reduces tear-out, and produces cleaner overall results, especially on figured or interlocked grain patterns where the grain direction shifts within the board.
- Watch for burning. Maple and cherry are notorious for scorch marks if the bit dwells too long in one spot or if the feed rate drops unexpectedly. If you notice dark burn marks appearing, either increase your feed rate slightly, decrease the router speed, or both. Burn marks on hardwood can sometimes be sanded out, but deep burns in maple may require taking an additional shallow pass to remove the scorched surface entirely.
- Use sharp bits — non-negotiable. A dull bit on hardwood is a safety hazard and a quality disaster. The motor works harder, the cut heats up, and the wood burns. Carbide-tipped bits hold their edge well on hardwoods, but they do eventually dull, especially after extended use on dense species or abrasive materials. If you notice the bit requiring more pressure to feed or producing increasingly rough surfaces, it’s time to sharpen or replace it.
- Consider spiral bits for joinery. When cutting dados, grooves, or mortises in hardwood, spiral bits (especially upcut spirals) produce significantly cleaner cuts than standard straight bits because their shearing geometry slices through the dense fibers rather than chipping them. The improvement in cut quality is especially noticeable in oak and ash, where the open pore structure can cause straight bits to chip out along the pore lines.
Plywood and Sheet Goods: A Different Animal Entirely
Plywood, MDF, and particleboard present their own routing challenges that don’t fit neatly into the softwood or hardwood categories. Because plywood is made of alternating grain layers glued together, the router bit encounters shifting grain direction at every veneer layer, which causes unpredictable tear-out — particularly on the top surface where the bit exits. MDF and particleboard, meanwhile, are extremely uniform but highly abrasive, dulling bits faster than any solid wood species.
For plywood routing, a downcut or compression spiral bit is the single best investment you can make. A downcut spiral pushes the cutting forces downward into the board, leaving a perfectly clean top surface edge — the show face. A compression spiral combines upcut action at the tip with downcut action at the top of the cutter, producing clean edges on both faces of the board simultaneously. These bits cost more than standard straight bits, but the difference in edge quality on plywood is dramatic and immediately visible.
For MDF and particleboard, use moderate speeds, keep a shop vac connected to the router’s dust port (the fine dust is particularly harmful to breathe), and accept that bits will dull noticeably faster than they would in solid wood. Some woodworkers designate older or resharpened bits specifically for MDF work to save their best bits for solid wood projects.
Template and Pattern Routing: Making Identical Cuts Every Time
Template routing is one of the most powerful techniques a wood router enables. It lets you cut complex or repeatable shapes with perfect consistency — cut a template once, and then use it to produce as many identical workpieces as you need, all with the same profile, the same dimensions, and the same clean edges. Sign makers, furniture builders, production cabinet shops, and instrument makers all rely heavily on template routing because it eliminates the variability of hand layout and freehand cutting.
How Template Routing Works
The concept is straightforward: you create a template — a rigid pattern cut from plywood, MDF, or hardboard — that represents the exact shape you want to rout. You attach the template to the workpiece with double-sided tape, clamps, or screws, and then run a bearing-guided flush-trim bit or a guide bushing along the template’s edge. The bearing or bushing rides against the template while the cutter transfers the shape to the workpiece below (or beside) it. The result is a perfect copy of the template’s shape, and every subsequent workpiece produces the same result.
There are two main systems for template routing, and understanding the difference between them affects your accuracy and setup:
Bearing-Guided Bits
A bearing-guided flush-trim bit has a small ball-bearing mounted at the tip (top-bearing) or at the shank end (bottom-bearing) of the bit. The bearing is the same diameter as the cutter, so when it rides against the template edge, the cutter follows the exact same path. Top-bearing bits are used with the template on top of the workpiece — the bearing contacts the template while the cutter trims the workpiece below. Bottom-bearing bits work with the template underneath — the bearing contacts the template from below while the cutter trims the workpiece above.
Top-bearing bits are the more common setup because they keep the template visible while you work, making it easier to follow curves and watch for problems. The main limitation of bearing-guided bits is that they’re sized for specific applications — a 1/2″ diameter flush-trim bit follows the template exactly, but if you need to offset the cut (produce a shape slightly larger or smaller than the template), you need a different approach.
Guide Bushing Systems
A guide bushing is a metal collar that attaches to the router’s sub-base and extends below it. The bushing surrounds the bit without touching it, and its outer edge rides against the template while the bit cuts the workpiece. Unlike a bearing-guided bit, the guide bushing is offset from the bit by a small distance — typically 1/16″ to 3/16″ depending on the bushing and bit diameters — which means the workpiece shape is slightly different from the template shape. You account for this offset when designing the template, and the result is a precise cut that would be nearly impossible to achieve freehand.
Guide bushings are essential for certain types of work, particularly:
- Inlay work. A guide bushing paired with a small straight bit lets you rout a recess (the inlay pocket) and then rout the inlay piece to fit perfectly inside it, using the same template for both cuts but with different bushing/bit combinations to account for the offset.
- Hinge mortising. A template for a standard door hinge with guide bushing routing produces perfectly consistent mortises every time, which is a huge time-saver during door hanging.
- Sign lettering. Letter templates designed for guide bushings let you rout perfectly spaced, perfectly sized letters into wood for signs, plaques, and shop labels.
Template Materials and Construction
The best template material is 1/4″ or 1/2″ MDF or Baltic birch plywood — both are stable, easy to shape, and smooth enough for a bearing or bushing to glide against without catching. Hardboard (the smooth, tempered variety) also works well for simple templates. Whatever material you choose, the template edges must be smooth and accurately shaped, because any imperfection — a bump, a flat spot, a rough section — transfers directly to every workpiece you rout from it.
Shape the template using whatever tools are appropriate — a bandsaw for curves, a sander for smoothing, and a file or rasp for fine-tuning tight corners. The template is the master pattern, so spending an extra ten minutes sanding and fairing its edges saves time on every subsequent piece you produce from it.
Clamping and Holding the Template
The template must stay perfectly stationary relative to the workpiece during routing. Any movement between the template and workpiece ruins the cut and can cause the bit to grab. Double-sided carpet tape is the most common holding method for smaller templates — it’s strong enough to prevent movement during routing but releases cleanly when you pry the pieces apart. For larger templates, toggle clamps screwed to the template and clamping the workpiece against a bench provide more positive holding force. Pin nails or brads through the template into waste areas of the workpiece also work well when the nail holes will be hidden or removed.
Depth Control for Inlay and Multi-Pass Work
For inlay work, precise depth control is critical — the inlay pocket and the inlay piece must be the same depth for a flush result. Using a plunge router with a fine depth stop, or a fixed-base router with a turret depth stop, lets you set the exact cutting depth and repeat it consistently. A common approach is to rout the inlay pocket to a depth of about 1/16″ to 3/32″, then rout the inlay piece to the same depth from a thicker piece of contrasting wood, and glue the inlay into the pocket with the excess material above the surface. Once the glue dries, a flush-trim bit or a hand plane trims the inlay flush with the surrounding surface, producing a perfectly clean, professional inlay.
Router Joinery Deep Dive: Dadoes, Mortises, Dovetails, and More
While a router shapes decorative profiles beautifully, its equally important role is cutting the joints that hold furniture and cabinets together. A well-equipped router can produce virtually every common woodworking joint — dadoes, grooves, rabbets, mortises, tenons, dovetails, box joints, and even loose-tenon joinery — often with greater precision and speed than hand tools or dedicated jigs. Understanding which joints work best with a router, and how to set them up properly, opens up an enormous range of project possibilities.
Dadoes and Grooves
A dado is a flat-bottomed channel cut across the grain of a board; a groove is the same cut made with the grain. Both are the backbone of cabinet and shelving construction — the plywood back of a cabinet sits in a rabbet, the shelves fit into dadoes, and the face frame attaches with mortise-and-tenon or pocket-hole joints that also start with a routed recess in many shops.
To rout a dado, set a straight bit to the desired depth (typically one-third the thickness of the mating workpiece for maximum strength), and either use an edge guide attached to the router base or clamp a straightedge to the workpiece as a fence to guide the router in a straight line. For standard 3/4″ plywood shelving, a 3/4″ straight bit cuts a dado in a single pass; for solid wood, you may need to make two overlapping passes with a narrower bit to achieve the full width.
Accuracy matters enormously with dado joinery — a dado that’s even 1/64″ too wide produces a visible gap in the finished piece, while one that’s too tight requires force to assemble and risks splitting the wood. Testing the fit on scrap pieces of the same material before cutting into your project stock is essential. A dado that fits properly should allow the mating piece to slide in with light hand pressure — snug enough that it doesn’t fall out under gravity, loose enough that you don’t need a mallet to assemble it.
Rabbets
A rabbet is an L-shaped notch cut along the edge or end of a board. Rabbets are used for cabinet backs (the plywood panel sits in a rabbet around the case perimeter), drawer sides (the bottom panel slides into a rabbet), and frame-and-panel assemblies. A rabbeting bit — which has a bearing that controls the cut width — is the fastest way to cut rabbets, because you simply set the depth, run the bit along the edge, and the bearing automatically creates a consistent-width rabbet without measuring or fence adjustments.
Mortises
A mortise is a rectangular hole — essentially a deep, narrow dado cut into the face or edge of a board — that accepts a tenon on the mating piece to form a mortise-and-tenon joint. This is one of the strongest and most traditional joints in woodworking, and a plunge router cuts mortises faster and more accurately than most hand methods.
To rout a mortise, use a plunge router with a straight bit (spiral upcut bits produce the cleanest mortises because they pull chips up and out of the cut). Set the depth stop for the desired mortise depth — typically 1/2″ to 3/4″ for furniture-scale joints — and mark the mortise boundaries on the workpiece. Plunge the bit at one end of the mortise, rout to the other end in a series of overlapping plunge cuts, then clean up the ends to produce a flat-bottomed, square-ended mortise. Taking the cut in multiple shallow passes (1/4″ per pass) keeps the motor from bogging down and produces cleaner sidewalls.
A shop-made mortising jig — a simple cradle or fence that holds the workpiece steady and positions the router exactly over the mortise location — makes the process faster and more repeatable, especially when you’re cutting multiple identical mortises for a set of chair legs or a table frame.
Tenons
While a tenon is traditionally cut on a table saw with a dado stack, a router can cut tenons with equal precision — and sometimes more conveniently, particularly on long or unwieldy workpieces. The approach is simple: use a straight bit to remove material from each face of the tenon shoulder, leaving the tenon cheek at the correct width. A router table with a fence makes this especially fast, because you can set the fence to the exact tenon length and run each face across the bit in a single pass.
Loose (Floating) Tenon Joinery
Loose-tenon joinery — where you cut matching mortises in both mating pieces and join them with a separate tenon piece (a floating tenon) — is one of the most practical uses of a router for joinery. Systems like the Festool Domino combine a router-like cutting action with a proprietary loose tenon, but you can achieve the same result with a plunge router, a straight bit, and a simple alignment jig. The loose tenon itself can be shop-made from hardwood strips or purchased as pre-cut birch or beech dowels.
The advantage of loose-tenon joinery over traditional mortise-and-tenon is that both workpieces receive the same operation — cutting a mortise — so there’s no need to cut tenon cheeks and shoulders on the end of a board, which simplifies the process considerably and eliminates the risk of a poorly fitting tenon. Many production furniture shops use loose-tenon joinery exclusively for frame construction, and the strength is comparable to traditional mortise-and-tenon when properly executed.
Dovetails and Box Joints
A router paired with a dovetail jig produces dovetail joints that would take considerable skill and time to cut by hand. The jig holds the workpiece at a precise angle and spacing while a dovetail bit or straight bit routs the pins and tails simultaneously, creating perfectly fitting joints in minutes rather than hours. Popular dovetail jig systems from Leigh, Porter-Cable, and Keller all use routers as the cutting tool, and the results — tight, consistent dovetails across every joint in a drawer box — are impressive even for experienced hand-tool woodworkers.
Box joints (also called finger joints) are a simpler alternative to dovetails that also look attractive and create a strong mechanical interlock. A straight bit in a router table, guided by a simple shop-made jig with a pin that indexes each cut to the next one, produces box joints with consistent spacing and tight fits. Box joints are especially popular for decorative boxes, drawers, and small cases where the joint pattern is part of the design.
Sliding Dovetails
A sliding dovetail is a dovetail-shaped groove that runs the length of a board, accepting a mating piece with a matching dovetail-shaped tongue. The joint locks together with a sliding fit, creating a strong mechanical connection that doesn’t require glue (though most woodworkers do glue the final few inches to lock it permanently). A dovetail bit in a router, guided by a straightedge clamped to the workpiece, cuts the groove in a couple of passes, sneaking up on the final width for a snug fit. This joint is common for shelf-to-case connections in traditional casework where the shelf needs to be both strong and removable during assembly.
Router Care & Maintenance
Routers are relatively low-maintenance compared to other power tools, but a few habits extend their life significantly and keep cuts clean.
- Clean the collet regularly. Resin and dust buildup in the collet reduces bit grip and can cause runout, leading to rougher cuts.
- Check base plate screws. Vibration loosens sub-base screws over time; a loose base plate causes chatter and inaccurate depth.
- Keep bits sharp and clean. A dull or resin-caked bit forces the motor to work harder and burns the wood instead of cutting it cleanly.
- Store bits properly. Loose bits rattling in a drawer dull faster and can chip carbide edges.
- Vacuum out the motor housing vents occasionally to prevent dust buildup from overheating the motor during long sessions.
A well-maintained router paired with sharp bits and a stable bench surface will consistently outperform a more expensive router that’s neglected.
Common Router Mistakes That Ruin Otherwise Good Projects
Even experienced woodworkers pick up bad router habits over time, and a lot of “this router is junk” complaints online are actually technique problems rather than tool problems. Understanding the most common mistakes ahead of time will save you material, time, and more than a few close calls with a spinning bit.
Routing Against the Grain Direction
A router bit spins, and depending on which direction you feed the tool relative to that spin, you’re either cutting “with the grain” of the cut path (climb cutting) or against it (conventional cutting). Feeding a handheld router in the wrong direction on an outside edge causes the bit to grab and pull itself — and your hands — along the workpiece uncontrollably. The general rule for handheld routing on an outside edge is to move the router counter-clockwise around the piece; on an inside cut, move clockwise. Router tables reverse this because the workpiece moves instead of the tool.
Taking Too Much Material in One Pass
New router owners often try to cut a full-depth profile or mortise in a single plunge. This overworks the motor, increases tear-out, and dramatically raises the odds of bit deflection or a bit binding mid-cut. Multiple shallow passes — typically no more than 1/8″ to 1/4″ of material per pass depending on bit diameter and wood hardness — produce cleaner results and put far less strain on the motor and bearings.
Ignoring Bit Speed Recommendations
Every router bit has a maximum safe RPM based on its diameter — larger-diameter bits need to spin slower because the outer edge of the cutter is moving through more distance per rotation. Running a 3-inch panel-raising bit at the same RPM you’d use for a small roundover bit is a common and genuinely dangerous mistake. Most router bit packaging lists a maximum RPM; when in doubt, slow down.
Skipping a Test Cut on Scrap
It’s tempting to jump straight into the actual workpiece, especially on a simple-looking profile. A thirty-second test cut on a matching offcut catches depth errors, tear-out issues, and bit chatter before they show up on the piece you actually care about.
Not Securing the Workpiece Properly
Router vibration and cutting forces are more aggressive than most hand tools. A workpiece that shifts mid-cut ruins the piece and creates a genuine safety hazard. Clamps, a vacuum-hold jig, or a well-designed bench with dog holes and hold-downs all solve this — which is another reason a stable woodworking workbench is worth the investment alongside the router itself.
Essential Router Jigs Worth Building for Your Shop
One of the greatest strengths of a wood router is how much its capabilities expand when paired with a well-designed jig. A jig holds the workpiece, guides the router, or both — transforming cuts that would be difficult or dangerous freehand into safe, repeatable operations. Many of these jigs can be built from shop scraps in an afternoon, and the investment in time pays for itself with the very first project.
Edge Guide Jig
While most routers come with a basic edge guide, a shop-made version can be longer, more rigid, and more versatile than the stamped-metal guide in the box. A simple edge guide made from a straight piece of hardwood or aluminum extrusion, with two adjustable points of contact against the workpiece edge, gives you a stable reference for routing dadoes, grooves, and slots parallel to an edge. Adding a T-track slot to the guide lets you adjust the offset without re-clamping, which is a significant time-saver when you’re cutting multiple grooves at different distances from the edge.
Circle-Cutting Jig
Routing perfect circles — for round tabletops, lazy Susans, circular inlays, or decorative cutouts — requires a pivot-point jig. The simplest version is a thin strip of plywood or hardboard with a nail hole at one end (the pivot point) and a slot at the other end that attaches to the router base. Set the pivot nail at the center of the desired circle, mount the router on the other end of the jig, and rotate the router around the pivot to cut a perfect circle. The slot allows you to adjust the radius, and the result is far cleaner than a jigsaw or bandsaw circle because the router produces a smooth, tear-free edge in a single pass.
Tenoning Jig
A tenoning jig for the router table holds a workpiece vertically and slides it across the bit to cut tenon cheeks on the end of a board. The jig typically consists of a vertical fence with toggle clamps to hold the workpiece, mounted on a base that slides along the router table fence. This setup lets you cut perfectly square, consistent tenon cheeks without trying to balance a long workpiece flat on the table. It’s especially useful for chair and table construction where multiple tenons need to be identical.
Dovetail and Box-Joint Jigs
Commercial dovetail jigs from Leigh, Porter-Cable, and Keller have been the standard for years, but shop-made versions are entirely viable and often more customizable to your specific needs. A basic box-joint jig is simply a sled with a pin that indexes each cut to the spacing of the fingers — run the sled across the bit once for each finger, then flip the workpiece and repeat for the mating piece. The result is perfectly interlocking fingers that look impressive and create a strong mechanical joint. Building a dovetail jig is more complex but equally rewarding, and there are dozens of proven shop-made designs available in woodworking publications and forums.
Sign-Making Jig and Lettering Template System
For woodworkers who make signs, shop labels, or personalized gifts, a template-based lettering system paired with a guide bushing jig eliminates the need for freehand lettering skill. The templates — available commercially in a wide range of fonts and sizes — nest individual letters into a carrier strip, and the router with a guide bushing follows the letter cutouts to rout perfectly shaped letters into the workpiece. A simple jig with a straight fence keeps the baseline consistent across multiple lines of text, and the results look professional even for someone who has never made a sign before.
Hinge-Mortising Jig
Routing hinge mortises with a template and guide bushing is faster and more precise than chiseling them by hand. A hinge-mortising jig is simply a template sized to a standard door hinge (3-1/2″ or 4″ for residential doors, 4-1/2″ or 5″ for commercial), with a cutout that matches the hinge leaf dimensions. Clamp the template to the door or jamb, run the router around the inside of the template with a guide bushing and straight bit, and the result is a perfectly sized mortise every time. Some commercial hinge jigs are adjustable for different hinge sizes and are worth the investment if you’re hanging more than a few doors.
Tapering Jig
While tapering is usually done on a table saw, a router-based tapering jig lets you cut smooth, consistent tapers on chair legs and table legs with a straight bit and a guide fence. The jig holds the workpiece at the desired taper angle while the router passes along it, removing material in a straight, controlled taper. This approach works particularly well on shorter legs where a table saw tapering jig would feel unwieldy.
Router Safety Best Practices: Protecting Yourself and Your Work
A wood router is one of the safer power tools in a shop compared to a table saw or jointer, but it still operates at extremely high RPM with exposed spinning cutters, and complacency around it leads to injuries every year. Most router accidents fall into a few predictable categories — bit grabs, kickback on a router table, eye injuries from flying debris, and hearing damage from prolonged exposure — and all of them are preventable with consistent habits.
Personal Protective Equipment
Eye protection is non-negotiable. A spinning router bit throws chips and dust at high velocity, and a single wood chip in the eye is a medical emergency, not an inconvenience. Wear safety glasses or a face shield every time the router is running, without exception.
Hearing protection is equally important and more often neglected. Routers operate in the 85–95 decibel range depending on the bit and material, which is well above the threshold for cumulative hearing damage during extended exposure. Over a multi-hour routing session — building a set of cabinet doors, for example — the cumulative noise exposure without hearing protection can contribute to permanent hearing loss. Foam earplugs, earmuffs, or electronic hearing protection that allows conversation while blocking harmful noise levels are all effective options.
A respirator or dust mask rated for fine wood dust (N95 minimum, P100 preferred) protects your lungs from the fine particulate that routers produce in large quantities. Fine dust, especially from hardwoods and MDF, is a documented respiratory hazard linked to long-term lung damage and increased cancer risk. A dust port connected to a shop vac or dust collection system catches most of the visible chips, but a respirator protects against the ultrafine particles that escape any collection system.
Bit Installation and Removal
When installing a router bit, push the shank fully into the collet until it bottoms out, then pull it back out approximately 1/16″ to 1/8″. This ensures the shank isn’t bottoming against the collet’s closed end (which can prevent the collet from gripping properly) while still providing maximum shank engagement. Tighten the collet firmly with the wrenches provided — most routers use two wrenches or a spindle lock plus one wrench — but don’t over-tighten to the point of damaging the collet. A properly seated, properly tightened collet should hold the bit securely through the full range of normal routing forces.
Never start the router with the bit touching the workpiece. The bit should be clear of all contact before the motor is switched on, and you should wait for the bit to reach full speed before beginning the cut. Similarly, always let the bit come to a complete stop before setting the router down after a cut — a spinning bit that contacts a workbench, your fingers, or a power cord can cause damage or injury in an instant.
Clamp Everything
The single most important safety rule in routing — whether handheld or on a table — is to clamp the workpiece securely before cutting. A spinning router bit generates significant force, and an unclamped workpiece can be grabbed by the bit and thrown across the shop. For handheld routing, clamp the workpiece to the bench with C-clamps or bar clamps positioned where the router won’t contact them. For router table work, use push sticks, featherboards, and hold-downs to keep the workpiece firmly against the fence and table surface throughout the cut. Your fingers should never be closer than 3 inches to a spinning bit — if they are, you need a jig, a push stick, or a different approach to the cut.
Understanding Grain Direction and Feed Direction
Routing against the direction of bit rotation (conventional routing) is the safe, standard approach for handheld work — it pushes the router against the direction of travel, giving you control. Routing with the direction of bit rotation (climb cutting) pulls the router along the workpiece, which can cause loss of control if you’re not expecting it. Climb cutting has legitimate uses — reducing tear-out on the trailing edge of a cross-grain cut, for example — but it should only be attempted with very light passes, a firm grip, and a clear understanding of the forces involved. For beginners, the rule is simple: always route conventionally (counter-clockwise on outside edges, clockwise on inside edges with a handheld router, and right-to-left feeding on a router table).
Starting and Stopping Cuts Safely
When beginning a handheld cut on an edge, start the router away from the workpiece, let it reach full speed, then carefully bring the bit into contact with the wood and begin feeding. For plunge cuts, position the router on the workpiece with the bit retracted, start the motor, then lower the bit into the material using the plunge mechanism. Never start the router with the bit already engaged in the wood — the sudden torque can cause the router to jump or the workpiece to shift.
When ending a cut, maintain your feed rate through to the end of the pass and then pull the bit out of the cut before releasing the plunge lever or lifting the router. Slowing down at the end of a pass lets the bit linger in one spot, which causes burning on hardwood and can leave a visible mark where the feed rate changed.
Router Table Safety Specifics
Router tables introduce their own set of safety considerations. The spinning bit is exposed through the table surface, and small workpieces can be difficult to control near the bit. Featherboards — spring-loaded guides that press the workpiece against the fence — are one of the most valuable router table safety accessories because they keep the workpiece moving consistently and prevent it from lifting off the table during the cut. Starting pins (small metal posts that thread into the fence near the bit) give the workpiece a pivot point for beginning freehand profile cuts with bearing-guided bits, preventing the bit from grabbing the workpiece before it contacts the bearing.
Never reach behind, over, or under a spinning bit on a router table to retrieve a cut-off piece or adjust something. Turn off the motor, wait for the bit to stop completely, and then make adjustments. This seems obvious, but the temptation to make a quick adjustment while the router is running is one of the most common causes of router table injuries.
Respecting the Tool’s Limits
Every router has a maximum bit diameter it can safely operate, specified by the manufacturer — typically limited by the opening in the sub-base or base plate. Running a bit that’s too large for the router’s base opening is dangerous because the cutter isn’t fully guarded by the base. Similarly, running a small router at maximum depth and width on a large profile in dense hardwood pushes the motor beyond its design limits, causing overheating, bit deflection, and potential failure. Know your router’s capabilities and stay within them.
Router Bits and Accessories Worth Owning
The router itself is only half the equation — the bits and jigs you pair it with determine what kinds of cuts you can actually make. Here’s a practical starter list that covers the majority of common woodworking tasks.
Core Bit Set
A starter set should include a straight bit for dados and grooves, a roundover bit for softened edges, a chamfer bit for angled edges, a flush-trim bit for laminate and template work, and a rabbeting bit for cabinet-back grooves. Most quality starter sets bundle these six to fifteen profiles in a single case, which covers roughly 80% of what a hobbyist shop will ever need.
Edge Guides
An edge guide attaches to the router base and rides along the edge of the workpiece, letting you cut a perfectly straight groove or dado without a separate straightedge clamped down. Most full-size routers, including the Bosch and DEWALT combo kits above, include a basic edge guide in the box.
Template Guide Bushings
These small collars attach to the router’s sub-base and let the router follow a template pattern, which is essential for repeatable work like cutting identical mortises, sign lettering, or inlay pockets. Not every router accepts the same bushing system, so check compatibility before buying a template kit.
Dust Collection Adapters
Routing produces a genuinely large volume of fine dust, and a dust port adapter connected to a shop vac makes a noticeable difference in visibility, cleanup time, and air quality, especially during long template or table-routing sessions.
A Router Table (Eventually)
Once you’re doing repetitive edge profiling or panel work, a router table turns the router into a stationary tool and lets you move the workpiece instead, which is both safer and more precise for certain cuts. The Triton TRA001 above was specifically designed with table mounting in mind, but most full-size routers can be table-mounted with the right plate.
Dust Collection for Routers: Setting Up an Effective System
Routing is one of the dustiest operations in a woodshop. A router spinning at 20,000+ RPM through wood produces a continuous stream of fine dust and chips that scatter in every direction — downward through the table opening, backward out of the cut, and airborne in a cloud around the workpiece. Without effective dust collection, that debris accumulates on the shop floor, coats every surface in a fine layer of dust, and — most importantly — fills the air you’re breathing with particles that are genuinely harmful over time. Setting up proper dust collection for your router work isn’t a luxury; it’s one of the most impactful things you can do for your long-term health and your shop’s cleanliness.
Router-Mounted Dust Ports
Most modern routers include a dust port — a small nozzle on the motor housing or base that connects to a hose. When connected to a shop vacuum or dust collection system, this port captures a significant portion of the chips and dust generated during handheld routing. The effectiveness varies by model — routers with larger, more strategically positioned ports (like the DEWALT DWP611PK) tend to capture more debris than routers with small or poorly placed ports — but even a modestly effective dust port is far better than no collection at all.
For maximum capture, connect the dust port to a dedicated shop vacuum with a fine-dust filter bag or a HEPA-rated filter. Standard shop vacuum filters don’t capture the finest particles, which are the most harmful to breathe. Upgrading to a fine-dust filter bag — available for most major shop vacuum brands — dramatically improves the air-quality benefit of the dust collection setup.
Router Table Dust Collection
A router table benefits from two collection points: one below the table surface (typically a large box or shroud surrounding the router that connects to a dust collection port) and one at the fence level (a dust hood built into or attached to the fence that captures chips thrown backward by the bit). Together, these two collection points catch the vast majority of debris generated during table routing. Many commercial router tables include both collection points, but if yours doesn’t, adding a below-table shroud is a simple shop-made project — a plywood box that encloses the router area with a 4″ dust collection port — and a fence-mounted dust hood can be as simple as a 2-1/2″ hose positioned near the bit opening.
Overhead and Ambient Collection
Even with router-mounted and table-mounted collection, some dust escapes into the shop air — particularly during freehand routing where the bit is exposed on all sides. An air filtration unit mounted overhead in the shop continuously cycles room air through a fine filter, capturing the airborne dust that the primary collection system misses. These units are relatively inexpensive, quiet, and effective at reducing the overall dust level in the shop during and after routing sessions. They’re not a substitute for source collection (the router’s dust port and a shop vac), but they complement it well.
Shop Vacuum vs. Dust Collector
For router dust collection, a shop vacuum is often more practical than a large dust collection system. Shop vacuums generate high static pressure through a narrow hose, which matches the small-diameter dust ports on routers (typically 1-1/4″ to 2-1/2″). Large dust collectors generate high volume through wide ducting (4″ to 6″), which is ideal for table saws and planers but less effective at capturing dust through a router’s small port. If your shop has both systems, connect the router’s dust port to a shop vacuum and use the large dust collector for the below-table collection point on a router table, where the larger opening benefits from higher air volume.
Practical Tips for Cleaner Routing
- Turn on the dust collection before starting the router — getting the airflow established first means chips are captured from the very first moment of the cut.
- Position the hose so it doesn’t interfere with the router’s movement or your grip. A hose that drags on the workpiece or catches on a clamp is both a quality problem and a safety hazard.
- Empty the shop vacuum bag or canister before it’s completely full. A vacuum running with a full bag loses significant suction, reducing its capture effectiveness.
- Clean or replace the vacuum filter regularly — a clogged filter reduces airflow and defeats the purpose of the collection setup.
- Wear a respirator even with dust collection running. No collection system captures 100% of the dust, and the ultrafine particles that escape are the ones most harmful to your lungs.
Beginner Router Projects to Build Confidence and Skills
A new router sitting on the workbench is exciting — and a little intimidating. The spinning bit, the noise, the high RPM all conspire to make the first few cuts feel more dramatic than they actually are. The best way to build confidence with a router is to start with simple, low-stakes projects that teach the fundamental skills — controlling feed rate, maintaining consistent depth, following a line, and reading grain direction — without risking expensive material or complex joinery. Each of the projects below introduces one or two core router skills and produces something useful or attractive enough to be worth the time.
Roundover a Cutting Board
This is the classic first-router project, and it’s popular for a reason. Take a flat-sanded cutting board or a piece of hardwood about 3/4″ to 1-1/2″ thick, install a 1/4″ or 3/8″ roundover bit, set the depth so the bearing rides against the edge, and run the router counter-clockwise around all four edges. The result is a smooth, professional-looking edge profile that transforms a plain rectangular board into something that feels finished and comfortable to hold. This project teaches edge routing basics — feed direction, steady speed, and consistent depth — in about five minutes of actual cutting time.
Chamfer a Picture Frame
Similar to the roundover project but with a different visual result. A 45-degree chamfer bit on a picture frame — either a simple shop-made frame or one from a craft store — creates a clean, geometric edge that looks distinctly modern. This project introduces you to routing end grain (the short ends of the frame), which requires a backer board clamped behind the workpiece to prevent tear-out as the bit exits the wood.
Make a Simple Box with Routed Joints
A small box — a keepsake box, a phone charging station, or a shop-supply container — is a great project for learning rabbet and dado joinery. The sides are connected with rabbets (a step-shaped notch on each corner), and the bottom sits in a groove or dado around the inside perimeter. All the joinery is cut with a straight bit in a handheld router guided by a clamped straightedge. The project teaches grooving, dado-cutting, and the importance of test-fitting joints before assembly.
Route a Juice Groove in a Serving Board
A juice groove — a shallow channel routed around the perimeter of a serving or charcuterie board — is both functional and decorative. Use a core-box (round-nose) bit or a small cove bit, set to a shallow depth of about 1/8″, and route a continuous channel about 1/2″ to 3/4″ from the board’s edge. This project introduces template routing concepts if you use a shop-made template to keep the groove at a consistent distance from the edge, and the result is a piece that looks genuinely professional.
Build a Wall-Mounted Key Holder or Mail Organizer
A small wall-mounted organizer with routed keyhole slots on the back and chamfered or roundovered edges is a practical project that combines edge routing with plunge routing. The keyhole slots are cut by plunging a straight bit into the back of the workpiece, routing a narrow channel to the keyhole location, and then widening the end to accept a screw head. This teaches plunge routing technique — positioning, plunging, and controlling depth — in a simple, forgiving application.
Add a Decorative Edge to a Shelf
A plain plywood or solid-wood shelf gains character with a decorative edge profile — an ogee, a classical bit, or even a simple bead. Routing the front edge of a shelf that will hang in a living room, bathroom, or entryway is a quick, satisfying project that introduces you to decorative profile bits and shows how a single router pass can transform the appearance of a flat board.
Practice Sign Making on Scrap
Take a piece of scrap wood, print out a name or phrase in a font you like, attach it to the wood with spray adhesive, and use a small V-groove bit or straight bit to trace the letters freehand. Your first attempt won’t be museum-quality, but the process teaches bit control, depth management, and how to follow a curved line with a router — skills that transfer directly to more complex projects later. Sign making is one of those areas where a compact trim router like the Makita RT0701C excels, because its lighter weight and smaller size make it easier to control during the precise, detail-oriented work of lettering.
Progressing Beyond Beginner Projects
Once you’ve completed a few of these simple projects, you’ll have the fundamental skills to tackle more complex work — face-frame cabinets, frame-and-panel doors, dovetailed drawers, and inlaid tabletops. The key is to increase complexity gradually rather than jumping from a roundover cutting board directly to a set of raised-panel cabinet doors. Each project builds on the skills of the previous one, and the confidence you develop with each successful cut makes the next project feel less intimidating and more like a natural progression.
And if you’re looking to outfit your shop with the other essentials alongside a router, make sure you have a solid set of woodworking tools to complement the router — particularly a reliable random orbital sander for cleanup after routing, and a good cordless drill for the assembly phase of any project.
Frequently Asked Questions
What horsepower router do I actually need for furniture work?
For most furniture-scale projects, 1.25–2.25 HP is plenty. You only need 3+ HP if you’re routinely running large panel-raising bits or wide dado cuts in hardwood on a router table.
Is a plunge router or fixed-base router better for beginners?
A combo kit that includes both is the smartest choice for beginners, since it removes the need to guess which type of cut you’ll want to make first. Fixed bases are simpler to start with, but plunge capability quickly becomes essential.
Can a compact trim router replace a full-size router?
Not entirely. Compact routers excel at edge work, laminate trimming, and light detail cuts, but they lack the power and 1/2″ collet capacity needed for heavy joinery or large-diameter bits.
Are cordless routers powerful enough for real projects?
Modern brushless cordless routers handle trim work, edge profiling, and light plunge cuts very well. For heavy, continuous joinery work, a corded router still generally outperforms cordless options.
What size router bit shank should I buy — 1/4″ or 1/2″?
If your router accepts both, buy 1/2″ shank bits when available. They flex less, produce cleaner cuts, and handle larger-diameter profiles more safely than 1/4″ shanks.
Do I need a router table, or is handheld enough?
Handheld routing covers the majority of hobbyist tasks. A router table becomes valuable once you’re doing repetitive edge profiling, panel raising, or need more control over smaller workpieces that are safer to move across a table than to move a router across.
How do I stop my router from burning the wood?
Burning usually comes from moving too slowly, using a dull bit, or running the bit at too high an RPM for the material and bit diameter. Slow the RPM for larger bits, keep bits sharp, and maintain a steady feed rate.
What’s the difference between the Bosch and DEWALT combo kits?
The Bosch has more power (2.25 HP vs. 1.25 HP) and a more refined plunge mechanism, while the DEWALT is lighter and more comfortable for extended one-handed use. Both are excellent; the choice comes down to whether raw power or handling comfort matters more to you.
Is it worth buying a router with above-table height adjustment?
If you’re mounting the router in a table permanently, yes — reaching underneath a table to adjust bit height gets old fast. The Triton TRA001’s above-table winder is one of its biggest selling points for table use.
Can I use the same router bits across different router brands?
Yes, as long as the shank size matches your router’s collet (typically 1/4″ or 1/2″). Router bits are largely universal across brands.
How loud are wood routers, and do I need hearing protection?
Routers run at very high RPM and are among the louder tools in a shop. Hearing protection is strongly recommended for any extended routing session, along with eye protection given the amount of chip and dust ejection.
What accessories should I buy alongside a new router?
A quality bit set, an edge guide, template guide bushings, and a dust collection adapter cover most needs. If you plan to mount it in a table eventually, check that your router model has compatible table-mounting plates available.
How long do router bits typically last before they need replacing?
Carbide-tipped bits, which is what most quality router bits use, can last for hundreds of linear feet of cutting in typical hardwoods before needing sharpening, depending on how well they’re cared for and whether they’re kept clean and free of resin buildup. Cutting in abrasive materials like MDF or particleboard tends to dull bits considerably faster than solid hardwood.
Should I buy a router as part of a combo kit or as a bare tool?
If you don’t already own the bases or batteries, a combo kit is almost always better value, since buying the motor and bases separately usually costs more overall. If you’re adding a router to an existing battery platform you already use for other tools, buying the bare tool and using batteries you already own makes more financial sense.
Final Verdict: Which Router Should You Buy?
If you only buy one router, the Bosch 1617EVSPK remains the safest, most versatile pick thanks to its plunge/fixed combo design and strong motor. If lightweight handling matters more to you, the DEWALT DWP611PK is an excellent alternative. Serious router-table builders should look hard at the Triton TRA001, while anyone doing on-site or mobile work will get the most value from a cordless option like the DeWalt DCW600B, Milwaukee 2723-20, or the plunge-capable Metabo HPT 36V.
Whichever router you choose, pair it with sharp bits, a stable workbench, and proper dust collection, and it will reward you with clean, professional-looking results on every project.
Browse Top Wood Routers on Amazon
Pingback: 12 Best Woodworking Tools: Essential Picks From Amazon