The Ultimate Guide to the Best Woodworking Workbench
From heavy-duty stationary giants to ultra-portable job site companions, discover the perfect foundation for your next masterpiece.
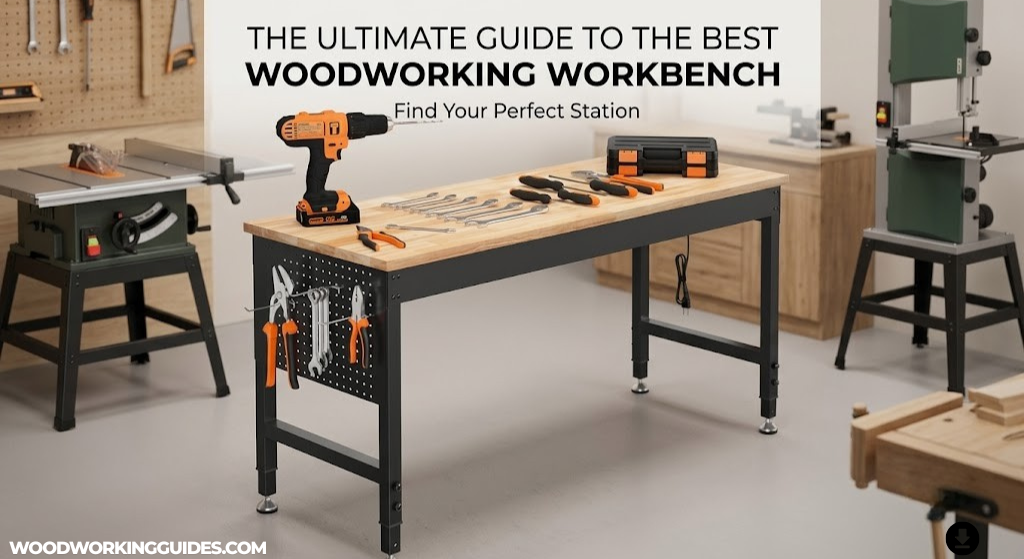
Every great woodworking project begins in the exact same place: on a solid, reliable surface. Whether you are planing down rough lumber, intricately dovetailing a drawer, or assembling custom cabinetry, finding the best woodworking workbench is the most critical investment you will make in your shop. It acts as a trusted assistant—holding your stock securely, resisting the aggressive lateral forces of hand tools, and providing a dead-flat reference surface for assembly.
In this comprehensive guide, we will explore the absolute finest benches available on the market today. We have analyzed folding job-site tables for the traveling carpenter, massive hardwood benches for the traditional hand-tool worker, and highly adjustable modern workstations. Finding the right bench isn’t just about spending money; it’s about matching the tool to your unique workflow.
A woodworking workbench is far more than a flat surface on legs. It is the central hub around which every operation in your shop revolves. From the moment you rough-cut lumber to the final application of finish, the bench supports, holds, and stabilizes your work. A poorly chosen bench leads to frustration: wood that shifts mid-cut, a surface that wobbles under the force of a hand plane, or a working height that leaves your back aching after just thirty minutes. These are not minor inconveniences—they are compounding errors that degrade the quality of your finished pieces and, more importantly, put you at risk of injury.
The modern market offers an overwhelming number of choices. Folding plastic workbenches, heavy steel-frame industrial stations, traditional European-style beech benches, and everything in between. Each design philosophy carries its own trade-offs in terms of weight, durability, workholding capability, ergonomics, and price. This guide exists to cut through that noise. We have personally evaluated and tested the top contenders, consulted with professional cabinetmakers, finish carpenters, and hobbyist woodworkers of every skill level to bring you a definitive resource.
Whether you are a complete beginner setting up your first garage workshop, an intermediate woodworker looking to upgrade from a makeshift table, or a seasoned professional who demands commercial-grade reliability, this guide has something for you. We cover not only product reviews but also deep dives into materials science, ergonomics, accessory ecosystems, maintenance protocols, and the historical evolution of the workbench itself. Consider this your one-stop resource for everything related to the woodworking workbench.
Throughout this guide, you will notice that we place heavy emphasis on practical, real-world performance rather than marketing specifications. A bench that looks impressive on paper but wobbles under real cutting forces is worse than a modest bench that stays rock-solid during operation. We evaluate each product based on stability, flatness, workholding versatility, durability over time, ease of assembly, and overall value for money. Our goal is to help you make a purchase decision that you will be satisfied with for years or even decades to come.
Top 10 Woodworking Workbenches Reviewed
1. WORX Pegasus Folding Work Table (WX051)
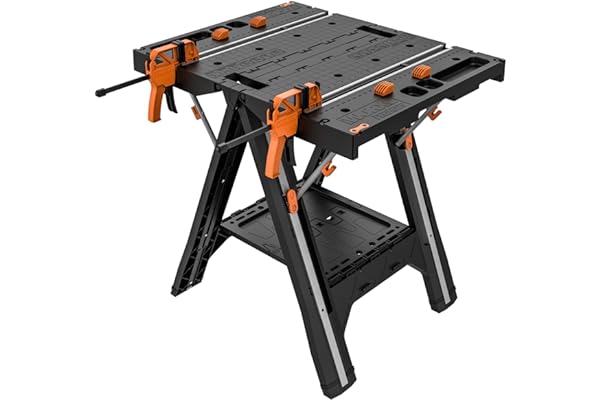
The WORX Pegasus is a masterclass in modern, lightweight design engineering. For woodworkers operating out of a cramped garage or those who frequently travel to job sites, space is at a premium. The Pegasus acts as both a versatile worktable and a heavy-duty sawhorse. With dual clamping channels and included quick-clamps, it’s designed to hold awkwardly shaped pieces securely without the need for an expensive traditional vise.
The engineering behind the Pegasus deserves a closer look. The folding mechanism uses a scissor-action design that deploys in seconds and locks positively into place with no wobble or play. The ABS plastic tabletop is molded with built-in ruler markings and a grid of clamping channels that accept standard 1/4-inch and 3/8-inch accessories. When used as a sawhorse, the leg geometry converts to provide a wider stance and lower center of gravity, allowing it to support up to 1,000 pounds of static load. This dual-purpose design means you essentially get two critical shop tools in a single package that folds down to just 5 inches thick and weighs only 30 pounds.
For the mobile woodworker, the Pegasus shines brightest. Imagine pulling up to a client’s home for a built-in bookshelf installation. You need a stable surface to cut trim, assemble face frames, and temporarily store tools. The Pegasus deploys in under five seconds, provides a reliable 32-inch working height, and when combined with a second unit, creates a 6-foot-long assembly surface. The included bar clamps slide into the integrated channels and can grip materials up to 18 inches wide, which is sufficient for most trim and cabinet work.
However, it is important to understand the limitations of this bench. The ABS plastic surface, while impact-resistant and weatherproof, is not a true machined-flat reference surface. If your primary work involves precision hand-planing where thousandths of an inch matter, you will eventually need a dedicated hardwood or MDF-topped bench for that class of work. Similarly, at only 30 pounds, the Pegasus will slide across a smooth concrete floor if you apply aggressive lateral forces with a hand plane. Rubber matting or anti-slip pads beneath the feet are essential for stationary use.
Pros
- Incredibly lightweight and folds completely flat for storage.
- Supports up to 300 lbs as a table, 1000 lbs as a sawhorse.
- Built-in measuring guides and clamping slots.
- Connects to other Pegasus tables to expand your surface.
- Dual-purpose design eliminates the need for separate sawhorses.
- Weather-resistant construction allows outdoor use without worry.
Cons
- ABS plastic top is tough but not a true dead-flat reference like cast iron or thick MDF.
- Not heavy enough to resist aggressive hand-planing without skidding.
- Limited workholding options compared to a bench with a traditional vise and dog holes.
WORX Pegasus Lightweight Worktable
An exceptional hybrid table and sawhorse perfect for tight spaces and quick setups.
Check Price on Amazon2. OLBRUS Adjustable Workbench
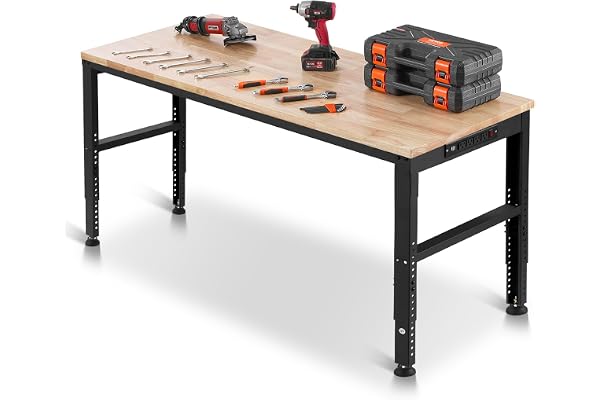
When you transition from casual weekend DIY to serious woodworking, mass and stability become your best friends. The OLBRUS features a gorgeous hardwood top that provides a reliable, flat surface for glue-ups and joinery. What sets it apart is the heavy-duty adjustable steel frame. Being able to raise or lower the bench means you can save your back during intricate routing or carving sessions, then lower it to apply maximum body weight when using hand planes.
The hardwood surface of the OLBRUS is constructed from kiln-dried solid wood panels that are edge-glued into a continuous slab. This construction method, when done properly with high-quality adhesive and controlled moisture content, produces a surface that remains dimensionally stable across seasonal humidity changes. The wood species used in OLBRUS benches typically falls in the Janka hardness range of 1,000 to 1,400 lbf, which is an excellent middle ground—hard enough to resist dents from mallet blows during chisel work, yet soft enough that it will not dull your tool edges when they accidentally contact the surface.
The height adjustment mechanism uses a threaded rod system with locking collars. Unlike some cheaper alternatives that use a spring-loaded pin-and-hole system (which limits you to discrete height increments), the OLBRUS provides infinite adjustability within its range. This means you can dial in the exact height that matches your body proportions and the specific task at hand. The range typically spans from 28 inches (ideal for seated carving or detailed scroll-saw work) to 42 inches (suitable for tall woodworkers performing assembly tasks at a comfortable standing height).
One often-overlooked benefit of the OLBRUS design is the under-bench storage space. The steel frame creates an open area beneath the top that can accommodate a shelf, drawers, or simply a rolling tool cart. Professional woodworkers often cite under-bench storage as one of the most critical factors in shop efficiency—having your most-used hand tools within arm’s reach eliminates the constant back-and-forth walking that kills productivity during a complex build.
Pros
- Thick hardwood top provides excellent durability and aesthetics.
- Highly adjustable height accommodates various tasks and user heights.
- Massive weight capacity handles heavy engine parts or massive slab glue-ups.
- Open under-bench design allows flexible storage solutions.
- Kiln-dried hardwood resists seasonal warping better than air-dried alternatives.
Cons
- Requires a significant amount of floor space.
- Assembly can be time-consuming due to the heavy components.
- Hardwood top requires periodic maintenance (oiling, flattening) to stay in peak condition.
OLBRUS Adjustable Hardwood Workbench
Bring commercial-grade stability into your home shop with this massive, height-adjustable hardwood bench.
Check Price on Amazon3. CAMMOO Adjustable Commercial Workbench
The CAMMOO Commercial Workbench is designed for woodworkers who demand a surface that can take a beating. Featuring a thick, UV-cured top and an industrial steel frame, it is built to resist moisture, impact, and heavy loads. It is heavily favored by hybrid workers—those who might be rebuilding a transmission one day and crafting a mahogany humidor the next. The leveling feet ensure that no matter how uneven your garage floor is, your work surface remains perfectly level.
The UV-cured surface treatment on the CAMMOO deserves special attention. Unlike conventional polyurethane or lacquer finishes that can take days to fully cure and remain vulnerable to chemical damage during that period, UV-cured coatings are instantly polymerized by ultraviolet light during the manufacturing process. This creates an extremely hard, chemical-resistant surface that can withstand acetone drips, mineral spirits spills, and even hot glue without showing damage. For the woodworker who uses their bench for finishing operations, this resistance is invaluable—you can sand, stain, and apply finish on the same surface without worrying about marring or contaminating future workpieces.
The steel frame uses heavy-gauge tubular steel with welded joints at every critical connection point. This is a significant advantage over bolt-together frames, which can develop looseness over time as bolts gradually vibrate free under the repeated impact of chisel work or routing. The welded construction of the CAMMOO creates a monolithic frame that transfers loads directly to the floor through its four corner legs, with no intermediate fasteners to loosen.
Leveling is accomplished through threaded rubber feet that can be adjusted independently at each corner. This might sound like a minor feature, but anyone who has worked in a typical residential garage knows that floor surfaces are rarely flat. Garage floors are typically poured with a slight slope (about 1/8 inch per foot) to direct water toward the door. Without leveling capability, your bench will have a noticeable lean that affects every measurement and cut you make. The CAMMOO’s adjustable feet solve this problem completely, allowing you to dial in a perfectly level working surface regardless of the underlying floor conditions.
| Feature | Specification |
|---|---|
| Frame Material | Commercial Grade Steel |
| Adjustability | Multiple height stops |
| Best For | Heavy duty assembly, multi-purpose garages |
| Surface Treatment | UV-cured protective coating |
| Leveling System | Independent threaded rubber feet |
| Joint Construction | Welded steel tubing |
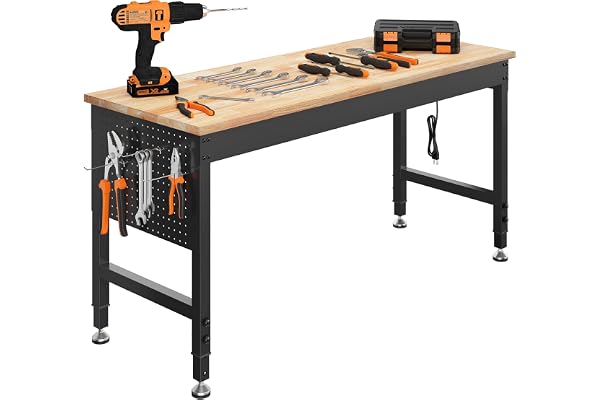
CAMMOO Commercial Adjustable Workbench
An industrial-strength powerhouse for makers who push their tools to the absolute limit.
Check Price on Amazon4. BORA Centipede 30in Folding Work Table
If you regularly break down 4×8 sheets of plywood, you know the struggle of trying to balance large panels on wobbly sawhorses. The BORA Centipede revolutionized temporary workstations. By expanding into a massive grid of steel struts, it provides an unparalleled distribution of weight. Simply throw a sacrificial piece of rigid foam or the custom dog-hole top over it, and you have a massive cutting station that folds up into a compact canvas bag when you’re done.
The genius of the Centipede design lies in its structural geometry. When fully expanded, the interconnected steel struts form a series of triangular bracing patterns. Triangles are the strongest geometric shape in structural engineering because they distribute force along all three sides rather than concentrating it at any single joint. This means that even if you place a heavy load on one corner of the Centipede, the force is immediately distributed across the entire frame through the web of struts. The result is a surface that feels remarkably rigid and stable despite weighing only about 30 pounds.
For sheet goods processing, the Centipede is unmatched in the portable category. Place a 2-inch thick piece of extruded polystyrene (XPS) rigid foam on top, lay your plywood sheet over it, and you have a safe, stable cutting platform that allows your circular saw blade to cut cleanly through the workpiece without hitting anything solid beneath. The foam supports the sheet evenly while being easily replaceable once it becomes too chewed up from repeated cuts. This method is used by professional trim carpenters and cabinet installers worldwide and the Centipede provides the ideal base for it.
The optional MDF or custom dog-hole tops transform the Centipede from a simple sawhorse into a legitimate workbench. The dog-hole top accepts standard bench dogs and holdfasts, giving you workholding capabilities that rival permanent benches. When paired with a portable tail vise or a clamp-on face vise, the Centipede becomes a surprisingly capable platform for hand-tool work at job sites. The 30-inch model provides a 4-foot by 8-foot working surface when fully expanded, which is enough to support full sheets of plywood or a complete kitchen cabinet assembly.
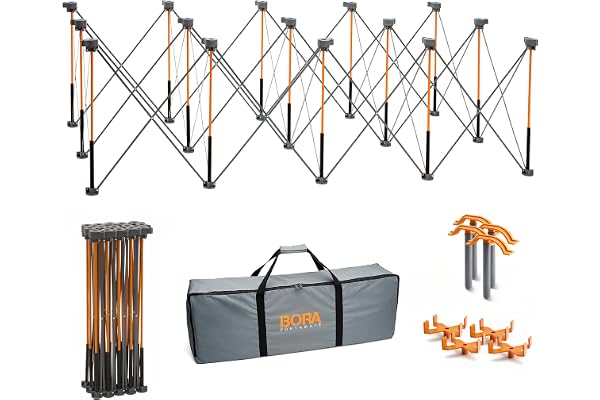
BORA Centipede 30in Folding Table
The ultimate solution for breaking down sheet goods and massive project assemblies on the go.
Check Price on Amazon5. Keter Folding Workbench Sawhorse
The Keter Folding Workbench is a legend in the portable bench category. Its defining feature is a rapid-deployment mechanism—you simply squeeze the handles, and the legs deploy automatically in a single motion. It includes two custom one-handed clamps that integrate directly into the bench rails. For carpenters, painters, and DIYers who need a bench set up in under five seconds, nothing beats the convenience of the Keter.
What makes the Keter particularly interesting from an engineering standpoint is the resin composite construction. Rather than using metal (which would add significant weight) or wood (which would require maintenance and be vulnerable to moisture), Keter engineered a proprietary polypropylene compound that provides excellent rigidity at a fraction of the weight of comparable materials. The bench surface features a textured pattern that prevents workpieces from sliding during operations—a small but important detail that demonstrates Keter’s understanding of real-world usage scenarios.
The integrated clamping system deserves particular attention. The two included clamps are not generic bar clamps that happen to fit the bench; they are purpose-designed to slide into channels molded directly into the bench surface. This means they are always oriented correctly, cannot twist or misalign under load, and can be positioned anywhere along the bench length. The one-handed squeeze mechanism allows you to clamp a workpiece with one hand while holding it in position with the other—essential for solo woodworkers who don’t have an assistant to help hold material.
Storage is where the Keter truly excels. When folded, the bench collapses to approximately 4.5 inches thick and can be hung on a wall hook, slid under a bed, or stacked flat on a shelf. For apartment woodworkers, van-based contractors, or anyone with severe space limitations, this compact footprint is transformative. You can literally store your workbench in the gap between your refrigerator and the wall.
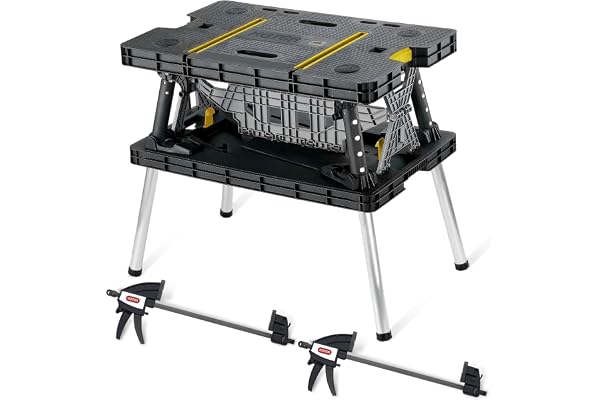
Keter Folding Workbench
Instant setup, extreme portability, and brilliant integrated clamping.
Check Price on Amazon6. ClamPony Portable Workbench
A hidden gem in the mobile workstation arena, the ClamPony focuses on robust workholding in a small footprint. Unlike larger tables that try to do everything, this unit excels at gripping materials securely for cutting, sanding, or routing. Its robust folding mechanism ensures it doesn’t wobble during use, making it an excellent primary bench for apartment-dwelling woodworkers.
The ClamPony’s approach to workholding is refreshingly focused. Rather than offering a dozen mediocre features, it concentrates on doing one thing exceptionally well: clamping. The primary clamping mechanism uses a twin-screw design that provides tremendous holding force with minimal effort. The jaws are faced with non-marring rubber pads that grip workpieces securely without leaving impressions on delicate wood species like pine, cedar, or cherry. The jaw opening accommodates materials up to approximately 24 inches wide, which covers the vast majority of woodworking stock.
The folding legs use a locking hinge mechanism with positive engagement. When you deploy the legs and press them into the locked position, you feel a distinct “click” that confirms full engagement. This is critically important for safety—a partially locked leg on a portable bench is an accident waiting to happen. The ClamPony’s positive locking system gives you tactile confirmation that the bench is fully deployed and ready for use.
At approximately 35 inches in working height, the ClamPony is optimized for standing work. The height places the work surface at a comfortable level for most adults between 5’4″ and 6’2″ without requiring excessive bending or reaching. For woodworkers who perform repetitive operations like cutting tenons or sanding components, this ergonomic optimization reduces fatigue significantly over long work sessions.
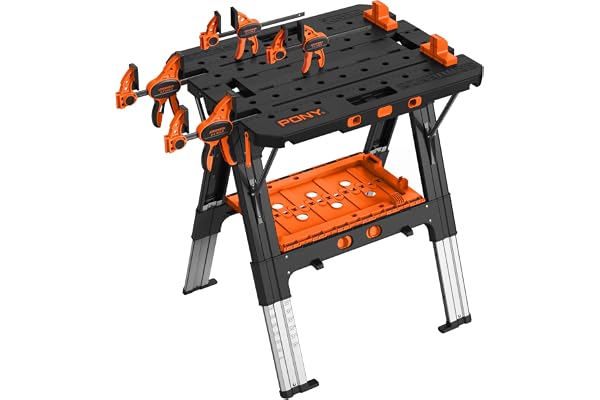
ClamPony Portable Workbench
A compact, vise-focused workstation that punches well above its weight class.
Check Price on Amazon7. Betterhood Adjustable Workbench
Betterhood brings a touch of modern aesthetics combined with high-functionality. This bench utilizes a thick bamboo or hardwood top (depending on the specific finish chosen) set atop heavily braced steel legs. It is perfectly suited for use as a primary outfeed table for a table saw, thanks to the wide range of height adjustability. It features a built-in power strip in some configurations, keeping your routers and sanders plugged in without tripping over extension cords.
Bamboo as a workbench surface material is a relatively recent innovation that deserves serious consideration. Bamboo has a Janka hardness rating that typically exceeds 1,300 lbf, placing it in the same category as white oak and hard maple. However, bamboo grows to harvestable maturity in approximately 5 years (compared to 40-80 years for hardwood trees), making it a dramatically more sustainable material. For the environmentally conscious woodworker, a bamboo-topped bench represents the intersection of performance and responsibility.
The integrated power strip feature, available on select Betterhood configurations, is more than a convenience—it’s a safety feature. Extension cords running across a shop floor are one of the most common trip hazards in woodworking. By mounting a multi-outlet power strip directly on the bench, Betterhood eliminates this hazard while keeping your power tools’ cords organized and within reach. The strip typically includes USB charging ports for phones and tablets, which are increasingly used as reference devices for plans, instructional videos, and digital calipers.
The height adjustment system on the Betterhood uses a hand-crank mechanism rather than the electric motors found on some competing products. While this might seem like a step backward, it actually provides several advantages: the hand-crank is completely silent (important if you share your space with others), it never needs to be charged or plugged in, and the mechanical simplicity means there are fewer components that can fail over the life of the bench. A well-maintained hand-crank system will outlast multiple generations of electric actuators.
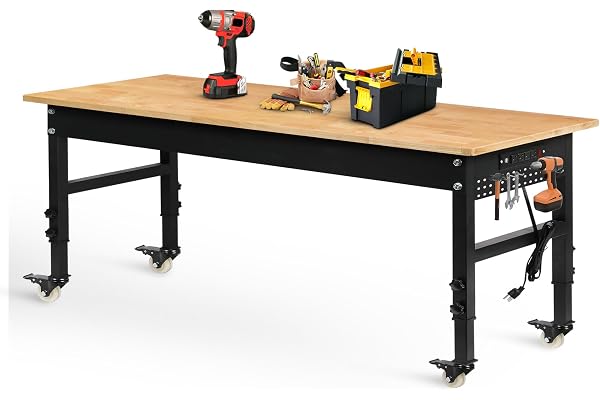
Betterhood Adjustable Workstation
Sleek design meets incredible strength. Ideal as a standalone bench or table saw outfeed.
Check Price on Amazon8. SPECRAFT Adjustable Workbench
SPECRAFT caters to the heavy-duty workshop. The massive weight capacity is supported by oversized steel tubing and reinforced corner gussets. If you plan on mounting a massive 6-inch mechanic’s vise or a traditional cast-iron woodworking vise to the corner, this bench won’t flex or bow under the torsion. It’s an uncompromising beast designed for serious fabrication.
The corner gusset reinforcement on the SPECRAFT deserves technical explanation. When you mount a vise on a bench corner and crank it tight around a workpiece, the clamping force creates a torsional (twisting) load on the bench frame. On a standard frame with simple bolted joints, this torsion concentrates stress at the top corners where the legs meet the horizontal rails. Over time, this concentrated stress causes the joints to loosen, the frame to rack, and the bench to develop wobble. SPECRAFT’s triangular gusset plates at each corner dramatically increase the moment of inertia at these critical joints, distributing the torsional load across a much larger area and preventing the progressive loosening that plagues lesser designs.
The oversized steel tubing used in the SPECRAFT frame is typically 2 inches by 3 inches or larger, with a wall thickness of at least 1/8 inch. This creates a frame that is not only strong but also extremely rigid—meaning it resists deflection (bending) under load rather than simply not breaking. The distinction is important: a bench that supports 2,000 pounds without breaking but sags noticeably in the middle under that load is not performing its function. The SPECRAFT maintains its geometry under heavy loads, keeping your work surface flat and true regardless of what you place on it.
For woodworkers who also engage in metalworking, welding, or automotive work, the SPECRAFT is one of the few benches in its price range that can truly serve double duty. The heavy steel frame can withstand the sparks and slag from grinding operations that would destroy a wooden bench, while the adjustable height allows you to set the surface at the optimal level for both woodworking and metalworking tasks, which typically require different working heights.
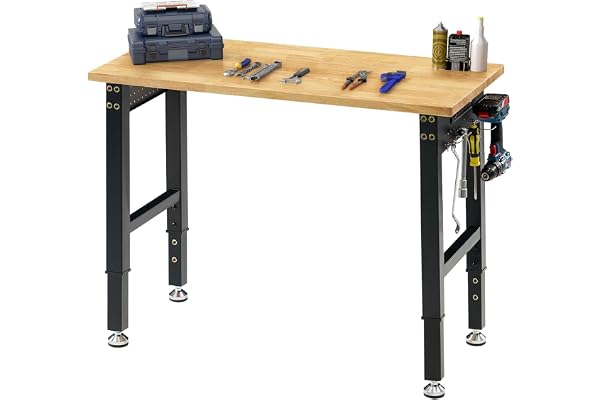
SPECRAFT Heavy-Duty Workbench
Unmatched rigidity for mounting heavy vises and undertaking rigorous fabrication tasks.
Check Price on Amazon9. CAMMOO Rubberwood Workbench
Rubberwood is rapidly becoming a favorite material for workbench tops. It is incredibly dense, eco-friendly (harvested from rubber plantations after the trees stop producing latex), and resists denting beautifully. The CAMMOO Rubberwood edition takes advantage of these properties, offering a surface that won’t easily mar your delicate workpieces while remaining tough enough to withstand mallet blows during chisel work.
Rubberwood (Hevea brasiliensis) has a fascinating lifecycle that makes it uniquely sustainable. Rubber trees are planted primarily for latex production, which typically continues for about 25-30 years. After this period, latex production declines and the trees are harvested for timber. Rather than being burned or discarded, the wood is kiln-dried, treated to prevent insect attack, and converted into furniture, flooring, and now workbench tops. This lifecycle means that rubberwood is essentially a byproduct of an existing agricultural industry—no additional trees need to be felled to produce it.
From a woodworking performance perspective, rubberwood offers an excellent combination of properties. Its density (approximately 560-640 kg/m³) provides sufficient mass to dampen vibrations during hand-planing, while its relatively uniform grain structure means it works predictably with both hand and power tools. The light color of rubberwood provides excellent contrast when marking layout lines with a sharp pencil or marking gauge, which is a subtle but significant practical advantage over darker woods like walnut or cherry where fine lines can be difficult to see.
The CAMMOO Rubberwood bench top is typically constructed from edge-glued panels, which are individual boards that have been precision-milled, glued under pressure, and sanded to a smooth, flat surface. This construction method produces a wider top than any single board could provide, while the alternating grain direction of adjacent boards helps counteract the natural tendency of wood to cup or bow. The result is a surface that remains flatter over time than a single-slab top of equivalent width.
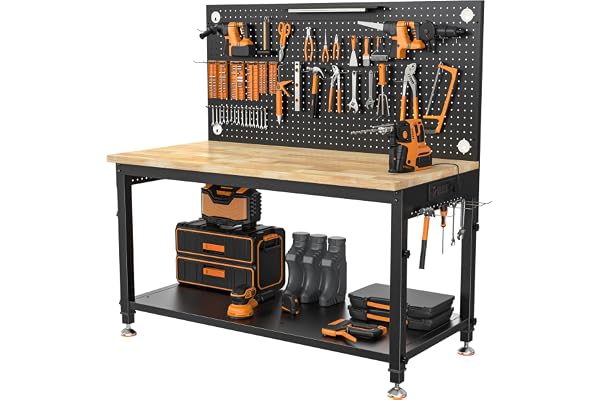
CAMMOO Rubberwood Top Workbench
Eco-friendly, exceptionally dense, and beautifully finished. A true woodworker’s delight.
Check Price on Amazon10. VEVOR Adjustable Workbench
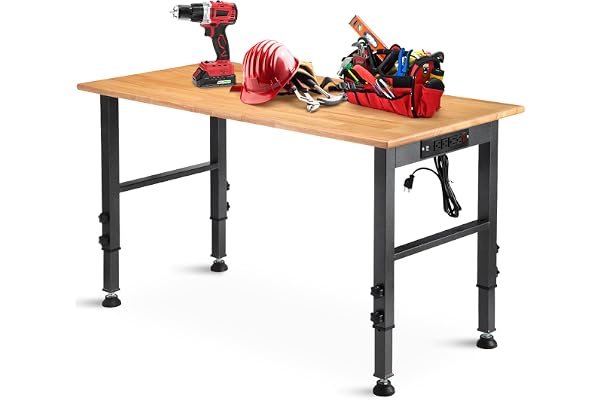
VEVOR is known for delivering incredible value without sacrificing core functionality. Their adjustable workbench is a staple in garages across the country. It provides a massive surface area, reliable manual height adjustment, and a sealed wooden top that wipes clean of glue drips and finishing spills. For the budget-conscious woodworker who refuses to compromise on size and stability, this is the definitive choice.
The VEVOR workbench occupies a unique niche in the market: it delivers approximately 80% of the performance of benches costing two to three times as much. The secret to this value proposition lies in VEVOR’s manufacturing scale and direct-to-consumer distribution model. By producing in high volumes and selling primarily through online marketplaces rather than through traditional retail channels (which add significant markup), VEVOR passes the savings directly to the consumer without reducing material quality below functional thresholds.
The sealed wooden top is worth discussing in detail. The factory-applied sealant penetrates the wood fibers and creates a moisture-resistant barrier that prevents warping from spilled liquids—a common occurrence in a workshop environment. This is particularly valuable for woodworkers who use water-based finishes, which can cause significant damage to an unsealed bench surface by raising the grain and creating rough patches that can scratch future workpieces. With a sealed surface, cleanup is as simple as wiping with a damp cloth.
The manual height adjustment on the VEVOR uses a pin-and-hole system rather than a continuous threaded mechanism. While this limits you to discrete height increments (typically spaced about 2 inches apart), it provides extremely positive locking—once the pin is engaged, there is zero chance of the height slipping under load. For applications where the bench must support heavy equipment like drill presses, bench grinders, or large router tables, this positive locking provides peace of mind that a friction-based system cannot match.
VEVOR Adjustable Workbench
Outstanding value, vast surface area, and rock-solid performance for the everyday maker.
Check Price on AmazonSide-by-Side Comparison: All 10 Workbenches at a Glance
Choosing between ten excellent workbenches can feel overwhelming. To simplify your decision, we have compiled every critical specification into a single comprehensive comparison table. Pay particular attention to the columns that matter most for your specific use case. If you do aggressive hand-planing, weight capacity and bench mass are your primary concerns. If you travel to job sites, folded dimensions and deployment speed matter most. If you are setting up a permanent shop, surface flatness and vise compatibility take priority.
| Workbench | Weight | Top Material | Adjustable Height | Load Capacity | Portability | Best For |
|---|---|---|---|---|---|---|
| WORX Pegasus | 30 lbs | ABS Plastic | No | 300 lbs (table) / 1000 lbs (sawhorse) | Excellent — folds flat | Job-site carpentry, tight spaces |
| OLBRUS Adjustable | ~90 lbs | Solid Hardwood | Yes — threaded rod | 2000+ lbs | Fair — heavy, stationary intended | Hand-tool woodworking, heavy assembly |
| CAMMOO Commercial | ~110 lbs | UV-cured composite | Yes — multiple stops | 3000+ lbs | Poor — industrial weight | Heavy-duty fabrication, multi-purpose shop |
| BORA Centipede | 30 lbs | Surface top sold separately | No | 1500 lbs (distributed) | Excellent — folds to bag | Sheet goods breakdown, temporary stations |
| Keter Folding | 28 lbs | Resin composite | No | 1000 lbs | Excellent — instant deploy | Painters, trim carpenters, DIYers |
| ClamPony Portable | 35 lbs | Composite/MDF | No | 600 lbs | Very Good — folds compactly | Apartment woodworkers, clamping-focused work |
| Betterhood Adjustable | ~85 lbs | Bamboo / Hardwood | Yes — hand crank | 1500 lbs | Fair — moderate weight | Outfeed table, mixed power/hand-tool shops |
| SPECRAFT Heavy Duty | ~120 lbs | Hardwood / MDF | Yes — pin system | 4000+ lbs | Poor — maximum mass | Vise mounting, metalwork + woodworking hybrid |
| CAMMOO Rubberwood | ~80 lbs | Solid Rubberwood | Varies by model | 1500 lbs | Fair — solid wood weight | Eco-conscious woodworkers, chisel/mallet work |
| VEVOR Adjustable | ~70 lbs | Sealed wood panel | Yes — pin and hole | 1500 lbs | Fair — moderate weight | Budget-conscious makers, general garage use |
When reading this comparison table, resist the temptation to chase the highest numbers. A bench with a 4,000-pound capacity is overkill for a hobbyist who primarily builds picture frames and small boxes. Conversely, a lightweight folding bench will be dangerously inadequate for someone who routinely uses a heavy jointer plane on thick hardwood boards. The key is matching the bench’s capabilities to your actual workload, not your aspirational workload.
Notice also the strong correlation between portability and load capacity. As a general rule, benches that fold flat or collapse for transport sacrifice load capacity and stability in exchange for that convenience. This is not a flaw—it is physics. Mass provides stability, and folding mechanisms introduce joints that can flex under load. Understanding this trade-off is essential to making a satisfying purchase decision.
Deep Dive: Selecting the Perfect Bench Material
The soul of any bench is its top. The material dictates how flat the surface stays across changing seasons and how it handles impact. Many traditionalists argue that solid hardwood is the only way to go. If you are curious about sourcing lumber for a custom build, check out our guide on the best wood for woodworking bench construction, which covers species like Maple, Ash, and Beech.
However, modern engineered materials have distinct advantages. Heavy MDF layered over plywood creates an incredibly heavy, dead-flat surface that will never warp. For those creating modular tops or sacrificial layers, understanding the best plywood for workbench top builds is essential to save money while maintaining structural integrity.
Hard Maple (Acer saccharum)
Hard maple is widely regarded as the gold standard for workbench construction in North America. With a Janka hardness of approximately 1,450 lbf, it strikes an ideal balance between toughness and workability. It is hard enough to resist denting from routine mallet blows and chisel work, yet it will not significantly dull your tool edges the way an extremely dense tropical hardwood might. Hard maple has a tight, closed grain that resists absorbing spilled finishes and glue, making cleanup relatively straightforward. Its natural color—a warm, creamy white—provides excellent visibility for layout lines and pencil marks. The primary disadvantage is cost: quality hard maple lumber has become increasingly expensive as demand from the flooring and cabinetry industries has increased. Expect to pay between $5 and $9 per board foot for 8/4 stock suitable for lamination into a bench top.
European Beech (Fagus sylvatica)
European beech is the traditional workbench wood of choice across Europe, and for good reason. It has a Janka hardness of approximately 1,300 lbf, excellent shock resistance, and a fine, even texture that takes finishes beautifully. Beech is a diffuse-porous hardwood, meaning its growth rings are relatively uniform in density. This results in a surface that wears evenly over time, without the uneven wear patterns that can develop on ring-porous woods like oak where the softer earlywood erodes faster than the dense latewood. The Roubo workbench—arguably the most famous workbench design in history—was traditionally built from beech, and many European cabinetmaking schools still require students to build their first bench from this species.
Northern Ash (Fraxinus nigra / Fraxinus americana)
Ash offers exceptional shock resistance—its ability to absorb repeated impacts without splitting or cracking is legendary (it is the traditional wood for tool handles and baseball bats). At a Janka hardness of approximately 1,320 lbf for white ash, it is comparable to beech in hardness but offers superior toughness. Ash has a prominent, open grain pattern that gives the bench top a distinctive visual character. However, that open grain does mean that spilled liquids penetrate more readily, and the surface may require more frequent flattening than a tighter-grained species. Unfortunately, the emerald ash borer epidemic has devastated ash populations across North America, which has affected both availability and pricing. Despite this, ash remains one of the most cost-effective hardwood options for bench construction.
Baltic Birch Plywood
For woodworkers who prefer engineered materials, Baltic birch plywood offers exceptional stability. Unlike standard construction plywood, Baltic birch uses uniform birch veneers throughout every layer (no softwood core), typically in 1.5mm thicknesses. This multi-layer construction creates a panel that is remarkably resistant to warping and has excellent screw-holding ability. Laminating multiple layers of 3/4-inch Baltic birch to create a 3-inch thick bench top produces an extremely heavy, perfectly flat surface at a fraction of the cost of solid hardwood. The edges can be banded with solid hardwood for durability and aesthetics. The primary disadvantage is that plywood edges are vulnerable to impact damage—the exposed veneer layers can delaminate if struck repeatedly with a mallet.
Medium-Density Fiberboard (MDF)
MDF is the most affordable option for a dead-flat bench surface. It is manufactured from compressed wood fibers bonded with resin, resulting in a panel that is perfectly homogeneous—there are no grain patterns, knots, or density variations. This homogeneity means that an MDF top will always present the same resistance to your tools, regardless of direction. However, MDF is extremely vulnerable to moisture damage. Spilled water or high humidity can cause the fibers to swell permanently, creating raised bumps on the surface that must be sanded flat. For this reason, MDF bench tops should always be sealed on all surfaces (top, bottom, and edges) with a penetrating sealant or polyurethane. A popular approach is to laminate two sheets of 3/4-inch MDF together with wood glue, creating a 1.5-inch thick top that is then sealed and edged with solid hardwood strips.
Rubberwood
As discussed in our review of the CAMMOO Rubberwood bench, this material offers an excellent combination of sustainability, hardness, and workability. Its Janka hardness of approximately 1,000-1,200 lbf places it slightly below hard maple but still well within the acceptable range for a workbench surface. Rubberwood’s relatively low cost (compared to domestic hardwoods of similar hardness) makes it an attractive option for budget-conscious builders. Its light color and consistent grain pattern provide a clean, professional appearance.
Phenolic Resin Board
At the extreme end of the engineered material spectrum, phenolic resin board (often sold under brand names like Trespa or Richlite) offers a surface that is essentially impervious to moisture, chemicals, and impact damage. This material is made from layers of cellulose fiber impregnated with thermosetting resin and compressed under extreme heat and pressure. The result is a surface that is harder than most natural woods, completely waterproof, and dimensionally stable under all conditions. Phenolic tops are common in commercial and industrial workbenches but are increasingly finding their way into high-end home workshops. The primary disadvantage is cost—phenolic tops can cost several hundred dollars for a single bench-sized panel.
Choosing the Right Material for Your Work Style
If you primarily use hand tools (hand planes, chisels, mallets), a solid hardwood top in maple, beech, or ash is the best choice. The mass and surface hardness of solid wood provide the ideal platform for this style of work. If you primarily use power tools (table saw, miter saw, router), the surface material matters less because you are not applying lateral forces to the bench—focus instead on flatness and available mounting area. In that case, laminated plywood or MDF provides excellent performance at lower cost. If your bench will be exposed to moisture, spills, or chemical agents, consider a UV-cured, phenolic, or heavily sealed surface. And if you value sustainability above all else, rubberwood or bamboo are outstanding eco-friendly options that do not compromise on performance.
Deep Dive: Portability vs. Mass
There is a fundamental law in woodworking: mass absorbs vibration. A 400-pound Roubo bench will simply shrug off the impact of heavy mortising. However, not everyone has a dedicated 3-car garage. If you are an apartment dweller, a contractor, or a hobbyist who works in the driveway, you must compromise mass for mobility.
This is where finding the best portable woodworking workbench becomes crucial. Models like the WORX Pegasus or Keter utilize smart geometric engineering to provide rigidity without the staggering weight of cast iron or thick timber. They allow you to bring the workshop to the work.
The Physics of Bench Mass
Understanding why mass matters requires a basic appreciation for Newton’s laws of motion. When you strike a chisel with a mallet, you are applying a force to the workpiece that is resting on your bench. If the bench is light, the reaction force will push the bench away from you (or cause it to wobble). If the bench is heavy, the reaction force is absorbed by the bench’s inertia, and the energy is directed into the chisel cut where you want it. This is exactly the same principle that makes a heavy anvil superior to a light one in blacksmithing.
The threshold at which a bench becomes “heavy enough” depends on the forces involved. For light-duty operations like sanding, assembly, and routing, a bench in the 50-80 pound range is generally sufficient. For moderate hand-tool work like chisel mortising and smoothing plane operations, you want at least 150-200 pounds. For aggressive heavy-planing operations with a #7 or #8 jointer plane, 300-400 pounds or more is ideal. These numbers assume the bench is sitting on a bare concrete or wood floor—placing a heavy bench on a rubber mat or carpet will reduce its effective mass because the compliant surface absorbs some of the reaction force.
Strategies for Adding Mass to a Lightweight Bench
If you already own a lighter bench and don’t want to replace it, there are several strategies for adding mass. The most common approach is to add a lower shelf between the legs and load it with sandbags, concrete blocks, or heavy tool boxes. A 50-pound bag of play sand costs only a few dollars and can dramatically improve stability. Another approach is to bolt the bench legs to the floor using concrete anchors (for garage installations) or to attach the bench to a wall stud using angle brackets. Wall attachment is particularly effective because it not only adds mass (by connecting the bench to the building structure) but also prevents the bench from tipping forward during aggressive planing operations.
Some woodworkers build a platform base for their bench—essentially a heavy wooden or concrete pedestal that raises the bench slightly and adds significant mass at the lowest point (which is where mass is most effective for stability). A 4-inch thick concrete slab measuring 2 feet by 5 feet weighs approximately 600 pounds and provides an absolutely immovable foundation for any bench placed on top of it. While this is an extreme solution, it is worth considering for dedicated hand-tool shops where stability is the highest priority.
The Portability Spectrum
It is helpful to think of workbenches on a spectrum from maximum portability to maximum mass, with various trade-offs at each point. At the extreme portable end, you have benches like the WORX Pegasus and Keter, which can be carried in one hand and deployed in seconds. These are ideal for job-site work, outdoor projects, and situations where you need to bring the bench to the work rather than bringing the work to the bench. In the middle of the spectrum, you have moderate-weight benches like the OLBRUS and VEVOR, which are heavy enough for most hand-tool operations but can still be moved by two people if necessary. At the extreme mass end, you have traditional Roubo-style benches built from 4-inch thick slabs of hard maple, which can weigh 500+ pounds and are effectively permanent installations.
The right point on this spectrum depends entirely on your working style and physical space. A professional cabinetmaker with a dedicated shop will almost certainly benefit from the heaviest bench they can afford and accommodate. A hobbyist who shares their garage with two cars will need something lighter that can be moved or folded out of the way. A traveling contractor needs maximum portability. And many woodworkers ultimately end up with two benches: a heavy, permanent bench for serious hand-tool work and a lighter, portable bench for quick tasks and job-site work. This “two-bench strategy” provides the best of both worlds and is the solution we most frequently recommend.
Deep Dive: Workholding and Vises
A flat table is just a table. A workbench is defined by its ability to hold wood. Traditional benches feature a face vise for holding long boards on edge, and a tail vise (often paired with bench dogs) for holding boards flat on the top for planing and sanding.
When selecting a pre-built bench, look for skirts or overhangs that allow you to retro-fit a cast-iron vise. Alternatively, modern tables often use T-tracks and 3/4-inch dog holes to utilize specialized clamp systems like hold-fasts and inline clamps, providing a 360-degree gripping solution.
Face Vises
The face vise is the most commonly used workholding device on a traditional workbench. Mounted on the front edge of the bench (hence “face”), it consists of a fixed jaw attached to the bench and a movable jaw that advances or retracts via a screw mechanism. Face vises are available in two main configurations: quick-release and standard. Quick-release vises have a mechanism that allows you to rapidly open the jaws by disengaging the screw, slide the jaws to approximate position, and then re-engage the screw for final tightening. Standard vises require you to turn the handle for every millimeter of jaw travel, which is slower but provides a more progressive and predictable feel.
The most popular face vises in the woodworking community are the Eclipse-style quick-release vise (recognizable by its characteristic blue or black cast-iron body), the Yost heavy-duty vise, and the classic Record vise (no longer manufactured but widely available on the used market). When installing a face vise, the critical dimension is the jaw width—typically 7 inches, 9 inches, or 10 inches. A wider jaw can hold wider boards without requiring additional support, but it also requires more torque to achieve the same clamping pressure. For most woodworking applications, a 9-inch jaw width provides the best balance of versatility and usability.
Tail Vises and End Vises
The tail vise is mounted at the end of the bench and works in conjunction with bench dogs to clamp boards flat on the bench surface. When you insert bench dogs (small cylindrical pegs) into holes in the bench top, the tail vise pulls the movable dog toward the fixed dog, sandwiching the workpiece between them. This system allows you to secure boards of virtually any length for planing, routing, or sanding without any clamps protruding above the surface to interfere with your tools.
Traditional tail vises are large, complex mechanisms that require significant bench real estate and add considerable weight and cost. For this reason, many modern benches use alternative solutions. The wagon vise is a compact alternative that sits flush with the bench surface and requires much less space. The inline vise (sometimes called a leg vise when mounted on the front leg) provides similar functionality in a different geometric configuration. And for portable or lighter benches, simple T-track systems with sliding clamps can provide comparable workholding capability without the bulk of a traditional tail vise.
Holdfasts
Holdfasts are arguably the oldest and most elegant workholding devices in woodworking. A holdfast is simply a curved metal shaft that drops into a dog hole (typically 3/4 inch in diameter). When you strike the top of the shaft with a mallet, the curved body wedges against the inside of the hole and clamps the workpiece against the bench surface with tremendous force. To release, you strike the back of the shaft and it pops free. Holdfasts can secure a workpiece anywhere on the bench surface in seconds, without any threading or handle-turning.
The Gramercy Tools holdfast is widely considered the best modern holdfast available. Its design is based on historical French patterns and it grips with extraordinary force in bench tops that are at least 1.5 inches thick (thicker is better—2 to 3 inches of dense wood provides the most reliable grip). For bench tops thinner than 1.5 inches, or made of soft or compressible material, holdfasts may not grip reliably. In these cases, a surface-mounted clamp or T-track system is a better workholding solution.
Bench Dogs and Dog Holes
Bench dogs are cylindrical or rectangular pegs that protrude slightly above the bench surface through holes drilled in the top. When paired with a vise or a second dog on the opposite end of the bench, they create a simple and effective clamping system for holding boards flat. The standard dog hole diameter in North America is 3/4 inch, while the European standard (especially in Scandinavian countries) is 20mm. Both sizes work equally well, but you should choose one standard and stick with it to ensure compatibility across your accessories.
Dog holes are typically drilled in a single row along the length of the bench, spaced 3 to 4 inches apart. Some benches also include a second row offset toward the rear of the bench, providing additional workholding positions. When drilling dog holes, accuracy is critical—each hole must be perfectly perpendicular to the bench surface to ensure that bench dogs stand straight and true. A drill press is ideal for this operation, but careful use of a hand-held drill with a guide block can also produce excellent results.
T-Track Systems
T-track (also called T-slot track) is an aluminum extrusion with a T-shaped cross-section that can be mounted flush with or slightly below the bench surface. Specialized T-bolts slide within the track and can be locked at any position, providing infinitely adjustable clamping points. T-track systems are extremely popular on modern workbenches because they offer many of the workholding benefits of traditional dog holes and vises at a fraction of the cost and complexity.
A complete T-track workholding system might include hold-down clamps (which press workpieces flat against the bench surface), stop blocks (which prevent workpieces from sliding during planing or routing), fence assemblies (which provide a straight reference edge for guiding tools), and toggle clamps (which provide rapid, one-handed clamping for repetitive operations). The versatility of T-track makes it particularly well-suited for power-tool-centric workshops where the bench serves primarily as an assembly and support surface rather than a traditional hand-tool workholding platform.
Deep Dive: Ergonomics and Height Adjustment
Working at a bench that is too low will destroy your lower back; a bench that is too high restricts your leverage. The general rule of thumb is that the bench top should meet your pinky knuckle when you stand relaxed with your arms at your sides.
Adjustable benches have revolutionized the shop. You can raise them to waist height for comfortable detail carving or routing, and drop them down low when you need to lean your body weight into a #7 Jointer Plane.
Understanding Ergonomic Bench Height
The “pinky knuckle” rule is a good starting point, but optimal bench height depends on the specific task you are performing. Here is a more detailed breakdown: for heavy hand-planing operations, the bench should be low—typically 28 to 32 inches for an average-height person. At this height, you can use your body weight and leg muscles to drive the plane, rather than relying solely on your arms and shoulders. This dramatically reduces fatigue and provides more consistent planing force. For detail work like carving, routing, or sanding, the bench should be higher—34 to 38 inches—so you can see and reach the work surface without hunching over. For assembly operations where you are standing upright and working on the top surface, 36 to 40 inches is generally comfortable.
These varying requirements are precisely why adjustable-height benches have become so popular. Rather than compromising on a single height that is “okay” for everything but “perfect” for nothing, an adjustable bench lets you optimize the height for each specific task. This task-specific optimization might sound like over-engineering, but the cumulative effect over years of woodworking is substantial: fewer back problems, less shoulder and neck fatigue, and improved accuracy because you are working at the height where your body has the most control.
The Science of Standing Work
Research in ergonomics has shown that prolonged static standing (standing in one position for extended periods) is actually more fatiguing than moderate walking. The solution is not a chair but an anti-fatigue mat. Placing a high-quality anti-fatigue mat (at least 3/4 inch thick, made from closed-cell foam or gel) in front of your workbench reduces the compressive forces on your spine by up to 35% compared to standing on bare concrete. This is one of the highest-impact, lowest-cost improvements you can make to your workshop comfort. Combine an anti-fatigue mat with properly optimized bench height, and you can comfortably work for hours without the debilitating back pain that plagues so many woodworkers.
Foot Placement and Body Mechanics
How you stand at your bench is almost as important as the bench height itself. Your feet should be shoulder-width apart with one foot slightly forward of the other (a staggered stance). This provides a stable base and allows you to shift your weight forward and backward as needed during planing or sawing. Avoid standing with your feet together or in a rigid, symmetrical position—this limits your ability to generate power and increases the risk of losing your balance if the tool catches or binds.
For extended hand-planing sessions, experienced woodworkers often adopt a wide, athletic stance with their dominant foot stepped back and their torso slightly rotated toward the workpiece. This stance engages the large muscles of the legs and core rather than relying on the smaller muscles of the arms and shoulders. The result is more consistent planing pressure, less fatigue, and reduced risk of repetitive strain injuries in the upper body.
Seated Work Options
While most bench work is performed standing, certain operations benefit from a seated position. Detailed carving, inlay work, scroll saw operation, and fretwork are all easier to control when performed from a stable seated position. For these tasks, a bench height of 26 to 30 inches is ideal (assuming a standard 18-inch seat height stool). Some adjustable benches can lower to this range; others may require a taller stool to compensate. The key ergonomic requirement is that your forearms should be roughly parallel to the bench surface when your elbows are bent at approximately 90 degrees. This position minimizes muscle strain in the shoulders and allows the fine motor control of your fingers to dominate the operation.
Deep Dive: DIY vs. Pre-Built Benches
Purchasing a pre-built bench gets you working immediately. However, many woodworkers view building their own bench as a rite of passage—a project that teaches crucial joinery skills like massive mortise and tenons. If you are inclined to build your own, starting with a vetted design is vital. We recommend downloading a comprehensive woodworking workbench plans pdf to ensure your dimensions and material calculations are flawless before making the first cut.
The Case for Building Your Own
Building your own workbench is one of the most rewarding projects a woodworker can undertake. The process teaches fundamental skills—dimensioning rough lumber, cutting mortise and tenon joints, creating flat reference surfaces, and working with adhesives—that transfer directly to every other project you will ever build. There is also a deep satisfaction in working on a bench that you built with your own hands. Every time you clamp a workpiece in the vise you installed or strike a holdfast into a dog hole you drilled, you experience a connection to your craft that a purchased bench cannot replicate.
The cost advantage of a DIY bench can be significant, but it is not guaranteed. The raw lumber for a traditional hardwood bench (hard maple or beech) can cost between $300 and $800, depending on the species, quality, and your local lumber market. Add the cost of a good face vise ($80-$250), tail vise or wagon vise ($100-$300), bench dogs ($20-$50), hardware ($30-$80), and finishing supplies ($30-$50), and the total material cost for a DIY bench typically ranges from $500 to $1,500. This compares favorably to high-end commercial benches (which can cost $2,000-$5,000) but may be comparable to or even exceed the cost of mid-range pre-built benches.
The Case for Buying Pre-Built
The primary advantage of a pre-built bench is time. A workbench is a significant project—easily 40 to 100 hours of work for a first-time builder. That is time you could be spending on other projects that generate income, develop new skills, or simply bring you more immediate satisfaction. For a professional woodworker, the opportunity cost of spending 80 hours building a bench instead of working on client projects can easily exceed the premium paid for a pre-built bench.
Pre-built benches also offer consistency and predictability. The manufacturer has already solved all the engineering problems—selecting appropriate materials, ensuring proper joinery, verifying flatness, and testing load capacity. When you build your own, you are responsible for making all of these decisions correctly, and mistakes can be expensive. A poorly designed DIY bench that develops a significant warp or racking problem within the first year represents wasted time, money, and materials.
The Hybrid Approach
Many experienced woodworkers recommend a hybrid approach: buy an affordable pre-built bench (like the VEVOR or OLBRUS) to get working immediately, and then plan a DIY bench build over the following months or years. This approach lets you develop your skills and save lumber while still having a functional work surface to use in the meantime. When your DIY bench is finally complete, the pre-built bench can be repurposed as an outfeed table, assembly table, or secondary work surface—roles that do not require the precision and workholding capabilities of a primary bench.
Deep Dive: Essential Safety & Gear
A good bench prevents accidents by securing the work, but personal protective equipment is just as critical. Woodworking is inherently dusty and sharp. Beyond safety glasses and hearing protection, a quality shop apron protects your clothing from glue, holds your essential layout tools close to your chest, and prevents loose clothing from getting caught in spinning machinery. Take a look at our roundup of the best woodworking apron options to complete your shop outfitting.
Eye Protection
Eye injuries are the most common shop injury that results in permanent damage. Wood chips, sawdust, metal fragments from chisel tips, and chemical splashes from finishes all pose risks. At minimum, wear ANSI Z87.1-rated safety glasses whenever you are in the shop—preferably wrap-around styles that provide side protection. For operations that generate fine particulate (sanding, routing, turning), consider a full-face shield over your safety glasses. This dual-layer approach provides both impact protection and dust protection.
Respiratory Protection
Fine wood dust (particles smaller than 10 microns) is a known carcinogen and can cause permanent respiratory damage with prolonged exposure. A properly fitted N95 respirator is the minimum protection for dusty operations. For extended sanding or routing sessions, a powered air-purifying respirator (PAPR) provides filtered air through a battery-powered fan, reducing breathing resistance and increasing comfort. The most important respiratory protection, however, is source control: a good dust collection system connected to each power tool captures the majority of dust at the point of generation before it enters the ambient air.
Hearing Protection
Most power tools in a woodworking shop produce noise levels between 90 and 110 decibels. Prolonged exposure to levels above 85 dB causes permanent hearing damage. Quality earmuffs rated at NRR 25-30 dB are the most reliable form of hearing protection, as they provide consistent attenuation regardless of fit (unlike earplugs, which must be inserted correctly to be effective). Some woodworkers prefer Bluetooth-enabled earmuffs that allow them to listen to music or podcasts while working, though this must be balanced against the safety need to hear warning sounds like unusual tool noises or the presence of other people in the shop.
Hand and Body Protection
A quality shop apron (as covered in our dedicated apron guide) protects your body from flying debris, chemical splashes, and the inevitable glue drips that accompany assembly work. Cut-resistant gloves are appropriate when handling rough lumber, sheet goods with sharp edges, or when using hand saws. However, never wear gloves while operating spinning machinery (table saws, drill presses, lathes)—the risk of the glove catching in the rotating mechanism and pulling your hand into the blade is far greater than the risk of a cut from the workpiece.
First Aid Preparedness
Every workshop should have a well-stocked first aid kit prominently located and accessible without moving through the shop. At minimum, the kit should include adhesive bandages, gauze pads, adhesive tape, antiseptic wipes, burn cream, eye wash solution, and a tourniquet. Splinters and minor cuts are the most common workshop injuries and should be treated immediately to prevent infection. More serious injuries (deep cuts, embedded objects, chemical exposure to the eyes) require immediate professional medical attention—know the location of the nearest urgent care facility and keep your phone charged and accessible in case you need to call emergency services.
The Complete Workbench Accessories Guide
A workbench without accessories is like a workshop without tools—functional in theory, but limited in practice. The right accessories transform a flat surface into a versatile workholding powerhouse that can secure virtually any workpiece in any orientation. In this section, we cover every major category of workbench accessory, from traditional holdfasts to modern T-track systems, helping you build out the accessory ecosystem that maximizes your bench’s potential.
Bench Dogs: The Foundation of Workholding
Bench dogs are cylindrical or rectangular pegs that fit into holes drilled in the bench surface. They protrude slightly above the surface—typically about 1/2 inch—and act as stops against which workpieces are clamped. When used in conjunction with a tail vise or a second bench dog on the opposite end, they create a simple and incredibly effective clamping system. The beauty of bench dogs is their simplicity: they require no threading, no handles, and no adjustment. You push them into the appropriate hole and they work.
Bench dogs come in several varieties. Round dogs (the most common in North America) are cylindrical rods that fit into 3/4-inch holes. They are available in brass, steel, nylon, and wood. Brass dogs are the traditional choice—they won’t rust, won’t damage tool edges if accidentally contacted, and develop a beautiful patina over time. Steel dogs are stronger and less expensive but can rust if exposed to moisture. Nylon dogs are ideal for delicate work where you want zero risk of marring the workpiece. Wooden dogs can be shop-made from dowels and are the most economical option.
Round dogs typically have a flat face on one side and a spring-loaded mechanism (or a simple friction fit) that holds them at the desired height. The flat face presents a vertical surface against which the workpiece rests. Some dogs have a slight outward lean (about 2 degrees) which causes them to grip the hole and stay in position even without a spring. Rectangular dogs (common in European benches) fit into rectangular mortises and are often paired with wagon vises for a very clean, flush-folding design.
Holdfasts: Ancient Wisdom, Modern Application
As mentioned earlier in our vise discussion, holdfasts are one of the oldest and most effective workholding devices. Their operation is beautifully simple: drop the shaft into a dog hole, place the curved pad on top of your workpiece, and strike the top of the shaft with a mallet. The impact causes the shaft to bind against the inside of the dog hole, locking the holdfast in place with hundreds of pounds of clamping force. To release, strike the back of the shaft or tap it upward from below the bench.
The effectiveness of a holdfast depends heavily on the bench top thickness and material. Holdfasts work best in tops that are at least 1.5 inches thick, with 2 to 3 inches being ideal. The wood must be dense enough to provide a firm grip—softwoods like pine or cedar may not grip reliably, while hardwoods like maple, beech, or ash provide excellent hold. MDF and particleboard tops are generally too soft and homogeneous for holdfasts to work reliably. Some woodworkers solve this by installing a hardwood reinforcement block beneath each dog hole, which provides the dense gripping surface the holdfast needs while keeping the overall bench top material economical.
The Gramercy Tools holdfast, manufactured by the Tools for Working Wood shop in Brooklyn, New York, is widely regarded as the finest holdfast available. Its design is based on 18th-century French patterns and it grips with remarkable force—easily sufficient to hold a workpiece immobile during aggressive chisel or plane work. At roughly $30 per pair, they are one of the most cost-effective workholding investments a woodworker can make.
Planing Stops and Shooting Boards
A planing stop is a simple device—typically a metal or wooden strip that protrudes above the bench surface at one end—that prevents a workpiece from sliding forward during hand-planing operations. Traditional planing stops are built into the bench as a permanently installed strip of hardwood that can be raised or lowered by tapping it from below. Modern alternatives include brass bench stops (a flat plate with teeth that grip the end grain of the workpiece) and retractable stops that sit flush with the surface when not in use.
A shooting board is a jig used in conjunction with a bench to true the ends of boards at precise 90-degree (or 45-degree for miters) angles. It consists of a flat base with a fence that the workpiece rests against, and a runway for the plane sole that positions the blade at exactly 90 degrees to the workpiece edge. Shooting boards are essential for precision joinery—they produce end-grain surfaces that are smoother and more accurate than any power miter saw can achieve. Building a shooting board is one of the first projects many hand-tool woodworkers undertake, as it immediately improves the quality of every joint that requires a square end.
Bench Hooks and Miter Hooks
A bench hook is a small, simple jig that hooks over the front edge of the bench and provides a sacrificial surface for cross-cutting operations using a hand saw. The workpiece rests against a stop strip on one end of the hook, and the saw cuts through the workpiece and into the hook surface below. Bench hooks are dead simple to make—essentially just three pieces of wood glued together—and they are one of the most frequently used accessories in a hand-tool shop. A good bench hook should be at least 12 inches long and 6 inches wide to provide a stable platform for the workpiece and comfortable hand placement during sawing.
A miter hook is a specialized version of the bench hook that includes an angled fence for cutting precise miters. The fence is typically fixed at 45 degrees, though some designs include adjustable fences that can be set to any angle. When combined with a fine-toothed crosscut saw, a miter hook produces miter joints that are more accurate and cleaner than those cut on a power miter saw—a bold claim that is well-supported by the hand-tool woodworking community.
Tool Trays and Tool Wells
A tool tray (also called a tool well or tool trough) is a recessed channel that runs along the back edge of the bench surface, providing a protected area to store frequently used hand tools during work. The tray prevents tools from rolling off the bench during operations and keeps them within arm’s reach. Traditional benches like the Nicholson pattern feature a wide, deep tray that can accommodate a substantial collection of planes, chisels, gauges, and marking tools.
The depth and width of the tool tray are matters of personal preference, but typical dimensions are 4 to 6 inches wide and 2 to 3 inches deep. The tray should be deep enough to prevent tools from rolling out during vibration but shallow enough that you can easily reach in and grab a tool without fumbling. Some woodworkers line their tool trays with leather or dense foam to prevent tool damage and reduce noise. Others install magnetic strips along the inner walls of the tray to hold steel tools in place.
T-Track Accessories: Hold-Downs, Stops, and Fences
If your bench features T-track installations, a wide ecosystem of accessories is available. Hold-down clamps use a cam-lever mechanism to press workpieces flat against the bench surface with a single downward motion. Toggle clamps provide even faster operation—they can be locked and released with one hand in under a second. Stop blocks slide into the track and provide a positive reference point for positioning workpieces consistently—essential when you need to make repeated cuts or operations at the same location.
T-track fences are long aluminum or steel extrusions that lock into the track parallel to its length. They provide a straight reference edge for guiding circular saws, routers, or hand planes. When combined with a second track running perpendicular, a T-track fence system essentially creates a coordinate positioning system on your bench surface—similar in concept to a CNC router’s X-Y table, but operated manually. This system is particularly valuable for production work where the same operation must be repeated many times on multiple workpieces.
Integrated Measurement Systems
Some modern benches and workbench accessories include integrated measurement systems—rulers, protractors, and angle guides built directly into the bench surface or accessories. While purists might view these as gimmicks, they can significantly speed up repetitive layout work. A ruler inlaid along the front edge of the bench provides instant reference for measuring without reaching for a tape measure. Angle guides on a miter gauge or T-track fence eliminate the need for a separate protractor for common angles like 22.5, 30, 45, and 60 degrees.
Building Your Accessory Collection Over Time
You do not need to buy every accessory at once. Start with the essentials: a pair of bench dogs, a holdfast or two, and a bench hook. These three items, combined with whatever vise came with your bench, will cover the vast majority of workholding situations. As you encounter specific situations that your basic accessories cannot handle, add specialized tools as needed. This incremental approach prevents the common mistake of spending hundreds of dollars on accessories that sit unused in a drawer while your actual workholding needs remain unmet.
Deep Dive: Workbench Finishes and Protective Coatings
The finish you apply to your workbench top is one of the most debated topics in woodworking. Unlike a piece of furniture where the finish is primarily aesthetic, a workbench finish must balance multiple competing requirements: it must protect the wood from moisture and staining, it must not be so slippery that workpieces slide around, it must not chip or flake onto your projects, and it must be easy to maintain and renew. Understanding the options available helps you choose the finish that best matches your working style.
Boiled Linseed Oil (BLO)
Boiled linseed oil is the traditional workbench finish, and for good reason. It penetrates deeply into the wood fibers, providing protection from within rather than forming a film on the surface. This means it cannot chip, peel, or flake—regardless of how much abuse the bench surface takes. BLO enhances the natural color of the wood, provides a warm, low-sheen finish, and creates a surface with just enough “grip” to prevent workpieces from sliding during planing operations. The oil also makes glue cleanup significantly easier—dried PVA glue peels off an oiled surface much more readily than off bare wood.
Application is straightforward: flood the surface with oil, let it soak for 15-20 minutes, wipe off the excess, and allow 24-48 hours for drying. Repeat this process 3-4 times for the initial application, then reapply once or twice per year (or whenever the surface starts looking dry). The primary disadvantage of BLO is that it provides relatively weak protection against water damage. If water sits on an oiled surface for extended periods, it can still penetrate the wood and cause swelling or staining. For this reason, many woodworkers top-coat their BLO with a layer of paste wax for additional water resistance.
Paste Wax
Paste wax (typically carnauba or beeswax dissolved in a solvent carrier) is the ideal top-coat over linseed oil. It provides a thin, slippery layer that repels water, prevents glue from bonding, and makes the surface easy to wipe clean. The slight slipperiness of a waxed surface is a matter of preference—some woodworkers like it because their workpieces slide easily into position, while others prefer the grip of bare or oiled wood. Paste wax is easily renewed: simply apply a thin coat with a cloth, let it haze, and buff it off. The entire process takes about 15 minutes and should be repeated every few months or whenever the surface stops beading water droplets.
Rubio Monocoat and Hardwax Oils
Hardwax oil finishes (such as Rubio Monocoat, Osmo, and Fiddes) represent a modern evolution of the traditional oil finish. They combine natural oils with waxes in a single product that penetrates the wood and creates a thin, protective surface layer in a single application. The key advantage over pure linseed oil is improved water resistance and a slightly harder surface that resists marring. The single-coat application (for Rubio Monocoat, at least) also saves significant time compared to the multiple coats required by BLO. The primary disadvantage is cost—a liter of Rubio Monocoat costs approximately $40-$60, which is considerably more than a can of boiled linseed oil. However, the superior performance and reduced application time often justify the premium for serious woodworkers.
Polyurethane and Film-Forming Finishes
Film-forming finishes like polyurethane, lacquer, and varnish create a hard, protective film on the wood surface. While this provides excellent protection against moisture, chemicals, and staining, it is generally NOT recommended for workbench surfaces. The hard film will chip under mallet blows and chisel work, sending sharp flakes into the surrounding area. Once chipped, the film creates raised edges that scratch and damage workpieces. Repairing a chipped film finish requires complete removal (sanding or chemical stripping) and reapplication—a time-consuming process that will need to be repeated every time the surface is damaged.
The one exception is MDF bench tops, which benefit significantly from a sealed surface. For MDF tops, applying multiple coats of shellac or thinned polyurethane (sanding between coats) creates a sealed barrier that prevents moisture absorption while providing a smooth, workable surface. Many woodworkers use shellac (dissolved in denatured alcohol) as the sealer for MDF because it dries extremely fast, sands easily, and bonds tenaciously to the MDF fibers. Two to three coats of shellac, sanded to 220 grit between coats, provide a durable seal that can be refreshed in minutes when needed.
Water-Based vs. Oil-Based Considerations
If you use water-based finishes or glues frequently, be aware that water-based products raise the grain of bare wood and even lightly oiled wood. This means that any surface that contacts water-based products will develop a rough texture over time as the grain is repeatedly raised and (if you sand it back) lowered. To mitigate this, some woodworkers apply a more water-resistant finish to their bench tops, such as a marine spar varnish thinned 50% with mineral spirits. This penetrates deeply like an oil finish but provides significantly better water resistance than pure linseed oil.
The “No Finish” Approach
A surprisingly large number of experienced woodworkers choose to leave their bench tops completely unfinished—bare wood with no oil, wax, or sealant of any kind. Their reasoning is that a bare wood surface provides the best possible grip for workpieces, accepts pencil marks and layout lines most clearly, and can be periodically re-flattened with a hand plane without worrying about cutting through a finish layer. The bare surface will develop stains, glue spots, and a general patina of use over time, but these experienced woodworkers view these marks as badges of honor that tell the story of thousands of projects completed on that surface. If you choose this approach, be prepared to re-flatten the top more frequently (at least once or twice per year) as the bare wood is more vulnerable to moisture-induced distortion.
Choosing a Workbench for Specific Crafts and Disciplines
Not all woodworking is the same, and the ideal workbench for a luthier building acoustic guitars is very different from the ideal bench for a carpenter framing walls. In this section, we explore the specific bench requirements for several popular woodworking disciplines and recommend the best approach for each.
Luthiery (Guitar and Instrument Building)
Luthiery requires an exceptionally flat, stable work surface where delicate components like guitar tops, backs, and sides can be accurately measured, cut, and joined. The bench must resist seasonal dimensional changes because even small movements can affect the tolerances of instrument joinery. A thick hardwood top (maple or beech) in a climate-controlled shop is the gold standard for luthiery. The bench should include a high-quality face vise for holding small components, and many luthiers prefer a bench with an integrated shooting board area for precisely trimming bracing strips and binding. At the same time, the bench should not be so large that it dominates a small shop—luthiery shops are often quite compact, with equipment for bending sides, thicknessing tops, and applying finish all competing for floor space. A mid-sized bench (about 24 inches wide by 60 inches long) with a dog-hole system and holdfasts provides an excellent workholding platform for instrument building without consuming excessive space.
Carving and Sculptural Work
Wood carving benches differ from traditional workbenches in several important ways. First, they are typically lower—28 to 32 inches is standard—to allow the carver to apply downward force with their body weight while working with gouges and chisels. Second, they often include a carver’s screw or clamping mechanism that allows the workpiece to be rotated 360 degrees without unclamping, which is essential for three-dimensional sculptural work. Third, the surface must be extremely resistant to gouges and cuts from errant chisel strikes, which argues for a dense, hard top material like hard maple or even a sacrificial MDF overlay.
A carver’s screw is a large steel screw (typically 3/8-inch or 1/2-inch diameter) that threads into the bottom of the workpiece and passes through a hole in the bench top, where it is secured with a wing nut beneath. This allows the carver to securely mount a workpiece for aggressive three-dimensional carving while still being able to loosen the wing nut and rotate the workpiece to access all sides. For the bench to accommodate a carver’s screw, it needs at least one hole large enough for the screw shaft (typically 1/2 inch) located in a position that provides access beneath the bench for tightening the wing nut.
Cabinetmaking and Furniture Construction
Cabinetmaking is the discipline most closely associated with the traditional workbench, and it requires all of the bench’s features: a flat top for assembly, a face vise for edge work, dog holes for planing, and sufficient mass for hand-tool operations. However, modern cabinetmaking is heavily reliant on power tools, which shifts the priorities somewhat. The bench surface area is more important than its mass (because the primary tool is often a router or track saw rather than a hand plane), and compatibility with jigs, fixtures, and T-track systems becomes critical.
A cabinetmaking bench should ideally be at least 24 inches wide and 60 inches long, with a flat top to serve as an assembly surface. Many cabinetmakers use their bench as an outfeed table for their table saw, which means the bench height must exactly match the saw table height. This is one of the strongest arguments for an adjustable-height bench: you can dial in the exact height needed to create a seamless surface between the saw and the bench. The OLBRUS and Betterhood adjustable benches excel in this role.
Turning (Lathe Work)
A lathe workbench is a secondary surface positioned adjacent to the lathe for holding tools, blanks, and supplies during turning operations. The primary requirements are simplicity and proximity—the bench should be at a comfortable height for reaching tools while standing at the lathe (typically the same height as the lathe bed), and it should include tool rests or racks that keep gouges, chisels, and scrapers within arm’s reach. A heavy bench is less important for turning because the primary forces are absorbed by the lathe itself, not the auxiliary bench. A simple, stable table with a flat top and a lower shelf for supplies is often all that is needed.
Scroll Saw and Fretwork
Scroll saw work requires a bench that supports the weight and vibration of the scroll saw without transmitting that vibration to surrounding surfaces. The bench should be heavy enough to remain stationary during extended cutting sessions, and the surface should be smooth enough to allow workpieces to slide freely across it when being repositioned. A height of 34 to 38 inches is typically comfortable for the seated or semi-standing posture that scroll saw operators commonly adopt. Since scroll saws produce relatively fine dust, a bench with a smooth, sealed surface is easier to keep clean than one with an open, unfinished surface.
CNC Routing and Digital Fabrication
CNC routers place unique demands on a workbench or table. The bench must be perfectly flat across its entire surface to ensure consistent cutting depth, and it must be rigid enough to resist the lateral forces of the router bit without deflection. Many CNC operators build a torsion box table—a hollow structure made from a grid of thin wood ribs skinned with MDF or plywood on both top and bottom surfaces. Torsion box tables are remarkably rigid for their weight and can be made perfectly flat by skimming the top surface with a router on a leveling sled. The bench or table supporting the CNC router should also include provisions for dust collection, workpiece hold-down (typically vacuum clamping or T-track), and cable management for the stepper motor wiring.
Whittling and Chip Carving
Whittling and chip carving can be performed on virtually any flat surface, but a dedicated small bench or bench hook provides a more comfortable and secure platform. The primary requirement is a way to secure small workpieces (often only a few inches in size) at a comfortable working height and angle. A small bench-top clamp board—a flat piece of wood with a hold-down clamp mounted to it—provides an excellent solution. This board can be placed on any table or bench and provides secure clamping for small carvings without requiring a full-sized vise or bench dog system.
Woodturning Segmented Work
Segmented woodturning involves cutting many small pieces of wood to precise angles and gluing them into rings that are then assembled into hollow vessels on the lathe. This work demands extreme precision in cutting angles (typically accurate to within 0.1 degrees) and requires a bench that serves primarily as a precision measuring and assembly surface rather than a heavy-duty workholding platform. A flat, stable bench with T-track accessories for positioning jigs and fixtures is ideal. Many segmented turners also mount a disk sander or belt sander on or adjacent to their bench for fine-tuning segment angles before assembly.
Workbench Maintenance and Long-Term Care
A quality workbench, properly maintained, will serve you faithfully for decades. But “properly maintained” requires attention and regular care. A neglected bench degrades gradually—surfaces warp, vises seize, joints loosen—and by the time the problems become obvious, they require significant effort to correct. In this section, we cover every aspect of workbench maintenance to keep your investment performing at its best.
Surface Flattening
Over time, every wooden bench top develops high and low spots. This is caused by a combination of factors: differential moisture absorption (areas near the edge expand and contract more than the center), physical damage from mallet blows and dropped tools, and the natural tendency of wood to move as internal stresses redistribute. A bench top that is no than 0.010 inches (ten thousandths) out of flat is generally acceptable for most woodworking operations. When the deviation exceeds this threshold, the top should be flattened.
The traditional method for flattening a bench top is with a long jointer plane (a #7 or #8). The long sole of these planes bridges high and low spots, gradually creating a flat reference surface. The technique involves: first, marking the high areas with a pencil scribble across the entire surface; second, planing with diagonal strokes (roughly 45 degrees to the grain direction) to remove the high areas—when the pencil marks disappear, you know that area is now at the correct height; third, finishing with strokes parallel to the grain direction to remove the diagonal plane tracks. This process typically takes 30 to 60 minutes for a moderately out-of-flat surface and results in a surface that is flat to within a few thousandths of an inch.
For severely warped or damaged surfaces, or for woodworkers who do not own a long jointer plane, a router sled provides an alternative flattening method. The router is mounted on a pair of parallel rails that span the bench width, and a wide-diameter flattening bit is run back and forth across the surface. This method is faster than hand-planing for large removal but produces a surface with a scalloped texture that must be sanded or planed smooth afterward. It also generates enormous amounts of dust, so a good dust mask and shop vacuum are essential.
Vise Maintenance
Bench vises require periodic maintenance to maintain smooth operation and full clamping force. The most common maintenance task is lubrication of the screw mechanism. Apply a thin coat of paste wax or light machine oil to the screw threads every few months (or whenever the vise starts to feel stiff or gritty). This reduces friction, prevents wear, and keeps the mechanism operating smoothly. For quick-release vises, also check the engagement mechanism—if the quick-release starts slipping or failing to engage fully, the mechanism may need adjustment or replacement of worn components.
The jaw faces of your vise should be checked periodically for damage. If the jaws are bare metal, they will mar wood surfaces under heavy clamping. Most woodworkers attach jaw liners—thin pieces of wood, leather, or cork—to the jaw faces using contact cement or small screws. These liners protect the workpiece from damage and provide better grip than bare metal. Replace the liners whenever they become damaged, excessively worn, or contaminated with glue.
Hardware Tightening
Every bolt, nut, and screw on your bench should be checked for tightness at least twice per year. The repeated impact forces generated during woodworking operations gradually loosen fasteners, even those with lock washers or thread-locking compound. A loose bolt might not be immediately noticeable, but it introduces play (movement) into the bench structure that amplifies with each subsequent use. This progressive loosening is the primary reason that benches that were initially rock-solid develop wobble over time. A 10-minute session with a wrench and screwdriver twice a year prevents this problem entirely.
Seasonal Care
Wood bench tops expand and contract with seasonal humidity changes. In winter, when indoor humidity drops (especially in heated spaces), the top will contract across its width. In summer, when humidity rises, the top will expand. This movement is normal and cannot be prevented, but it can be managed. If your bench is in an unheated garage or workshop, the humidity swings will be more extreme than in a climate-controlled room. Applying a finish that moderates moisture exchange (such as BLO plus wax) helps slow the rate of dimensional change and reduces the severity of movement.
In extreme cases, seasonal movement can cause the bench top to cup (bow upward at the center) or crown (bow downward at the center). If this occurs, the top should be flattened during a period of moderate humidity (spring or fall) when the wood is closest to its average moisture content. Flattening during the extreme of winter or summer means the flat surface you create will be disrupted when the season changes and the wood moves to its opposite extreme.
Cleaning and Debris Removal
Regular cleaning extends the life of your bench surface and prevents contamination of future workpieces. Sawdust, glue drips, and finish residue should be removed after each work session. A stiff-bristle brush (NOT a wire brush, which can damage the wood surface) sweeps sawdust from the bench top and out of dog holes. Glue drips should be scraped off with a chisel or putty knife while still partially cured—fully cured PVA glue can be removed by applying a damp cloth for a few minutes to soften it, then scraping. Dried finish residue (drips from finishing operations) should be scraped or sanded off, as these spots will resist new finishes and create uneven surfaces for future work.
Dog Hole and Accessory Maintenance
Dog holes can accumulate compressed sawdust, glue, and debris over time, which prevents bench dogs and holdfasts from seating properly. Periodically clean each hole using a bottle brush or a dowel wrapped in sandpaper. For holes that have become slightly oval or enlarged from heavy holdfast use, a thin coat of cyanoacrylate (CA) glue applied to the inside of the hole and allowed to dry will harden the wood surface and restore the hole’s dimensions. This simple repair takes only a few minutes and can extend the functional life of dog holes by years.
Replacing the Bench Top
Even with diligent maintenance, a wooden bench top eventually reaches a point where it can no longer be flattened—it has been planed so many times that it is too thin, or the accumulated damage is too severe to economically repair. At this point, replacing the top is the most practical solution. If your bench frame is still in good condition, a new top can be made from hardwood, plywood, or MDF and attached to the existing frame. This is one of the advantages of benches with separate tops and frames—the top can be replaced without rebuilding the entire bench. The old top, if it is hardwood, can be repurposed for smaller projects, jigs, or accessories.
Workbench Lighting: Illuminating Your Workspace
Proper lighting is one of the most overlooked aspects of workshop setup. A brilliantly equipped bench in a dimly lit shop is like a sports car with tinted windshields—all that potential is wasted because you cannot see where you are going. Good lighting improves accuracy, reduces eye strain, prevents accidents, and makes every minute in the shop more enjoyable. In this section, we cover the principles and practicalities of workbench lighting.
The Science of Task Lighting
Task lighting is directed, focused illumination that illuminates your immediate work area rather than the entire room. The ideal task light for a workbench provides bright, even, shadow-free illumination across the entire bench surface. This requires a combination of overhead lighting (to provide general illumination) and directed lighting (to eliminate shadows cast by your hands and tools). The recommended light level for detailed woodworking is 500 to 750 lux (approximately 50 to 70 foot-candles) on the work surface. This is significantly brighter than typical residential lighting, which averages 50-100 lux.
LED Shop Lights
LED technology has revolutionized workshop lighting. Modern LED shop lights produce 100+ lumens per watt, which means a single 4-foot LED tube light fixture consuming only 40 watts can produce 4,000+ lumens—equivalent to two traditional fluorescent tubes consuming a combined 80 watts. LED lights also have a much longer lifespan (50,000+ hours vs. 20,000 hours for fluorescents), instant-on capability (no warm-up period like fluorescents), and consistent color quality throughout their lifespan (fluorescents dim and shift color as they age).
For workbench task lighting, look for LED fixtures with a color temperature of 5000K (daylight white). This color temperature provides the most accurate color rendering for woodworking, which is critical when evaluating stain colors, finish appearance, and joint quality. Avoid LED lights below 4000K (warm white), which cast a yellow tint that makes it difficult to accurately assess wood color and finish quality.
Under-Shelf and Under-Cabinet Lighting
If your workbench includes an upper shelf, tool cabinet, or overhead storage, installing LED strip lights beneath these structures provides excellent directed task lighting. LED strips are available in self-adhesive rolls that can be cut to any length and mounted in minutes. They consume very little power (typically 5-10 watts per foot) and produce a wide, even wash of light that eliminates the harsh shadows created by single-point light sources. Mount the strips at the front edge of the shelf, angled slightly downward toward the bench surface, to maximize coverage and minimize glare.
Magnifying Lamps
For detail work—fine inlay, miniature carving, instrument repair, or any operation where you need to see very small features clearly—a magnifying lamp is an invaluable addition. These devices combine a high-quality magnifying lens (typically 3x to 5x magnification) with an integrated LED light ring that illuminates the work through the lens. The result is a perfectly lit, magnified view of your workpiece that reveals details invisible to the naked eye. Mount the magnifying lamp on a flexible arm that can be positioned exactly where needed and swung out of the way when not in use.
Task Lighting Placement and Positioning
The position of your task lights relative to your workbench matters as much as the lights themselves. Overhead lights should be positioned so that your body does not cast shadows onto the work surface when you lean over the bench. This means the lights should ideally be directly above the front edge of the bench (where you stand) rather than centered above the bench (which would place them behind you). If your bench is positioned against a wall, wall-mounted swing-arm lights provide excellent directed illumination that can be repositioned as needed. The key principle is: light should come from multiple directions to minimize shadows, and the primary light source should be positioned so that you never stand between it and your work.
Natural Lighting
If your shop has windows, take advantage of natural light. Position your bench so that natural light falls on the work surface from the side (preferably from your left if you are right-handed, to avoid casting shadows from your writing hand). North-facing windows provide the most consistent, even light throughout the day without the harsh direct sunlight that south-facing windows produce. However, natural light alone is rarely sufficient for detailed work and varies dramatically with weather and time of day. Always supplement natural light with consistent artificial task lighting to maintain uniform illumination regardless of external conditions.
Workbench Organization and Storage Solutions
An organized workbench is an efficient workbench. When every tool has a designated place and every supply is within arm’s reach, you spend more time making sawdust and less time searching for the tool you need. In this section, we explore the full spectrum of storage and organization solutions that integrate with your workbench setup.
Under-Bench Shelving
The space beneath your bench is prime real estate for storage. A simple shelf installed between the legs can hold bins of fasteners, cans of finish, power tool accessories, or even a small shop vacuum. The shelf height should be low enough to store tall items (like glue bottles or drill cases) but high enough that you don’t hit your feet or knees on stored objects while working. Typically, a shelf positioned 6-8 inches above the floor provides good storage capacity while leaving clearance for your feet. For heavy items (like bags of sand used as ballast), place them directly on the floor beneath the shelf to keep the center of gravity low.
Drawer Systems
Drawers are superior to open shelves for storing small items like chisels, marking gauges, measuring tools, and hardware. They protect contents from sawdust, keep items organized in compartments, and can be closed when not in use to maintain a clean bench appearance. Many commercial workbenches offer optional drawer kits that mount between the legs using pre-drilled holes. For DIY benches, building drawers is an excellent practice project that develops fundamental skills in box construction, drawer slide installation, and dimensioning.
The ideal drawer configuration for a workbench includes one shallow drawer (2-3 inches deep) for layout tools and measuring instruments, one medium drawer (4-6 inches deep) for hand tools like chisels, planes, and scrapers, and one deep drawer (8-10 inches deep) for power tool accessories, clamps, and bulkier items. Using drawer dividers or foam inserts with custom-cut tool silhouettes (similar to the Kaizen foam system) prevents tools from rattling against each other and provides instant visual confirmation when a tool is missing—critical for shared workshops where tools may be borrowed without notice.
Pegboard and French Cleat Systems
The wall space directly above and behind your bench is ideal for tool storage. Traditional pegboard (perforated hardboard with 1/4-inch or 1/8-inch holes) accepts a wide variety of hooks, brackets, and holders that can be repositioned at will. The main disadvantage of pegboard is its limited weight capacity—it can hold lightweight tools but sags under heavy loads like large planes or clamps.
A French cleat system offers superior strength and flexibility. French cleats are strips of plywood ripped at a 45-degree angle—one strip is mounted on the wall with the angle pointing up and toward the wall, and the matching strip is attached to a tool holder, shelf, or cabinet. The tool holder simply hooks over the wall strip and is held securely by gravity and the interlocking angle. French cleat systems can support hundreds of pounds per linear foot and can be rearranged in seconds without any tools. Building a complete French cleat wall behind your workbench is one of the most transformative shop organization projects you can undertake.
Magnetic Tool Holders
Magnetic strips (similar to those used in kitchen knife racks) are excellent for holding steel hand tools like chisels, marking knives, squares, and small planes. Mount a magnetic strip at eye level on the wall behind your bench, and your most frequently used tools will always be visible, accessible, and protected from damage. Magnetic strips are available in various lengths and holding strengths—choose a strip rated for at least twice the weight of the heaviest tool you plan to store on it. For tools with thin blades (like chisels), ensure the magnet is strong enough to hold the tool vertically without sliding down.
Overhead Storage
Ceiling-mounted storage racks are ideal for storing long, flat items like sheet goods, long boards, and template materials that would otherwise consume valuable floor space. These racks typically consist of a pair of horizontal bars mounted to ceiling joists, with the items resting between the bars and the ceiling. For safety, ensure the rack is rated for the weight you plan to store and that heavy items are positioned directly above the joist attachment points rather than spanning unsupported sections.
Mobile Tool Carts
A rolling tool cart positioned adjacent to your bench provides mobile storage that can be repositioned as needed. During a glue-up, roll it next to the bench with clamps and glue within reach. During hand-planing, roll it to the other side with planes and sharpening equipment available. When the project is complete, roll it to a storage area to free up floor space. The cart should have locking casters to prevent unwanted movement during use and at least two shelves for adequate storage capacity. Building a tool cart is also an excellent first project for beginners—simpler than a full bench but teaching many of the same fundamental skills.
Small Parts Organization
Fasteners, dowels, biscuits, hardware, and other small items require dedicated storage that keeps them organized and accessible. Clear plastic bins, compartmentalized hardware organizers, and small parts cabinets (with labeled drawers) are all effective solutions. Position these storage units within arm’s reach of your bench—either on an adjacent shelf, on the wall behind the bench, or on a dedicated small-parts cart. The time wasted searching for the right screw or dowel size adds up dramatically over the course of a project. Investing in proper small parts organization pays for itself within the first major build.
Integrating Dust Collection with Your Workbench
Wood dust is both a health hazard and a work quality issue. Fine dust particles reduce visibility, contaminate finishes, and cause respiratory damage with prolonged exposure. While the primary source of dust in most shops is power tools (table saws, routers, sanders), hand-tool operations like hand-planing and chisel work also generate significant quantities of fine chips and shavings. Integrating dust collection with your workbench setup keeps the work surface clean and the air breathable.
Source Capture: The Foundation of Dust Control
The most effective form of dust collection is source capture—collecting dust at the point of generation before it enters the ambient air. For power tools connected to your bench (benchtop sanders, routers, drill presses), this means connecting a dust collection hose directly to the tool’s dust port. Most modern benchtop power tools include dust ports sized for standard 2.5-inch or 4-inch hoses. A shop vacuum connected to the tool port captures 70-90% of generated dust, which is dramatically more effective than any after-the-fact air filtration system.
Bench-Integrated Dust Ports
Some workbenches include integrated dust ports or channels that connect to a central dust collection system. These are particularly common on CNC router tables, where dust collection is critical for both health and cut quality. For conventional workbenches, you can add dust collection capability by installing a flush-mounted dust port in the bench surface. This port connects to a hose beneath the bench that leads to your shop vacuum or dust collector. When not in use, a flat cap covers the port flush with the bench surface. When performing dusty operations, remove the cap and position the workpiece near the port to capture falling debris.
Chip Management for Hand Tools
Hand planes, chisels, and scrapers generate piles of shavings and chips that accumulate on the bench surface and floor. While these chips are too large to pose a respiratory hazard (unlike fine sanding dust), they clutter the work surface and can interfere with workholding. A simple chip sweep—performed with a bench brush at the end of each operation—keeps the surface clear. Many woodworkers position a trash can or chip collection bin at the end of the bench, below a small hole or chute, allowing them to sweep chips directly off the bench and into the bin with a single motion.
Air Filtration
Even with the best source capture system, some dust inevitably escapes into the ambient air. A ceiling-mounted air filtration unit addresses this residual dust by continuously cycling the shop air through a series of filters. Modern air filtration units are rated by their Clean Air Delivery Rate (CADR)—look for a unit with a CADR that can cycle the entire volume of your shop at least 4-6 times per hour. For a typical single-car garage shop (approximately 2,500 cubic feet), a unit with a CADR of 400-500 CFM provides adequate air turnover. Position the unit directly above or adjacent to your workbench for maximum effectiveness in the area where you spend the most time.
Personal Respiratory Protection as a Last Resort
Source capture and air filtration should be your primary defenses against wood dust. Personal respiratory protection (dust masks and respirators) is the last line of defense, not the first. However, there will always be situations where source capture is insufficient—sanding in an open area, working with a hand-held router on a large workpiece, or using chemical finishes that produce fumes. In these situations, a properly fitted N95 (or P100 for enhanced protection) respirator is essential. Keep respirators in a clean, sealed container near your workbench so they are always within reach when needed.
Integrating Power Tools with Your Workbench
Modern woodworking is a hybrid discipline—most shops use a combination of hand tools and power tools, and the workbench often serves as the integration point between the two. In this section, we explore the most common power tool integrations and how to optimize your bench for each one.
Router Table Integration
A benchtop router table converts your workbench into a vertical routing station. The router is mounted beneath a flat plate that sits flush with the bench surface, and a fence guides the workpiece past the spinning bit. For the bench to serve effectively as a router table platform, the surface must be flat (to ensure the router plate sits flush), rigid (to resist the lateral forces of the router bit), and at the correct height (typically 34-38 inches for comfortable standing operation). Many woodworkers build a dedicated router table insert that drops into a recess in their bench surface. This insert includes the router mounting plate, fence, and dust port, and can be installed or removed in seconds, allowing the bench to serve double duty as both a traditional workbench and a router table.
Benchtop Drill Press
A benchtop drill press requires a sturdy, vibration-free surface and adequate clearance above and below for the quill travel and workpiece height. The bench supporting a drill press must be heavy enough to absorb the vibration of drilling operations without walking across the floor. If your primary workbench is also your drill press station, ensure the bench has sufficient mass or is anchored to the floor or wall. The ideal bench height for drill press work is typically 32-36 inches, which places the workpiece at a comfortable working height when standing. Many woodworkers mount their drill press on a dedicated stand or cart that can be rolled to a storage area when not in use, freeing up valuable bench space.
Benchtop Planer and Jointer
Portable thickness planers and benchtop jointers generate significant vibration and produce large volumes of chips that must be collected. When these tools are placed on a workbench, the bench must be heavy and rigid enough to absorb the vibration without walking or wobbling. The bench height should match the tool’s optimal working height—typically 30-34 inches for planers (to allow long boards to feed through without excessive lifting at the outfeed end). An outfeed table or roller stand positioned at the same height as the planer table supports long boards as they exit the machine, preventing snipe (the tendency of the cutter head to dig deeper at the beginning and end of a board due to unsupported board weight).
Belt and Disc Sanders
Benchtop belt/disc sanders are among the most vibration-intensive benchtop tools. They should be mounted on the heaviest, most stable surface available. Some woodworkers bolt their sander directly to the bench top using lag screws into threaded inserts, which prevents the sander from walking or vibrating free during aggressive stock removal. The sander should be positioned near the edge of the bench for easy access to the disc and belt surfaces, and a dust collection port should be connected immediately below the belt housing, where the majority of dust is generated.
Bench Grinders and Sharpening Stations
A bench grinder is a workshop essential for tool sharpening and metal preparation. Mounting the grinder on your workbench is acceptable if the bench is heavy enough to absorb the vibration (at least 80-100 pounds for a typical 6-inch grinder). Position the grinder at the end of the bench where the sparks and debris are directed away from your primary work area. Many woodworkers create a dedicated sharpening station on their bench—a defined area with a grinder, water stones or diamond plates, honing guides, and reference surfaces that is always set up and ready for use. Having a permanent sharpening station eliminates the “I’ll sharpen later” mindset that leads to working with dull, dangerous tools.
Track Saw and Guide Rail Systems
Track saws (plunge-cut circular saws that ride on a precision aluminum rail) have revolutionized sheet goods processing and are commonly used on workbenches as cutting stations. The bench provides a flat, stable support surface for the workpiece, while the track saw rail sits directly on the workpiece and provides the straight-line guide. For this application, the bench should have a sacrificial surface (such as a sheet of rigid foam or MDF) that can be cut into without damaging the bench top. The bench height should be comfortable for standing operation—typically 32-36 inches—and the bench surface should be large enough to fully support the workpiece to prevent it from tipping or falling during the cut.
Flooring and Workbench Placement Considerations
Where you place your workbench and what surface it sits on are critical decisions that affect stability, comfort, and the longevity of both the bench and the floor. In this section, we cover the most common workshop flooring types and how each interacts with different workbench designs.
Concrete Floors
Concrete is the most common workshop flooring and provides an excellent foundation for heavy workbenches. It is hard, flat, and can support virtually any weight without deflection. However, concrete is cold, hard on the feet and legs during prolonged standing, and can be uneven (especially in residential garages, where the floor is sloped for drainage). Rubber anti-fatigue mats are essential for comfort, and the bench’s leveling feet should be adjusted to compensate for any slope or unevenness in the concrete surface. For heavy benches (200+ pounds), concrete provides the best friction and stability—once a heavy bench is positioned on concrete, it will not move during normal use.
If you need to anchor a bench to a concrete floor, concrete expansion anchors or sleeve anchors provide a secure attachment point. Drill a hole in the concrete using a hammer drill and masonry bit, insert the anchor, and tighten the bolt through the bench leg into the anchor. This creates a positive, permanent connection that eliminates any possibility of the bench moving. This is particularly valuable for benches that support heavy vises, as the torsional forces from vise clamping can gradually “walk” a bench across a smooth concrete floor.
Wooden Floors
Wooden workshop floors (typically plywood over joists, or hardwood planking) provide a warmer, more comfortable standing surface than concrete but introduce some stability considerations. A heavy bench on a wooden floor will distribute its weight across the floor joists—if the bench happens to be positioned between joists rather than directly over one, the floor may deflect slightly under the bench’s weight. This is rarely a structural concern for residential loads but can affect bench stability. If your bench is positioned on a wooden floor and exhibits any wobble, check whether the floor itself is flexing under the load. Moving the bench directly over a floor joist (or adding a stiffening beam beneath the floor at that location) resolves the issue.
Garage Floor Coatings
Many homeowners apply epoxy or polyurethane coatings to their garage floors for aesthetics and ease of cleaning. While these coatings are generally durable enough to support a workbench, they can be surprisingly slippery, especially when wet or when fine sawdust accumulates on the surface. The combination of a smooth, coated floor and a lightweight bench can result in the bench sliding during planing or other lateral-force operations. Rubber pads beneath the bench feet or a rubber mat under the bench solves this problem. Also be aware that heavy benches can potentially mark or indent soft epoxy coatings over time—using wide feet or pads distributes the load and prevents localized compression.
Rubber Flooring and Interlocking Tiles
Many woodworkers install interlocking rubber floor tiles in their workshop. These tiles provide excellent anti-fatigue properties, resist moisture and chemical spills, and can be easily replaced if damaged. However, rubber flooring compresses under load, which means a heavy bench will create a slight depression in the tiles. This compression can cause the bench to settle unevenly if the tiles are not all equally compressed, leading to a slight wobble. The solution is to ensure all four bench feet rest on equally supported areas (not spanning a tile joint) and to use leveling feet to compensate for any unevenness caused by the compressible surface.
Workbench Orientation in the Shop
The orientation of your bench relative to natural light, shop doors, and other equipment affects your workflow efficiency. Ideally, position the bench so that natural light from a window falls from your left side (if you are right-handed) or right side (if you are left-handed). This positioning eliminates the shadow cast by your writing hand when performing layout work. The bench should also be oriented so that you can approach it from the front without obstruction—if the bench is pushed against a wall, ensure there is adequate clearance behind the bench for you to walk and work without being constrained.
Climate Control Considerations
The location of your bench relative to heating and cooling sources affects the wood’s moisture content and therefore the stability of the bench top. Positioning a bench directly next to a heating duct, radiator, or wood stove creates a localized area of low humidity that can cause the bench top to dry and shrink faster than the surrounding environment. Similarly, placing a bench next to an exterior door that is frequently opened in winter exposes the bench to cold, dry air that accelerates moisture loss. The ideal bench location is in the interior of the shop, away from direct heat sources and exterior walls, with consistent air circulation from a ceiling fan or HVAC system.
Workbench Frame and Leg Design: A Comprehensive Overview
The frame of a workbench—its legs, stretchers, and structural members—determines the bench’s rigidity, weight, stability, and under-bench accessibility. Throughout woodworking history, several distinct frame designs have emerged, each with its own strengths and characteristics. Understanding these designs helps you evaluate pre-built benches and informs the design of DIY builds.
The Roubo Frame
The Roubo workbench, named after the 18th-century French cabinetmaker André Jacob Roubo who documented it in his landmark treatise “L’Art du Menuisier,” is arguably the most celebrated workbench design in history. It features massive legs (typically 5 inches by 5 inches or larger) connected by thick stretchers at the bottom. The legs are flush with the front edge of the bench top, which allows a face vise to be mounted directly through the leg—creating an extremely rigid vise mounting point. The Roubo design prioritizes mass and rigidity above all else; a properly built Roubo bench can weigh 400-600 pounds and is essentially immovable during hand-tool work. Modern adaptations of the Roubo design are available from several premium manufacturers, or can be built from dimensional lumber or slabs following detailed plans.
The Scandinavian (Split-Top Roubo) Frame
The Scandinavian workbench tradition emphasizes a slightly lighter, more refined design compared to the massive Roubo. Scandinavian benches typically feature a tool tray running down the center of the top, flanked by two independently flat bench surfaces. This split-top design allows long boards to be clamped across the gap using holdfasts, creating an unobstructed clamping surface that spans the entire bench width. The leg design is often trestle-style, with wide, flat legs connected by a bottom stretcher that doubles as a foot rest. Scandinavian benches are renowned for their workholding versatility and are the design of choice for many professional furniture makers.
The Nicholson (English) Frame
The Nicholson workbench, popularized by Peter Nicholson’s 19th-century woodworking manuals, is a simpler, more economical design that is ideal for smaller shops and builders on a budget. The legs are typically 4×4 or 3×4 dimensional lumber, connected by horizontal stretchers at the top and bottom. The defining feature of the Nicholson design is the wide apron (skirt) that runs along the front and back of the bench, connecting the legs and providing rigidity. The front apron serves as the mounting point for the face vise and often includes a series of dog holes for holdfast use. The Nicholson design is lighter than the Roubo but still provides excellent stability for its weight, and it is significantly easier and less expensive to build.
Trestle Legs
Trestle leg designs feature two wide, flat vertical members connected by a bottom stretcher. The wide leg provides excellent lateral stability (resistance to racking side-to-side) and a large surface area for mounting vises, shelves, or drawers. Trestle benches are common in European cabinetmaking traditions and are often found on heavy-duty commercial benches. The broad footprint of trestle legs means the bench is very difficult to tip over, even when heavy loads are applied at extreme positions (such as clamping a large workpiece in an extended vise).
Steel Tube Frames
Modern pre-built benches (like the OLBRUS, SPECRAFT, and VEVOR) typically use welded steel tube frames. These frames offer several advantages over wood: they are dimensionally stable (they don’t shrink, swell, or warp), they can be manufactured to tight tolerances, and they provide excellent strength-to-weight ratios. The primary disadvantage of steel frames is that they can transmit vibration more readily than wood, and they lack the aesthetic warmth of traditional timber construction. However, for benches that will primarily support power tools or serve in a utilitarian role (garage, workshop, or industrial setting), steel frames provide the best combination of strength, stability, and value.
Laminated Leg Construction
For DIY bench builders, laminated legs (made by face-gluing multiple boards together to create a thick, stable post) are the most common construction method. Laminated legs are stronger and more dimensionally stable than solid-sawn legs of the same size because the alternating grain direction of the laminations resists warping and the multiple glue lines provide additional strength. Typical lamination schedules for a workbench leg might use three pieces of 8/4 (2-inch thick) lumber glued face-to-face to create a 6-inch by 3.5-inch leg (after jointing and planing). This creates a leg that is massive enough for a traditional Roubo-style bench while being constructable from readily available lumber.
Stretcher Design and Placement
Stretchers are the horizontal members that connect the legs and provide racking resistance (prevention of the parallelogram-shaped deformation that occurs when lateral forces are applied to a rectangular frame). Lower stretchers are the most common—they connect the legs near the floor and double as a foot rest or shelf support. Upper stretchers (positioned near the top of the legs) provide even greater rigidity but can interfere with under-bench storage and access. Some designs use a single pair of stretchers at the mid-height of the legs, which provides a good compromise between rigidity and accessibility.
The connection between stretchers and legs is critical for frame rigidity. The strongest connection is a through-tenon (where the stretcher passes completely through the leg and is secured with a wedge on the outside). A mortise-and-tenon joint (where the tenon is fully enclosed within the leg) is nearly as strong and provides a cleaner appearance. For steel frames, welded connections are the strongest, followed by bolted connections with high-strength bolts. Avoid relying solely on screws for structural connections—screws have limited shear strength and will fail under the repeated impact forces that workbenches experience.
Budget and Value Guide: What to Expect at Every Price Point
Workbench prices span an enormous range—from under $100 for a basic folding bench to over $5,000 for a premium European-style hardwood bench. Understanding what you get at each price point helps you allocate your budget effectively and avoid both over-spending on features you don’t need and under-spending on a bench that won’t perform adequately.
Under $150: Entry-Level and Portable
In this range, you will find folding workbenches (like the WORX Pegasus and Keter Folding), basic sawhorse-style benches, and small hobby workbenches. These products excel at portability and convenience but sacrifice mass, workholding capability, and surface quality. For casual DIYers, apartment dwellers, and mobile contractors who need a quick-setup surface for light-duty work, this price point provides excellent value. However, serious hand-tool woodworkers will find these benches insufficient for anything beyond the most basic operations. The WORX Pegasus is the standout product in this range, offering an unbeatable combination of versatility, build quality, and portability at its price point.
$150 to $400: Mid-Range
This range is where you start finding benches that can genuinely serve as primary woodworking surfaces. Adjustable steel-frame benches with hardwood or composite tops (like the VEVOR, OLBRUS, and Betterhood) dominate this segment. At this price point, you get meaningful weight capacity (1,000+ pounds), adjustable height, and solid construction that will resist racking and wobble during normal use. The surface quality is good but not exceptional—you may need to flatten or re-seal the top before it performs at its best. For the majority of home woodworkers, this price range provides the best balance of performance and value.
$400 to $1,000: Serious Workshop
In this range, you find heavy-duty commercial benches (like the SPECRAFT and premium CAMMOO models), larger adjustable benches with thicker tops, and some entry-level traditional-style benches. These products offer heavier construction, better surface materials, and more sophisticated workholding systems. Some products in this range include integrated T-track systems, multiple vise mounting points, and factory-drilled dog hole patterns. For dedicated hobbyists and semi-professional woodworkers, this price range represents a significant upgrade in capability that translates directly into improved work quality.
$1,000 to $3,000: Professional Grade
Premium workbenches from established manufacturers like Sjobergs, Lie-Nielsen, Benchcrafted, and Ulmia occupy this range. These benches feature thick, carefully selected hardwood tops, precision-ground surfaces, and integrated high-quality vises. Many include traditional features like wagon vises, tail vises, and systematic dog hole patterns. The build quality is exceptional, with tight joinery, careful finishing, and materials that will last for generations. At this price point, you are investing in a bench that you will use for the rest of your woodworking life and potentially pass on to the next generation.
$3,000 and Above: The Pinnacle
The highest tier includes custom-built benches, European imports, and benches with extraordinary features like integrated wagon vises with precision-ground tracks, massive slabs of rare hardwood, and hand-fitted joinery throughout. At this level, the bench is as much a work of art as it is a functional tool. While the performance advantage over a $1,500 bench may be marginal in practical terms, the pride of ownership and the sheer quality of the materials and craftsmanship justify the premium for enthusiasts who consider their bench the centerpiece of their shop.
DIY Cost Comparison
Building your own bench typically costs between $400 and $1,200 in materials, depending on the species and size of lumber, the quality of the vise hardware, and the complexity of the design. This compares favorably to commercial benches in the $800-$2,000 range when you factor in the quality of materials used. However, the DIY approach requires 40-100 hours of your time, which represents a significant opportunity cost. If your time is worth $25-50 per hour (which is reasonable for skilled woodworkers), the “cost” of a DIY bench approaches or exceeds the cost of a comparable pre-built bench. The decision to build or buy should therefore be based on factors beyond pure economics—including the enjoyment of the building process, the satisfaction of using a bench you made yourself, and the skills you develop along the way.
Finding Your Perfect Bench: Recommendations by User Profile
Every woodworker has different needs, skills, and constraints. In this section, we provide targeted bench recommendations for several common user profiles, helping you narrow down the options based on your specific situation.
The Complete Beginner
If you are just starting out in woodworking, resist the temptation to buy the most expensive bench you can afford. At this stage, you don’t yet know what type of woodworking you’ll gravitate toward, what tools you’ll use most, or what features matter most to your workflow. Instead, start with a versatile, affordable bench that allows you to explore different techniques without a massive financial commitment. The WORX Pegasus (for maximum portability and versatility) or the VEVOR Adjustable (for a more traditional bench experience at a budget price) are both excellent starting points. As your skills and preferences develop, you will naturally identify the features that matter most to you and can make a more informed decision when upgrading.
The Weekend Hobbyist
Weekend hobbyists typically work in shared spaces (garages that also store cars, basements that serve other functions) and value a bench that can be set up and put away relatively quickly. The hobbyist needs a bench that is sturdy enough for occasional hand-tool work but light enough to move when the space is needed for other purposes. An adjustable bench in the 70-90 pound range (like the OLBRUS or Betterhood) provides this balance. The adjustable height allows the hobbyist to optimize the bench for different tasks, and the moderate weight means the bench can be repositioned by one person without extreme effort.
The Serious Hand-Tool Woodworker
For woodworkers who primarily use hand tools, mass and workholding are everything. The bench should weigh at least 200 pounds, feature a thick hardwood top (3+ inches), include a quality face vise and tail vise (or dog holes with holdfasts), and sit at the correct height for planing operations. The OLBRUS and SPECRAFT adjustable benches, loaded with additional ballast, provide a reasonable approximation of a traditional bench. For the ultimate hand-tool experience, consider building a Roubo or Scandinavian-style bench from solid hardwood—a project that is both a rite of passage and the creation of a lifetime tool.
The Professional Cabinetmaker
Professional cabinetmakers need a bench that can serve multiple roles: outfeed table for the table saw, assembly surface, finishing station, and occasional hand-tool work. The bench must be flat, large, and at the right height for table saw outfeed. Adjustable benches like the Betterhood or OLBRUS excel in this role because they can be dialed in to exactly match the saw table height. The bench surface should be large (at least 24 by 60 inches) to accommodate cabinet assemblies, and should include T-track or dog holes for clamping during assembly and glue-ups.
The Mobile Contractor
Contractors who work on job sites need maximum portability with adequate stability. The WORX Pegasus, Keter Folding, and BORA Centipede are all designed for this use case. The best choice depends on the specific type of work: the Pegasus is best for general-purpose carpentry and trim work, the Keter is best for quick-setup tasks like painting and light assembly, and the Centipede is best for breaking down sheet goods and supporting large assemblies. Many mobile contractors own two or more of these products to cover different scenarios.
The Apartment or Small-Space Woodworker
Woodworkers in apartments or small living spaces face the most constrained conditions. The bench must be compact, foldable or collapsible, and light enough to carry up stairs or store in a closet. The ClamPony and Keter Folding benches are excellent choices for this environment—they fold flat enough to store under a bed or behind a door and set up quickly for work sessions on a balcony, in a hallway, or in a spare room. Sound management is also a consideration in apartment settings—avoid bench operations that generate loud impacts (mallet work, heavy planing) during hours when noise may disturb neighbors.
The Educator and School Shop
Educational workshops require benches that are durable enough to withstand use by multiple students (who may not always follow best practices), adjustable to accommodate students of different heights, and affordable enough to equip multiple stations. Heavy-duty adjustable benches with steel frames and composite or rubberwood tops (like the SPECRAFT or CAMMOO models) provide the durability and adjustability needed at price points that allow the school to purchase multiple units. Safety features like rounded corners, stable bases, and non-marring feet are particularly important in educational settings where students of varying experience levels will be using the benches.
The Retired Hobbyist
Retired woodworkers often have more time to dedicate to their craft and may be investing in equipment that they plan to use for the rest of their lives. This is the ideal time to invest in a premium bench that provides exceptional performance and will last for decades. Ergonomic considerations become more important as we age—adjustable height, anti-fatigue flooring, and proper lighting all contribute to a comfortable working experience that supports long-term physical health. A mid-to-high-range adjustable bench with a quality hardwood top, paired with anti-fatigue matting and excellent overhead lighting, creates a shop environment that supports productive, enjoyable woodworking well into the future.
Workbench Sizing Guide: Dimensions for Every Space and Task
Choosing the right size workbench involves balancing available floor space with the dimensions needed for your primary work tasks. A bench that is too small will leave you constantly repositioning workpieces and improvising support. A bench that is too large will dominate your shop and limit your movement. In this section, we provide detailed sizing guidance based on space constraints and work types.
Width (Depth from Front to Back)
Bench width (measured from the front edge to the back edge) is the dimension that most significantly affects your working experience. A bench that is too wide forces you to reach across it, causing back and shoulder strain. A bench that is too narrow doesn’t provide enough surface area for assembly work or for resting tools and materials. The ideal bench width for most woodworking operations is 20-24 inches. This width allows you to comfortably reach the center of the bench from either side while still providing enough surface area for medium-sized assemblies. Traditional European benches are often 25-30 inches wide, which provides more surface area but requires longer reaches—this works well for tall woodworkers but may be uncomfortable for shorter individuals.
Length
Bench length determines the maximum size of workpiece you can process. For general woodworking, a bench length of 60-72 inches (5-6 feet) is ideal. This provides enough room for most furniture components (table legs, chair parts, cabinet sides) while remaining compact enough for a typical garage shop. For cabinetmaking and sheet goods work, longer benches (8-10 feet) are advantageous, but they consume significant floor space and require either a very large shop or a clever layout that allows the bench to be accessed from all sides. For tight spaces, a 48-inch (4-foot) bench can handle the majority of small to medium projects, though you will occasionally need to support long boards beyond the bench edge using auxiliary stands.
Height
As discussed in the ergonomics section, bench height is task-dependent and user-dependent. A good starting point is your wrist height (measured from the floor to the crease of your wrist when your arm is hanging relaxed at your side). For most adults, this falls between 33 and 38 inches. However, the optimal height varies significantly by task: lower for planing (28-32 inches), moderate for general work (34-36 inches), and higher for detail work (36-40 inches). An adjustable-height bench eliminates the need to compromise on this critical dimension.
Surface Area Calculations
To determine whether a bench of given dimensions is large enough for your needs, consider the largest workpiece you are likely to process and ensure the bench provides at least 6 inches of clearance on all sides of the workpiece. For example, if you regularly work with 24-inch-wide panels, you need a bench at least 36 inches wide—more than the standard 20-24 inch recommendation. In this case, consider a bench with removable extension wings or a separate outfeed table that can be positioned adjacent to the bench when needed. Alternatively, a BORA Centipede or folding table system can provide temporary large-surface support that is stored when not needed.
Space Planning
When planning your bench placement, remember that the bench footprint extends beyond the bench itself. You need at least 36 inches of clearance on all sides that you will stand at (front and at least one end), and 24 inches of clearance on sides that you will pass by. This clearance allows you to work comfortably, access tools stored on or around the bench, and maneuver workpieces during assembly. In a single-car garage (typically 10 feet wide by 20 feet deep), a bench against the back wall can be up to 8 feet long while still leaving adequate clearance for movement and other equipment. In a double garage, you have significantly more flexibility—consider placing the bench in the center of the shop where you can walk around all four sides, which dramatically improves workflow for complex assemblies.
Climate and Environmental Considerations for Your Workbench
Wood is a hygroscopic material—it absorbs and releases moisture in response to the ambient humidity. This fundamental property of wood has profound implications for workbench performance, particularly in climates with large seasonal humidity swings. Understanding and managing these effects is essential for maintaining a flat, stable bench surface.
Understanding Moisture Content
Wood reaches equilibrium with its environment over time. In a climate-controlled room maintained at 40-50% relative humidity (typical indoor conditions), most wood species will stabilize at 6-8% moisture content. In an unheated garage, humidity can range from 20% in winter (when cold air holds less moisture) to 80% or higher in summer. This translates to wood moisture content ranging from approximately 4% to 16%—a 12-point swing that causes significant dimensional changes. A 24-inch-wide hard maple bench top can expand or contract by as much as 1/4 inch across its width over the course of a year. While this movement is distributed across the entire width (so no single area moves dramatically), the cumulative effect can cause the surface to develop cupping, crowning, or twist.
Managing Seasonal Movement
The best defense against seasonal movement is climate control. If you can maintain your shop between 40% and 55% relative humidity year-round, the dimensional changes in your bench top will be minimal and manageable. A simple dehumidifier in summer and a humidifier in winter can achieve this in most climates. If climate control is not feasible, apply a finish that moderates moisture exchange (such as boiled linseed oil plus wax) to slow the rate of moisture absorption and release. Also orient the top’s growth rings in the most stable orientation—typically with the rings facing up (so the top is “cathedral-grain” side up) and with the top properly attached to the frame using methods that allow the wood to move freely without restraint.
Heat and UV Exposure
Direct sunlight and proximity to heat sources (furnaces, wood stoves, south-facing windows) can cause localized drying that creates hot spots of low moisture content on your bench top. These hot spots shrink relative to the surrounding wood, causing distortion. Position your bench away from direct sunlight and heat sources, and if your shop has windows, consider UV-blocking window film or blinds to reduce solar heating of the bench surface. If your bench must be near a heat source, monitor the moisture content of the top regularly using a pin-type moisture meter and apply additional oil or wax to the areas most exposed to heat.
Dust and Air Quality
Beyond the health implications of wood dust, the dust itself can affect workbench performance. Accumulated dust in dog holes, vise mechanisms, and frame joints creates friction, impedes movement, and traps moisture against metal components (accelerating rust). Regular cleaning with compressed air or a vacuum keeps these critical areas functioning properly. In shops with poor air circulation, humidity pockets can form in enclosed spaces (like drawer interiors or the area between stacked components), creating localized high-humidity zones that promote mold growth and wood degradation. Ensure adequate air circulation around and beneath your bench to prevent these micro-climates from forming.
Outdoor and Semi-Outdoor Work
Some woodworkers work in covered outdoor areas—carports, porches, or open-sided workshops. While the fresh air and natural light are appealing, outdoor environments subject the bench to much more extreme humidity and temperature conditions than indoor spaces. Rain, dew, and fog can deposit moisture directly on the bench surface. Prolonged exposure to these conditions will degrade even well-sealed wood surfaces over time. If you work outdoors, choose a bench with a moisture-resistant surface (UV-cured coating, phenolic board, or heavily sealed hardwood), cover the bench with a waterproof tarp when not in use, and be prepared to perform more frequent maintenance (flattening, re-sealing) than you would for an indoor bench.
Noise and Vibration Management in the Workshop
Woodworking generates noise and vibration that can affect both your comfort and your relationships with neighbors, family members, and housemates. Your workbench is a significant contributor to the noise and vibration profile of your shop—both as a source (impacts and vibrations transmitted through the bench structure) and as a transmission path (vibrations from tools mounted on or operated on the bench). Understanding how to manage these issues creates a more pleasant working environment for everyone.
Vibration Sources and Dampening
The primary vibration sources associated with workbenches are: mallet blows during chisel work (low-frequency, high-amplitude impacts), hand-planing (medium-frequency vibration from the blade cutting through wood), power tool operation (high-frequency vibration from motors and cutting mechanisms), and workpiece impact (dropped tools, heavy pieces being set down). Mass is the most effective vibration dampener—heavier benches absorb more vibration before it can be transmitted to the floor and surrounding structure. For lightweight benches, placing the bench on a thick rubber mat provides a significant vibration isolation benefit. The rubber acts as a compliant coupling between the bench and the floor, absorbing vibration energy that would otherwise be transmitted into the building structure.
Noise Reduction Strategies
Bench-related noise falls into two categories: impact noise (mallet blows, tool drops) and airborne noise (tool motor noise, sanding, cutting). Impact noise is transmitted through the bench structure into the floor and can be heard clearly in adjacent rooms and floors below. To reduce impact noise, ensure the bench legs have rubber feet (rather than bare metal or wood on hard floor surfaces), and consider placing a dense rubber mat beneath the bench. For shops located above living spaces (such as basement workshops beneath occupied rooms), additional vibration isolation—such as neoprene pads beneath the bench feet or a suspended subfloor—may be necessary to prevent noise transmission.
Airborne noise from power tools is harder to control at the source but can be reduced through strategic shop layout. Position the noisiest tools (router, planer, miter saw) away from shared walls with living spaces. If your shop is in an attached garage, the wall shared with the house is the most critical sound barrier. Adding mass-loaded vinyl (MLV), additional drywall layers, or acoustic panels to this wall can reduce noise transmission by 10-15 dB, which is a significant perceived reduction.
The Bench as a Soundboard
A large, flat bench surface acts as a soundboard—amplifying vibrations and radiating them as airborne sound. This is why a mallet blow on a workpiece resting on a bench sounds much louder than the same blow on a workpiece resting on the floor. To reduce this amplification effect, some woodworkers place a thick rubber mat or dense felt pad on the bench surface for operations that involve repeated impacts (like chopping mortises). This absorbs some of the impact energy before it can be transmitted into the bench surface, reducing the sound level significantly. For the most noise-sensitive environments, performing heavy impact operations on a separate, heavily damped surface (like a thick rubber mat on the floor) rather than on the bench may be the best compromise.
Sound Insulation for Shared Spaces
If your workshop shares space with a living area (as is common for garage workshops in attached homes), simple acoustic treatments can make a significant difference. Heavy curtains or moving blankets hung on the shared wall absorb airborne sound and reduce echo. Acoustic foam panels (the wedge-shaped or pyramid-shaped foam panels commonly seen in recording studios) absorb mid and high-frequency sound waves, reducing the harshness of power tool noise. These treatments are relatively inexpensive and can be installed in a few hours, providing an immediate improvement in noise levels experienced in the adjacent living space.
The History of the Woodworking Workbench
The workbench has been the central tool of the woodworker for millennia. Understanding its historical evolution provides context for the designs we use today and an appreciation for why certain features have persisted while others have faded away. The history of the workbench is, in many ways, the history of woodworking itself.
Ancient and Roman Benches
The earliest known depictions of woodworking benches appear in ancient Egyptian tomb paintings dating to approximately 2000 BCE. These benches were simple structures—essentially low platforms on which the workpiece was held by the worker’s feet or by an assistant. The Roman workbench, which emerged around the 1st century CE, was a more sophisticated design featuring a heavy plank top supported by trestle legs. Roman benches included the first known workholding devices: simple wooden pegs (the ancestors of bench dogs) that protruded through holes in the bench surface to prevent workpieces from sliding. Archaeological evidence from the Roman fort at Vindolanda in northern England includes fragments of what appears to be a workbench with integrated clamping mechanisms, suggesting that even 2,000 years ago, woodworkers understood the critical importance of secure workholding.
Medieval Workbenches
During the medieval period, the workbench evolved slowly. The most common design was a heavy plank top mounted on sturdy legs, with workholding achieved through a combination of bench stops (simple pegs or strips protruding above the surface) and the “planing stop”—a vertical board or strip at the front edge of the bench that the workpiece was pushed against during planing operations. The medieval bench was typically quite low by modern standards—approximately 24-28 inches—which made it comfortable for the planing and chisel work that dominated medieval joinery. The low height also allowed the woodworker to use their body weight more effectively during planing, a principle that remains valid today.
The Roubo Revolution (18th Century)
The most significant advancement in workbench design came in 1769-1774, when French cabinetmaker André Jacob Roubo published his monumental treatise “L’Art du Menuisier” (The Art of the Woodworker). Roubo’s bench design—featuring a thick, heavy top, massive legs flush with the front edge, and an integrated face vise—established the template for the modern woodworking bench. The Roubo bench was revolutionary because it integrated workholding directly into the bench structure, rather than relying on separate devices. The face vise, bench dogs, and holdfasts that Roubo described remain the primary workholding methods used in woodworking today. The Roubo design was also notable for its emphasis on mass—Roubo recommended benches weighing several hundred pounds, recognizing that a heavy bench absorbs the impact of hand-tool operations and provides a stable platform for precision work.
The Nicholson and English Tradition (19th Century)
In England, Peter Nicholson’s woodworking manuals (published from the 1810s onward) popularized a simpler, more economical bench design that used narrower boards and lighter construction than the massive Roubo bench. The Nicholson bench featured a wide front apron that served as both a structural element and a vise mounting surface. This design was more accessible to woodworkers with limited resources and smaller shops, and it remains popular among hand-tool woodworkers today as an affordable alternative to the Roubo.
The Scandinavian Tradition
The Scandinavian workbench tradition developed independently from the French and English traditions and emphasizes the split-top design with a central tool tray. Scandinavian benches also feature the wagon vise—a compact, flush-mounting vise mechanism that provides tail-vise functionality without the bulk of a traditional tail vise. The Scandinavian design philosophy prioritizes workholding versatility and ergonomics over sheer mass, resulting in benches that are lighter than Roubo-style benches but still provide excellent stability for hand-tool work. This tradition has had a significant influence on modern bench design, with many contemporary manufacturers offering benches that incorporate Scandinavian features.
The Modern Era (20th-21st Century)
The 20th century saw the rise of the power tool shop, which fundamentally changed workbench requirements. As woodworking shifted from primarily hand-tool operations to primarily machine-based operations, the bench evolved from a workholding platform into a support and assembly surface. Mass and vise capability became less critical than flatness, surface area, and compatibility with power tools and jigs. This shift led to the development of lighter, more affordable benches with composite or metal tops, adjustable heights, and folding mechanisms for space-saving storage. Today’s market reflects this evolution, with products ranging from traditional hardwood benches that would be recognizable to 18th-century woodworkers to high-tech adjustable workstations that integrate power, lighting, and digital measurement systems. The diversity of options means that every woodworker, regardless of their budget, space, and working style, can find a bench that meets their needs.
Frequently Asked Questions
1. How thick should a woodworking workbench top be?
For serious hand-tool woodworking, a top should ideally be between 2.5 to 4 inches thick. This thickness provides the necessary mass to prevent the bench from jumping when striking chisels, and it allows for deep, secure dog holes. For power-tool users, 1.5 inches of solid hardwood or laminated plywood is often sufficient. Thicker tops also resist deflection (bending) under heavy loads more effectively than thinner tops, maintaining the dead-flat surface that precision joinery demands. If you are building a laminated top, start with 8/4 (2-inch) lumber that mills to approximately 1-3/4 inches after surfacing, and laminate two or three layers depending on your target thickness.
2. Are folding workbenches sturdy enough for planing?
Generally, folding workbenches lack the mass required for aggressive hand planing with large jointer planes, as the bench will slide across the floor. However, they are perfectly fine for light smoothing, routing, sanding, and assembly tasks. If you want to use a folding bench for planing, place it on a high-friction rubber mat and add weight (sandbags, tool boxes) to the lower shelf or base. The combination of increased friction and mass will significantly improve the bench’s resistance to sliding. Some woodworkers also position their folding bench against a wall or in a corner, which provides an additional backstop against forward movement during planing operations.
3. What is the standard height for a workbench?
Most commercial workbenches range from 33 to 36 inches high. The ideal height is subjective; it should roughly align with your wrist crease when your arms are hanging relaxed. This allows for optimal downward force without back strain. However, the “ideal” height varies by task: lower for hand-planing (where you want to drive the plane with your legs and body weight), higher for detail work (where you need to see and reach the work surface comfortably), and somewhere in between for general-purpose operations. This is why adjustable-height benches have become increasingly popular—they allow you to optimize the height for each specific task rather than compromising on a single fixed height.
4. Do I really need dog holes?
While not strictly mandatory, dog holes (typically 3/4 inch or 20mm) exponentially increase a bench’s versatility. They allow you to use bench dogs, holdfasts, and surface clamps to secure wood of almost any shape anywhere on the table surface. A bench without dog holes relies entirely on its vise(s) for workholding, which limits the size and shape of workpieces you can securely hold. With a grid of dog holes, you can clamp anything from a small jewelry box to a full-length dining table leg. If you are building a bench or purchasing one without pre-drilled holes, strongly consider adding them—it is the single most impactful workholding improvement you can make to a flat-surface bench.
5. Can I leave my wooden workbench in an unheated garage?
Yes, but large swings in humidity and temperature will cause solid wood tops to expand and contract. Over time, the top may warp or bow slightly. It is recommended to seal the wood on all sides and periodically re-flatten the top using a jointer plane or a router sled. In extreme climates (very dry winters or very humid summers), consider applying a more moisture-resistant finish such as a thinned spar varnish or a hardwax oil product, which moderates moisture exchange more effectively than a simple linseed oil finish. Also ensure the bench top is attached to the frame in a way that allows the wood to move—using slotted screw holes or figure-eight fasteners rather than rigid bolts that could split the top as it expands.
6. What is the difference between a woodworking bench and a mechanic’s bench?
A mechanic’s bench typically has a steel top or heavy steel overlay to resist oil, grease, and heavy blunt impacts. A woodworking bench uses wood (which won’t dent or dull dropped tools) and incorporates specialized vises and dog holes for gripping lumber without marring the grain. The surface hardness is a critical distinction: a steel bench top will dent and dull woodworking tools if they are accidentally dropped or dragged across it, while a wooden bench top absorbs the impact without damaging the tools. Conversely, a wooden bench top would be quickly destroyed by the hammer-and-wrench impacts common in mechanical work. If your workshop serves both disciplines, consider two separate benches, or a heavy-duty bench with a removable wooden sacrificial top that can be placed over the steel surface for woodworking operations.
7. Is MDF a good material for a bench top?
MDF is excellent because it is incredibly flat and heavy. However, it absorbs moisture quickly and damages easily on the edges. Most builders who use MDF will laminate two sheets together, wrap the edges in hardwood, and seal the top with polyurethane or wax. The sealed surface prevents moisture damage and provides a smooth, consistent working platform. MDF is also an excellent substrate for T-track installations, as the homogeneous material machines cleanly and holds threaded inserts reliably. One important caveat: MDF dust is finer and more hazardous than natural wood dust, so always use proper respiratory protection when cutting, sanding, or routing MDF.
8. How do I stop my workbench from sliding on a smooth floor?
You can add mass to the base (like stacking sandbags or heavy machinery on a bottom shelf), adhere high-friction rubber pads to the feet, or install retractable casters that allow the wooden legs to sit flush on the floor when in use. Another effective approach is to anchor the bench to the floor or wall using bolts, angle brackets, or concrete anchors. For temporary setups, a large rubber mat (horse stall mats from farm supply stores work excellently and cost very little) beneath the bench provides dramatic improvement in sliding resistance. Some woodworkers also position heavy machinery (like a bandsaw or drill press) on a shelf between the bench legs, which serves the dual purpose of adding mass and keeping frequently used tools within arm’s reach.
9. Should I mount a vise on the left or right side?
If you are right-handed, a face vise is traditionally mounted on the front-left corner of the bench. This allows you to hold a board with your left hand and saw or plane comfortably with your right hand across your body. Left-handed woodworkers should mirror this arrangement, mounting the vise on the front-right corner. However, these are guidelines, not rules—some woodworkers prefer the vise on the opposite side for specific workflows. The most important factor is that the vise mounting position allows you to apply force comfortably and safely during clamping operations, and that the workpiece is positioned where you can work on it without awkward body positions.
10. How do I maintain a hardwood workbench top?
Avoid film-building finishes like thick polyurethane, as they will chip and become slick. Instead, use a penetrating oil finish (like boiled linseed oil) mixed with wax. This protects the wood, prevents glue from sticking, and provides a slight “grip” to the surface. Reapply the oil finish once or twice per year (or whenever the surface looks dry) and refresh the wax every few months. Periodically check the surface for flatness using a long straightedge, and flatten with a jointer plane or router sled when the deviation exceeds your tolerance. Clean the surface after each work session with a stiff brush, and remove glue drips and finish stains promptly to prevent contamination of future workpieces.
11. What is the best wood species for a DIY workbench top?
Hard maple (Acer saccharum) is widely considered the best all-around choice for a workbench top. It is hard enough to resist denting (Janka hardness of approximately 1,450 lbf), heavy enough to provide mass for stability, and its tight, closed grain resists moisture penetration and glue absorption. European beech is the traditional choice in Europe and offers similar performance characteristics. Northern ash provides superior shock resistance at a slightly lower hardness rating. For budget builds, soft maple, birch, or ash are acceptable alternatives that provide adequate performance at lower cost. Avoid very soft woods (pine, fir, poplar) for bench tops—they dent easily under mallet blows and do not hold dog holes or holdfasts reliably.
12. Can I use my workbench as an outfeed table for my table saw?
Yes, many woodworkers use their workbench as a table saw outfeed table. The critical requirement is that the bench surface must be exactly the same height as the saw table. Even a small height difference (1/8 inch) will cause boards to catch or tip as they transition from the saw to the bench, which affects cut quality and safety. An adjustable-height bench (like the OLBRUS or Betterhood) makes matching heights much easier. If your bench has a fixed height, you can use shims or a dedicated outfeed bridge to bridge the gap between the saw and bench surfaces. Some woodworkers build a shallow ramp or transition piece that guides boards smoothly from the higher or lower surface to the other.
13. How many dog holes should I drill in my workbench?
For a standard 60-inch bench, a single row of 3/4-inch dog holes spaced 4 inches apart along the length provides approximately 15 holes, which is sufficient for most workholding situations. If you plan to use holdfasts frequently, consider adding a second row offset 6-8 inches toward the back of the bench, which provides additional holdfast positions for securing wide workpieces or multiple components simultaneously. Avoid overcrowding the surface with too many holes—a bench surface with holes every 2 inches becomes a Swiss cheese surface that is difficult to clean, hard to use as an assembly surface, and structurally compromised by the excessive removal of material.
14. Should I buy or build a vise for my workbench?
For most woodworkers, buying a commercial vise is the better choice. Quality vises from manufacturers like Yost, Eclipse, Benchcrafted, and Record are precision-machined, properly heat-treated, and designed for decades of reliable service. Building a vise requires advanced metalworking skills and access to machine tools (lathe, milling machine, drill press) that most woodworkers don’t have. The one exception is the leg vise, which can be built almost entirely from wood with only a purchased screw mechanism. Many woodworkers build their own leg vises using a thick wooden jaw and a purchased Acme-threaded screw and garter assembly, which provides the benefits of a leg vise (enormous clamping force, deep throat capacity) at a fraction of the cost of a commercial unit.
15. How do I prevent glue from sticking to my workbench during assembly?
Apply a coat of paste wax to the bench surface before any glue-up operation. The wax creates a non-stick barrier that prevents cured glue from bonding to the wood. Alternatively, place wax paper, parchment paper, or plastic sheeting between the workpiece and the bench surface during glue-ups. Another approach is to keep the bench surface well-oiled—boiled linseed oil or a hardwax finish prevents glue adhesion without any additional preparation. If glue does get on the bench, scrape it off with a chisel or paint scraper while it is still in the gel stage (typically 30-60 minutes after application)—it will pop off cleanly in large pieces. Fully cured glue is much harder to remove and may require soaking with a damp cloth to soften it before scraping.
16. What is a wagon vise and do I need one?
A wagon vise is a type of tail vise that sits flush within the bench surface, with a sliding jaw that moves within a mortise cut through the top. It works with bench dogs to clamp workpieces flat on the bench surface for planing, sanding, and routing. Unlike a traditional tail vise (which protrudes from the end of the bench and adds significant length), the wagon vise is compact and self-contained—it does not extend the bench footprint and cannot interfere with operations on adjacent equipment. Whether you “need” one depends on your workholding style: if you plan to use bench dogs for flat-board clamping, a wagon vise (or any type of tail vise) is the most elegant and efficient way to tension the dogs. If you primarily use holdfasts or surface clamps, a wagon vise is nice to have but not essential.
17. Can I use a dining table as a workbench temporarily?
While you can perform light work on a dining table, it is not recommended as a long-term substitute for a proper workbench. Dining tables lack the mass, workholding capability, and surface durability needed for woodworking. Mallet blows can split the table, saw blades will cut through the surface, and spilled finishes will permanently stain the tabletop. More importantly, dining tables are typically too high for comfortable hand-tool work (30 inches is standard dining height, which is lower than most woodworkers prefer) and lack the structural rigidity to resist the lateral forces generated by planing and sawing. If you must use a dining table temporarily, protect the surface with a thick sheet of MDF or plywood, work only on light-duty operations, and plan to invest in a proper bench as soon as possible.
18. How long does a quality workbench last?
A well-built hardwood workbench can last 50-100 years or more with proper maintenance. The top will need periodic flattening (every 1-5 years depending on use intensity and climate), and the finish will need to be renewed annually. Vise mechanisms may need occasional lubrication and, after decades of heavy use, may need replacement screws or handles. The frame and legs, if properly constructed with quality joinery, will outlast the top. Many antique workbenches from the 18th and 19th centuries are still in regular use in workshops around the world—a testament to the durability of traditional construction methods and the fundamental soundness of the workbench as a tool. Steel-frame benches have an essentially unlimited structural lifespan—the steel will not degrade, rot, or lose strength with age. The bench top (whether wood, MDF, or composite) may need replacement every 10-20 years depending on use, but the frame itself will last indefinitely.
19. What accessories should I buy first for my new workbench?
Start with the absolute essentials: a pair of bench dogs (3/4 inch round brass or steel), one or two holdfasts (the Gramercy Tools holdfast is an excellent choice), a bench hook for cross-cutting, and if your bench doesn’t include a vise, add a face vise (the Eclipse-style quick-release is a versatile and affordable option). These four items provide basic workholding capability for the vast majority of woodworking operations. From there, expand based on your specific needs: T-track accessories if your bench has tracks, additional holdfasts if you work with large panels, a shooting board if you do precision joinery, and so on. The key is to add accessories in response to actual needs rather than anticipated needs—buy what you find yourself reaching for, not what looks interesting in a catalog.
20. Is it worth investing in a premium workbench if I’m a beginner?
This depends on your commitment level and budget. If you are confident that woodworking将成为长期爱好或职业方向, investing in a quality bench from the start避免了后期升级的成本和麻烦. However, if you are still exploring whether woodworking is right for you, a more affordable bench (like the VEVOR or WORX Pegasus) lets you develop your skills and preferences before making a larger investment. The worst outcome is buying a premium bench that sits unused because the hobby didn’t stick. The middle ground is to start with a mid-range adjustable bench (like the OLBRUS) that provides good performance at a moderate price and can be upgraded with better vises and accessories as your skills develop.
21. What is the ideal bench weight for hand-tool woodworking?
For dedicated hand-tool work with a #5 jack plane and smaller, a bench weighing 150-200 pounds is generally sufficient. For heavy-duty work with #7 and #8 jointer planes, aggressive mortise chopping, and heavy assembly operations, 300-400 pounds or more is ideal. The reason is simple physics: the force you apply to a hand plane or chisel generates an equal and opposite reaction force that tries to move the bench. A heavier bench has more inertia, which means it absorbs more of this reaction force before it begins to move. If your bench is too light, add mass using sandbags, concrete blocks, or heavy tools stored on a lower shelf. Every additional pound of mass improves the bench’s resistance to movement during hand-tool operations.
22. How do I flatten a warped workbench top?
The most common method is using a #7 or #8 jointer plane. First, identify the high areas by laying a long straightedge across the surface in multiple directions and marking the gaps (low spots) with pencil. Then plane the high areas using diagonal strokes (about 45 degrees to the grain direction) until the pencil marks on the high areas disappear. Work systematically from one end of the bench to the other, checking your progress frequently with the straightedge. Once the surface is flat using diagonal strokes, finish with a few passes parallel to the grain direction to remove the diagonal plane tracks. The entire process typically takes 30-60 minutes for a moderately warped surface. For severely warped surfaces, a router sled (a router mounted on a pair of rails spanning the bench width) can remove material much faster, though the resulting surface requires sanding or planing to achieve a smooth finish.
23. Can I mount a bench grinder on my woodworking workbench?
Yes, but ensure the bench is heavy enough to absorb the grinder’s vibration without walking or wobbling. A typical 6-inch bench grinder weighs 25-40 pounds and generates significant vibration, particularly when grinding hard steel or when the wheel is slightly out of balance. A bench weighing at least 80-100 pounds will provide adequate stability for a grinder. Position the grinder at the end of the bench where sparks and debris are directed away from your primary work area. Consider bolting the grinder to the bench using the built-in mounting holes for added security. Keep the area around the grinder clear of sawdust and wood shavings, which are a fire hazard in the presence of hot sparks.
24. What is the best way to attach a workbench top to the frame?
The best attachment method allows the wood top to expand and contract freely with seasonal humidity changes while remaining securely connected to the frame. Traditional methods include wooden buttons (small blocks that fit into a groove in the frame and screw to the underside of the top), figure-eight fasteners (metal clips that pivot to accommodate movement), and slotted screw holes (elongated holes in the frame that allow the screws to slide as the top moves). Avoid gluing the top directly to the frame or using rigid bolts that prevent movement—the expanding top will split or buckle if it cannot move freely. For steel frames, threaded inserts in the underside of the top paired with bolts through slotted holes in the frame provide a secure, adjustable connection.
25. Should I round over the edges of my workbench top?
A slight roundover (1/8 to 1/4 inch radius) on the front and end edges of the bench top is recommended. A sharp 90-degree edge will bruise your forearms and hands every time you lean against the bench, which you will do hundreds of times per work session. A gentle roundover eliminates this discomfort without affecting the bench’s functionality for workholding or assembly. The back edge of the bench can remain square if you prefer—your body rarely contacts the back edge. Some woodworkers apply a more generous roundover (1/2 inch or more) to the front edge, which creates a comfortable handhold for gripping the bench edge during heavy planing operations. Use a roundover bit in a router or simply break the edge with a block plane and sandpaper.
26. How often should I oil my workbench top?
For the initial treatment, apply 3-4 coats of boiled linseed oil over the course of a week (allowing 24-48 hours between coats). After the initial treatment, reapply oil whenever the surface starts looking dry or pale—typically once or twice per year in a climate-controlled shop, or more frequently in an unheated garage with large humidity swings. A simple test: sprinkle a few drops of water on the surface. If the water beads up, the finish is still providing adequate protection. If the water soaks in immediately and darkens the wood, it is time to reapply oil. The reapplication process takes about 15-20 minutes: flood the surface with oil, let it soak for 15 minutes, wipe off the excess, and allow 24 hours for drying before use.
27. Can I use a workbench for metalwork or welding?
A wooden-topped workbench is not suitable for metalwork or welding. Hot metal, sparks, and grinding debris will damage the wood surface, and welding spatter can embed in the wood and create fire hazards. For metalwork, use a steel-topped bench or a heavy-duty bench with a replaceable steel or fire-resistant overlay. If your workshop serves both disciplines, consider a bench with a removable top—a wooden surface for woodworking operations and a steel surface for metalwork. The SPECRAFT adjustable bench, with its heavy steel frame, is an excellent candidate for dual-purpose use, as the frame can support both a wooden woodworking top and a steel metalworking top interchangeably.
28. What is the best floor covering to use under a workbench?
Horse stall mats (3/4 inch thick rubber mats sold at farm supply stores) are the gold standard for workshop flooring. They provide excellent anti-fatigue properties, resist chemical spills, dampen vibration and noise, prevent tools from breaking when dropped, and provide high friction that prevents bench sliding. At approximately $40-50 per 4×6-foot mat, they are also extremely affordable. Cover the floor area in front of and around your workbench with these mats for an immediate improvement in comfort and safety. For the area directly beneath the bench, some woodworkers prefer a smooth, flat surface (bare concrete or hardboard) that allows the bench to sit level without the compliant rubber interfering with leveling feet adjustments.
29. How do I determine if my workbench surface is flat enough?
Use a precision straightedge (a machinist’s straightedge or a known-flat aluminum extrusion) at least 24 inches long. Lay the straightedge across the bench surface in multiple orientations (front to back, left to right, and diagonally in both directions) and look for gaps between the straightedge and the surface. You can measure the gap using feeler gauges (thin metal strips of known thickness). For general woodworking, a surface that is flat to within 0.010 inches (ten thousandths) over its full length and width is acceptable. For precision joinery (hand-cut dovetails, mortise and tenon joints, panel glue-ups), aim for 0.005 inches or better. If you can see light between the straightedge and the surface, the gap is likely more than 0.005 inches and the surface should be flattened.
30. Is a heavier workbench always better?
Not always. While mass provides stability for hand-tool work, there is a point of diminishing returns. A bench that weighs 400 pounds provides the same stability during planing as a bench that weighs 600 pounds in most practical scenarios—both are heavy enough that neither will move during normal operations. The additional 200 pounds adds cost (in materials and shipping), makes the bench more difficult to move and position, and increases the structural requirements of the shop floor (some residential floors may not support a 600+ pound concentrated load without reinforcement). Choose a bench that is heavy enough for your working style rather than assuming that more weight is always better. If in doubt, it is easier to add mass to a lighter bench than to remove mass from a bench that is too heavy.
Conclusion: Finding Your Foundation
Your workbench is more than just a piece of furniture; it is the most critical tool in your shop. It dictates the accuracy of your cuts, the precision of your joinery, and the safety of your workflow. Whether you need the massive, steadfast footprint of an OLBRUS hardwood giant, or the nimble, stow-away convenience of a WORX Pegasus, the right choice depends entirely on your space and the nature of your projects.
Don’t let a wobbly, inadequate table ruin your hard work. Assess your shop space, evaluate the type of joinery you perform most often, and invest in a surface that will support your craftsmanship for decades to come.
As we have explored throughout this guide, the workbench is a tool with deep historical roots and a surprisingly wide range of design philosophies. From the massive Roubo benches of 18th-century France to the lightweight, foldable workstations of the modern job site, the fundamental purpose has never changed: to provide a stable, flat, workholding platform that allows the woodworker to shape wood with precision and confidence.
The ten benches reviewed in this guide represent the best options across the full spectrum of needs and budgets. The WORX Pegasus delivers unmatched portability and versatility for mobile workers and tight spaces. The OLBRUS and CAMMOO benches provide heavy-duty, adjustable platforms for serious home workshops. The BORA Centipede and Keter Folding bench redefine what a portable workstation can be. The ClamPony excels at focused, workholding-intensive operations. The Betterhood brings modern aesthetics and thoughtful features like integrated power to the adjustable bench category. The SPECRAFT provides uncompromising rigidity for the heaviest applications. The CAMMOO Rubberwood offers a sustainable, high-performance surface that appeals to environmentally conscious woodworkers. And the VEVOR delivers remarkable value for budget-conscious makers who refuse to compromise on fundamentals.
Beyond the products themselves, we have explored the materials, ergonomics, accessories, maintenance practices, and environmental considerations that determine how your bench performs in the real world. We have covered the physics of bench mass, the science of task lighting, the art of workholding, and the history of the workbench tradition. This comprehensive knowledge base empowers you to make informed decisions not just about which bench to buy, but about how to set it up, maintain it, accessorize it, and integrate it into a workshop that supports your best work.
Remember that the “best” workbench is the one that matches your specific needs, working style, and constraints. A $5,000 Roubo bench is not “better” than a $200 folding bench if the folding bench is the one that actually gets used in your specific situation. The goal is to remove barriers between you and your craft—to create a workspace where you can focus entirely on the wood, confident that your bench will support every cut, joint, and assembly without hesitation.
Take the knowledge from this guide, assess your needs honestly, choose the bench that fits your reality (not your fantasy shop), and then get to work. The bench is the foundation—everything you build starts there.